Repair
0
4 677
Share
Finishing a room with plasterboard has become firmly established in renovation traditions - leveling walls, installing arches and ceilings. However, few people know that gypsum plasterboard is used to construct kitchen furniture, which in its quality will compete with the furniture. Do-it-yourself plasterboard structures are intended for craftsmen with imagination who do not want to create stereotypical housing. A DIY plasterboard kitchen is also a possibility. Let's find out about this in more detail.
Antique furniture made of light wood matches perfectly with beautiful walls and floors
- Design options for a plasterboard kitchen
- Selection of drywall and tiles
- How to make kitchen furniture with your own hands from plasterboard: step-by-step instructions
- Preparing the wall and calculating the ceiling
- Kitchen cabinet-rack with shelves and space for hood
- Bar counter
- Kitchen arch-rack
DIY kitchen furniture made of plasterboard
You can arrange plasterboard furniture for any room in the apartment.
As a rule, stationary, built-in cabinets, pencil cases and shelving for various purposes are made from plasterboard. This inconvenience is fully compensated by the low cost of materials and ease of installation. Anyone can adjust furniture to the required dimensions, manufacture and install it themselves. The positive aspect of such furniture is the opportunity to bring your wildest design fantasies to life. Drywall can be given any most unusual shape; a large palette of pigment dyes allows you to paint furniture in a color that matches the interior, and if desired or necessary, it can be easily repainted in another color.
The surface of plasterboard kitchen furniture can be covered with paintable duplex or embossed washable vinyl wallpaper. Depending on the design concept, self-adhesive polyvinyl chloride film and other finishing materials are used.
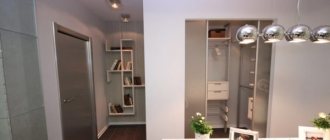
Communication box
The last but not least popular idea is to use leftover drywall in the interior. Using this useful and practical material, you can create a spectacular shaft that completely hides utility wiring or sewer pipes in the bathroom and kitchen. Such a box is very easy to manufacture, and when decorating it, you can take into account the overall concept of the interior.
We have provided 12 solutions that are found everywhere. All methods have been tested and confirmed in practice, so you can safely use them during renovations in your apartment. The main thing is, don’t be afraid to show your imagination and ingenuity, and you will get an unusually impressive interior with plasterboard structures.
Drawings for plasterboard furniture
First you need to draw up a drawing of plasterboard furniture; photos and detailed instructions can be found on the Internet. The project can be ordered from craftsmen or based on measurements, sketched out on paper yourself.
- Having determined the location for future plasterboard furniture, take measurements with a tape measure and, using a spirit level, determine the correspondence of the horizontal and vertical planes. Using a carpenter's angle, check the correctness of right angles at several points where the floor and walls meet. Take at least three vertical measurements at the corner joints of the walls and display the degree of deviation. Builders do not always adhere to strict parameters, and possible wall discrepancies must be taken into account when designing plasterboard furniture. Visually unnoticeable flaws of builders can create significant problems if it is built strictly at right angles without taking such deviations into account.
- Sketch out a plan diagram with a pencil on paper, try to depict the furniture in a three-dimensional plane - general view, side view and front part. A drawing indicating dimensions will help you make furniture from plasterboard with your own hands and calculate the required amount of materials.
Tools and material
To assemble a plasterboard table with your own hands, you will need the following tools and materials:
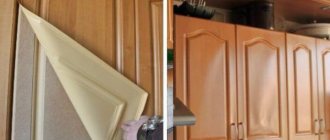
drywall knife. You can replace it with an ordinary stationery knife, but it will be more difficult for them to create the desired shapes;
Tools for working with drywall
These materials will help you complete the work of creating a computer, desk or coffee table.
Plasterboard-covered coffee table Return to contents
Installation of a plasterboard furniture frame for the kitchen
Inspect the kitchen space and determine the location of the new drywall furniture. If there are niches in the kitchen, you can use them successfully. At your request, you can build individual elements of kitchen furniture in the kitchen - cabinets, pencil cases, cabinets - buffets, or make a full-fledged kitchen corner.
- Start work by marking the floor and walls, using chalk, use a long, even strip to mark the places where the profile strips for drywall are attached. Select a profile for guides and posts with a galvanized metal thickness of 3-4 mm. You will also need a wooden beam of the appropriate size to fill the “U”-shaped profile. The timber must be well dried, as it may subsequently twist. Choose waterproof plasterboard - with a thickness of 6.5 to 12.5 mm, it will best suit the kitchen atmosphere.
- The profiles are attached to the walls and floor with self-tapping screws and plastic dowels. In places where the profiles come into contact with the floor and walls, a shock-absorbing gasket is attached, which dampens possible vibrations of the building. The guide and rack profiles are fastened together with small “bug” screws. For arched and smooth bends, the side edges of galvanized profiles are trimmed with metal scissors. The cutting step for a non-standard configuration, depending on the degree of bending, ranges from 0.5 cm to 5 cm. Sometimes it is necessary to trim protruding corners in the form of a trapezoid.
- Horizontal guides for shelves on which you plan to place heavy objects or household appliances - for example: stacks of ceramic dishes, a TV or a microwave oven - it is advisable to reinforce them with a profile made of thicker metal, and be sure to insert a wooden beam in the middle.
Sequence of work
During installation, you must follow a certain sequence of actions:
- Marking the places where profiles are attached to surfaces. You can start it from the ceiling, where the guide profile will be installed. Then, using a plumb line, you need to transfer the markings to the floor where the lower guide profile will be located.
- Installation of guide profiles to the floor and ceiling. If the surface is concrete, use dowels (6 by 48 mm).
- Installation of rack profiles. They should be located at a distance of 60 cm from each other. During installation, rack profiles are attached to the walls and ceiling using direct hangers. In the place where the doorway will be located, you need to fix a horizontal profile, the length of which will be 10 cm greater than the width of the opening.
- Strengthening with wooden beams profiles that carry a large load. For example, these are profiles bordering the dressing room door and those adjacent to the wall.
- The “skeleton” of the profiles is completed by transverse elements. These short horizontal lines are installed every 60 cm.
To install lighting in the dressing room, before covering the plasterboard structure, you need to take care of the electrical supply.
- Cutting gypsum board sheets of the desired configuration. At the same time, follow the wise saying: “Measure seven times, cut once” to avoid wasting money.
- Installation of prepared sheets to a metal frame using self-tapping screws.
- Puttying corners, holes with screws and joints of sheets.
- Surface priming.
- Finishing. The inside of the dressing room can be wallpapered or painted; the outside can be used with a material that will harmonize with the decor of the room.
USEFUL INFORMATION: GKL sheet - what is it? Dimensions and thickness, types of material
The best option for doors for a dressing room is a sliding design.
Features of putty for kitchen furniture made of plasterboard
The base surface must be prepared. Corners and joints are sanded with sandpaper or a special mesh float. Irregularities are trimmed with a drywall knife.
- For internal and external corner joints, you can use a plastic or metal perforated corner. There is a flexible corner for arched or non-standard curved corners. Perforated corners are placed on putty. The fastening points, recessed 1 - 2 mm into the plasterboard, are treated with an anti-corrosion primer and rubbed with putty. Direct joints of plasterboard sheets are reinforced with self-adhesive PVC reinforcing tape.
- Before puttying, coat the rubbed and sanded surface with a universal primer. It is advisable to purchase primer and putty from the same manufacturer. Dry putty is diluted with water to the consistency of thick sour cream or ready-made liquid putty is purchased. For leveling and the base, a layer of 2–3 mm of starting putty is applied. Using a small spatula, 8 - 10 cm wide, putty is applied to the edge of a wide spatula, 25 cm wide, and applied evenly to the base surface of the plasterboard kitchen furniture, and then smoothed.
- After drying, the surface is sanded, a layer of 1–2 mm of finishing putty is applied and left until completely dry. Finally, the surface is sanded especially carefully. Using circular motions, use a fine-grained abrasive material on a wide grater. The surface is primed with a deeply penetrating universal primer and painted in a suitable color with water-based paint.
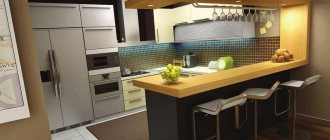
Design solutions for decorating kitchen furniture made of plasterboard
There are a lot of finishing materials for drywall. You can stick wallpaper or self-adhesive PVC film, natural cork or even ceramic tiles onto the surface. It all depends on the design features of the plasterboard kitchen.
Painting with water-based paint
Painting is the simplest and easiest way to finish plasterboard kitchen furniture. The surface is covered with water-based paint, brush or roller. The required tone is achieved by adding pigment dyes. It should be taken into account that when drying, the color saturation weakens, and over time, under the influence of sunlight, it may even fade. Paint drywall furniture at least twice. The first coat of water-based paint, after complete drying, will show the degree of color saturation. The second layer can be used to lighten or, conversely, to saturate the color scheme and achieve the desired result.
Pasting wallpaper onto the plasterboard base of kitchen furniture
The side walls of plasterboard kitchen cabinets can be covered with wallpaper to match or match the walls. Wallpaper is pasted in the same way as on walls. Thick, washable wallpaper is suitable for the kitchen. Paintable duplex wallpaper has a moisture-proof and light-protective coating. As a rule, they have a relief ornament or design. Two-layer vinyl wallpapers that imitate wood, burlap, ceramic tiles, etc. are well suited. Vinyl is a fairly durable material intended for washing, it practically does not fade and is quite suitable for the kitchen.
Front doors for kitchen cabinets made of plasterboard
In the kitchen, you just need to have cabinets with doors. Some shelves and niches can be closed with glass doors, others with facades made of moisture-resistant MDF or wood. Furniture fittings stores have a large selection of facades and mounting hardware for them. Beautiful handles always catch the eye and set a certain tone for the interior.
Lighting fixtures for kitchen furniture
Local lighting in the kitchen is very convenient and practical. Spotlights built into plasterboard kitchen furniture will perform a dual function. They will be a harmonious element of the interior and functionally illuminate the areas necessary for work, while saving energy. The location of the lamps is thought out in advance, and installation and installation is done at the time of erecting the frame and attaching the drywall.
Instructions for assembling a kitchen from plasterboard with your own hands
After finishing the renovation, the question of filling the room with furniture almost always arises. And the two most important criteria that determine the final choice are budget cost and ergonomic design. After all, in a limited space it is necessary to fit and conveniently arrange a large number of objects. This problem is solved in expensive high-end headsets, but, unfortunately, not in cheap options. But there is an opportunity to independently create everything that is necessary, based on the layout of the room and for a small amount.
What exactly can we do in the kitchen from plasterboard with our own hands without special knowledge?
Not a single thing can be done efficiently without the most minimal understanding of the ongoing process. Therefore, if you decide to make your own kitchen from plasterboard, then read the various descriptions of the material and techniques for processing it.
The first question that worries the minds of DIYers is: how strong is this structure, can it withstand the necessary load and will it not fall apart during use? In fact, this building material is very durable, despite its fragility. If installed correctly, the structure can withstand a load of more than 150 kg per 1 square meter. m.
You can make the following items for your kitchen using plasterboard yourself:
- Shelves;
- Niches;
- Working surface (tabletop);
- Bar counter;
- Open cabinets;
- Seating corners with built-in storage niches.
As you can see, you can replace all pieces of furniture that are traditionally used in this case with structures made of this material. The complexity and volume of the upcoming work is more than compensated by two undoubted advantages:
1. You can organically arrange the space in the most convenient and comfortable way without the feeling that the room is cluttered. And also create a large number of storage spaces.
2. The final cost will be several times lower than when trying to do everything the same, but only using finished products, even from the most inexpensive material - chipboard.
The products will withstand the load placed on them without any problems: the shelves will not break under the weight of the dishes, the cabinets will not crack under the weight of household appliances (combines, meat grinders, etc.), the countertop will not bend due to the hobs and sink built into it.
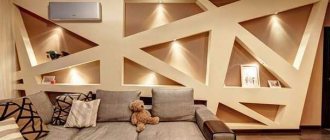
Columns made of plasterboard
From plasterboard, you can make columns of various configurations and sizes with your own hands, which will not only become the highlight of the bedroom interior, but can also perform many useful functions:
- divide the room into zones;
- mask risers and pipes;
- serve as a stand for necessary items and a source of additional lighting.
Columns of various configurations and sizes can be made with your own hands. They can be either rectangular, with niches, or round, semicircular or multifaceted.
The principle of work when creating plasterboard structures of this type will be the same as for a dressing room, starting with markings and ending with plasterboard covering and puttying. However, you need to take into account several nuances:
- If a rectangular column is installed in the middle of the room, 4 vertical posts will be required, if near the wall - 2.
- The corners of the columns need to be aligned using a special perforated corner.
- You can decorate plasterboard structures with decorative plaster, paint, wallpaper, decorative stone, and mosaics.
- To give the column a complete look, plinths are installed along its perimeter at the top and bottom.
- To create a round or semicircular column, you will have to bend drywall using a dry or wet method.
- Guide profiles for a round column can be bent by making cuts every 7–10 cm. Vertical profiles are installed often, in accordance with the radius of the guides.
- The width of the plasterboard part for a round column should be equal to the circumference, the length should be equal to the height of the structure.
- If the column will hide pipes inside, it is advisable to take care of sound insulation. You can use mineral wool for this.
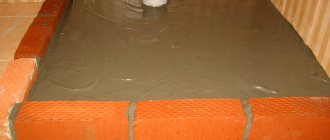
We make a kitchen countertop with our own hands from plasterboard and ceramic tiles
This product can be made in several variations, the most common: linear, L-shaped and U-shaped. Since everyone will develop the principle of creating a kitchen from plasterboard with their own hands, let’s consider the simplest example - a linear countertop.
To create this item we will need the following:
- Guide profiles.
- Plasterboard sheets (thickness not less than 18 mm).
- Drill and screws.
- Ceramic tile.
- Adhesive for installing tiles.
- Grout and spatulas (regular and rubber).
- Level, ruler, marker.
The height and width of the working surface can be selected either in accordance with the standards or individually, taking into account the height of the residents and their needs. Next, the process of creating a plasterboard countertop for the kitchen with your own hands looks like this:
1. On opposite walls we make four marks: in the corners and at the extreme points of the future product. We check the evenness with a level.
2. We go down ten centimeters lower and make four more similar marks. They indicate the attachment points of the four main profile guides.
3. Using strong self-tapping screws in increments of 15-20 cm, we attach two profiles (one higher, the other lower) to the wall to which the tabletop will adjoin.
4. We attach the other two elements to the walls at their ends; they will be the edge of the tabletop.
5. Between the upper and lower elements, 10 cm of profile support posts are mounted every 40 cm.
6. Transverse connections are installed between the upper elements adjacent to the wall and those located at the edge. The step between them is 40 cm.
7. Cover the surface of the structure and its front side with plasterboard.
8. Mark the places where the sink and stove will be installed, cut out the holes.
9. Tile the entire remaining surface. We seal the seams with a special grout that can withstand frequent washing.
The process of creating all these elements is quite simple and resembles the installation of walls from this material. It is worth paying attention to the number of elements that will give rigidity and strength to the entire structure. Read in our next article a comparison of kitchen sets made of wood and kitchens made of wood.
After this, all joints are primed and puttied, and reinforcing tape is laid on top. After complete drying, a second layer follows, and after it has dried, the joints must be cleaned. And then the last layer of putty is applied.
- GKL;
- Profiles;
- Self-tapping screws;
- Dowels;
- Hammer;
- Level ;
- Screwdriver;
- Sealant;
- Dye;
- Putty;
- Putty knife;
- Drywall knife;
- Brushes and roller.
It’s not a bad idea to have a drawing of the future piece of furniture - this way, the speed will go faster, the dimensions do not need to be checked every time, the blanks are made in advance. Installation: Do you have nowhere to place kitchen utensils or indoor plants? Not enough room for cookbooks or spice jars? There is a solution - the kitchen arch-rack will not only play a huge role in the interior, but is also functional enough for any needs.
The idea is simple - a vault and a plasterboard wall with shelves.
Assembling a kitchen set from plasterboard
General trends towards simplicity, minimalism, and combinatorics in design have made plasterboard furniture structures popular in the arrangement and interior design of kitchens. The question arises of how to make a kitchen set from plasterboard. The advantage of installing gypsum boards on a profile is its fairly easy assembly and versatility.
In practice, models of any configuration can be assembled from them. Kitchen set made of plasterboard
- The peculiarity of the installation of the lower guide is that it consists of two profiles: the lower U-shaped profile is turned with its hollow part towards the wall. Horizontal posts will be inserted into it;
- The second profile is attached to the side upper plane of the lower guide, turning its hollow part upward. Vertical posts are inserted into this profile. Top box frame made of plasterboard
They begin to make a kitchen set from plasterboard by marking it out. The kitchen design drawing is transferred to the wall. The markings are made strictly according to the level, using a plumb line and an angle (90⁰). First, make the top box from plasterboard with your own hands, in the following sequence:
- the ability to make any figure from gypsum board, including non-standard ones (oval, curved);
- Do-it-yourself kitchen sets made of plasterboard can be installed quickly enough, if you have certain skills;
- lighting is installed in them;
- designs are decorated with various materials;
- fit into different stylistic solutions;
- exclusivity, uniqueness of such a headset;
- low cost.
It is worth noting that it is difficult to make such a kitchen without a project. That is why you need to start with it. They plan the space to scale and draw furniture designs with dimensions in the drawing. How to make a project:
Features, pros and cons
So, in the kitchen it is possible to construct standard furniture from gypsum board fabrics: pencil cases, cabinets, a table, a niche for a TV, arches with shelves, racks and a lot of other elements. The advantage of any plasterboard product is the availability and low price of the material. They are also different.
- Easy to install.
Plates can be attached in a variety of ways, including with glue. The main thing is to take into account the load. The products themselves are light, which removes the heaviness from the floors. - Ease of finishing.
The panels themselves do not create an impressive appearance, but they are easy to paint, wallpaper, tile, in other words, they lend themselves to any finishing. If damaged or dismantled, a plasterboard fragment can be replaced without much effort. - Furniture made from such raw materials is completely safe.
It does not emit harmful substances, is resistant to high temperatures (does not burn or melt), which allows electrical cables to be laid under or on it.
At any time, a plasterboard furniture structure can be disassembled and a new model can be constructed.
- Fragility of the material. Naturally, such interior items are designed for a certain weight, which is not recommended to be exceeded.
- The suitability of raw materials is limited in rooms with high humidity. Even when using moisture-resistant types, they must be additionally protected. Otherwise, soaking with regular condensation cannot be avoided.
It turns out that drywall has almost no downsides. It is important to choose the right material for a particular structure, and then accurately carry out independent installation. Then there will be no problems, and the result of the work done will please you
Drywall and humidity
There is always high humidity in the kitchen. However, for such an interior it is not necessary to choose raw materials with a moisture-proof coating. As a rule, kitchen units are equipped with an extractor hood, which prevents moisture from penetrating into the material.
Drywall is always finished with paint (paint, tiles, oilcloth, washable wallpaper).
Through it, moisture will not reach the base. The thickness of the panels is selected based on the functions of the product, as well as taking into account the size of the working area and the strength of the frame. Interior items made of cardboard should be as functional as possible (shelves, pencil cases). Load-bearing walls (arches with shelves, shelving, bar counters) can be used as the basis for such structures.
DIY plasterboard kitchen
That is, basic theoretical knowledge can be easily obtained - the rest depends on the efforts and desire of a person to turn his kitchen into a real designer masterpiece. And not only beautiful, but also, what is equally important in this case, is maximally functional. This product can be made in several variations, the most common: linear, L-shaped and U-shaped. Since everyone will develop the principle of creating a kitchen from plasterboard with their own hands. then consider the simplest example - a linear tabletop.
A kitchen made of plasterboard provides designers with many opportunities for imagination, and a home with such a kitchen will become cozier and more comfortable.
- kitchen cabinets and shelves. The peculiarity is that you can make any desired size and give the product any desired shape. Wooden furniture does not have such flexibility. As for strength, this is 100% okay, since both the gypsum boards are quite rigid and the metal from which the structure’s frame is made;
In fact, of course, we cannot list everything that can be done, since there are too many variations, so we will consider only the most popular solutions.
Hidden cornice
Plasterboard ceilings (as well as suspended or suspended ceilings) will not surprise anyone for a long time. However, you can evoke the respect and approving look of guests at home if your curtains and curtains seem to flow straight from the sky. It looks very aesthetically pleasing. The thing is that the cornice is skillfully hidden from view.
Do not forget that ceiling plasterboard is thinner than usual. However, with its help you can go wild and decorate the ceiling with a variety of patterns using the technique of creating different ceiling levels.
It became possible to hide the curtain rod by creating a ceiling niche for it. Types of niches:
- A deep niche is used for hanging heavy and massive curtains in combination with lighter curtains
- A shallow niche serves for the so-called strings and light flowing tulle on them
- The window niche is located near the window. This type is the most common
- Niche for zoning. It can be in any part of the room, and the curtain falling from it should separate zones of different purposes in the same room. Here, a piece of fabric serves as a kind of partition. This zoning is very practical and mobile, as it does not weigh down the interior and can be removed at any time
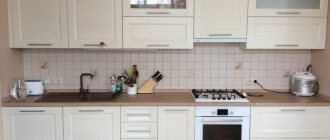
DIY kitchen made from plasterboard
Depending on the style of the interior, a plasterboard kitchen can be with or without doors. Doors, as a rule, use factory ones. An alternative is neat curtains or open niches, ala country style. Plasterboard kitchens lined with tiles are typical for various areas of country style.
The tiles for their cladding are chosen in natural shades: white, beige, terracotta, brown, earthy. Blue or green are also common. The tiles used are slightly rough, which gives the kitchen a certain touch of antiquity and a homely atmosphere. Such kitchens are the real center of the home, where it is pleasant not only to cook and eat, but also to gather with the whole family.
The variability of drywall allows you to forget about such nuances as uneven walls of the room, modules in the manufacture of furniture, and focus on functionality and form based on ease of use. You can not only make cabinets of any size and configuration, but also make an accent, for example in the form of a hearth or a non-trivial imitation of columns. The plasticity of plasterboard structures allows you to create a kitchen of any shape and configuration, a combined composition of cabinets and a table - an island or a bar counter. The use of tiles both for cladding furniture and on the floor and walls creates an amazing effect of unity of space.
So, a plasterboard kitchen is a series of niches that limit the space of individual drawers. More often, plasterboard construction is made only for the bottom row of kitchen units, and the top row is made of wall cabinets or open shelves. This is due, in my opinion, to the fact that plasterboard cabinets look somewhat heavy.
But there are options here. Here is an example of an elegant kitchen, where the upper part is a plasterboard structure.
We make a kitchen set from plasterboard with our own hands
To increase the service life of plasterboard structures, it is necessary to pay special attention to the quality of the purchased material and avoid distortions during installation. Textiles will help complete the decor of the room. To decorate arches, open niches and shelves in country style, curtains made of natural materials - cotton and linen - are ideal, and a long tablecloth would be appropriate on the table. If the tiles are colorful, it is better to give preference to plain textile options. To make the tabletop durable, thick baked plywood (from 12 mm) is usually used for its manufacture.
You can purchase a ready-made countertop or cover the plasterboard base with tiles. A tiled countertop is a non-trivial option that is sure to attract the attention of guests. Another emphasis can be placed on simulating a hearth, the role of which will be played by a built-in stove and a stylized hood made of plasterboard. If the tiles are chosen correctly, you will get a harmonious and non-standard interior. Today, no one is surprised by the use of plasterboard and gypsum fiber in construction and repair.
However, the capabilities of these materials are far from limited to these areas. How about creating a kitchen set out of plasterboard? While some shrug their shoulders doubtfully, others are already enjoying a stylish and functional kitchen in which every detail meets the needs of the owners - after all, they made it themselves!
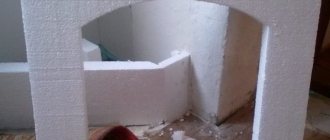
Fireplace
The fireplace body, created from plasterboard sheets, will fit perfectly into the interior of the room. Decor can be made on top of plastered plasterboard sheets.
Plasterboard fireplace
For example, glue textured tiles, bricks, stones, or simply paint the surface in the desired color. A fireplace in the room will provide comfort and harmony.
DIY installation and design of plasterboard kitchens
All of the above design options can be made with your own hands. Any type of tile will look great on them. As a result, your kitchen will become functional, practical and definitely more beautiful.
In the kitchen, the entire set is most often decorated with tiles . It is even used to decorate shelves and niches. Tiles can be attached to adhesive mortars.
The tile seams are then sealed with caulk or epoxy grout.
- put the room parameters on a sheet of paper;
- determine the location of the headsets;
- We put the dimensions of the structures on paper: height, width and depth.
Note! Any structure must be rigid and durable, especially if it will withstand a certain weight. If the niche will have doors, the frame, accordingly, needs to provide space for this. The third stage is covering the metal structure with plasterboard sheets. It is worth noting here that only moisture-resistant sheets should be used. The frame should be sheathed with sheets as follows: Drywall today is used in any residential space, including a toilet, bathroom and kitchen. It is ideal for the microclimate of the kitchen and will make its design as simple as possible.
In addition, plasterboard is used as a base for attaching tiles. Kitchens made of plasterboard allow you to create maximum functionality and practicality. This finishing material is ideal for bringing your design to life.
Niches and shelves
Shelves or niches are created from drywall scraps, which serve as additional space for placing decorative items and decorations, plants, and equipment. Based on the purpose for which it will be used, you need to create a frame. If the shelf can be light, then a conventional frame is sufficient, but if a large load on the niche is planned, then it is worth strengthening the sheathing structure with jumpers.
Niches and shelves made of plasterboard Niches and shelves made of gypsum board in modern design can be of a variety of shapes and colors, which allows the owner of the space to fully use his imagination.