Modern fashion trends in the arrangement of residential premises dictate their conditions. Drywall is used in every room to create a fashionable and practical design. Today, any thing can be made from drywall. It is famous for its environmental friendliness, evenness, and practicality. The only drawback is fragility. It can be eliminated when installing a drywall frame. Plasterboard structures serve not only for decorative purposes, but also for functionality.
Structures that can be made from plasterboard
Plasterboard sheets are used to make a two-level ceiling with lighting, boxes for hiding lighting fixtures, pipes and other communications; plasterboard is used in bathhouses and bathrooms.
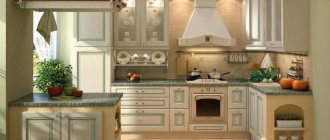
Plasterboard structures in the interior of an apartment The tabletop and cabinet, arch and bar counter are made from plasterboard. Do-it-yourself plasterboard structures are easy and quick to make. The main thing in such work is not to deviate from the algorithm of actions and take into account the advice from the masters.
Decorative plasterboard structures are made in residential premises not only for the sake of the interior. Many of the structures made have their own functions. With their help, space in the apartment is saved, coziness and comfort are created. These plasterboard structures always correspond to fashion trends and look solid.
Varieties
Plasterboard structures are boxes that are sheathed with sheets and decorated with decorative cladding. It is rational to use them for interior work, thanks to which an original interior is created in apartments and private houses.
Plasterboard compositions are:
- complex;
- simple;
- curvilinear;
- smooth;
- fencing.
According to the area of use, the following design options are distinguished:
- Ceiling. To level ceiling tiles, it is rational to use simple single-level systems. For the original design of the premises, you need to choose a multi-level ceiling containing shaped inserts, lighting and stretch fabric.
Ceiling
- Wall. GCRs are suitable for performing simple finishing in order to hide various surface defects, and for creating chic partitions that divide the room into small zones. Drywall is also suitable for creating a “standard” wall separating rooms.
- Arch. Decorative arches have been in demand among consumers for many years now. The arch can be trapezoidal, rounded and rectangular. An elliptical or semicircular arch would be very original.
- Furniture. GCR is constantly used to create bookshelves, shelving or fancy niches. In addition, plasterboard makes beautiful bar counters, wardrobes and walls for the hallway or guest room. The finished furniture is beautiful and multifunctional.
- Decorative box. Various wires, etc. are hidden in this design. Drywall is often used to level window and door slopes and to hide the ventilation system.
- Decor elements. Due to its unpretentiousness and practicality, columns, false fireplaces and geometric niches are made from gypsum plasterboard.
Important! In rooms with a high humidity coefficient, it is rational to use moisture-resistant plasterboard sheets.
Arches
With the help of arches of various types, corners are smoothed out, making plasterboard doorways and other elements of the apartment’s interior softer and more modern. To create an arch, you will need a set of drywall tools and material, which includes an arched profile, drywall, and self-tapping screws.
Plasterboard arches in the interior The profile can be bent by cutting its edges with a certain step. The profile should be secured using self-tapping screws. First you need to attach it vertically, then bend it on top. If lighting is provided in the arch, then you should lay a corrugated wire with wires under the drywall. This must be done carefully. The wires must be solid and not touch metal.
The wires are hidden and laid in corrugation. Drywall is applied to the profile. For better bending, you need to take a sheet 9 mm thick. There are several methods for bending gypsum boards. Having chosen one of them, the bent, cut sheet of drywall is attached to the profile with self-tapping screws.
After installing the gypsum board, you should start reinforcing the corners, joints and subsequent decoration. Plasterboard arches in an apartment or house make the atmosphere more pleasant, the room larger and brighter.
Option for a plasterboard arch in the interior of a room
Step-by-step instruction
1. Markings should be applied.
To do this, using a pencil and a ruler, you need to mark on the surface the place where the guide profile is attached, which is installed on the floor and ceiling along the perimeter of the room with a margin of 5 cm. It should be taken into account that this gap is sufficient for laying internal electrical wiring, insulation or sound insulation.
For subsequent wall finishing, it is necessary to ensure that the angle between the touching walls is 90 degrees.
2.Install the guide profile.
First, you should install the guide profile on the floor and ceiling. Then use a level to secure the profile vertically to the wall. To do this, use dowel-nails or self-tapping screws, securing them after 50 - 60 cm.
3.Install straight hangers, attaching them to the wall every 50 - 60 cm.
4.Install vertical posts.
This must be done in increments of 60 cm. If a more rigid fastening is required, then the distance can be reduced to 40 cm.
The distance between the racks should be made taking into account the width of the drywall, that is, a multiple of it. For vertical racks, you should take a ceiling profile cut to the required length. Then it is installed in a guide profile on the floor and ceiling and secured with hangers. Fastening is carried out using self-tapping screws with a press washer.
5. Laying insulation and sound insulation.
After securing all vertical posts, if necessary, you can lay insulation and sound insulation. This must be done between the vertical posts.
It should be noted that if it is necessary to hide electrical wiring in a room, this must be done before laying insulation.
6.Installation of drywall sheets.
To level the walls in a dry room, ordinary plasterboard, 1.2 cm thick, is used. It is assigned a gray color. Moisture-resistant plasterboard of a greenish or blue tint is used for rooms with high humidity.
First you need to cut the sheets to the appropriate length. Then, leaning the sheet against the frame, secure it with drywall screws. The fastening step should be about 20 cm. The screw head should not protrude, but should be recessed into the sheet of drywall. But you also need to prevent the self-tapping screw from breaking through the cardboard sheet.
The fastening points and joints must be puttied. After drying, you should clean the putty areas and carry out the second stage - applying finishing putty to the walls.
This is necessary to give it final evenness. After the putty has dried, you can also smooth out any uneven areas. You can use sandpaper for this. Next, if necessary, the wall should be primed.
The rack frame is fastened in the same way as a metal frame.
Niches
The niches created from plasterboard in the apartment have their own purposes:
- Bed head. A niche in the bedroom serves as lighting at night. If the design has shelves, the necessary items are placed there - glasses for reading and watching TV, a board book, a phone charger, knitting.
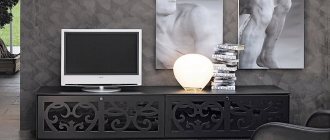
- A niche for a TV makes the interior of the apartment modern; all wires and telecommunications are perfectly hidden in this niche.
- Corner niche made of plasterboard - mainly comes with lighting and shelves for small things that make the interior of the room - photo frames, colored stones, beads.
- A niche for a mirror is not only a frame with lighting fixtures, but also an additional shelf for a comb, lipstick, and keys.
To create a niche you will need a few tools and a small set of materials. The main factor here is the reinforced frame made of a plasterboard profile, because mainly the lower part of the niche is supported by a heavy object. In a dry room, a wooden beam serves as a reinforcement, but reinforcement can be created from profiles.
Assembled frame with wires laid in corrugation. Wires are hidden in the created frame. It is covered with plasterboard. The corners must be covered with reinforced aluminum corners. The joints on the plasterboard structure are covered with sickle tape and puttied.
Plasterboard covering and putty The decor of a plasterboard niche should correspond to the overall design of the room.
Style and design
Various structures are made from plasterboard sheets, which not only act as original interior decoration, but also allow you to divide or combine several zones in a room. Recently, arches can be found in many apartments; they are a stylish transition between rooms and, unlike ordinary doorways, fit harmoniously into all design styles. To give this design a complete look, it is additionally decorated with wallpaper or masonry.
There are also many design options for plasterboard niches. Their design can have different depths, sizes and shapes. Various decorations in the form of figurines, flowers, vases and toys will help add aesthetics to the niches. In addition, their finishing includes the installation of lighting and colored glass. In the kitchen and bathroom, walls lined with plasterboard are usually finished with ceramic tiles or material simulating stone or brick.
Box
Drywall boxes in apartments are created to hide ugly objects. In the kitchen there is a hood, in the toilet and in the bathroom there is a plasterboard box for pipes. Hiding communications can also be done using a box. To create the box design you will need a set of tools and materials. There must be a galvanized profile, moisture-resistant drywall, and self-tapping screws for drywall. Depending on the location of the box, a frame base is made.
An example of a frame base for a box. This base consists of guide profiles. Then the frame is covered with plasterboard and the decor is created. The main factor here is evenness. Everything should be done clearly and to a building level.
Decoration Materials
But any design structure requires external finishing. We will use wallpaper, ceramic tiles, decorative plaster, and fabrics as finishing materials. And the interior of plasterboard walls is well complemented by properly selected furniture, curtains, and lighting.
Wallpaper as a finishing material
A surface mounted from plasterboard sheets is most suitable for wallpapering. Such a surface requires practically no additional preparation, excluding putty, cleaning of joints, screw heads and primer before gluing.
Let's celebrate right away! Wallpaper with a paper base does not even require a surface primer.
About ceramic tiles
Attention! Ceramic tiles are laid only on moisture-resistant cardboard, designated GKLV and having a greenish color. As a rule, when a structure is monaded, two or more layers of plasterboard are laid under the ceramic tiles. Using a moisture-resistant sheet of plasterboard, ceramic tiles can be laid in any room. If you are going to cover communications, then first build boxes from plasterboard, and then cover them with ceramic tiles.
Putty and decorative plaster
Although the resulting surface when using drywall does not require additional leveling, the joints and screw heads must be puttied. For this, finishing putty is used. The use of satin gypsum is allowed.
The resulting surface is most often wallpapered and painted.
But for design solutions, decorative plaster is used, providing inexhaustible finishing options. Not only does the plaster itself allow you to create different interior designs, but the use of textured rollers or Venetian plaster technologies allows you to create real works of art.
Ceiling
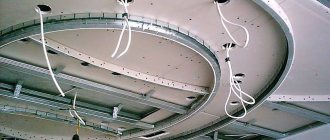
Leveling the ceiling with plasterboard in the bedroom, creating a suspended ceiling with lighting, reproducing a two-level ceiling from plasterboard - there are many options to make the room extraordinary, modern, and functional. For plasterboard ceilings, sheets up to 12.5 mm are mainly used, as well as a ceiling profile. The plasterboard structure on the ceiling should be light and not weighed down by objects.
Prepared markings on the ceiling To create a plasterboard ceiling, you need to carefully prepare it, take measurements and make markings. These first steps in work are the main ones. Profiles and hangers are mounted according to the markings. The frame must be not only smooth, but also durable. Thermal insulation material is installed into the finished frame, which also serves as sound insulation. And also all the wires and cables are laid there.
Covering the prepared ceiling The finished frame can be covered with plasterboard. This also has its own nuances:
- for multi-level figured ceilings, plasterboard should be bent into a certain shape;
- the sheets are attached in this order: first the whole sheet is mounted, and then the remaining space is sewn up. Sheets should not create a single horizontal border;
- It is mandatory to reinforce the joints with serpyanka. Primer and putty.
When creating a plasterboard ceiling, you should work in stages, following a clear algorithm of actions.
Colors
Drywall is produced in a wide range; it is considered one of the most popular materials in construction. Each type of product differs not only in its size, but also in its properties and technical indicators. When you go shopping for drywall, you need to pay attention to the fact that it is sold in different colors, which indicate the properties and scope of the material. It is worth noting that the color does not affect the appearance of the finish.
Gray plasterboard, as a rule, is chosen for installing interior partitions and for leveling walls ; it is made from cardboard and gypsum with a thickness of 12.5 mm. It is considered the cheapest option for covering surfaces in rooms with normal humidity and temperature conditions. Green sheets are characterized by an increased level of moisture resistance, so they are recommended for installation in rooms where air humidity exceeds 70%. Red and pink plasterboard is highly resistant to fire; it is used for cladding ventilation systems and fireplace structures. The presence of a yellow color on the surface of the material means that it can be used for cladding facades and bases that are constantly exposed to the negative effects of moisture, sunlight and drafts.
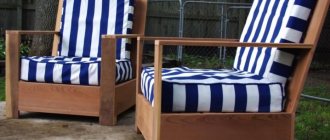
Shelves
The created plasterboard shelf structures can be different in length, functionality, and shape. If the shelf is long and a heavy thing is installed on it, then its frame made of profiles is reinforced, sometimes a sheet of chipboard is placed under it.
Interior variations with plasterboard shelves If the shelf is small in size and serves for a photo frame in the bedroom or a vase with dried flowers, then a regular frame is created and two layers of plasterboard are applied. The profile is mainly galvanized.
Shelves made of plasterboard in the kitchen Shelf options:
- Corner shelves made of gypsum plasterboard can be used for small essentials. For heavier objects (books), the frame is strengthened.
- TV shelf in the living room.
- Shelf in the kitchen for dishes.
- Shelf in the bathroom for bath accessories.
- In the children's room for toys.
- In the bedroom for knitting and glasses.
Interior of a room with plasterboard shelves
To make a shelf you will need a set of tools and plasterboard, as well as profiles and screws. You can create a shelf separately, and then use anchors to hang it on a wall or corner.
Options for using drywall
Drywall can be used both to transform vertical surfaces and to make horizontal and arched structures. The interior of the room can be transformed as follows.
On the ceiling
Using plasterboard you can make a perfectly flat suspended ceiling. Thanks to the use of this material, the designer is able to organize the installation of recessed lamps in large quantities, which makes it possible to make the lighting of the room more uniform, or to use the illumination of only one small area of the area. This interesting method can be used in any room, but in the presence of high humidity, the use of special moisture-resistant drywall and lamps that have a high degree of protection will be required.
When making a suspended ceiling, plasterboard is attached to a frame, which consists of special metal profiles that must be securely fastened to the surface of the main ceiling.
On the wall
Drywall can be effectively used for various design transformations of an ordinary wall of a house or apartment. The simplest design options with this material are the usual alignment of the wall plane. The plasterboard sheet can be installed using an adhesive solution directly on the wall or on a special wooden or metal sheathing.
A more interesting and decorative way is to make various designs in relief on the wall. This design can be of any shape due to the good flexibility of this material. If it is necessary to strongly bend the plasterboard sheet, then using a needle roller it is necessary to make numerous holes on the back side of the material.
Arches and partitions
To install partitions, a frame method of installing plasterboard sheets is used. To securely fasten the material, self-tapping screws with wide heads are used, which during installation must be completely recessed into the material and then sealed with gypsum mortar. Plasterboard partitions allow you to easily install various electrical fittings on the wall surface. In the niche between the two sheets there is enough space to place the wiring, and for mounting a socket or switch, special socket boxes with “claws” are available for sale, thanks to which, when fixed, this element does not damage the fragile plasterboard surface.
When installing an interior partition, in some cases they refuse to use a door, and to move from one room to another, an arch is installed, the height of which significantly exceeds human height. Plasterboard material is quite fragile and even a slight impact can leave marks on its surface, so when installing an arched structure, the arched vault should be raised as much as possible relative to the floor surface.
Thanks to the good flexibility of plasterboard, it is possible to construct arches not only of a classic look, but also in the shape of an ellipse or trapezoid. To organize the transition between rooms, very interesting plasterboard structures in the form of semi-arches have recently been used.
A plasterboard arch can be made not only in a partition made of this material, but also in any rectangular room, such as a corridor.
Niches and shelves
Niches in a plasterboard wall allow you not only to refuse the use of certain types of furniture, but also to create unique lighting inside such recesses, as well as hide switches and sockets.
The niche can be placed in a plasterboard wall either horizontally or vertically. Two parallel vertical niches look good, with one horizontal one between them. A floor niche for placing a decorative fireplace is also popular among designers. This design can be supplemented with niches for placing vases of flowers.
Shelves made of plasterboard allow you to place books, various decorative elements or collectibles on them. You can install a small LCD TV on a plasterboard shelf, but the structure of such a shelf must be reinforced with a profile, and the sheet must be chosen thicker.
Door and window slopes
Making door and window slopes from plasterboard allows you to save a lot of time compared to plastering such areas. The thickness of the material for these works must be at least 12.5 mm. If the slopes are made indoors, then a regular plasterboard sheet is used. For external slopes, moisture-resistant plasterboard should be used.
The process of making slopes is completely simple:
- Each slope is measured using a tape measure;
- The measurements are transferred to the plasterboard sheet;
- A piece of drywall is cut out to the required shape;
- A plasterboard slope is being installed.
Installation can be carried out on mounting foam, putty, or using a pre-installed frame.
The interior can be improved using drywall in various rooms, so before starting work, you should determine which method will be ideal for a particular room.
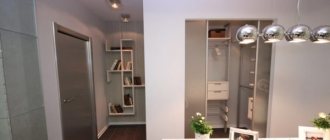
Wardrobe and dressing room
A plasterboard wardrobe in a bedroom or a plasterboard dressing room is created in an apartment in order to save space and is decorated with the overall interior. Thus, maximum functionality is obtained with a minimum of space. Wardrobes can be built into the wall, like dressing rooms built into a plasterboard partition, or they can be corner.
To create a closet or dressing room, you must first decide on the location. Make all measurements and markings. Afterwards you will need a standard set of tools and materials. The profiles are attached to the rough surface using dowels. This will make the structure rigid and allow it to bear a certain weight. Vertical posts can be secured with self-tapping screws. The main thing is the fact of evenness. The frame needs to be strengthened with the help of more profiles and jumpers.
You should carefully check the rigidity of the created structure, the strength of the installation and the evenness of the surface. Only after this can the frame be sheathed with plasterboard. In some cases, there is light in the dressing room or closet. To do this, a corrugated wire is built into the finished frame. After covering with plasterboard, you need to take care of the joints and further finishing.
Construction for plasterboard: where to start
Any plasterboard product requires the presence of a frame, which is subsequently sheathed with sheets of plasterboard. Before starting installation work, it is necessary to prepare the surface for installation of the structure. If there is old finishing, it must be removed and the walls must also be cleaned of dirt and dust. The last thing you need to do at the preparation stage is to transfer the design drawing from paper to the wall using a pencil.
Sheathing device:
- According to the marks, holes are drilled in the wall for further fastening of the profile.
- To implement the corner shelf, we will need two blanks from the guide profile. From the beginning of the profile, measure the length of the future shelf to the corner, make a cut, then measure the width and cut it in the same way. The procedure is repeated twice so that when the profile is bent at the cut points, a rectangle is obtained.
- The workpiece is attached to the wall using dowels, and the same is done with the second workpiece.
For more reliable fastening and maintaining the desired shape of the shelf, the places where the profile bends are secured with self-tapping screws.
For detailed instructions on creating a frame for drywall, see here:.
Fireplace
The fireplace in the living room interior is unusual and beautiful. If this item is present in the room, it becomes warm and cozy. A fireplace made of plasterboard can be installed quickly and easily with your own hands. There are two types of plasterboard fireplaces: straight - against the wall, corner. To create a fireplace in the living room, you will need to purchase the necessary materials: drywall, profiles, screws, a set of tools.
Installation diagram for a frame for a plasterboard fireplace You should make markings, decide on the depth of the fireplace and begin installing the frame.
The frame should be strengthened, because heavy objects are placed on the fireplace. The profiles are attached to the wall using dowels. The rear wall is assembled from guides and crossbars.
Then the camera is assembled. Here you should use a profile curved into a semicircle. After which the depth of the fireplace and the front panel are created. Stiffening ribs must be present in creating the frame. They are installed horizontally from wooden beams.
Covering the fireplace with plasterboard The finished frame is sheathed with cut-out plasterboard shapes and reinforced. All joints should be reinforced with sickle tape, and corners with aluminum corners.
Design option for a corner fireplace To ensure the evenness of the structure, you can use a level and plumb lines. The decor of the fireplace should match the interior of the apartment and not stand out from the general background. Watch the video for the process of installing a plasterboard fireplace.
Useful tips in the interior
To solve design problems, use not only architectural techniques, but also the use of various finishing materials.
A fashionable design for plasterboard walls in a hall can be achieved not only by using expensive finishing materials. If you need a fresh idea and an unexpected solution, we recommend taking a 3D tour to a photo gallery.
Design of plasterboard walls in the hall: arches and niches
The main room of any apartment is considered to be the living room or hall. It is where guests are most often received and the whole family gathers. Not only ease of use, but also the atmosphere depends on the proper design of the room.
We suggest assembling a niche for a TV or an arch.
TV niche
Modern TV has a flat design and low weight. Installation on the wall is provided using a factory-made bracket or a do-it-yourself TV bracket. Fixed in this way, it looks harmonious in the interior of a public institution, as it provides an overview for every visitor.
In the room, the TV looks more harmonious in a niche. And this design ensures higher safety.
How to make a niche for a TV
To make a niche for a TV from plasterboard sheets you will need the following tools and materials:
- The materials you will need are a metal profile marked CW, UW. This is the so-called guide and rack profile. With its help, the frame of the future niche is assembled.
- As a material for the frame, you can use a wooden beam with a section of 30×30 mm.
- To cover the niche, use plasterboard with a thickness of 6.5–12.5 mm.
- The frame is assembled using self-tapping screws, installed and secured with special connections and dowels.
- To give the niche a curved contour, use arched profiles and thin sheets of plasterboard.
The tool you can't do without is:
- drills with speed control;
- shooter;
- construction knife;
- hacksaws for metal;
- metal scissors;
- planer
It is necessary to mark, measure and install the structure using:
- roulette;
- plumb line;
- cord;
- level.
Getting started on making a niche must begin with developing a project that takes into account the size of the TV being installed.
- You need to provide space for ventilation of the device, laying of connecting cables, and installation of additional devices.
- When designing a niche for installing a TV, consider simultaneously creating a shelving unit to accommodate books, flowers, and decorations. This will not only add additional harmony to the interior, but will also serve as additional space.
- Installation of original lighting is appropriate.
This layout will allow for the laying of various communications that fit organically into the structure. Learn more about installing a profile structure.
Find out how you can hang your TV and save money on a bracket by making it yourself.
Niche assembly
- Any work begins with marking the installation site of the niche.
- Mark the location of the future niche on the wall.
- After cutting the vertical rack rails from the profile to size, secure them to the wall using dowels.
- Cut out horizontal carriers from the guide profile and secure them to the racks using self-tapping screws.
- To increase the rigidity of the structure, install additional jumpers.
- You have now created the frame of your future niche.
- To cover the structure, cut blanks from plasterboard. The workpieces are fastened to the frame using self-tapping screws in increments of at least 25–30 cm. Do not forget to recess the screw heads to a depth of 0.5 mm.
- Install fittings for switches, sockets and lamps.
- The resulting niche frame must be puttied, cleaned and a finishing layer applied.
We design and assemble an arch
It is advisable to use arches in the construction of partitions, decorating a wall. The arches decorating the entrance to the kitchen and loggia look harmonious. Installing arches allows you to significantly expand the space of the room, increase the doorway, and get rid of doors. Arches are especially appropriate in small apartments.
The procedure for installing arches
The work begins with acquiring the required amount of material. You will need a plasterboard sheet, a metal profile or a wooden beam, fasteners, and putty. Having decided on the appearance of the future arch, make a sketch or drawing.
- Mark the dimensions on the walls.
- Calculate what and how many materials you need.
- The walls to which the arch frame will be attached must be leveled.
- Attach the rack profiles to the walls, floor, and ceiling using dowels.
- You should end up with a U-shaped design.
- We cut out the upper part of the arch from plasterboard and fasten it to the resulting structure along the perimeter with self-tapping screws in increments of 20–40 mm.
- Now you need to attach a pre-cut piece of plasterboard to the lower shelves of the U-shaped structure. To ensure the radius, the profile is cut in several places with metal scissors.
- If you need an arch of a certain width, do the work listed above with the second part of the arch.
- In order to sew up the radius of the arch, it is necessary to bend the cut piece of plasterboard. Drywall bends well if it is cut widthwise on one side in steps of 10–20 cm. The size of the step depends on the radius of the arch. The smaller the radius, the faster the cutting step.
- The curved drywall is secured with self-tapping screws.
- All irregularities and depressions must be puttied and sealed. Finishing material is applied on top.
I wish you success.
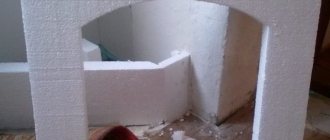
Shower room
A shower cabin made of plasterboard takes up little space, but at the same time it is practical to use. They come to the creation of such a design when there are no appropriate cabin sizes. It can be straight, angular, semicircular.
Shower cabin design plan To produce this design with your own hands, you will need a diagram. Afterwards, markings are made according to the plan. Be sure to indicate the supply of water pipes, sewerage and electrical wiring.
Preparing the base for drywall
Diagram for installing a drain pipe in the floor of a shower stall. A plasterboard shower stall starts from the bottom. The pallet is made of brick and cement. In this process, a sewer outlet is manufactured. Afterwards the assembly of the frame begins. The frame must be strong, rigid, and even. It must be covered with moisture-resistant plasterboard. All profiles must be galvanized to prevent metal corrosion.
Creating, covering and finishing the frame of the shower cabin After covering the frame and reinforcing the joints, tiles are laid on the plasterboard surface.
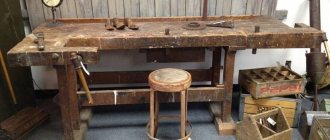
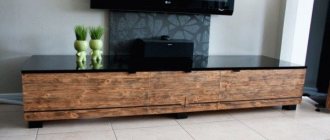
TV stand
Why buy an expensive TV stand if there is drywall left after renovation? You can make a plasterboard cabinet to your liking, the desired length, with an interesting finish. To produce a plasterboard TV stand, you will need dimensions and a drawing. Markings are made on the wall or in the corner with all the necessary points. The drawing indicates the height, length, width of the cabinet. The profile is attached to the wall according to the markings. Another profile is inserted into this profile, and so on. This creates a frame base for the cabinet.
To make the frame rigid, the profiles that create the depth of the cabinet are reinforced either with another profile or with a wooden lath. A sheet of chipboard or other dense material is attached to the top, where the countertop is supposed to be, because drywall can bend and break under the weight. Sheathing with plasterboard does not take much effort and time. You should prepare a plasterboard cutout in advance. All corners and joints are reinforced. Next, the TV stand is subject to the desired decor. The best option is to cover the structure with decorative adhesive film.
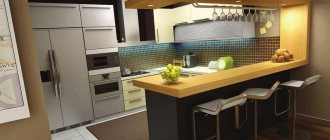
Bar counter
A gypsum plasterboard bar counter plays a big role in a living space. If this is a studio apartment, then separating the kitchen and living room with a bar counter is a great option. You can drink tea and eat at the bar counter. If the plasterboard structure is created with shelves, then this is a place to put cutlery, napkins, and so on. The bar counter can be:
- Wall-mounted – adjacent to the main wall.
- The peninsula is a continuation of the kitchen furniture.
- Island - not adjacent to anything, standing in the middle.
- Mobile – extends, folds, rises.
To create a bar counter, you should decide on its type (it can serve as zoning for the room or stand in the middle of the dining room). Next, you need to know its dimensions, dimensions, appearance (closed, open, with shelves or backlit).
After all the questions, you can begin marking and installing the frame. Creating a frame base begins with the use of a level and guide profiles. Next, a frame is created according to the type of structure and, if necessary, reinforced.
View of a bar counter with lighting After the production of a rigid, reliable and practical profile skeleton, the sheathing is carried out with moisture-resistant plasterboard. Decoration is carried out individually, based on the appearance of the kitchen. Please remember that liquid may be spilled on the bar counter. It is often wiped with damp microfiber. Household members use this design every day.