127164
Today, due to the dynamic development of new technologies, the requirements for the design and manufacture of products intended for furnishing premises have increased. Modern and functional steel and furniture hinges come in a wide variety of varieties, on which the durability of household items depends when used. Correctly chosen fittings give the furniture strength and take it to a higher design level.
Types of loops by design
They are hinge units that connect the doors to the cabinet body. Various design solutions make it possible to leave the door leaf open at a certain angle. Based on the method of fastening facades, you can choose the following models:
- Four-jointed.
- Mezzanine.
- Pianos.
- For glass doors.
Quadruple joint
The most common and popular are 4-hinge furniture hinges. They are distinguished by their versatility and high reliability. There are three types of four-hinged hinges, which differ from each other in the method of fastening the shoulder cup to the striker:
Slide-on. The protruding part of the strike plate fits into the shoulder. Fastening is carried out with a fixing screw. The connection has notches on both sides. The length of the arm can be lengthened or shortened by securing the connection with notches.
Clip-on. This system allows you to do without a screw. The parts of the loop are connected by a latch. Such canopies are called quick installation models. The cabinet door can be removed and replaced without tools.
Key-hole. The cup arm is placed with a hole on the counter plate screw. The edges of the opening are inserted under the screw. The mounting hole resembles a keyhole.
Their varieties are used depending on the position of the closed door relative to the wall of the cabinet body. There are the following four-hinged types:
- invoice;
- semi-invoice;
- loose-leaf;
- corner;
- inverse;
- adit.
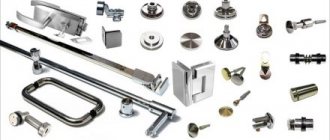
Manufacturing materials
The durability of furniture fittings, including the quality of hidden hinges for furniture, determines its uninterrupted service life. Therefore, when purchasing both a ready-made set and components for self-assembly or manufacturing, you need to pay close attention to the material from which all fastening mechanisms are made.
The hidden furniture hinge is made of metal alloy. This alloy is called Zamak, or TsAM (after the first letters of the metals it contains). It is a mixture of aluminum, magnesium, zinc, copper. It is characterized by high strength, wear resistance, smooth matte or shiny surface, and is absolutely safe for humans.
Other furniture fittings, fasteners and mechanisms are also made from this alloy. The top is often covered with brass or nickel-plated connections. In addition, it is possible to manufacture furniture hinges from metal with plastic elements.
Changing the installation angle
If four-hinged hinges do not allow the doors to open to the desired angle, use additional pads. You can purchase them at a furniture supermarket.
The platforms are made of plastic and metal. Place it under the hinge's mounting bar, and the angle will change in the desired direction. For example, a 10-degree overlay can either increase or decrease the installation angle of the façade.
Along with one-dimensional tabs, there are universal ones with angle adjustment. The installation platforms are equipped with a mechanism that changes the angle of inclination of the strike plate (adjustment is carried out using a screwdriver).
Adjusting the angle using a bolt
What it is
Before talking about how to install or replace hinges, it is worth noting that the overhead fittings of the type in question are fasteners designed primarily for connecting doors to cabinet furniture.
[adv1]
Regardless of the intended purpose, color, shape or material of the product, they are united by one feature. This is an installation method, that is, installation on furniture structures. The use of such loops eliminates the need to make special holes for cups. They are simply not provided there. Yes, you may have to drill holes for the screws. But this is done with an ordinary drill, which almost every man has in his household.
This feature saves time and effort. After all, you won’t have to pre-prepare the seats for the hinges. It is enough to make do with the markings.
Planting cup
The most common diameter of the loop cup is 35 mm. There are models with 26 mm and 40 mm cups. You can drill out seats in the body of a door made of chipboard or MDF using a milling cutter. Pay attention to the depth of the cutter and the thickness of the facade. The mass reserve under the cup should be at least 3 - 4 mm.
The location of the holes along the height of the door is not limited in any way. Make markings for the hinges on the facade at a distance of ¼ of the length from the top and bottom of the door.
Keep the edge of the recess circle from the end of the facade at a distance of 4 - 5 mm. It's best to use a template.
Tips for choosing
A properly selected furniture hinge will ensure long-term use of the furniture. It is worth paying attention not only to the cost of products, but also to the main characteristics. Recommendations from experts will help you decide:
- The method of opening the door and the dimensions of the hinge are specified. Small facades require small canopies, and vice versa.
- Attention is paid to the manufacturer, the optimal ratio of cost and quality.
- During an external inspection of furniture corner hinges, the presence of dents, cracks and other defects is checked.
- Fittings must be certified in the Russian Federation; reliable sellers always have supporting documents.
- You should trust only specialized stores that sell original products. Qualified consultants will help you make the right choice and provide information on installation and maintenance of products.
Tips for choosing wheels for furniture and rules for calculating loads
All straight and angular furniture hinges, except cupless ones, are produced with or without closers. The action of this device can be compared to a shock absorber, which ensures smooth, silent closing of doors, without hitting the furniture body. Among the undoubted advantages of such an addition are an increase in the service life of structures, resistance to loads, and protection against leakage of oil and working fluid. The models are adjustable and serve for the tightest fit of surfaces.
For thick facades, hinges with a cup diameter of 45 mm are selected. A good option would be spring reverse models.
Specify the method of opening the door and the dimensions of the hinge
Pay attention to the manufacturer, the ratio of cost and quality
Check for dents, cracks and other defects
Selection and installation methods
Before purchasing a specific hinge model, you need to know the angle of the cabinet front to ensure convenient door opening.
To place the hinges correctly, purchase a template. Companies such as Blum offer special marking devices as an accompanying product for their products. Using the template, you can easily make markings for self-tapping screws on the front and side of the cabinet, and also accurately determine the center of the cutout using a crown for the recess for the cup.
If you learn video better than text, watch Evgeniy’s video from the BlackAsb channel, which clearly shows the rules for installing furniture hinges:
How to install furniture piano hinges?
Let's look at the example of installing an overhead cabinet door, that is, one that is hung over the side walls. In this case, the piano hinge is first attached to the inside of the door, and then to the end of the side wall of the cabinet. The door opening angle will be 90 degrees. During installation, the piano hinge requires precise alignment and screwing, since small distortions can lead to incorrect fit of the facade.
Installation sequence:
Step 1.
Using a hacksaw, cut the required length corresponding to the height of the facade.
Tip: If the last hole for the screw is too far from the end of the strip (more than 40 mm), then it is advisable to make an additional countersunk hole at a distance of 15 mm from the end.
Step 2.
Smooth rough edges using a hand sander or file.
Step 3.
Attach the hinge to the inner face of the facade, and the hinge should be flush with its edge. For fasteners, use small self-tapping screws 3x16 mm or 3.5x16 mm.
Tip: It is quite difficult to screw self-tapping screws into chipboard, so first mark the fastening points with an awl and drill holes with a drill whose diameter is 1 mm less than the diameter of the fastener.
Step 4.
Place the hinge as accurately as possible and secure with the two outermost screws, then screw in all the rest.
Step 5.
Install the door in its place, aligning the façade in height. Mark the mounting points on the end of the cabinet wall, drill holes and screw the hinge.
Note.
If the design stipulates that the door is inserted between the walls of the cabinet, then the hinge is first screwed to the wall and then to the end of the door.
Number of hinges for cabinet door
The standard number of hinges on a sash is 2 pieces. However, cabinets can be more than 2 meters high and quite wide. Based on this, you will need to determine exactly how many turning devices you need so that they can withstand the significant load from a massive door. To do this, you need to know the weight of the door leaf and refer to the table:
Installation instructions
See also:
Which dish dryer to buy in a closet, how to install it yourself
Installing hinges that do not require insertion is quite simple. This eliminates the need for milling.
See also:
Rocking chair made of plywood: do it yourself, simple and affordable
You just need to follow the instructions:
- First, markings are made on the side of the door;
- It is better to retreat at least 25 mm from below and above;
- the loop is applied to the canvas to mark points for the screws;
- if everything is level, holes for fasteners are drilled;
- the door leaf and the furniture facade are connected;
- a control check of closing and opening is carried out;
- adjustment is being made;
- All screws are finally tightened tightly.
This completes the installation.