- December 9, 2018
- Furniture
- Anna Gasfer
Tables with folding legs are versatile pieces of furniture. The main advantage is that they do not take up too much space during operation and storage. Sometimes it’s difficult to choose the right option: what’s offered in the store is either of questionable quality or you’re not happy with the price. In this case, you can make a folding table with your own hands. We'll look at how in the article.
Table functionality
A folding table made of wood is very durable and is not inferior in convenience to ordinary furniture. It can be used as a writing desk, a lunch desk, for children's activities, or for crafts. If you think about the decor, it will fit well into the interior of the room. As an option, you can make your own table with folding legs, which will take up little space during transportation.
Another plus: it is ideal for small spaces; if necessary, it can always be folded and hidden in a closet, thereby freeing up space in the room. Some models easily fit into the trunk of a car, which is very convenient - you can take it with you while traveling.
And you don't have to buy it. Making a folding wooden table with your own hands is not at all difficult. The article presents drawings and describes the main stages of work.
This is a simple design. The most important thing is to prepare all the components and process them efficiently. The dimensions indicated in the drawing give an idea of the dimensions of the entire structure and individual elements.
Criterias of choice
Today, furniture legs are made from various materials that differ in their performance properties. The supports have different sizes and shapes; when choosing, you should listen to the advice of experts:
- The weight of the headset has a significant impact on the choice of a particular model of legs. If cabinet furniture is very heavy, you should not use curved supports; they are not as resistant to loads, unlike the straight version.
- When choosing, it is important to ask your consultant whether it is possible to choose a leg of a different color or shape for this product. If during the operation of the furniture the supports become unusable, then there will be no difficulties in replacing them.
- It is necessary to take into account what specific product the leg will be used for; it is necessary to measure the height of the already installed model before purchasing. For kitchen furniture, it is advisable to choose compact options, and for a coffee table - higher supports.
- Protective pads will prevent the legs from deforming the bottom of the furniture. Felt and felt materials are used as this element. The first option is more effective and affordable. It is not recommended to refuse to purchase such pads.
- Since supporting structures are subject to increased loads, it is necessary that they be resistant to wear. The legs should not have any dents, cracks, or other deformations.
It is worth noting that the interior will be complete if the supports and the furniture itself are combined with each other in terms of the material from which the products are made. Classic solid wood headsets will require wooden supports; for high-tech, metal models are more suitable.
For heavy furniture it is better to use straight legs
Before purchasing, you should measure the height of the existing support
Special pads will protect the bottom of the furniture
Supports must be wear-resistant
Beginning of work
First of all, the dimensions of all parts for making a table with your own hands are calculated. You can choose any diagram and drawing of a folding table - it all depends on your capabilities and preferences. In this case, you will need a tabletop and blanks for the legs. As the main material, you can use not only wood, but also glass, metal, plastic or cork panels. So, you should have a drawing of a table (for example, like the one presented later in the article):
The simplest option is wooden boards fastened together. If desired, you can use a solid countertop. Often folding table legs are made of iron, but at home it will be much easier to work with wood. The following is a list of necessary elements (the letters are indicated in the diagram).
It is important to correctly calculate the thickness of the legs for the tabletop so that they can easily support its weight and not sag. A larger dining table will need more supports. And they will be larger in diameter. You should also install additional horizontal beams between the top mounts and the countertop. Step-by-step procedure for assembling the table:
You can buy wood, boards and other materials necessary for work at a hardware store. You can cut the boards for folding table legs yourself if you have a workbench, circular saw, or handsaw. Always wear polycarbonate safety glasses and a respirator when operating a saw. If you don’t have a saw at home, most stores will cut the wood to the required length.
Selecting good wood for table legs.
It is better when the leg preparation has a large supply of lumber. Always use a generous allowance on the blank, at least 1/4" in width and 4" longer in length than the length of the finished Cabriole Legs, unless you plan to paint them. Otherwise, poor selection of fibers will ruin the appearance of the leg. Pay great attention to the selection of wood structure and grain direction. The first step is to determine your foot measurements. Table legs come in different sizes, but most often production starts with the basic dimensions of 10/4”-16/4”. It is better, when you prepare the support blanks, not to touch them for several days until the final formation of the blank. Once you have decided on the size of the finished leg, you need to make your own template. Three-dimensional appearance or S-curves Cabriole Legs, at first glance, may seem like complex parts. Luckily, a 2D template makes it easy to mark and cut a 3D profile on a band saw. All that's left to do after the bandsaw is a little handwork to fine-tune the shape of the leg. The base template shape is made from 1/4" thick plywood (chipboard). The template should be the same width as the Cabriole Legs and 4” longer than the finished leg length (28”).
Wood coating
Then the wood is coated with a special varnish, which allows the material to be preserved in its original form and protected from moisture and mechanical damage. As an option, you can use water-repellent varnishes; they are considered a fairly reliable product. If you accidentally spill water or another drink, the surface of the countertop will remain unharmed.
Today, the choice of varnishes and paints is very wide: from transparent to dark, matte and the brightest. In addition, the right varnish will make the table an attractive piece of furniture.
Which kitchen tables are in fashion: 6 trends
When wondering how to choose a good kitchen table, you probably also want to know which kitchen tables are in fashion right now.
Wooden
The fashion for eco-style and natural materials has given natural wood even greater popularity (although it has never gone out of fashion). When thinking about which kitchen table is best to buy so that it combines practicality, durability, beauty and timeless relevance, take a closer look at the wooden options
Wooden kitchen table. Design: Louise Bradley
Extendable dining table with wooden legs 84-168x84 cm sonoma oak Everyday
8900 rub.
buy
Dining table round white with legs, diameter 100 cm Eiffel
20300 rub.
buy
Extendable dining table with wooden legs 140-187x84 cm sonoma oak Reina
17600 rub.
buy
Dining table round with wooden legs 100 cm oak Cheryn
16990 rub.
buy
Dining table with metal legs 80x120 cm Dino walnut veneer
19900 rub.
buy
Dining table with wooden legs 150x86 cm light brown Fremont
29900 rub.
buy
Dining table white with wooden legs 120x60 cm Eames Frank
12990 rub.
12081 rub.
buy
Extending dining table white with wooden legs 140-187x84 cm Reina
17600 rub.
buy
Extendable dining table with wooden legs 140-187x84 cm Coimbra ash Reina
17600 rub.
buy
Wooden dining table with figured legs 150 cm Upsala cappuccino
15840 rub.
buy
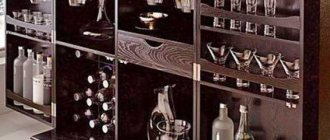
Metal
Metal in all its forms burst into the top of decorative trends a few seasons ago - and, it seems, is not going to leave it. Metal dining room furniture is a fashion trend. Bonus: most often such models look laconic, elegant, and do not overload the interior.
Stone countertops
Another current major trend is natural stone (especially marble, travertine). Countertops made from this material look extremely impressive and can be used. They are also heat-resistant and wear-resistant. Disadvantage: natural stone is a rather heavy material, and also a significant cost item during repairs.
Transparent furniture
The ability to discreetly place, literally dissolve a large piece of furniture in space is a good bonus. This is why transparent tables, chairs, and even entire transparent islands are in trend.
Bar tables
High bar-type tables are another current option. This model would be especially appropriate in a loft interior, a Scandi kitchen, or a modern setting.
Advice. In a small kitchen, a bar table can become the center of the main dining group, and in larger rooms it can serve as an auxiliary area.
Cancellation of lunch group
Oddly enough, a complete rejection of the usual dining set in the kitchen is also among the trends. In a number of situations, such a solution will be really good and justified:
- if the kitchenette is very tiny, and there is simply nowhere to install a traditional dining area;
- if the dining group is located in another room (for example, in the living room);
if the role of the dining area is taken on by an island, a bar counter or a window sill-table top.
Kitchen island instead of a table in the kitchen. Design: Amber Interiors
Blueprints
The first step is to prepare a drawing of a folding table. It will be much easier to create furniture with your own hands if you follow the instructions. Do not place the legs too close to the center or edges. Place them so that they do not protrude beyond the table when the table is folded. Mark the location of each leg with a pencil on the back of the tabletop. The legs should be positioned symmetrically, at the same distance from the edge.
What should you consider if you are making a folding table with your own hands? In the diagram, the legs do not need to be drawn in detail. The main thing is that the mounting locations are indicated. The table supports do not have to be positioned strictly vertically; there are various design options. They can be directed diagonally and intersect at an angle of 90 degrees, like an ironing board, for example.
Wooden or metal beams acting as legs can be fastened in pairs. This option is considered more stable than one with single supports. In addition, at an angle of 30 degrees to their upper part, you can direct additional fasteners, which will serve as a fixing element.
CURVED LEGS? IT'S SIMPLE!
The variety of shapes given to curved furniture legs can be applied to a variety of modern types of furniture, not just antique-style pieces. At the same time, the most attractive for the home craftsman is the simple model of the figured leg of homemade furniture, offered by the French magazine “System D”.
The methods for manufacturing curved supports described in this article are not a repetition of those that are usually used in furniture factories - they are more accessible and are perfect for small teams of furniture workshops and individual craftsmen.
Figure 2 shows, as an example, three types of legs that are the easiest to manufacture and profile: for a bureau, a stand for trinkets and a multi-purpose soft bench. Next to them are the shadow contours of the bars from which they are obtained. Thanks to a well-thought-out cutting method, such shaped furniture supports require less effort and material, while the waste is no greater than in the manufacture of more complex models.
Using a band saw or a regular bow saw, much less a jigsaw, makes it relatively easy to obtain these kinds of curves: curved legs of the simplest shape can be rough cut and finished by hand, even faster than on a machine.
Rice. 1. Template for a bent table leg (plywood, s10) and its use on the workpiece.
Rice. 2. Options for bent furniture legs (a) and the shape of the blanks for their production (b):
1—high leg for bureau; 2—medium leg for a stand, bedside table, 3—small leg for a bench.
Blank
Since some parts of the legs are very thin, it is necessary to use dense and durable wood, such as maple or birch. These two species are especially suitable because during subsequent finishing they make it possible to successfully imitate walnut or mahogany.
The first step is to prepare a block of sufficient size so that the entire leg of the corresponding profile can be cut from it. Therefore, it can be “composite” - glued together from boards 35 mm thick.
The planes of the boards that are joined together must be processed with a jointer and adjusted more precisely. If possible, use hot-curing glue (for example, PVA). Make sure that the clamps clamp the boards evenly along the entire length. Allow the glue to fully cure before starting the next operation.
In the case of joining a leg blank that must withstand significant loads, the use of high quality glue is very important.
To make the workpiece, a template is used, which makes it easier to draw the contour of the leg on its edge. It must be taken into account that the contour must be applied on two adjacent faces of the workpiece, with their convex sides facing each other.
While the glue is drying on the workpiece, make a template (for example, the one shown in Figure 1) from a piece of plywood 10 mm thick. First, cut a strip of plywood to the required length and width. The intended appearance of the leg can also be drawn on it (the main contours of the three models of legs are shown in the figure with the grid). However, in order to achieve maximum accuracy of the bend line, the template must first be drawn on a piece of hard cardboard, then the outline is cut out and applied to the plywood from which a template will be cut along the contour (each, of course, is intended only for one piece of furniture).
The curved line on the left of the template is the line of the back edge of the leg; the line on the right in the same picture is the front edge.
Mark the profile of the workpiece using a template. Carefully check the coincidence of the contours on the edges of the block (without such a check before cutting, the workpiece may be damaged). The two front sides of the legs are most visible in the finished product, but from certain points all four sides of the legs are visible, especially when looking along the length of the table.
Rice. 3. The main contours of the patterns on the scale grid:
a - for the legs of heavy furniture, b - for a light table, c - for a stand, d - for a bench.
Sawing
In order to cut a curved profile on a workpiece of similar thickness, it is better to use a jigsaw.
Scrape off any glue that may have come out of the joints under pressure when gluing the boards together into a piece, and thoroughly clean the edges. When cutting, strictly adhere to the intended contour and do not put pressure on the saw with the workpiece, because this can cause overheating and jamming of the saw blade.
After one part has been cut, place the cut piece in its old place and fasten both parts with one or two pins, placing them in such a way that the saw blade cannot touch them during the second cut of the edge. Installing a sawn piece in the old place provides a larger support plane for subsequent cuts. But nevertheless, this support cannot be completely relied upon - if the end of one part of the workpiece lifts slightly while the saw is running, this can cause the blade to jam and fail.
After small radius curves have been cut, continue the operation quite slowly; haste will lead to a violation of the cutting accuracy.
Finalization of the workpiece
The protruding corners on the legs of the resulting sample are usually preserved; the corners in the upper part of the bend are sometimes rounded. All irregularities after sawing should be destroyed by sanding with sandpaper or a well-sharpened scraper (scraper). The latter tool is particularly recommended for long curved surfaces; To avoid jamming of the cutter, it must be adjusted in such a way that the thinnest chips can be removed with each movement.
Finally, process all curved profiles along all edges - uncorrected defects will complicate the final finishing.
If the leg is intended for a table, the end plane at its top should be aligned at right angles to the vertical edges, and cutouts should be made on it for connections to the support elements of the lid.
Options - any
The leg models shown in the pictures are marked, cut and finished in the same way, in approximately the same way as described above. On the legs, the outer protrusion can be rounded. On top of the curved legs, a support part is attached, in which grooves are cut out for assembly with other furniture elements. This model is very suitable for a stand for radio equipment or for a banquette by the fireplace. But the use of such a leg is not limited only to these types of furniture, it can be longer or shorter, have a different shape of the top; this model can be applied in a wide variety of cases.
Rice. 4. Making a small leg (simplified version):
a - sawing the block; b - the resulting leg blank, c - manual finishing of the leg blank - with sandpaper on a block, d - finished bench with bent legs.
The short leg shown in Figure 4 is very suitable for a low stool or bench. The sample of a simple leg that we see in the figure does not, strictly speaking, belong to the ancient style, but its silhouette consists of the same curves, which allows us to classify this sample as belonging to the same category of curved legs. To mark such a model, you don’t even need a template: it the outline is so simple and the size is so small that it can be drawn by placing a piece of cardboard with an approximate profile on the workpiece. However, it is sometimes difficult to cut out such a short leg due to the uneven texture of the wood.
Before sawing the workpiece, you need to make sure that all its edges are at right angles to each other - this is necessary to ensure reliable support when sawing.
The short leg is usually fastened with a long screw or installed on inserted round tenons (dowels), with glue applied to the contacting planes.
We recommend reading
- WHEELS FOR TRAINS +VIDEO. Wheels for trains, with their help passenger trains move, freight trains deliver food across the country, and electric locomotives on these same wheels provide movement...
- HALOGEN BULBS Every day we use a huge number of things and have almost stopped noticing them. But it turns out that in the production of seemingly insignificant things there is a lot hidden...
Mounting on brackets
What is the best way to fasten the brackets when making a table with your own hands? Folding legs are best secured using brackets with flat parts that have holes for screws. The main part of the element is a spring rod, which is used to fix the table legs when they are extended.
Take measurements of the top of each leg. When extending, the upper half of the mechanism, attached to the tabletop, must be flat relative to the upper plane of the support. Mark the bracket screw holes on the leg and table top with a pencil. First, secure the bracket part to the leg, then screw it to the tabletop plane. Double check all measurements before drilling holes for screws in the legs or table. Also check that each leg can bend along the tabletop and perpendicular to it when extended.
Completion of work
Lay the table on the floor so that each leg is level, using the penciled holes as a guide. First make holes to secure the brackets to the table. Attach the bracket segment to the leg and then to the bottom of the table. Repeat the same steps for each leg: measurements, alignment, fastening.
Install special rubber or fabric attachments at the ends of folding table legs. It is quite simple to perform this procedure with your own hands. This precaution will protect your floors from scratches and damage.
What to do to avoid scratching the floor
By moving a furniture set, you can easily scratch the floor covering, ruining not only its attractive appearance, but also the product itself. There are several ways to prevent this:
- Use nylon bottle caps. They must be installed under the furniture supports themselves. This option also simplifies the rearrangement of large items.
- Place pieces of damp cotton cloth under the legs of the furniture. The material will prevent scratches on the floor, and water will make it easier to move furniture.
- Use raw potatoes. First, it must be cleaned and cut into circles about 7-8 cm thick, with a diameter slightly larger than the furniture support. Next, a recess is made under the legs, and the product moves.
- Buy a rug (thick wool). Place it under the legs of the furniture and then move it carefully. This requires several people: one to pull the rug, the other to pull the furniture.
- Use lard skins. As in other methods, you need to place it under supports and carefully move the furniture. At the end of the procedure, traces of grease can be removed with a cloth and soapy water.
- Buy felt stickers for furniture legs. You can rub the path of movement of the product with paraffin. After this, the furniture will glide well and will not scratch the flooring.
- Cut small pads from unnecessary linoleum or leather.
- Treat the floor covering with soapy water. After this, the furniture will move easily, but the product is more suitable in cases where linoleum is used.
The purpose of furniture screed, its main types
Using these simple methods, you can easily rearrange any set and other heavy objects, making your work easier and keeping the floor intact. The correct choice of supports is important, since the comfortable operation of the products and the design of the room in general will depend on their quality, material of manufacture and attractive appearance. Furniture legs do not require special care; you just need to periodically wipe them with a damp cloth to remove dirt and dust.
Scope of application of furniture hinges with a closer, installation features
Use nylon lids from jars as protection.
Place a damp cloth under the feet
Use raw potatoes
Lay down a wool rug
Place lard skins under the legs
Buy protective stickers for supports
Cut linings from leather or linoleum
Soap the floor well
Woodworking tools
Each craft uses its own tools. The quality of the finished product depends on the right choice. The most commonly used tools for making wooden objects and furniture are hammer and nails. Hammers that have a claw on the back are very convenient. It balances the impact and helps remove an incorrectly driven nail.
Screws are considered a good alternative to nails. They are often used to secure folding table legs. You can do all the work yourself, even with a simple screwdriver. For faster work, it is recommended to use an electric screwdriver.
To process or cut wood, you will need a good knife and chisel. A stationery knife with a disposable blade is used for applying patterns and trimming unnecessary parts.
The chisel is usually beveled on both sides; in some models, it is beveled only on the side of the cutting edge. In principle, anyone can work, it all depends on your desires. The chisel must be carefully hit with a hammer so as not to damage the structure of the wood. To check whether the table is level in the end, you should use a level. It will show how inclined the surface is relative to the horizon.
Table decoration
An important point in the process of creating furniture is, of course, decor. The easiest way to decorate is painting. We sell a wide range of paint and varnish products from various manufacturers. It is important to choose not only the right shade that will harmoniously combine with the interior items, but also the quality. It is better to choose an option that dries quickly and has no odor. For application you can use a paint brush or roller.
For a more original finish, you can resort to hand painting or unusual coloring. A variety of stripes, checks and other geometric patterns are created using paper tape or a stencil.
Beginners are often afraid of ruining a product with poor-quality dyeing, because they have never done this before. Alternatively, you can use spray paint. Simply shake it and spray the paint over the table surface.
Over time, plain countertops become boring. In this case, something needs to be changed. But you don’t have to repaint or buy new furniture. You can try decoupage or choose a new tablecloth.
Main varieties
Today, manufacturers produce legs of various modifications for cabinet furniture, which are divided into several categories:
- Decorative legs - perform several functions: aesthetic and supporting. Thanks to these elements, you can change the appearance of furniture due to a wide variety of colors, shapes, and materials. In addition to their attractive appearance, these supports must be strong and stable. The most popular legs are made from solid hardwood. Natural wood is treated with special compounds to protect against insects and rot.
- Roller supports are most often installed on office furniture, but other items are also found. The most popular are wheels. They are bearing, bushing, linear, rotary. The structures give the furniture mobility, reduce the possible risk of damage to the floor covering, can take high loads, and do not emit noise. Modern models often have a brake, this prevents spontaneous movement.
- Sliding supports (with height adjustment) are the best option for uneven floors. Most often, such legs are equipped with a screw mechanism. There are also products with a hinged mounting of the thrust bearing to the screw. This option is characterized by ease of adjustment and inexpensive fittings.
- Regular stands. They do not have a height adjustment function, they look simple, and sometimes cheap. Metal legs are often found - usually used in minimalism, hi-tech, and modern styles.
Rules for selecting mortise handles for furniture, installation nuances
Decorative
Roller
Sliding
Regular