Types of loops and their features
First you need to decide which hinges are suitable for your door. There are the following types of fittings:
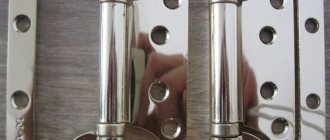
- Invoices. The plates differ in their shape and fit into each other when closed. They are attached directly to the surface of the canvas and the box.
- Mortise. The plates are screwed to the canvas and core so that they are recessed to a depth equal to their thickness.
- Hidden. They are installed directly in the doors, their main mechanism is hidden in the door leaf.
- Screw-in. Instead of plates, the design uses pins that are screwed into the material and thus masked.
Types of hinges for interior doors
Mortise hinges are the simplest and most commonly used.
When it comes to an interior door, it is best to use overhead or mortise hinges. Hidden variations are mostly installed for entrances, but doing this with your own hands is quite difficult.
Checking the door
After the hinges are installed and the door is hung, you need to check its functionality. If you suddenly hear a creaking noise when opening or closing, lubricate the hinges with some compound - machine oil, grease, technical petroleum jelly. If the hinges are cut too deeply, do not despair: this situation can be corrected by using a rubber gasket, thick cardboard or hardboard.
If the canvas ends up being too low and therefore scratches the floor, you need to raise it. To do this, a washer is placed between the hinge canopies, after which the entire structure is raised. As you can see, hanging a door is not as difficult as it seems, especially if you approach this process responsibly and pay timely attention to each defect.
Installing the Top
Since the most popular fittings are mortise card hinges, the process of installing them should be considered in more detail. To do everything flawlessly you will need the following tools:
- screwdriver;
- chisel;
- blade;
- ruler;
- hammer;
- pencil.
The best option for carrying out the work is the following sequence: the upper part is installed first, and then the lower.
First you need to outline the position of the parts. Usually two loops are enough. In this case, the top one is installed at a level of 20 cm from the edge, but it is better to move the bottom one a little and fix it another 10 cm higher. If necessary, the third loop is installed clearly in the middle between the top and bottom.
Sequence of installation of mortise card loops
Disassemble the loop into two parts and attach its top to the end of the fabric. Trace the outlines, and then remove some of the material according to these marks. To carefully select the excess, you need to run a blade along the contour, and then use a hammer and chisel to scrape off the coating and the top layer of wood. The depth of the notch must match the thickness of the plate.
After all the parts are recessed flush, they can be fixed in the prepared place. For this, screws or self-tapping screws are used. For screws, you need to pre-drill holes.
Doors
50 votes
+
Vote for!
—
Vote against!
Installation of the door frame is accompanied by the work of installing the door on the hinges. It is quite possible to perform this process on your own, but only if you become familiar with the technology for its implementation. There are several methods for installing a door on hinges. We'll look at how to embed hinges into a door and how to remove a door from its hinges below.
Table of contents:
- How to hang a door on hinges: features of the professional method
- How to put a door on hinges using a homemade method
- How to install hinges on a door: features and technology of the process
- How to weld hinges on a door made of metal
- How to hang hinges on a door: features of choosing hinges
How to hang a door on hinges: features of the professional method
This method of installing a door on hinges is easy to implement. It is most often used by professional workers due to the speed of work. Therefore, during the work you will need a special tool. First of all, to insert the loops you will need to use a manual milling machine. With its help, it is possible to perform work on arranging a clean cut. Also, you should prepare a tool with which you can cut the hinges.
This device has the shape of a lining that prevents mechanical damage to the door leaf. In addition, with the help of some professional tools, it is possible to completely set the dimensions of the hole for the hinges on the door leaf. In this case, it is possible to significantly simplify the process of installing the door on the hinges.
Please note that there is equipment that can be used to create a groove both on the surface of the door leaf and on the door frame. With its help, the two parts of the door frame are connected together, so the process of aligning the groove joints is no longer necessary. It is with the help of this equipment that it is possible to speed up the installation of hinges on the door.
If you don’t have such tools, you shouldn’t give up, because with the help of one milling machine, you can also do the job of installing a door on hinges. This tool, if you have the skills to work with it, allows you to build a groove connection for hinges, both on the door and on the door frame. However, the disadvantage of its use is the low quality of the result obtained and more time to complete the insertion.
Also, if you are careless with the mechanism, there is a risk of scratches on the door and spoiling the attractiveness of their appearance. Therefore, the foot of the router should be covered with a protective material such as felt.
How to put a door on hinges using a homemade method
This method is characterized by a lower quality of the result obtained than the previous option. To carry it out, a chisel and a hammer are enough. The popularity of this method is explained primarily by the availability of materials for its implementation.
If the door has a laminated coating, then as a result, the edges of the hinge groove will be sloppy and aesthetically unattractive. Instructions on how to install hinges on a door with your own hands are given below:
1. At the beginning of work, markings should be made for installing the groove. To do this, install the canopy on the end part of the canvas, outline it with a pencil. Please note that at this stage you should be especially careful, since the hinges must be installed in proportion to the door leaf. Incorrectly installed hinges will not be able to rationally distribute the load and will lead to premature failure of the door.
2. Next comes the process of edging the groove joint. A hammer and chisel are used for these purposes. The chisel should be installed a few millimeters inside the door leaf. This edging should be done in relation to the previously completed markings.
3. Next comes the process of selecting the groove joint itself using a chisel. In this case, the chisel is installed with a slight slope. The groove connection is knocked out with a hammer. Particular care must be taken at this stage to avoid damage to the face surface.
This method of installing hinges is suitable for a wooden door that is subject to further painting. Since after its implementation, sloppy chips and selections are formed. Coloring will help eliminate and improve their appearance.
How to install hinges on a door: features and technology of the process
If you do not have experience installing doors on hinges, then it is best to use this option. Using a certain type of canopy allows you to avoid cutting them into special grooves. There are two ways to do the work:
1. Use of hinges without inserts. To install this kind of hinged mechanisms, you will not need to cut grooves either on the door or on the frame. Their design is quite simple and allows them to be installed directly on the door. After the door is closed, they are installed into each other, since the thickness of one part of the hinge is no more than 0.25 cm, a technological gap is formed between them. To install this hinge, simply screw it onto the door and the door frame. Among the disadvantages of using this method is, first of all, the unaesthetic appearance of the door after installation.
2. The use of screw-in hinges is also important for beginners. In this case, the grooves on which conventional hinges are attached are replaced with holes. To install such a hinge, you will need two holes in the door frame and one in the door itself. To install the canopy, simply screw it into the previously prepared holes. Please note that the holes must be located in the correct order in relation to each other. The appearance of such loops is more attractive than that of the previous version.
In addition, another alternative option for installing a door is the use of pin hinges. They are inserted directly into the canvas. However, the specific design of such a loop hides the place from the insert, so the aesthetic side of the issue remains at the proper level.
This loop consists of two plates, the rotation of which is carried out around an axis. This device is installed at the bottom and top of the door. In some cases, the top hinge is still visible, but only if the door is left open.
How to weld hinges on a door made of metal
To perform these works, electric arc welding is used. At the same time, it is necessary to have skills in working with these tools. Properly installed and welded hinges on the door will ensure high-quality and silent opening.
In addition, during the work process you will need to have:
- steel door hinges;
- records;
- welding;
- electrodes;
- mechanic's type hammer;
- Bulgarians;
- special clothing, masks and protective gloves.
Most often, the loops have the shape of a cylinder or are distinguished by the presence of hexagons. The first version of the hinge is simpler to make and easier to weld to the door. To weld the hinges, special plates are used.
All work is carried out outdoors; the surface for laying the door must be strictly horizontal. scarves must be welded to the loops using a continuous seam. Otherwise, the quality and reliability of the connection will be compromised.
In addition, the plate must be selected in relation to the size of the loop. Also, you should take into account the load from the door, its weight and dimensions. With the help of these elements it is possible to equip a so-called working platform on which welding work will be carried out. In addition, they will serve as a support between the door and the hinge.
Before installing the hinges on the door and before starting welding, the doors are installed in a vertical position. Next, their position in relation to the loops is checked. After checking and marking the welding points, the welding process on the door frame follows. It is with the help of plates that the welding process can be facilitated for people who have no experience in performing this work.
To check that the door is installed correctly, use a laser level. It is he who will help determine the installation location of the second of the loops, after welding the first. This is followed by attaching the hinge, pressing the door to the leaf and continuing to work. After welding the loops is completed, the seams are processed using a grinder.
How to hang hinges on a door: features of choosing hinges
When the need arises to hang hinges on a door, people who have never done this turn to specialists and spend quite a lot of money to complete this process. However, before attaching hinges to the door, we recommend that you familiarize yourself with the recommendations that will help even beginners complete this process.
First of all, installing hinges begins with their selection. You should also determine the number and direction of hinges on the door, if they did not come with it. If the door is double-leaf, then for its installation you will need two hinges for each of the leaves.
There are several options for door hinges:
- card;
- mortise;
- hidden;
- Screw-in type hinges.
Each of these loop options has individual advantages and disadvantages. Card loops can be either removable or non-removable. The second version of the hinges provides two-way opening of the door. However, if you need to remove the door, it is best to use removable hinges.
The mortise version of the hinge is used if the total weight of the door leaf is more than twenty kilograms.
To install hinges on a single-leaf door, you need to determine its opening type. The number of hinges is determined based on the weight of the door, the material from which it is made and the operational load that is placed on it. To fix a door consisting of one leaf, two hinges are enough; if it is an entrance door, then it is better to use three hinges.
Tip: When purchasing hinges in a store, ask the salesperson to open them for you. Since quite often you come across mechanisms with deformed rods inside.
In addition, make sure that the color of the hinges is in harmony with the overall tone of the door, fittings such as handles and locks. The screws must also match the color of the hinges. To carry out the work of hanging a door on its hinges, you will need:
- plumb line;
- level;
- drill or screwdriver;
- chisels;
- hammer;
- measuring tape;
- carpenter's pencil.
The hinges are installed in relation to the top and bottom of the door by 20-30 cm. If there is a third hinge, its installation is carried out directly in the center of the door leaf. If you plan to install four hinges, then the total length of the door should be divided into five parts and the installation location of each canopy should be marked.
One part of the hinge is installed on the door leaf, without rods. The second part of the hinge is installed directly on the door frame.
In order to fix the hinge on the door leaf, follow the instructions on how to install hinges on the door:
1. Place the hinge on the surface of the door and trace it with a pencil.
2. Using a chisel, remove the hinge installation outline. The depth of the layer being removed should be equal to the thickness of the loop itself.
3. Using an electric drill or screwdriver, secure the hinge using the previously purchased self-tapping screws.
4. When choosing the diameter of the drill, choose an element that is half a centimeter smaller than the screw itself. Thus, it will be possible to increase the reliability of fastening.
5. Next comes the installation of the door into the frame. The door should be opened slightly and the lower part of the second canopy should be installed into the canopy. The installation location of each hinge is indicated on the door frame.
6. In these areas you should also remove the top layer using a chisel. Fix the second part of the canopy in these recesses. Make sure the rods are horizontal. Otherwise, it will not be possible to achieve smooth opening of the door.
It is possible to change the order of actions. In some cases, the hinges are first fixed to the frame and then to the door.
If, when checking the door for operability, a squeak is observed, then use machine oil, technical petroleum jelly or grease to lubricate them. If the loops are too deep, special pads based on rubber or thick cardboard are installed under them.
If there is a problem with the door leaf being too low, then to raise it, you should install washers between the canopies. If, while installing the hinges, you get stuck with a screw that cannot be pulled out, use a drill to remove it. The place where the screw was installed should be sealed with a wooden dowel, which was previously soaked in glue.
Installing hinges on a door video:
Bottom assembly
After the upper part of the hinge has been fixed to the door, you can begin installing the lower fragments. To determine the exact level of their location on the frame, you need to attach the door to the opening. Place the canvas in the box and move it to the open position. Then place the bottom of the loop so that it can be pushed up. Mark its location, taking into account that after installation the canvas should not touch the floor and, at the same time, should not rub from above.
After the extreme border has been outlined, attach the part to the frame and repeat the operation of installing it in the same sequence: trace the outline, cut off the sides with a stationery knife and clean it with a chisel. Then screw the parts with self-tapping screws.
How to properly install hinges on a door?
First, you need to prepare the tool:
- Pencil for outlining.
- Ruler.
- Blade for precise cutting of contours.
- Chisel.
- Hammer for chisel.
- Screwdriver.
Installation of the hinge part on the canvas
The first step is to install the upper hinges on the canvas; this is customary because this is the most optimal solution. And since card mortise loops are most often used, we’ll start with them.
Take a pencil with a ruler and mark the exact position of the top loop. It should be 20 cm from the top edge of the door leaf. The bottom one should be at a height of 30 cm from the bottom edge of the door. In order to correctly install hinges on a solid wood door, the weight of which is quite large, it makes sense to install a third, middle hinge.
Each loop is disassembled into two halves, each of which is applied to the designated place. Then the place where the loop is attached is carefully traced along its contour with a pencil.
After this, using a chisel, carefully remove a layer of material equal to the thickness of the loop along the marks. To do this, first make neat cuts along the contour with a blade, and only after that the work with a chisel begins. The material is removed little by little by lightly tapping the chisel with a hammer.
In this way, proceed with all the hinge halves that need to be installed, both on the door leaf and on the frame. When all the parts fit into the recesses flush with the surface, the hinges can be screwed on. This is done with self-tapping screws or self-tapping screws, the only difference is that you need to prepare holes for the screws.
Installation of the bottom (box) part
After the hinges are installed on the door leaf, begin installing the corresponding hinge parts on the frame. In order for the door to open and close freely, without touching the floor or the top of the frame, the door leaf must be adjusted correctly - installed exactly in the opening.
Then, having opened the door in this position, you need to mark with a pencil the place where the lower (boxed) halves of the hinges are attached, taking into account that the hinge installed on the door leaf will fit onto the boxed part of the hinge.
After the extreme position marks of the box halves of the hinges have been marked, the door leaf is removed from the opening and the operation is repeated - the hinge is applied to the mark and the outline is completely outlined. Using a blade, cuts are made along the contour, and notches are made with a chisel and hammer. The hinges are screwed on with screws or self-tapping screws.
Hanging the door
The last step is to directly hang the door itself. The lower part of the hinge contains an axis on which the door with the upper fragments must be placed. Bring the canvas to the open position, lift it and put it on the hinges. If it is not possible to lift the door leaf, then detachable hinges with a removable rod are installed. It is necessary to remove the rod from the hinge, connect the two parts of the fittings and insert the rod into place. Before hanging the door, it is recommended to lubricate the parts with machine oil or grease.
Be sure to check the level, otherwise misalignment will occur over time.
To avoid problems during operation, the door must be installed exactly level
As you can see, hanging a door correctly on its hinges is not difficult, but for a beginner it may seem like a difficult task, which may result in minor defects. Some of them can be eliminated quite simply:
- if the plates are recessed too deep, place a piece of cardboard, thin plywood or rubber under them;
- if the canvas rubs against the threshold or floor, you need to put a gasket on the rod to raise its level;
- It also happens that you need to reweigh the plates, in this case there may be a problem with unscrewing the screw; you can drill it with a drill and then close the hole using a dowel plug.
To get the job done better, hire an assistant. An outside perspective and free hands will significantly speed up the process.
Choosing door awnings
Before you go to the store, you need to decide which hinges to buy. The focus should be on functionality rather than appearance. The choice will be successful if you analyze the following aspects in advance:
- Which way should the door open? As a rule, this is important for reasons of saving square meters, and, sometimes, for ease of use of sockets and switches;
- Will I have to take it off sometimes? The problem is relevant only for apartments with an old layout, where even a completely open doorway makes it difficult to carry large objects;
- Weight and dimensions of the door leaf.
The selection criteria are clear. It remains to find out what type of canopy is suitable for them. Most often you have to choose between the following types of door hinges:
- Universal. The most common canopies today. It gets its name from the ability to open in both directions. They have many design solutions and are quite reliable. One “but” – they don’t allow you to remove the door from its hinges. Therefore, if necessary, you will have to unscrew the fasteners.
- One-sided. It is impossible to move the door to the other side without changing the awnings. But if necessary, it can be easily removed and replaced. The opening side is marked with the letters “L” and “P”.
- Pendulum. Structures equipped with such hinges are capable of opening forward and backward, but such a design is rarely used in residential premises;
- Screw-in. Miniature canopies, one part of which is screwed into the canvas, and the other into the box. This way there is no need to work with a chisel. True, the door must have a protrusion at the end - a European door.
These are just the basic, most common types of loops. As for the weight and dimensions of the canvas, the following relationship exists:
- Hinges 75 mm long can be installed on a door weighing no more than 25 kg;
- Canvas weighing from 25 to 40 kg can be hung on loops 10 cm long;
- The same length, but with a hinge width of 60 mm, is suitable for doors from 40 to 60 kg.
As for the dimensions, there is the following rule - a door with a height of 210 cm or more is hung on 4 hinges, which should be located at equal intervals. Everything about loops. Now let's talk about how to install them. The process will be discussed using the example of the most common canopies - universal ones. However, this method is also suitable for some other species.
Door dimensions
Door blocks - the door itself and the door frame - are made to standard sizes, but before hanging the door, you may need to plan its longitudinal edge with a plane or saw off the end with a saw.
Vertical gaps in the door rebate should be approximately 3 mm, and horizontal gaps (top and bottom of the door) - about 5 mm. Always remove a layer of equal thickness from the right and left sides of the door, and if you plan the ends of the doors with a plane, then to prevent chipping, remove the chips from the edge of the end towards the center.
How to properly install an interior door (video)
Hanging doors is a rather difficult, but quite doable task. If you carefully and efficiently carry out all the steps described by us, you will certainly get a satisfactory result.
Installing a door - a lot depends on this seemingly simple operation. A skewed door leaf is not only disappointment and a spoiled mood. These are drafts moving around the house, poor sound insulation and lack of comfort. In the end, it’s just not beautiful, but it can also ruin the most modern and expensive renovation. How to properly hang a door on its hinges and enjoy comfort and silence, and not listen to constant reproaches from loved ones? To do this, you need to be patient, arm yourself with the necessary tools and refresh your memory of the main nuances of the work.
How to hang a door on a closet
The principle of hanging cabinet doors is not much different from installing entrance or interior doors. However, there are some peculiarities here.
The hinges on which the doors will be hung on the closet differ from interior hinges. For external furniture doors, overhead or semi-overlay fasteners are used.
Many people are interested in the question of how to correctly spell a hung or hung door. In this phrase you need to use the word “hung”.
Hinges are also located on the door and on the cabinet wall. The number of loops depends on the size of the product. Only two elements can be placed on a cabinet up to 100 cm. For furniture up to 200 cm high, three hinges are enough, and for a set measuring 250 cm or more you will have to purchase as many as four fasteners.
As in the case of interior doors, the hinges are first installed on the door using self-tapping screws. If the device has a collapsible mechanism, then the second part is installed on the wall, and only then the door leaf is hung.
If your cabinet doors are made of glass rather than wood, then they need to be secured to the hinges with clamps through special rubber pads. The clamps are additionally secured with self-tapping screws and covered with special decorative elements.
Installing hinges
To hang an external paneled door made from hardwood, you will need three pairs of secure hinges, typically 100mm in size; however, most can be installed on 75mm hinges. If you decide to install brass hinges, always secure them with brass screws.
Using one of the existing doors as a reference, determine which side (right or left) of your new door the hinge locations will be located on (in some flat hollow-core doors, the frame bars on which the hinges are attached are made of solid wood), and use a marking square to draw lines across the edge of the door.
Then, using the hinge itself or a set of marking templates, mark the width of the installation insert: the inner edge of the strip of each hinge should run along the edge of the door so that only the hinge protrudes outward. On the same outer side, mark the depth of the insert.
Take a chisel and mallet and make a notch; first hold the chisel vertically and cut notches perpendicular to the longitudinal marking line; then, when selecting wood, hold it at an angle and with the beveled side of the blade down, so as not to allow it to go too deep.
Using the loop itself as a template, mark the boundaries of the notch. Using a chisel and mallet, make a notch for the hinge.
Be extremely careful and do not go beyond the recess markings. When the loop fits tightly into the recess, use a thin drill or awl to drill guide holes for the screws, and then screw them into place.
Attach the door to the frame, lifting it with the help of transverse spacers 5 mm from the floor (threshold), and transfer the installation locations for the hinges to the jamb. Make the recesses in the same way, keeping an eye on their size, then drill pilot holes for the screws and, again placing the door on the cross spacers, attach it to the jamb.
Make sure the door opens and closes freely without catching on the frame. If necessary, remove it and increase the depth of the recesses or insert cardboard spacers into them.
Practical advice:
As a mark indicating the depth of the hole being drilled, take insulating or adhesive tape and wrap it around the drill, leaving the required distance from its cutting edge.
By moving the chisel blade from the open side of the recess, level the seat. Install the hinges and fasten them with screws. The hinge should fit tightly in the recess, and the hinge should protrude outward.
Difficulties of work
Many people are interested in the question of how to hang a compartment door if there are internal drawers next to them. In this case, shelves and drawers located on the inside should be somewhat shorter in depth than the external elements. During installation, you should also pay attention to the fact that dead zones may form at the intersection of the frames. If drawers get caught in them, then it will be impossible to open them and they will lose their functionality. In general, experts do not advise installing sliding doors yourself, since each sliding system has its own characteristics, the door is rigidly tied to the frame, and therefore you can simply ruin the furniture.
