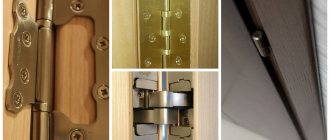
Good day to all! It's time to talk about furniture hinges without inserts. Currently, buying such products is not a particular problem. Their price is quite low, but objective shortcomings make you think about whether they are worth buying.
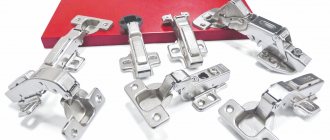
The current range of furniture fittings is huge. Just take a look at what Leroy Merlin or Castorama has to offer.
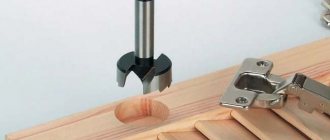
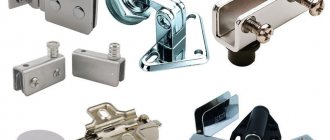
All overhead furniture hinges can be divided into those that require insertion, that is, the use of a special drill for hinges, as well as simple fastening without preliminary recesses. The second option is easier in terms of do-it-yourself installation. But products without drilling have their obvious disadvantages.
What it is
Before talking about how to install or replace hinges, it is worth noting that the overhead fittings of the type in question are fasteners designed primarily for connecting doors to cabinet furniture.
[adv1]
Regardless of the intended purpose, color, shape or material of the product, they are united by one feature. This is an installation method, that is, installation on furniture structures. The use of such loops eliminates the need to make special holes for cups. They are simply not provided there. Yes, you may have to drill holes for the screws. But this is done with an ordinary drill, which almost every man has in his household.
This feature saves time and effort. After all, you won’t have to pre-prepare the seats for the hinges. It is enough to make do with the markings.
Application area
In terms of materials, these types of hinges can be used for plywood, thin wood, chipboard sheets and more.
[adv2]
Overhead hinges, which do not require insertion, are most widely used in the assembly of furniture structures. A good example is piano hinges. Depending on the variety, they can also be used to connect doors and small doors, including full-fledged interior and even outdoor structures. They can be found on double-leaf gates, for example. Although in this case it was arrow loops that became most widespread. So it's still worth thinking about.
You could say this. Overhead furniture hinges, which do not require a cut-in during installation, are widely used on panels with a small thickness and on structures where it is simply impossible to make a cut-in.
Recommended Procedure
Marking
- The optimal distance between loops and fabric cuts is 200 mm. Lines are drawn at such distances from the bottom and top.
- The canopies are applied so that their edges coincide with them. But the installation of door hinges is carried out taking into account the direction of the door opening (left or right).
- The pencil outlines the outline of the canopy.
- Using a chisel, a sample of wood is taken to a depth equal to the thickness of the hinge cut into the interior (or entrance) door; the surface is leveled.
- The canopy is installed in the prepared “window”, its position is checked and, if necessary, adjusted.
- After this, marks are marked and holes for fasteners are drilled.
This completes the first stage of the insertion. But there are a number of nuances that should not be overlooked.
- The canopy rod should not touch the door tightly, otherwise the mobility of the fittings will be limited; There will be difficulties with closing/opening the door. But you shouldn’t extend the loop far beyond the perimeter of the canvas either. The load on it will increase, the fastenings will gradually weaken, and as a result - misalignment.
- The frame is made of timber. If the model is from the “budget” category, then the wood for it is taken from 1 or 2 grades. It is quite possible that when marking, there will be a knot at the point where the hole is drilled. Therefore, inserting hinges exactly in this place is impractical, since one of the fastening elements simply will not perform its function. The logical solution is to slightly move the canopy from the problem area to either side, but no more than 25 mm.
- All canvases differ in size and weight (depending on the material of manufacture). For massive models, at least three hinges should be inserted into the door. This will level the load on the canopies and extend the maintenance-free operation of the structure. The marking is carried out in the same way, but it is advisable to place the additional loop not strictly in the center of the cut of the fabric, but with an upward shift. This will increase the reliability of all fasteners.
Box
It is more convenient to install door hinges on the jamb when it is not yet secured in the opening. After its installation, it is more difficult to make accurate markings, since you will have to rigidly fix the canvas, and this is quite difficult. But the technique is completely identical.
Attaching the hinges
Just one note - be sure to use self-tapping screws for wood. During operation, you will have to adjust the canopies or replace one of them. Therefore, when deciding how to embed hinges into a door, you should not forget about the problem of the maintainability of the fittings. In addition, nails often split the wood, which means there is a risk of damage to the frame. Yes, and it will definitely not be possible to direct such fasteners, and if it is skewed, the tip of the nail will definitely appear on the surface of the canvas.
All that remains is to hang the door and check the smoothness of its movement, the tightness of the fit and the absence of gaps between it and the jamb.
Installing hinges on interior doors is a rather specific issue. The fact is that canopies are different, and not all of them are attached using the tie-in method. Each modification has certain installation features.
Varieties
Finding a huge assortment of similar loops in Moscow, St. Petersburg and any other city will not be difficult. The price is reasonable, and installation is extremely simple.
Before you begin installation, you should decide on the option that suits you. Depending on the application, they can be divided into the following subtypes:
- Furniture. Now they are used quite rarely. Usually these are furniture designs that are created in a classic style. Also relevant for restoration and repair. They are practically not used on new furniture;
- Interior and entrance doors. They look aesthetically pleasing, and installation does not take much effort and time, even for a person without experience in such matters. If it is a door made of plastic or other thin material, it will not be possible to simply cut off the insert layer;
- Street. This mainly concerns hinges for gates and wickets. The fittings are large and therefore used much less frequently than arrow hinges.
There is another classification, which is based on the design features of the fittings themselves.
In videos where loops are used and installed without the need for time, they usually remember:
- articulated;
- card;
- piano;
- secretory loops.
Each option considered has its own characteristics.
Here we are talking about the following points:
- Card. These hinges also come in mortise versions. But varieties without inserts are somewhat more compact. Depending on their shape, they can be standard or figured;
- Pianos. It is unlikely that you will be able to find such hinges in the assortment of leading manufacturers, including Boyard, Hettich or the same Blum. Morally and technically outdated. In fact, this is a more extended version of the card loop. Used on pianos, folding tables and old cabinets;
- Secretory structures resemble card ones, but differ in rounded shapes. Suitable for doors that open from top to bottom or bottom to top;
- Hinged products are suitable in situations where the thickness of the wood is minimal and it is impossible to make an insert.
Almost everywhere we are talking about the fact that the fittings are outdated. And indeed it is.
The greatest demand now is for mortise structures. By adding hinges with a closer, you get fittings that are optimal in functionality, reliability and versatility.
What are loops without mortise (butterfly loops). Pros and cons of these loops, according to our experts
Inserting hinges is one of the most important stages when installing a new door, requiring not only special tools, but also skills in working with the material. The best way to install a door if necessary is not to experiment, but to call a specialist. Even if we are talking about such seemingly simple-to-install structures as butterfly hinges or hinges without mortise. Despite the novelty of the hinges, controversy has already flared up around them - some argue that butterfly hinges are good for everyone - they are easy to install, reliable, and durable. Other experts openly reject them. So who is right, and is it worth choosing “butterflies”?
What are loops without mortise?
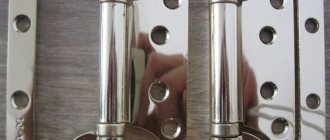
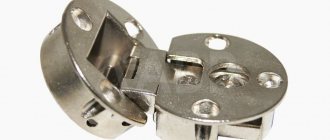
Butterfly loops got their name due to their original shape - one of the plates of such a loop is made in the shape of a butterfly wing and is inserted into a correspondingly shaped cavity on the second plate. A distinctive feature of such hinges is that there is no need for insertion. The hinges are simply placed on the door end and secured with self-tapping screws, hence their second name - hinges without mortise. They have become widespread where you need to quickly install a door leaf, and where there are no special requirements for the quality of installation - for example, in country houses. Novice craftsmen and amateurs invariably speak highly of butterfly loops, but serious professionals often do not favor them.
Advantages of hinges without insertion
The main advantages of butterfly loops that our craftsmen highlight are the following:
- The main advantage of butterfly hinges is that there is no need for insertion, which can significantly reduce the time spent on door installation. And much less effort is spent, and the amount of special tools is reduced to a couple of screwdrivers,
- Butterfly hinges are optimal when installing lightweight door panels weighing less than 35 kg. Only in this case can they ensure reliable operation of the door mechanism and guarantee good door fastening. Butterfly hinges are not suitable for heavier door panels.
- hinges without mortise are good for installing interior doors and doors of country houses - in a word, wherever high demands are not placed on the door leaf in terms of the quality of room protection. It is worth saying that butterfly hinges are indeed capable of withstanding constant opening and closing of the door for a long period of time, but - again, only if the door leaf is light enough.
Disadvantages of butterfly loops
The disadvantages that experts note when installing butterfly hinges are the following:
- impossibility of removing the door leaf from the hinges after installation using “butterflies”,
- Butterfly hinges are inferior in aesthetic criteria to classic hinges,
- the reliability of fastening the door leaf leaves much to be desired - for comparison, classic mortise hinges allow you to achieve a stronger connection due to a larger number of mounting holes and a greater distance between them,
- limited scope of application (only light door leaves).
We offer a large selection of door fittings, which can be purchased in our online store or at the address Ekaterinburg, st. Gurzufskaya 44, 2nd floor. Our specialists can also advise on the choice of door fittings in the office or by phone.
Installation instructions
See also:
What tools are needed to assemble furniture yourself?
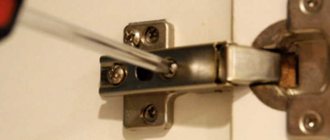
Installing hinges that do not require insertion is quite simple. This eliminates the need for milling.
See also:
Pelican shelf holder for wooden and glass shelves: operating principle
You just need to follow the instructions:
- First, markings are made on the side of the door;
- It is better to retreat at least 25 mm from below and above;
- the loop is applied to the canvas to mark points for the screws;
- if everything is level, holes for fasteners are drilled;
- the door leaf and the furniture facade are connected;
- a control check of closing and opening is carried out;
- adjustment is being made;
- All screws are finally tightened tightly.
This completes the installation.
Installation method
Let's look at how to install such fasteners. To install butterflies you will need a minimum set of tools:
- screwdriver,
- drill,
- screws,
- awl,
- roulette,
- pencil.
First, you need to determine the places for screwing the hinges, to do this, use a tape measure to measure approximately 20-25 centimeters from the top and bottom edges of the door, this will be the starting point for each hinge. It is better to attach the bottom one further from the edge to reduce the load on the upper part of the fittings.
Since the installation of hinges is carried out without insertion, immediately attach the plate to the end of the canvas and mark the location of the holes with an awl. Then carefully drill them so that you can easily screw the screws into the door.
Butterfly hinge installation sequence
After the initial installation, you need to determine the location of the plates on the door frame. To do this, you need to attach a canvas and roughly outline their positions. Then unscrew the hinges and more accurately mark the places for drilling.
After all the holes are ready, simply attach the sheet to the opening and screw both plates with self-tapping screws. Check the door movement, as in some cases defects may occur, which, however, are easy to eliminate.
