- Wooden stepladder: secrets of making a reliable structure with your own hands
- DIY stepladder: how to choose the right material
- Homemade stepladder: a few words about components
- Stepladder dimensions: secrets of correct calculation
- Making a wooden stepladder with your own hands: a detailed guide
- Key points about the most interesting part of the manufacturing process
- Transformable ladder chair: instructions for self-construction
- Do-it-yourself step stool: step-by-step instructions
- Small stepladder: design nuances
- Wooden stepladder: finishing touches
- How to extend the life of finished products: protection features
- Video: DIY wooden stepladder
Wooden stepladder: secrets of making a reliable structure with your own hands
The concept of “making it yourself” implies the manifestation of creative abilities, that is, the free interpretation of all kinds of practical recommendations. Having understood all the intricacies, it will not be difficult to make drawings of a step stool made of wood, assemble the structure with your own hands, and also process it.
Telescopic ladder: how to choose a stepladder (read more)
A wooden stepladder has many advantages, and making one yourself, thanks to the pliability of the material, is quite easy.
A stepladder is an indispensable attribute of any home or apartment.
Voting for the best stepladder for an apartment
Which stepladder for an apartment would you choose or recommend?
Altrex Double Decker
12.24 % ( 6 )
Hailo L60
22.45 % ( 11 )
Hailo K30
10.20 % ( 5 )
Tatkraft UPSTAIRS
4.08 % ( 2 )
Krause MONTO TOPPY XL
6.12 % ( 3 )
Nika SM5
8.16 % ( 4 )
VORTEX SS 1x5
8.16 % ( 4 )
ZALGER 511-3
6.12 % ( 3 )
EUROGOLD SUPERMAX
6.12 % ( 3 )
Dogrular Class Plus
0.00 % ( 0 )
Nika SM4
10.20 % ( 5 )
Sibrtech 97867
2.04 % ( 1 )
VORTEX SS 1x4
2.04 % ( 1 )
ZALGER 511-2
0.00 % ( 0 )
DIY stepladder: how to choose the right material
The degree of reliability of the entire structure, as well as its service life, directly depend on the raw materials that were chosen for its manufacture. Even if you draw up drawings of a wooden stepladder in the process of creating it yourself, if low-quality material was used, the ladder is unlikely to boast high strength and reliability. That is why it is so important not to make mistakes in the process of selecting material.
To make a reliable and durable item, you must use only high-quality materials.
Along with factory products, homemade stepladders are designed to withstand significant loads: the weight of a person, as well as a lot of tools and all kinds of devices necessary for work. In this regard, the quality of wood is of decisive importance. Of course, these requirements do not apply to wooden step stools. Regardless of the modification, the most important condition is the absence of cracks, chips and rot on the material.
In addition, the wood chosen for construction must be thoroughly dried. The permissible humidity level should not be more than 12%.
Note! The use of excessively damp wood will lead to deformation over time and then to destruction of the structure.
If the humidity exceeds the specified value, the material must be dried in a well-ventilated area, avoiding direct exposure to sunlight.
The wood for the stepladder must be well dried.
The diameter of the beams also plays an important role. Even if the stringers are very long, the cross-section should reach 4x4, 6x6 or 3x5 cm. This will not greatly affect the weight of the structure, but the reliability of the staircase will be fully ensured. As for the exact dimensions and types of lumber, it makes sense to talk about them only if the dimensions of the future structure are known.
Application
Before use, it is important to choose the right type of stepladder . There are 5 fundamental rules to follow.
— Before purchasing a stepladder, consider the location and conditions of the work. If the work will be carried out at home or outside the reach of climate change, almost any stepladder will do. When working with possible exposure to moisture, choose a material that is weather resistant.
— If you plan to work related to electricity, the metal staircase must have isothermal linings.
— If you need to change the location of the stepladder during repair work, pay attention to transformers, aluminum and equipped with wheels.
— Before work, it is necessary to note the maximum height at which the work will take place; the ladder must be at least 3 steps higher. Please note that the working height will be lower when installing an extendable stepladder.
— When carrying out work, it is necessary to take into account the weight of the tools and the weight of the person together, and choose a stepladder based on this weight. Otherwise, the stepladder is deformed under a weight higher than calculated.
Homemade stepladder: a few words about components
By making the structure yourself, it can be improved by adding individual elements. For example, metal spokes are designed to provide more reliable fixation of steps.
They are located under the step in special holes and attached with nuts and bolts. The length of these elements directly depends on the size of the tread (the width of the steps) and the degree of thickness of the stringers. However, their diameter should not be less than 8 mm. Otherwise, they will bend under the weight of the load. It is thanks to the spokes that the permissible pressure increases, which the steps of a wooden stepladder can subsequently withstand.
Nylon cords or iron chains serve to connect the supports and the main part on both sides, while simultaneously preventing them from moving apart.
Protective “shoes” for stepladder legs should be made of hard rubber.
Protecting the floor covering from scratches and preventing slipping is the main task of the so-called “shoes”. They are made of rubber, and ideally it should be hard, since soft nozzles have a short service life. In addition, the design can be supplemented with hooks for buckets and other accessories for tools. It all depends on the needs of the user.
Scope of application of stepladders indoors
A stepladder comes in handy when performing a variety of tasks that may arise for the user in an apartment. Even in houses with low ceilings, a stepladder has a number of advantages over other methods of carrying out work at a certain height above the floor of the room. It can be used in cases where it is necessary:
- Carry out a wide range of repair work: whitewash, paint, putty and plaster the upper part of the walls and ceilings, hang wallpaper.
- Clean the room in hard-to-reach places, for example, wipe dust from high shelves and cabinets.
- Install equipment, decorative elements, lighting fixtures: hang a chandelier, screw on an anchor hook for hanging various items, attach a curtain rod, etc.
- Get an item that is rarely used and hidden away.
Using a stepladder is very convenient for making repairs.
In all these cases, a stepladder will allow you to carry out the necessary activities as comfortably and safely as possible.
Stepladder dimensions: secrets of correct calculation
Regardless of what exactly it was decided to construct, be it a full-fledged staircase or a step-stool with your own hands, drawings with dimensions are the most important condition for starting work.
When talking about the height of the future staircase, we should not forget what exactly it is intended for. For example, for domestic use, a linear length of 1.5-1.7 m is considered optimal. Taking into account the height of most residential premises, as well as the average height of an adult. This is quite enough to reach the ceiling while on the top step.
If a folding stepladder is created for use in large rooms, when calculating the height of the structure, one should take into account whether a person can not only reach the upper racks, but also place something on them.
Standard sizes of wooden stepladders are 4, 5, 6 and 7 steps.
On a note! If we are talking about performing work in garden plots, the best option would be a 3-step wooden stepladder. Being quite stable, this design will provide the opportunity to conveniently collect the gifts of nature from most types of fruit-bearing trees.
The size of the tread is taken based on the 45th shoe size. Since the stepladder is intended for convenient and safe work at height, the width of the step must be at least 30 cm. And if the design of the product includes an upper platform, this figure can be increased to 45 cm. Moreover, to make a stepladder with your own hands from wood instead boards, you can use bars.
As for the number of steps, this indicator will have to be determined independently. Often the distance between steps is created within 20-30 cm. In this case, the overall height of the structure, as well as its steepness, should be taken into account. As a rule, the calculation process does not produce an even number of steps. The optimal solution in this case is to reduce the interval between the working and penultimate platforms. If you take into account all these nuances, there will be no difficulties with marking.
Another important criterion in the process of calculating the dimensions of the future product is the length of the steps. Regardless of the number of steps of a wooden stepladder (2, 4, 6 or 8), this indicator changes downward along the height of the structure. Since such a product is assembled in the shape of a pyramid with a truncated top, the recommended length of the steps is from 55 to 35 cm - for the lower and upper protrusion, respectively. This is enough to ensure comfort during ascent and descent.
The size of the stepladder is selected depending on its purpose.
Thanks to the recommendations described above, you can easily independently calculate the dimensions of the structure and understand the technology of its manufacture, regardless of the degree of complexity of the drawing of a stepladder made of wood with your own hands.
Working with a drawing
You can make a folding stool yourself or purchase a finished product. The purchase is not always financially affordable, so craftsmen with experience in carpentry prefer to create practical designs with their own hands. The procedure is simplified thanks to a large number of ready-made diagrams with a detailed description of the manufacturing process.
The design of the chair will depend on the type of design and materials used. It is necessary to clarify the purpose of the product. Based on this, wooden, chipboard or metal blanks, as well as suitable tools, are prepared for the work.
To make furniture yourself, you will need drawings with dimensions including general views, assemblies, and sections. The diagrams use special symbols that must be read correctly. The lines in the drawing are deciphered as follows:
- Solid thick ones are contour lines depicting a piece of furniture.
- Solid thin - used to indicate parameters.
- External thin ones - specify part numbers.
- Dotted - used to demonstrate elements that are not visible from a certain angle.
- Dash-and-dotted lines are center lines showing the middle of the furniture.
- The intersections of 2–3 center lines reflect the centers of round parts.
Patterns for crocheting covers for chairs and stools, stages of work
In furniture drawings, all dimensions are indicated in millimeters and are given in actual size, regardless of the scale of the diagram. The parameters of each element are reflected taking into account the length of the spikes. Capital Russian letters indicate the arrows of the cuts, and Roman numerals indicate the nodes.
In the drawings of step-chairs, each element is drawn in detail. Detailing is carried out - drawing structural parts, determining their sizes. This is a creative process, not just copying images. Using ready-made diagrams, you can make all the panels and drawers to order.
Making a wooden stepladder with your own hands: a detailed guide
Speaking about how to make a stepladder with your own hands from wood, it should be noted that first of all you will need to create drawings of the future product. It is necessary to clearly imagine exactly what the structure will look like, determine its configuration and basic parameters. While working on the drawings, you also need to think about the type of fasteners and create a list of materials that will be needed to construct the stairs.
Making a metal stepladder with your own hands is quite a difficult task. This will require many special tools, as well as skills in working with metal products. That is why wooden structures are very popular.
For the strings of wooden stepladders for the house, beams measuring approximately 5x5 cm are often used, and for steps - a board up to 4 cm wide. It is necessary to mark and cut the string beams to the required length. They must certainly be maintained in accordance with the height of the structure. In order to ensure the stability of the stairs, the lower ends of the beams should be cut at an angle of approximately 30°.
Drawing of a wooden stepladder with five steps.
After the beams of the required dimensions have been cut, the process of manufacturing the steps can begin. The length of the lower step should be approximately 65 cm, the upper one - no more than 35 cm. Adjustments to the dimensions will have to be made during the construction of the stepladder. After preparing the steps of the required size, it is recommended to number them on the reverse side to avoid confusion.
Note! To give stability to the product, it should be made in such a way that the bottom is wider than the top.
If the design of the product provides an additional platform, it should be made of the same material as the steps. The second part of the stepladder, which is the supporting part, is assembled according to the same principle. The only difference is that, in order to increase strength, the steps are replaced with crossbars, which are nailed in the transverse direction or diagonally.
Drawing 1. The base of the step stool:
A – sidewalls; B – crossbars.
The length of the tenons at the ends of the jumpers should be equal to the thickness of the sidewalls. You can make them a little longer and then cut them flush with the side after assembly.
In the two upper jumpers, it is necessary to drill and deeply countersink holes from the side of the arcuate cutout for the screws with which the stool seat will be attached.
Before connecting the sidewalls with jumpers, it is necessary to glue 06 mm hardwood dowels into the guide grooves on the sidewalls (see Fig. 1). These dowels will limit the movement of the step. But more on this later. When assembling sidewalls with jumpers using glue, be careful. Place those that have holes for screws in the upper part of the base with the arches down, and install the lower (central) jumper with the arched cutout up.
Key points about the most interesting part of the manufacturing process
When creating a wooden stepladder with your own hands, to achieve a reliable connection of all elements, bolts are used, special hinges are used to give mobility to parts of the product, and to fix the position, limiters or spacer mechanisms are used that prevent the legs from sliding on the surface.
It is necessary to prepare all parts of the stepladder and sand them thoroughly.
How to make a stepladder yourself? The installation process should begin with connecting the crossbars and the bowstring. To do this, self-tapping screws are placed at the ends, at the mounting points of the steps, by screwing them in. It is necessary to treat all joints with wood glue. The steps must be parallel to the floor when the ladder is unfolded. If the structure is equipped with a platform, it is necessary to install additional support.
The moving elements of the stepladder must be connected by means of hinges. In this case, you need to take care of the presence of a travel limiter, which should be secured to the end parts. This element is the key to the stability and reliability of the product.
If the steps of a folding stepladder are fastened using glue, to increase the strength of the structure, the strings are tightened using metal rods. They are placed under the steps: under the first, in the middle, and also under the step located at the top. The rods help give strength to the stairs.
In order to protect the stepladder from rotting, an antiseptic agent should be applied to the wooden parts, which forms a film with a water-repellent effect. In addition, you can coat the product with a varnish composition without touching the metal elements of the structure.
It is recommended to connect the parts of the future stepladder using self-tapping screws and a screwdriver.
By following the above recommendations, you can easily create a stepladder with your own hands. Following step-by-step instructions is the key to success.
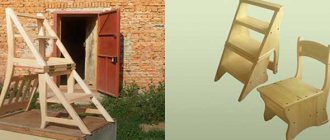
Transformable ladder chair: instructions for self-construction
When designing a transformable step stool with your own hands, drawings are the first thing you need to arm yourself with. Not only the final appearance of the product, but also its most important characteristics: convenience, strength and stability depend on how correct the calculations are.
Since such a chair serves primarily as a piece of furniture, it should become a successful addition to the interior. In addition, such a stool serves as a miniature staircase structure. It will help you easily reach shelves located at height, and will also become a very valuable assistant in the process of replacing light bulbs in a chandelier.
On a note! What distinguishes a wooden transforming chair from a stepladder is that in order to use the steps you will need to turn the product over, or rather, install one half of it on the opposite one.
The transformable staircase chair is not only a functional product, but also an interesting interior detail.
You can design such a chair with at least minimal woodworking skills. This is due to the fact that some of its elements are processed using a milling machine or drill with specific attachments. In this case, it is much more important to calculate the necessary indicators so that after assembly everything fits down to the millimeter.
A transformable wooden step stool planned for making with your own hands can be characterized by an arbitrary configuration.
However, it is necessary to calculate the following indicators:
- length of support legs;
- back height;
- number of steps;
- dimensions of steps;
- seat size.
When forming a drawing of a stepladder chair, it should be taken into account that the degree of height of the product during its operation depends on the length of the support legs. Additionally, longer legs can be installed, which are placed at an angle to increase the stability of the structure.
Drawing up a detailed drawing is the first stage in the manufacture of a product.
As for the backrest, it should be positioned in such a way that in the position when the product turns into a stepladder, it is on the floor level with the base support, at right angles to the surface.
The seat is divided into several parts to allow the structure to be folded. In this case, the best option for connecting the halves of the seat are piano hinges. The number of steps depends on the final height of the product. Often there are no more than 5 pieces.
In order not to worry about the fact that the chair legs may simply come out of the grooves, unable to withstand the load, it is recommended to additionally use metal rods equipped with nuts, tightening the parts on the sides.
Design Features
Quite often, this simplicity and routine can contain some hidden pitfalls, which, alas, only become obvious when something goes wrong. And if you do not pay enough attention to the process of studying certain nuances associated with construction or repair, the results may not be as great as you would like. First, you will need to resolve a few issues. Firstly, you must determine the configuration, appearance of the future chair, the material from which it will be made, the set of necessary tools and hardware technologies, you will have to try to take into account the time that will be spent on the production process and, finally, the cost of purchasing materials and fasteners and tools that will make up the project budget.
Before moving on to the instructions and practical recommendations on how to make a transformable chair, you need to understand the basics of working with a particular tree and not forget about the main purpose of this piece of furniture.
A chair, whatever it may be, is a piece of furniture that is designed for sitting. It can be either with or without a backrest. Thus, in most cases, the simplest version of a chair consists of 2 main elements - a seat and legs. The number of the latter is not at all limited to any specific number. So, the standard set of equipment for a transformable chair is the following:
- Wooden board or fabric for seat.
- Wooden blocks for legs.
- Saw.
- Plane.
- Roulette.
- Screwdriver.
- Self-tapping screws.
A folding chair allows you to create the most comfortable conditions for spending time on it and offers new possibilities for its use.
Return to contents
Main stages
First of all, you need to determine for whom and for what you intend to make this piece of furniture. Very often this stage is ignored (out of ignorance, by someone absent-mindedly), but it is these indicators that directly determine what material should be chosen to create a folding chair or a transformable chair, what dimensions should be used during the design process and actual construction. All this, in turn, can affect the amount of material resources spent. So, for example, you will either have to buy something in addition during the construction process, or, on the contrary, you will have a surplus that will have nowhere to be located later.
So, for example, if a chair is intended for children, then its size and material consumption can be significantly reduced (almost 2 times compared to the same chair, but for adults). In addition, there are special requirements for materials that relate to the environmental safety of a particular structure, because children can accidentally injure themselves. Your task will be to create a folding chair that will in no way harm your child. If the chair will be used mainly by adults, and some of them may be overweight, then it is better to choose hard wood or thick plywood to create such a chair. All these features will certainly affect such indicators as the labor intensity and cost of project implementation.
Return to contents
Installation process
So, as has already been determined, such a chair must withstand a fairly heavy person (weighing even up to 100 kg). In order to more accurately determine the dimensions of the chair, you can base it on the pieces of furniture you already have and measure all their details. Or you can contact stores and catalogs of furniture manufacturers. Standard chair sizes available. Thus, the distance of the seat from the ground surface can be 45, 44 and 41 inches. They are the most common in everyday use and are suitable for creating both a regular chair and a transformable chair.
Although you can deviate from these sizes and offer your own individual sizes. They usually need to fit the distance from a person's knee to the floor to fit comfortably on the seat. The back height also has standard dimensions. So, in furniture catalogs you can find the following indicators: 77, 82, 91 inches from the floor.
You must first take high-quality measurements that will correspond to the height of the seat and backrest. In a traditional 4-leg chair design, 2 bars (legs) should be short and another 2 should be long. You can buy consoles for these purposes, but you need to choose carefully so as not to purchase some fragile material that cannot support an adult. As a rule, in building materials stores specializing in lumber, you can choose from solid wood any parts of the required length and width, 15-25 mm thick. If there are no exact dimensions, then you can cut off the excess elements with a hacksaw at any time.
A folding chair can also consist of such materials, because sometimes it is enough for it to be folded in half. At the same time, when assembled, the structure will be flat and long. If your chair will be used in a cramped space, you will need to build a model with a reclining back.
A standard folding chair when folded has a backrest height of no more than 1 m, the seat width is 40 cm, and the seat height above the ground is 50 cm.
DIY chairs and transformable chairs can be made of wood, plastic or metal.
A resident of any apartment sometimes needs to rehang chandeliers, replace curtains, or simply change a burnt out light bulb. A person’s height does not allow this work to be done while standing on the floor; using a chair or stool is not always convenient, and the ideal option for performing the work is to use a stepladder. Considering that these works are not performed every day, it is desirable that the ladder be foldable or its function be performed by a transforming furniture product.
A transformable or folding ladder can, if unnecessary, be removed onto the balcony or pushed into a corner. The most popular are transformable stepladder chairs, which are easy to make at home with your own hands from scrap materials.
Do-it-yourself step stool: step-by-step instructions
First of all, to complete the work you need to stock up on certain materials.
An important step in making a stepladder is marking the parts.
The list includes the following titles:
- boards or plywood 2 cm thick;
- paint and varnish compositions;
- jigsaw equipped with an electric drive;
- drill;
- screwdriver;
- mallet;
- PVA glue;
- sandpaper;
- brush;
- self-tapping screws;
- loops;
- wood dowels.
First of all, using pre-prepared paper patterns, you should cut out blanks from boards or plywood in which you will make holes for dowels or cut out grooves, notches and tenons.
Note! The surface must be sanded and impregnated with compounds that have a moisture-proof function.
Then you need to apply glue to the wood dowels, and then use a mallet to hammer them into the prepared holes on the seat, back and steps. If you want to add strength to the structure, it is better to use self-tapping screws. It is necessary to install loops in the pre-created recesses and secure them. The next step is to re-sand the surfaces of the stepladder, especially in the secondary finishing areas. After this, you have to apply stain and varnish or drying oil and paint.
The details of the finished structure should not interfere with each other during transformation.
When making a ladder stool with your own hands, you should take into account that the elements of the product should not interfere with each other during movement. The two steps at the bottom, which resemble a compact chair, rotate using pins. During folding, they are placed inside the product. In this case, you can consider additional fasteners. The best solution would be a lock, which serves to secure the structure when unfolded.
The compactness of the product requires careful attention to both the manufacture of elements and the assembly itself. The drawings include information on dimensions, compliance with which is mandatory. Otherwise, the process of unfolding and folding the structure may become difficult or even impossible.
Although ladders, like any other folding structures, do not cause trouble during storage, they still require a certain amount of space. Chairs that can serve as a ladder are so compact that they do not require additional space at all. The request “how to design a transformable step-stool with your own hands” comes up quite often, which confirms the enormous popularity of such products.
Small stepladder: design nuances
For a person who is used to designing everything on his own, information about the specifics of installing staircase parts is completely uninteresting. For a competent home craftsman, assembling a stepladder chair using ready-made drawings with your own hands will not be difficult. But some aspects really deserve special attention.
For a beginner, it will be easier to make a small stepladder.
When marking the stringers to determine the installation points for the steps, the drilling locations should also be marked. To achieve strength, in some cases it is desirable to reinforce the elements with metal spokes. If for some reason this cannot be done, you can use powerful screws.
Regarding the fastening of the so-called “shoes”, it is worth knowing that it also has its own specifics. First of all, the lower cuts of the stringers should be slightly rounded. This will increase the convenience of installing the stepladder anywhere and reduce the wear of the heel.
In addition, it is necessary to correctly determine the method of fixing the “shoes”. If rubber products (rubber technical products) are characterized by sufficient elasticity, self-tapping screws can be used. When screwed in tightly, their heads sink into the rubber and do not leave scratches on the floor covering. However, since the dimensions of such fasteners are insignificant, they can quickly tear rubber goods. That is why it is necessary to place a washer under the head.
Note! When using hard rubber rubber, it should be mounted exclusively on glue. It will not be possible to press the head into such rubber, which means that the floor will be scratched not by the legs of the structure, but by the fasteners themselves.
The smallest wooden stepladders consist of only two steps.
To ensure that the legs of the stepladder do not move apart while a person is on it, a so-called limiter should be secured to approximately half the height of the stringers. This device is often ignored by home craftsmen, but an installed chain or long hook often saves you from falling from a mini-structure.
How to make a stepladder with your own hands in such a way that it provides comfort while working? Experts recommend attaching a pair of hooks to the sides of the stringers. On them you can place a bucket with solutions or paint, a container for harvesting, or a bag with the necessary tools.
The fact that a design equipped with such devices will be much more convenient to use is clear. In addition, you can secure at least one piece of plastic pipe at the top. The result is a functional case where you can place a hammer, screwdriver or other tools that are useful for work.
Wooden stepladder: finishing touches
There is very little left before the work is completed - just arrange the upper platform and install special limiters that will prevent the staircase from moving to a greater distance than was intended. As for making the platform, this process will not cause difficulties. You just need to cut it out of some material, for example, plywood. In addition, it has to be fixed on the upper stage of the structure using a movable method. Standard hinges are an excellent option for this.
One of the last stages of manufacturing is fixing the “shoes”.
In order for the platform to simultaneously perform the holding function, a special latch should be installed on the opposite side, with which it will cling to the top step of the second staircase. When choosing limiters, you can give preference to elementary straps that connect the stairs below. You just need to install the structure into working position and fasten the lower part with a plastic cable.
Regardless of what exactly it was decided to construct with your own hands: a step stool or a full-fledged structure made of wood - all elements of the product must certainly be sanded and treated with special solutions.
First of all, you need to sand all the parts that will be touched by human hands using sandpaper. The surfaces must become so smooth that during the operation of the stairs the possibility of driving a splinter in is completely excluded. In addition, it is necessary to clean surfaces if they have succumbed to mold.
Choosing the optimal staircase design
A staircase for a home must be stable and safe. An ordinary stepladder 2-4 meters high or a two-section structure is sufficient.
A stepladder with two sections turns into an extension ladder that can be used for outdoor work or as a ladder to the attic.
The three-section model is equipped with an additional section, making it multifunctional. It combines the functions of a stepladder, an extension ladder and a two-section ladder.
Aluminum 4-section staircase is considered professional staircase equipment, which is reflected in its cost.
You can choose and buy a stepladder for your home, the necessary components and other lifting equipment in our online store.
How to extend the life of finished products: protection features
To make a wooden step stool resistant to external influences, the product should be impregnated with a special composition - stain. This product acts as an antiseptic, prevents rotting, as well as the appearance of mold on the surface of the wood.
To protect wood, stepladders use stain, paint, drying oil, and other antiseptic impregnations.
On a note! Structural elements should be treated with stain before assembly. This will make it possible to significantly extend the service life of the product.
First of all, the wood must be treated with an antiseptic impregnation, which will provide reliable protection against rotting and create a film with a water-repellent effect. The optimal solution is varnishing. In this case, it is better to try not to touch the attachment points. As for paint, it will not always be appropriate, but will only be suitable as a last resort option. If everything is done correctly, the stepladder will delight you for many years.
Based on the above recommendations, we can conclude that getting the product into working condition is not at all difficult. Using exactly the same principle, you can construct a stepladder from a profile pipe using a drawing with your own hands. The difference between it and a wooden staircase lies only in the materials, as well as the devices necessary for the work and the method of connecting the parts of the structure.
Thus, making a ladder or step stool with your own hands, the drawings of which have been prepared in advance, is not difficult. The main thing is to take into account all the existing nuances of the further operation of the structure and correctly select the dimensions of all parts. Above are methods for manufacturing several of the lightest and most accessible products for design. By creatively approaching the process of processing them, you can get an original and incredibly beautiful design.
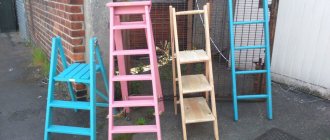
Old stepladder and ladder like a flower garden
Perhaps the most common use of an old, unnecessary ladder in landscape design is a flower garden. For an original flower garden, the stepladder will not have to be modified much. This stand will look good for both garden and indoor plants.
/decorwind.ru/wp-content/uploads/2015/07/lestnica-i-etajerka1.jpg" target="_blank">https://decorwind.ru/wp-content/uploads/2015/07/lestnica-i -etajerka1.jpg 492w" width="492″ /> Staircase as a flower bed