We have already mentioned the fact that most of the time a person spends going to the bathhouse is spent not in the steam room, but in the dressing room or relaxation room. And in these rooms the most important piece of furniture is the table. This unique king of the feast can be a standard one, purchased at a nearby supermarket, or it can be unique down to the last piece, made independently. Today, we choose a table for the bathhouse, meticulously and competently.
Choosing a tree for a bath
There are many types of wood, but not all of them are suitable for saunas and baths. There are certain requirements that the material must meet:
- low thermal conductivity;
- ease of processing;
- absence of cracks, knots and resin pockets;
- high density.
Conifers containing resins can only be used in the wash room, dressing room and recreation room, where there are no high temperatures. The exception is Canadian cedar, which has a low resin content and a very attractive texture. In all other cases, steam room furniture is made exclusively from hardwood - ash, linden, oak, aspen, poplar, alder and others.
Characteristics of wood
| Name | Color | Advantages | Flaws |
Pine | White, light yellow | The material is durable, good density, easy to process, affordable price | Releases resin when heated |
Spruce | Spruce White to reddish | Easy to process, has a beautiful texture, affordable | Highly susceptible to rotting, contains a lot of resin, a large number of knots |
Larch | Yellow | Beautiful texture, high density and strength, resistant to negative influences | Heavy, may crack during processing |
Oak | From light gray to brown | Beautiful texture, high strength, resistance to any aggressive influences | Heavy weight, requires effort when handling |
Ash | White to olive | Wear-resistant, not subject to cracking, bendable, has a beautiful texture | Sensitive to changes in humidity and temperature |
Poplar | Sandy, off-white | Easy to process and light weight | Prone to rotting |
Aspen | Light yellow | Easy to process and highly resistant to moisture | Wears out quickly and gets dark |
Alder | Pink to red-brown | Soft, light, easy to handle, moisture-resistant, does not deform or dry out, has a healing effect on the body | None |
Linden | Light beige | It has a pleasant aroma, has a healing effect, is easy to process, does not heat up, does not rot | None |
Canadian cedar | Reddish brown | Beautiful texture, high strength, very pleasant aroma, beneficial effect on the human body, does not rot | High price |
The wood must be dry, dense, without cracks or other defects, with a smooth surface. The higher quality the lumber, the longer the furniture will last. Raw boards are more difficult to process, and finished products become deformed when drying.
Texture of different types of wood
Prices for edged boards
edged boards
Peculiarities
The main difference between bath furniture and what we use in apartments is its moisture resistance. In conditions of high humidity and temperature, it should last a long time. Another important nuance is that the furniture is in direct contact with human skin. Environmental friendliness is the main criterion for selecting items for a bathhouse.
For relaxation in the bathhouse, an original Russian way of restoring strength, various types of furniture were invented; they will be discussed in the next section. It is worth highlighting the main requirements for the material:
- High density;
- Easy processing - sawing, grinding, trimming;
- Safety for humans;
- Low thermal conductivity – furniture should not heat up;
- Small amount of resins in the composition.
All of the listed characteristics indicate that the best furniture material for a bathhouse is wood of various species. It is worth noting that varnishes, paints and adhesives are not used in production. This is due to constant humidity conditions in the room, which causes the coating to swell and gradually peel off.
The healing properties of the bathhouse have been known since Ancient Rus', so there should be no objects harmful to the body in the room. In addition to the cleansing properties of steam passing over the skin, a person absorbs the smell of the materials from which the furniture is made.
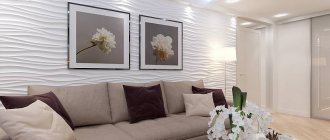
Traditionally, a relaxation room is designed in bath complexes - this is a place where people can relax in a calm environment, without hot steam. Some rooms require furniture on which a person can sit and have a snack.
The requirements for the coating in this case are different: they must also be moisture resistant, although they can have a varnish coating, since there is no constant exposure to steam.
Bath furniture can be made in various stylistic directions, let’s consider the most popular of them:
- Classic style - characterized by straight lines, rigor and practicality. There is no room for luxury here - all items are made discreetly and at the same time cozy. Steam rooms in spas are often equipped in this style;
- Antique sauna furniture is a common option for a free-standing sauna. Entering the room, you get the feeling of a fairy tale. All items are made in an antique style - they have rounded backs, fancy cutouts, and an aging effect.
To arrange a home bath or sauna, you can limit yourself to the classic style - it is inexpensive, and the items can be made with your own hands. If you plan to design a bathhouse for commercial purposes, choose an old style for bathhouses; visitors will appreciate it.
Types of furniture for baths and saunas
In addition to shelves, which are a mandatory piece of furniture, other furniture is also used in baths.
Furniture in the bathhouse
Carved bath lamp
Shelves, hangers, water containers
Sign – bath hanger
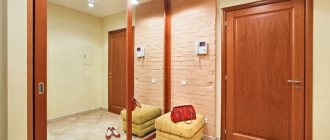
In the dressing room there are hangers and shoe stands, in the wash room there are comfortable benches or stools, in the rest room there is a table with benches and a couch, if the size of the room allows. Of course, the decisive role in choosing bath furniture is played by the preferences of the owners themselves: some like minimalism in the interior, others furnish the bathhouse with maximum comfort, taking into account every little detail.
Carved furniture - decoration and pride
Log bench
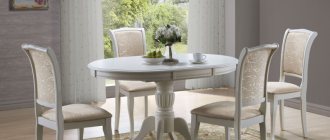
Table and benches in the bathhouse
Table and benches for the bath
The table in the bathhouse most often has a rectangular shape; its length and width are calculated taking into account the number of people who will be steaming at the same time. To save space, there are options for folding and folding wall tables, which you can also make yourself.
Folding table
Folding table - design
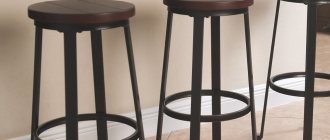
The most popular furniture is benches: people sit on them while washing and resting, put tubs and buckets on them, and sometimes even use them instead of shelves. They are made simple and with backs, wide, narrow, of various lengths.
Benches
Bath benches
Small bench
Bath bench
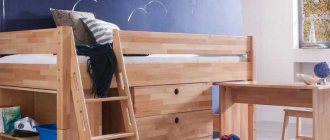
Additional attributes of the bath interior include hangers, footrests, and various shelves. Such furniture is small in size and easy to assemble, so making it is not at all difficult. If you use your imagination, you can give these products a very original shape.
Options for bath shelves
Log hanger
The main rule is that the furniture must be stable and have a thoroughly sanded surface so that splinters do not dig into the skin when sitting.
The dimensions of the furnishings depend on the area of the room: the smaller the bathhouse, the more compact the furniture. You should not overly clutter the space, because this is not only inconvenient, but also dangerous. It is recommended to make tabletops, backs and seats of benches, and stands not solid, but with small gaps for water drainage. This way the wood will dry out faster and last longer.
Tools for work
To make furniture yourself, you will definitely need a standard set of tools:
- hacksaw;
- a circular saw;
- Sander;
- set of cutters and hand router;
- drill with attachments or screwdriver;
- hammer;
- plane;
- pliers;
- clamps;
- square and tape measure;
- level.
Woodworking tools
Clamps
A circular saw
Level
For fastening you will need self-tapping screws, as well as metal corners. Experienced craftsmen make all connections without metal fasteners, using only wooden dowels. But such work requires skill and a lot of time, and with the help of self-tapping screws, furniture can be assembled much faster.
Metal corners
Furniture dowels
Prices for metal corners
metal corners
Making a table
1 way
For example, a rectangular table with cross-shaped legs is taken. This option is the easiest to implement, convenient to use, and takes up little space. This table seats 6 people freely.
Simple table
For work you will need the following materials:
- boards 30x145 mm and 40x250 mm;
- wooden slats 40x40 mm;
- screws and bolts;
- antiseptic primer.
Step 1. Boards 30x145 mm are cut so that you get 4 blanks 1.2 m long. Now you need to make oblique cuts on the blanks at an angle of 45 degrees, on both sides. Step back 10 cm from the ends, draw a line with a pencil to the corner of the board and saw off the excess. The cuts on each workpiece must be strictly parallel.
Preparing the table legs
Step 2. The workpieces are thoroughly sanded with a machine or sandpaper, the dust is swept away, treated on all sides with an antiseptic and dried.
Grinding
Step 3. The blanks are folded flat in pairs, crossing in the central part; the cut ends should be located in the same plane. After this, the legs are fixed with clamps and the locations of the fastening bolts are marked. There should be two bolts on each side - at the top and bottom of the intersection of the workpieces. Drill holes for fasteners.
Attaching the legs
Step 4. Bolt the workpieces and install the legs at a distance of 1.05 m from each other. Two spacers are made from the remaining 30x145 mm boards and screwed flat to the table legs, as shown in the diagram.
Bath table layout
Step 5. Blanks for the tabletop are cut from 40x250 mm boards - 3 pieces 1.75 m long. The blanks are processed with a grinding machine, impregnated with an antiseptic, and dried.
Step 6. The slats are cut into 2 pieces 77 cm long and also treated with a primer.
Bioprotective primer
Lay the blanks for the tabletop on a flat surface, face down, and connect them with crossbars made of slats using self-tapping screws.
Step 7. The tabletop is lifted, turned over and placed on top of the legs. The upper sections of the legs should fit snugly against the crossbars of the tabletop on both sides of the table. The structure is fixed with self-tapping screws.
The table is ready, you can bring it into the bathhouse and use it. For greater decorativeness, the edges of the tabletop can be made semicircular using a jigsaw.
The table top is visible, the edges of the boards are chamfered
Prices for wood primer
wood primer
Method 2
If the bathhouse will be used by no more than 3 people at a time, you can make a small wall table that takes up almost no space.
Wall table in the bath
To work you will need:
- 5 boards 30x200 mm 80 cm long;
- block 40x50 mm, 1 m long;
- 2 bars 40x50 mm, 75 cm long;
- self-tapping screws
Step 1. Choose a suitable place for the table, for example, near the wall under the bathhouse window. At a height of 70-80 cm from the floor, a mark is placed on the wall. Now, using a level, draw an even horizontal line along this mark, on which the width of the tabletop is marked.
Step 2. Boards and bars are treated with a sanding attachment on all sides, then primed and dried.
Step 3. Assemble the tabletop from the boards: the boards are laid in a row on a flat surface, leveled, fastened with crossbars made of 75 cm bars. One bar is screwed at a distance of 7 cm from the edge of the boards, the second is flush with the ends on the other side of the table top.
Step 4. The finished tabletop is applied to the wall at the level of the markings so that the crossbar fits tightly to the surface. Screw it in with self-tapping screws.
Step 5. Next, you need to install a support: the beam is placed under the edge of the tabletop so that it rests against the lintel from the inside, and its lower end is placed against the wall. Use a marker to mark the locations of the cuts, remove the beam and cut its ends at an angle of 45 degrees so that the cuts fit tightly to the surfaces of the table and wall. After this, the support is finally installed in place and fixed with self-tapping screws.
Drawing of a folding table
Folding table assembly diagram
Semicircular folding table
Semicircular folding table when folded
Table top cut out
Table support cut out
Drilling holes
Plate that will be attached to the wall
Connection of plate to support
Table assembly
Hinges for tilting the table cover
Fixing the table
Prices for timber
timber
Sauna bench
In the wash room there will be a wide bench to wash with all the amenities. As an example, one of the simplest drawings of a bench is presented.
Sauna bench
Sauna bench - drawing
During the work you will need:
- 3 boards 30x120x1500 mm;
- 2 wooden planks 1460x10x20 mm;
- 2 boards 420x260x30 mm;
- 1 board 1240x30x200 mm;
- wood glue;
- self-tapping screws
Step 1. Take one board 1500 mm long, lay it flat on the work table and secure it with clamps. Using a cutter, a longitudinal groove 10 mm deep is cut in the side surface for the entire length of the board. Exactly the same groove is made on the second board, and on the third board grooves are cut out on both sides.
Step 2. The milled boards are again laid on the work surface in a row, with a board with two grooves in the middle. All grooves and both planks are coated with glue, after which the planks are inserted into the holes, firmly connecting the boards into a shield, and the product is clamped with clamps.
Assembling the shield for the bench
Step 3. While the seat panel is drying, cut out the sides with a jigsaw. On the sides and in the lower part it is enough to make semicircular cutouts with a depth of 50 mm, and at the top, exactly in the middle of the workpiece, you need to select a groove for a longitudinal beam measuring 100x30 mm. To do this, first take preliminary measurements and mark the cutout lines with a pencil. The second sidewall is made in exactly the same way.
Step 4. Prepare a longitudinal beam: take a board 1240 mm long, lay it flat on the work table, measure 10 cm on each side and draw 2 parallel lines across the workpiece with a pencil. From the middle of the line a perpendicular is drawn to the end of the board and the resulting square is cut out with a hacksaw. On the other side they do the same. The result should be a workpiece with two protrusions, which can be rounded with a jigsaw for greater decorativeness.
Step 5. The sidewalls and longitudinal beam are ground, the cut edges are processed with a radius molding cutter. Next, all elements of the future bench are primed with an antiseptic composition and dried.
Step 6. Assemble the bench: the protrusions of the longitudinal beam are threaded into the grooves on the sides, fastened with screws on the sides. The seat panel is placed on top, aligned in the center, screwed with self-tapping screws along the line of connection with the longitudinal beam and to the upper ends of the sidewalls.
Bench assembly diagram
Prices for PVA glue for wood
PVA glue for wood
Shoe rack assembly technology
Making a shoe rack does not require a lot of time and labor, so you can cope with such a task in a couple of hours.
The shoe rack in the bathhouse is assembled and installed as follows:
- 2 side parts of the structure are being prepared, 35 cm wide and up to 90 cm high, as well as upper and lower parts 60 cm long.
- The workpieces are thoroughly cleaned with fine-grain sandpaper or a grinder.
- 2 cuts are cut from the slats for the vertical shelf, the length of which is equal to the width of the side parts (35 cm). The parts are fixed to each other with self-tapping screws; the sides of the structure are reinforced with metal corners or wooden blocks.
- Markings for the shelf are made on the side elements and holes of the required diameter are made.
- The finished product is a box with sides, top and bottom slats, and a vertical shelf (or several shelves) for shoes.
Footrest
You will need 5 planks 600x70x20 mm, 2 planks 400x70x20 mm and a block 50x50 mm for making the legs.
Footrest
Footrest for bath
Step 1. Well-polished planks 600 mm long are laid out in a row on a flat surface. Gaps of 10 mm are left between the slats and aligned along the length.
Step 2. Place two transverse planks on top, placing them along the edges of the planks, flush with the ends. The product is secured with screws.
Step 3. The block is cut into pieces 3-4 cm high; these will be the legs for the stand. They are applied to the transverse strips at the corners and secured with screws. Finally, treat the stand with stain or colorless wood primer.
You can make the stand not with a straight surface, but with a rounded one, which is much more comfortable for the feet. How to do this is detailed in the video.
Video - making a footrest
DIY sofa
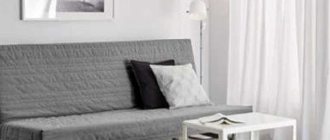
If the conditions in your bathhouse allow you to use fabric upholstery, and your hands remember how to work with wood and fabric, then you can take a risk and build a sofa for a bathhouse with your own hands. Shall we try?
As an example, let's take one of the simplest, but at the same time practical designs - a sofa book. You can sit on it comfortably, and if necessary, you can unfold it and turn it into a sleeping place. Versatility in a small sauna is an extremely useful thing. Let's go through the main stages of work:
- We begin work with the frame, or rather, with its lower supporting part, which in the finished product will serve as a storage compartment where it is convenient to fold bed linen. It is quite obvious that to store a bed, it must be periodically hung in the open air, no matter how good ventilation your bathhouse is equipped with. In the glove box it is convenient to store a set of household utensils and containers with rowan tincture, which is so good, especially in the cold. By the way, you don’t even need to reach for the next portion. To make a box, you need four boards, two 1900 mm each, two 800 mm each, all 200 mm wide and 25 mm thick. The amplifier requires four bars with a cross section of 50×50 mm and a length of 200 mm.
- The assembled box is reinforced along the short side with four crossbars made from four boards, 800 mm long, 50 mm wide and 20 - 25 mm thick.
- We cover the bottom of the structure with a sheet of fiberboard measuring 1900x800 mm and about 3 mm thick.
- The frame of the seat and backrest is made of timber with a cross-section of 40×60 mm, from which a rectangular structure with dimensions of 1890×650 mm is assembled. The mattress is supported by a set of lamellas - thin, narrow bars, which are assembled in the transverse direction in increments of 50 - 70 mm.
- For the armrests, we form a base with the given dimensions from furniture panels. Then, along the contour of the panel base, we attach a frame from a set of bars with a cross-section of 20x40 mm.
- To assemble the structure, you will need special accessories for book sofas, which can be purchased in specialized stores. With its help, the seat and backrest are connected, leaving a gap of 8 - 12 mm, when unfolded. When folded, the cut of the seat should not extend beyond the contour of the armrests.
- We lay interlining on top of the lamellas, secure it and proceed to laying the foam rubber mass. The thickness of the main layer is 40 mm; here we do not forget to make cutouts for the folding mechanism. To form a supporting cushion, another strip of foam rubber, 20 mm thick, is glued along the edge of the seat. And on top, along the entire plane, there is another one - a finishing sheet, 40 mm thick, the edge of which is tucked under the edge of the seat. A multi-layer set of foam rubber will create more comfortable conditions for furniture users. Similar work is carried out with the back. At the end of which, covers are pulled over them.
- We form the armrests. We glue a shaped foam strip, 40 mm thick, on top. There is a second one on top, but 20 mm thick. The inner side of the armrest is glued with a layer of foam rubber, 40 mm thick, not reaching the bottom of the shield 320 mm. The front part of the foam rubber at the end of the armrest is folded inward and secured. The planes are upholstered with fabric, on top of which the necessary fittings are fixed.
Let's be honest, making a sofa right away will not be easy. The right solution, so to speak, a “breakdown of the pen”, can be considered to be carrying out repair work on upholstered and other furniture.
This will allow you to objectively assess your capabilities to manufacture a product “from scratch.”
Bath hanger
Option 1
Bath hanger
To create a hanger you will need:
- flat board 400x20 mm and 50 cm long;
- 4 wooden knots with a Y-shaped branching with a diameter of 30 mm;
- plane;
- sandpaper;
- drill;
- stain;
- screws, nails or wooden dowels for fastening.
Branches should be chosen that are strong, with a dense texture, and without traces of rot. It is not necessary to look for knots of the same shape, the main thing is that they match in thickness. The length of the workpieces should not exceed 30 cm, and the length of the branches should not exceed 3-4 cm. The bark from the branches must be removed, and the workpieces are thoroughly dried in the shade.
Branches
Step 1. Each workpiece is planed on one side with a plane along the entire length to approximately ¼ of the thickness of the branch. This side of the branches will be attached to the base.
Sanding a branch
Attaching branches
Step 2. The ends of the branches on the workpieces are treated with sandpaper, rounding off the cuts.
Branch arrangement option
Step 3. The board is sanded, then covered with stain along with the branches and dried.
Step 4. Lay out the knots on the board and mark the attachment points with a pencil. If wooden dowels are used as fasteners, 2 holes are drilled on the smooth side of the workpieces - bottom and top at a distance of 5 cm from the ends of the branches.
Step 5. Holes for dowels 2 cm deep are also drilled in the board according to the markings, after which the branches are fastened to the base. When using nails or self-tapping screws, the caps are recessed into the wood by 1-2 mm, and then covered with heat-resistant putty to match the color of the wood.
Prices for stain
wood stain
Option 2
Bath hanger diagram
To work you will need:
- 3 boards 1120x100x20 mm;
- 6 boards 1500x120x20 mm;
- 1 board with a section of 200x20 mm for the shelf and sides;
- self-tapping screws 35 mm;
- wooden dowels 10x30 mm;
- wood plugs;
- stain;
- sandpaper;
- hacksaw;
- jigsaw;
- drill;
- hammer;
- tape measure and square;
- pencil;
- hooks
The manufacture of such a hanger is carried out in three stages: first, the frame is assembled, then a holder for hooks is made, and the shelf is attached last in the upper part of the frame.
Step 1. The wood is thoroughly sanded with sandpaper or a sanding attachment. Boards 1500 mm long are laid out on a flat surface parallel to each other, leaving a distance of 8 cm between them. The edges are aligned.
Sanding wooden boards with sandpaper
Step 2. Fasten the future frame of the hanger with three horizontal crossbars made of boards 1120 mm long. The upper cross member is located flush with the ends of the boards, the other two - in increments of 50 cm. All frame elements must be perpendicular. The screws are screwed in from the side of the crossbars, recessing them slightly into the wood.
Step 3. Start making a holder for hooks: cut a piece 1070 mm long from a 200x20 mm board, sand the ends. Now you need to secure the holder to the frame, but the hooks can be screwed in after installing the hanger.
Step 4. The holder is placed under the frame, laid parallel to the top crossbar at a distance of 10 cm from the top of the structure. Fasten with self-tapping screws, screwing 2 into each vertical board. This fixation of the holder gives the frame additional rigidity.
Step 5. From the remaining board, cut out a shelf 1070 mm long and cut out two side panels with a jigsaw, as in the diagram. All cuts must be sanded. Next, markings are made for the dowels: with a pencil, they mark the lines where the shelf fits to the sidewalls and the sidewalls to the frame boards, and points are placed on the lines for drilling holes.
Fastening the shelf and sides
Step 6. Drill holes according to the markings, insert dowels into the shelf, attach the shelf to the sides, and then to the frame itself. Additionally, the shelf is secured on the sides with self-tapping screws, the heads of which are covered with plugs.
Step 7. Determine where the hanger is attached to the wall, drill holes for fasteners in the wall and cross boards, install and fix the hanger.
Attaching the hanger to the wall
Unusual hooks made from forks
Coat hook made from a key
Classic coat hooks
Forged hooks
This is how you can furnish your bathhouse or sauna with homemade furniture. All the examples are quite simple, so even a novice master can cope with them. And even if everything doesn’t work out perfectly, hand-made furniture will make your stay in the bathhouse much more enjoyable!
Similar hanger design, assembled in the same way
Video - Furniture for baths and saunas made of wood
shelves
Bath shelf - diagram
Shelves for a small steam room
Before making shelves for a bathhouse, you need to take some measurements. The shelves should not cause inconvenience. Its device can be either single-tiered or three-tiered. It is believed that the heat is higher at the very top. The design resembles the shape of steps.
Once the required dimensions of the boards have been determined, you can begin to work:
- It is necessary to mount a frame of wooden posts. For this, a timber is taken.
- The racks are fastened together. You can even use metal screws here, because the body will not come into contact with this part of the shelf. The distance between the two posts should be about 50 cm.
- The frame must be attached to the walls of the bathhouse.
- Then the boards are attached to the frame. When installing them, you can no longer use metal. The distance between two adjacent boards should be about 1 cm. This is necessary so that the water can drain freely. In addition, this device allows the structure to dry faster.