Kitchen countertops made of any materials sooner or later lose their presentability and need updating. If you can’t afford a new set, you can restore the work surface.
In our article you will learn how to update an old countertop in the kitchen with your own hands, how to completely change its appearance without turning to specialists.
Types of countertops and their defects
Working surfaces are made from different materials:
- A natural stone. It is less susceptible to wear and tear than others. A countertop made of natural granite, for example, is not at all afraid of damage.
- Acrylic is a type of artificial stone. It is not resistant to scratches and cuts.
- Quartz agglomerate is durable like granite, but over time it still loses its appearance.
- Casting stone is a solid thin-layer polymer on a base. Requires careful sanding.
- Plastic is a budget option for countertops. It wears out quickly without the use of cutting boards.
- Wood treated with impregnations and varnishes also requires care to maintain its appearance.
Facades
When replacing or restoring facades, designers have complete freedom of action.
- Replacement of old facades with new ones. Justified when the old parts have really served their purpose, or there is no desire to waste time on restoration or alteration. As a rule, furniture showrooms offer standard-sized facades suitable for factory-made sets. Unified parts are interchangeable.
- Painting. Used for expensive furniture, when purchasing a new facade is more expensive than a trip to a paint shop. The advantage of this method is that you can invite an artist who can turn a boring set into a work of art. If you have a large-format photo printing service in your city, feel free to choose the image you like. At the same time, remember that the presence of perspective can visually push apart walls and blur the boundaries between reality and illusion.
- Pasting with film. Carefully done work will refresh the appearance of your headset and extend its service life for several more years.
Update your kitchen yourself. Solutions for skinali
Let's start with ideas for updating your kitchen backsplash. Sometimes all it takes is a little paint to completely transform a space. Tired tiles that line the backsplash or have lost their appearance. You can correct it with special materials and paint it in the color you like, suitable for the new design.
The apron can be made from plywood plates covered with fabric and protected with tempered glass. The fabric will add color and pattern, and the glass will not get dirty from splashes.
Update your kitchen yourself. Worktop
The kitchen work surface can set the tone for the entire culinary space. If your budget doesn't allow you to replace your countertop, try redoing it! Concrete creates a neutral, modern look. Concrete can be used to cover an existing countertop to give it a new look.
The next way to update the countertop is to cover the top with a durable self-adhesive film with a pattern reminiscent of the structure of natural stone, such as marble or granite.
Update your kitchen yourself. Kitchen cabinets
When your budget doesn't allow you to replace your tired cabinets, what's the best way to give them a stylish update? One possible solution: paint. Just as the brightly colored backsplash wowed us in the previous section, this emerald island shows how transforming it into a bold hue can create an elegant, vibrant focal point. content/uploads/2019/03/5c6479a2be9f1.jpg" class="aligncenter" width="600″ height="450″[/img]It's quite easy to refresh your kitchen! Repaint the wooden cabinets white, you will see how much lighter, cleaner and brighter the entire kitchen space will become. Sometimes it is enough to completely remove the cabinets from one of the walls, replacing them with open shelves. Of course, such a decision should be quite balanced, since you will have to get rid of not only the usual wall cabinets, but also tiles, which can make the space heavier. But it's worth it when you add chic open shelving.
Update your kitchen yourself. Special touches
Time to complete the look with details. Even if you can only update one element in your kitchen, choose it wisely. This way you can give your kitchen space a new look. Try replacing the handles on your drawers. By choosing brass as a material, you will add a noble shine to your kitchen.
Of course, the trend of tinting with gold is a trend when decorating a kitchen space. In this room, golden tones abound on the countertop, splashback, and flooring. It remains to highlight the design with the color of brass handles and gold cutlery.
Even a simple update to a wall grid to hang kitchen utensils can add style and functionality to the kitchen, freeing up countertops and cabinet space.
In conclusion, I would like to note that we should not forget that little things matter a lot. Details like beautifully designed shelves, an updated light fixture or a new faucet can work wonders. Even a small kitchen update will make it much more interesting!
Photo wallpaper is a new product for decorating not only children's rooms, but also kitchen utensils
A more interesting option than the previous one seemed to me to be a way to not only update the kitchen, but also radically change its appearance. Photo wallpapers today are in great demand for decoration in children's rooms and bedrooms. However, not only these rooms can be decorated in this way. The only caveat is the gluing of photo wallpaper onto the paint, which indicates the requirement to paint the kitchen unit. Among the tools you will need are: wallpaper glue, roller and paint, brush, scissors. To do the work yourself, you also need to take measurements, but for the renovation itself, you can use self-adhesive laminated options. They are more resistant to mechanical damage and are easy to wash.
If your choice is traditional wallpaper, then do not forget that after gluing is completed, the entire set should be covered with several layers of varnish. It is somewhat more difficult to update a kitchen set with photo wallpaper than with vinyl film, but its appearance is more attractive. By the way, photo wallpaper can be made to suit your preferences, which means that you can even update your kitchen furniture with your own portraits or photographs.
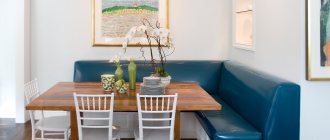
Countertop – replace kitchen unit or update it?
In the kitchen, countertops and tables lose their appearance the fastest. Therefore, every second person sooner or later asks the question: can you update or do you need to replace the old countertop?
A complete replacement should occur in cases where it is no longer possible to restore the element. The kitchen countertop needs to be removed before updating. Unscrew the fasteners and dismantle. Most likely, some effort will be required, since silicone is always used to better secure it - and, as you know, it does not lose its qualities after a long period of use. The choice of new material depends only on you, so you can safely experiment with shades and new sizes. If you decide to update your countertop, you can use materials such as paint or varnish. It’s very easy to design a kitchen set in this way, and for quality, follow this sequence:
- First you need to prepare the surface of the headset that will be painted. Use a sander or sandpaper
- Fill all chips and cracks with putty mixture. Once dry, use fine-grained sandpaper. To make the surface smooth and even. Only after this can you paint the countertop
- Alkyd paint is suitable for this process. Its first layer will be the primer of the material. Next, subsequent layers should be applied after the previous ones have dried. And for overall individuality, you can use various coloring techniques.
At the moment, you can buy or make your own various stencils, with which you can apply a drawing or pattern to the surface of the headset to be finished.
However, remembering the use of self-adhesive film for kitchen drawers, you can safely use it for the countertop. This method seemed to me the most acceptable, since with the help of paint we cannot imitate wood or stone, but self-adhesive has different textures. The film is applied very quickly, so it will not take a long time to update the kitchen set. As in the case of kitchen drawers, you will need to take measurements and then cut out the necessary pieces on the canvas. When cutting, leave a small margin, which will then be very easy to remove using a stationery knife. It will be much worse if you are missing a millimeter or two and this will be the most noticeable place.
On my own behalf, I would like to add that self-adhesive film can be used to correct various defects not only on kitchen furniture. From my own experience, long before the kitchen and its furniture, I experienced the quality of self-adhesive material. When the washing machine lost its appearance, and the paint peeled off in some places, after which the machine began to electrocute, there was no paint at hand. I felt sorry for the money to buy a new device, since the functionality of the machine was not inferior to the new models. Then the idea of using self-adhesive film arose in my head. Carefully removing the lid from the washing machine, it was vertical and not frontal, I washed the surface of the pasting. After taking measurements, I cut out the required piece and very quickly glued it to the lid. This may not seem like the best option to some, but I have been using this washing machine for 2 years now, and the film on it has not changed at all. And I, in turn, saved money and am very happy about it.
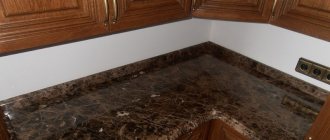
How to update an old countertop made of natural and artificial stones?
The optimal method of restoration is polishing and grinding, because the tabletops have an identical texture throughout their entire thickness. Care must be taken with cast stone applied to the base in a thin layer; it will only withstand 2-3 polishing updates. In the future, it is optimal to improve it in the same way as wood or plastic - by gluing, painting, glazing. The same methods can be used to transform a stone if the set has already become boring.
Before you get tired of the set, scuffs and scratches form on the stone surface, it’s time to sand and polish it. Required tools:
- Sander.
- Polishing machine.
- Polishing paste.
creative painting
Another creative way to renovate an old, worn-out countertop is by stenciling. To update the tabletop, you just need to apply a prepared stencil to its washed and degreased surface (a suitable motif for painting can be easily found on the Internet and cut out of thick cardboard).
For the work you will need paint (for the main tone and pattern), a foam sponge/brush, and a stencil with a pattern. Place a stencil on a properly prepared and painted base color tabletop surface and, firmly fixing it, apply the paint with a sponge/brush.
Advice. You should not use a sponge to pick up a lot of paint at once, as in this case it may flow under the stencil and the work will be completely ruined.
Well, and, of course, the most radical way to restore a tabletop is to replace its surface with a new material (chipboard, fiberboard, wood, composite, etc.). In this case, you will have to spend a lot of time and money, and more effort will be required than in previous cases.
You learned how you can quickly and inexpensively update your kitchen countertops with your own hands. The main thing is to approach work with attention and a good mood. Happy renovation!
How to update a kitchen countertop: radical methods
How to update a kitchen countertop with your own hands if its old appearance is no longer satisfactory? There are several options.
Pasting
The easiest way to transform your work surface. What to cover the tabletop with? To do this, you will need a thick vinyl film with a self-adhesive backing; photo wallpaper is also suitable.
How to do:
- The surface of the tabletop must first be degreased and sanded for leveling. Important . If there are potholes or chips on the surface, they must be filled with repair putty.
- Paste the film. It is important to fix one side correctly so that when rolling, the canvas moves parallel to the edge of the table. During the pasting process, you need to help with a plastic or rubber spatula to force out bubbles and smooth out the coating.
The service life of the film is 3-4 years with careful use.
Painting and glazing
The second easiest way to solve the problem is to update the countertop. Suitable for any type of surface that must first be puttied or sanded for leveling.
How to paint a kitchen countertop:
- Acrylic paint.
- Alkyd enamel.
- Water-based paint.
The coloring composition should be applied to a degreased surface in 2 layers. You can use your imagination and draw something on the tabletop. For those who don’t know how to draw, you can use ready-made templates.
Repair of countertops made of various materials
Repairing a kitchen countertop differs depending on the type of materials:
- wood, chipboard;
- stone or artificial stone;
- plastic;
- strained glass.
Tabletop made of wood or chipboard
When planning renovation work on tables made of wood or chipboards, it is necessary to take into account the characteristics of the materials.
Chipboard or fiberboard boards are impregnated with special compounds that increase the resistance of the coating to moisture and temperature changes, mechanical stress and cleaning with acidic chemical compounds. The material is distinguished by a variety of shades, textures, and affordable prices. However, it is necessary to take into account the possibility of scratches and stains appearing during operation.
Wood tables have an exquisite texture. The material is environmentally friendly, aesthetic, and has a tactilely pleasant surface. However, the wear resistance of the material is average; the coating requires careful cleaning and renewal of the protective layer and coating, which prevents the negative effects of sunlight.
You can restore a countertop made of chipboard and wood using special restoration compounds. To eliminate chips, dents and cracks from the surfaces of wood and chipboards, special restorative agents are used:
- soft or hard wax for furniture;
- furniture touch;
- water-repellent sealant.
Hard texture wax is used to eliminate mechanical damage on coatings that can withstand medium and heavy mechanical loads. The material is available in a small palette of shades and gives surfaces waterproof characteristics. Before use, the wax must be melted using a gas soldering iron, then the desired area should be covered with the composition. You need to wait a few seconds for the wax to cool, then use a knife to scrape off any excess material.
Soft wax is rubbed into the damaged coating using a spatula or an edge knife. The composition is optimal for eliminating cracks and small dents, holes left by self-tapping screws. Soft wax is applied to the surface, then the coating is polished with felt. The composition is suitable for eliminating defects in natural wood and allows you to emphasize the texture of wood fibers using an alcohol marker.
A furniture touch allows you to repair minor damage. The composition must be shaken in a container, then applied to the area. Depending on the degree of damage, 1-3 layers are applied. Each coating is dried for 5-8 minutes. Remains of the product are cleaned off with a felt cloth or cotton rag.
A sealant with water-repellent characteristics is used to hide the joints of elements to prevent surface deformation.
Stone countertop
The countertop of a kitchen set made of artificial or natural stone is highly durable, resistant to mechanical damage, high temperature, and high humidity. It is necessary to take into account the massiveness of the natural material, the high price and low maintainability. If part of the coating is damaged (chips), the entire surface will need to be replaced.
Artificial stone elements must be carefully treated with special chemical compounds. Repair work is carried out immediately after damage. The maintainability of artificial stone is high.
To remove stubborn stains on the surface, a polyester composition is used. It is allowed to sand the coating using sandpaper with a grit level of P120-P400. After sanding, the area needs to be polished with a felt cloth.
To eliminate chips, you need a special composition based on polyester resinous substances. It is necessary to clean and degrease the surface of the area and the area around it. The damage is rubbed with the compound, left to dry for 18-20 hours, then the coating is sanded with abrasive materials and polished with a felt rag.
Plastic table top
Coverings made of plastic materials are waterproof, durable, and resistant to chemical detergents. However, the fragility and brittleness of the plastic surface must be taken into account. Chips occur in the corner parts of the table. In order to update the tabletop, you will need a special adhesive base.
The compositions are applied using a construction gun. If the surface thickness is small, you can apply Moment glue or Superglue with a spatula. Titan adhesive composition is suitable for plastic surfaces. Before performing work, you need to fix the table, process it and leave it to dry. When repairing joints, the adhesive can be mixed with powder compounds.
Glass table top
Glass surfaces in the kitchen are used in modern styles. The material is durable, resistant to air humidity and water ingress, temperature changes, and is available in a wide range of shades and textures. However, glass is expensive and requires careful maintenance.
Glass restoration includes the following steps:
- surface cleaning;
- degreasing the material;
- applying varnish or paint;
- After drying, the element is fixed on the legs.
In addition to plain coloring, artistic painting can be used. For severe damage, glass replacement is recommended.
The following methods are used to remove scratches:
- You will need water and an ammonia solution. The composition will correct minor scratches. When preparing the product, the proportions must be observed; water (6 glasses) must be added to ammonia (30 g). Then you need to dip a napkin in the solution and wipe the surface. Remains of the composition are removed with a dry towel. The procedure can be repeated several times.
- Restoration work is carried out using a specialized paste (GOI), which is offered in automotive departments. Before use, you need to grind the paste to a powder. Then a cotton swab is dipped into the mixture and the scratches are treated for about 10 seconds. The movements should be polishing. The treatment can be repeated 2-3 times. Residues are removed with a dry cloth.
- The universal method involves the use of toothpaste. The composition is applied to a cotton pad and distributed using circular movements over the glass surface. Then you need to wet the cotton wool and wipe the table, removing any remaining paste. The technology allows you to eliminate traces of scratches, enhance the protective characteristics of glass, and prevent further damage. However, it is not recommended to use bleaching compounds that contain abrasive particles that damage the integrity of the coating.
In order to prevent damage, it is recommended to provide special care to surfaces and take into account the characteristics of the material:
- Cleaning wipes should be soft.
- Specialized glass products are used for cleaning.
- Do not place hot dishes on tables with photo printing; it is recommended to use special stands.
To prevent scratches, it is necessary to cover the glass with a tablecloth or fabric linings for dishes while eating.
Tabletop care
To ensure that the consequences of the restoration are pleasing for as long as possible, you should follow simple rules:
- Use cutting boards to cut food.
- Do not place hot dishes on the countertop.
- Do not use abrasives to remove dirt; replace them with gentle products.
- Do not subject the surface to shock.
- Wipe the countertop dry after each wash.
If you don’t want to bother with restoration, order a new work surface. At E-stoun.ru you can choose various materials to suit every taste and budget. The craftsmen do everything turnkey: design development, manufacturing and installation of countertops.
DECOUPAGE
A huge advantage of decoupage is that it does not limit your imagination and allows you to change the tabletop beyond recognition, with little effort. An old tabletop at a table can be changed beyond recognition if you approach the matter creatively.
You can make a creative thing with your own hands if you use the decoupage technique. Decorating the surface of a table using this technique does not require any special skills or abilities - anyone can do this work with a minimum of tools. For work you will need:
- PVA glue;
- Pictures;
- furniture varnish.
To decorate your table, you can purchase ready-made pictures for decoupage, sold in any craft store. But motifs cut out from paper napkins or pictures from magazines and books are quite suitable.
You can design a drawing on a computer and print it out - this way you can see the whole picture in advance and decide on the drawing before starting work. Stages of work:
- Before work, thoroughly wash the old countertop and treat it with any degreasing agent - a swab moistened with alcohol will do;
- Dilute the glue in a ratio of 1:1;
- Moisten the selected motifs with it and glue them to the tabletop. The composition is created based on your taste, the main thing is not to overdo it with the number of motifs, otherwise the tabletop will look tacky.
- Carefully straighten the glued pictures - there should be no bubbles under them;
- Wait until the tabletop is completely dry;
- Cover the dried surface with varnish;
- Wait for the varnish layer to dry and apply a second coat;
- To prevent new decorations from being erased from the tabletop during wet cleaning, repeat the varnishing operation 3-4 times. For ease of use, the varnish can be purchased in aerosol packaging.
This hand-made table design will be in a single copy. This will make the interior design unique and memorable.
Important : using the decoupage technique, you cannot decorate the surface of the working area, as it is subject to intensive use and is often washed with chemicals. Design using decoupage technique is suitable for dining tables, table tops and window sills.
We also recommend watching the video instructions:
Countertop color in a multicolor kitchen
Kitchens in bright colors, according to the rules, are complemented by neutral countertops. The priority colors remain:
- Beige.
- Woody.
- Marble.
- Black.
When choosing a shade, countertops are based on the “temperature” of the facades and the depth of their color saturation. Warm options made in orange, yellow or red solutions are best suited to cream or brown countertops. In “cold” sets, marble and gray versions of work surfaces look more impressive.
dark countertop in a multicolor kitchen
A perfectly white countertop is a universal option. She is a great companion in any color scheme. If you want an elegant, delicate kitchen, choose white countertops, but if you like brutal options, then you can’t do without a black surface.
How to attach a decorative sticker
It is better to carry out the gluing procedure together. Anyone can easily cope with the task if they are precise and attentive.
Algorithm of actions:
- Remove dirt and grease from the surface. If necessary, use special products.
- Place the decoration on the place where you want to stick it and secure it with pins or masking tape.
- Carefully pry up the layer that protects the adhesive base and remove it, pointing downwards.
- Place the sticker on the wall.
- Smooth the design using a roller or a special plastic spatula.
- Remove the tape and protective layer that protected the picture from damage.
How to paste a 3D image
Algorithm of actions for a wall sticker for the kitchen:
- Thoroughly clean the area where the sticker will be attached. Use a degreaser or soap solution.
- Take the stencil in your hands, apply it to the surface and secure it with masking tape. Make sure there are no gaps.
- Carefully attach the sticker to the template.
- Remove the stencil and the paper that protected the picture. For easier removal, the paper surface can be moistened with water.
Attention! If you are gluing a sticker to hide scratches and damage, then before attaching the product, level the surface until smooth. Otherwise, the sticker will not hide the flaw, but will emphasize it.
If the product is attached incorrectly, this can be corrected. Take a hairdryer and heat the sticker with warm air. Then remove it and re-glue it.