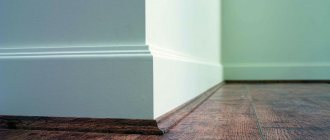
Types of kitchen skirting boards (borders)
Skirting boards vary in cross-sectional shape, material of manufacture and design . Like all long lengths, they are sold in whips of a certain length.
According to the cross-sectional shape, kitchen skirting boards can be:
- flat;
- rectangular;
- triangular;
- rounded;
- concave, etc.
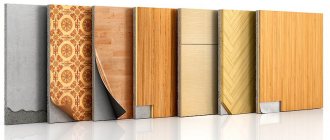
Based on the material they are made of, skirting boards are divided into::
- plastic;
- aluminum;
- steel;
- wooden;
- veneered;
- stone (artificial or natural stone);
- ceramic, etc.
Important! The first three options (plastic, aluminum and stainless steel) are sold ready-made with sets of special plugs and connecting elements. All others are made to order.
Shape matters
This criterion is selected based on the functional features of the baguette. There is only one rule here: the larger the gap between the tabletop and the wall, the wider the baseboard. Otherwise, he will not be able to hide all the flaws and irregularities. It will also not be able to protect against debris and moisture.
The stores offer kitchen skirting boards of various shapes:
- figured
- flat;
- triangular;
- rectangular;
- rounded.
Absolutely any form can be chosen.
It all depends on your taste preferences and overall kitchen design. On a note!
Baguettes made of wood and plastic have a wide variety of shapes.
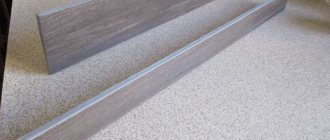
As for the sizes, the length of the frieze can reach 3, 3.5 and 4 meters. Additionally, it is equipped with a silicone seal. It helps to install tightly.
Criterias of choice
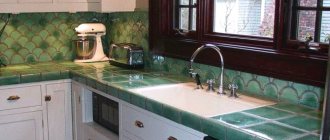
The plinth is matched to the countertop, kitchen set or apron . The overall style of the kitchen, the color of furniture handles and household appliances matter.
Here are the main criteria:
- The most successful and win-win option is to choose the color of the countertop. A large assortment of plastic borders allows you to do this without problems.
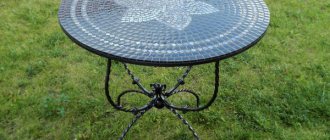
- On expensive countertops made of artificial stone, marble or granite, borders made of the same material are installed. They are made to order along with the tabletop.
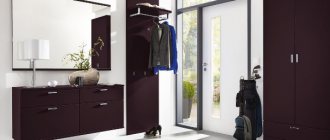
- For modern styles (modern, high-tech, minimalism, etc.) aluminum or steel skirting boards, as well as plastic borders imitating stainless steel, are suitable. They harmonize well with metal handles of kitchen facades and household appliances.
- Skirting boards “under the apron” are made from the material of the apron (porcelain tiles, ceramic tiles, etc.), or special borders “under the insert” are used, into which an edge is inserted that imitates the material of the apron.
- The corrugated front surface is more difficult to care for and dirt accumulates on it. Choose smooth models.
Important! Ready-made skirting boards are cheaper. Consider retail models first.
Plastic or aluminum
Aluminum and plastic curbs are used more often than others . This is due to the large assortment, ease of installation and affordable price (if we do not consider the products of European manufacturers).
Plastic
Plastic skirting boards are most in demand. This is the most budget option that has a lot of advantages.
pros:
- Low price (except European brands).
- Large assortment of shapes and colors.
- Ease of installation.
- Possibility of simulating any material.
- Flexibility.
Cons (for the cheapest ones):
- Low strength.
- Burnout of colored models in direct sunlight.
Plastic borders are decorated with a coating of PVC film of various colors and shades . The second option is a coating made of aluminum foil that imitates aluminum or stainless steel.
Price range – from 50 to 300 rubles. per linear m . A high-quality plastic plinth “stainless steel” or “aluminum” looks no different from its metal counterpart and lasts for many years.
It can be useful:
Everything about do-it-yourself kitchen renovation
How to make a kitchen apron with your own hands
All about sockets on the kitchen apron
Aluminum
Aluminum plinth is more expensive than plastic, but has a number of advantages.
pros:
- long service life;
- strength and scratch resistance;
- heat resistance;
- does not fade in the sun;
- high quality;
- easy installation.
Minuses:
- more expensive than plastic (about 1.5-2 times);
- not flexible (the apron wall must be perfectly flat).
Aluminum skirting boards have a durable anodized matte or glossy finish , sometimes imitating stainless steel. All connecting elements are made of ordinary plastic, without decorative coating. Price – from 150 to 400 rubles. per linear meter.
Reference! Length of finished kitchen skirting boards made of plastic and aluminum: produced in Russia, China and Poland - 3 and 3.05 m, Italy (Opes, Volpato, etc.) - 4, 4.2 and 5 m, Germany (Rehau) - 3.7 , 4 and 4.2 m.
How to attach a plinth to a tabletop
There are two main methods of attaching kitchen skirting boards - with self-tapping screws and glue.
Fastening with self-tapping screws
This is the most common and reliable installation method. The technology is as follows :
- Separate the decorative baseboard panel from its base.
- Decide on the number of required mounting elements: plugs, internal and external corners.
- Pay attention to the internal and external corners of the walls in the work area. If instead of right angles there are rounded elements (for example, an inserted corner profile for tiles), make the necessary adjustments to the mounting corners (cut them to the desired shape).
- Before starting work, take measurements of each of the segments of the future composite plinth structure, cutting the base taking into account the size of the mounting elements.
- Pay attention to the design features of the set of mounting angles and plugs. In some models they are attached to the base of the border, in others - to its front decorative panel. The length of the segments of all components depends on this.
- Clean the work area thoroughly. If the baseboard does not have a high-quality elastic seal around the edges, apply a small amount of silicone to the countertop before installation, having previously degreased the surface.
- Start installing the base from the simplest area, from the corner, screwing in the screws in increments of 20-30 cm. It is recommended to pre-mark the drilling locations by pressing on the base with an awl or a sharp screwdriver. If there are holes in the base of the plinth, this simplifies the matter.
- Use the “correct” self-tapping screws for installation: galvanized or brass. "Black" ones can become rusty over time. Select the size of the screws based on the installation method (to the wall or to the tabletop) and the model of the baseboard. When mounting to a wall, use dowels.
- Install the bezel trim by snapping it onto the base. Some curb models require you to first install the mounting bracket. Close the ends of the plinth with plugs and place them on glue for reliability.
- If you have problems with the front panel snapping into place, check the mounting of the base. Sometimes it is necessary to reduce the pitch of the screws, or loosen or tighten some of them.
Important! Buy skirting boards that have an elastic silicone seal around the edges. With it, the use of silicone sealant during installation is not necessary.
Glue mount
Liquid nails are used as glue; for artificial stone borders , special two-component acrylic-based adhesives are used. The glue must match the color of the countertop, otherwise the joints will be visible. Glue is applied using manual dosing guns.
The algorithm for performing the work is similar to the first method:
- Detach the baseboard from the decorative panel.
- Take measurements and cut the required sections of the future composite structure, taking into account the size of the mounting elements.
- Thoroughly clean the work area and degrease surfaces.
- Apply glue in a thin, even layer along the entire length of the segment. Place the base of the baseboard and press it firmly with your hands. Wait until the glue sets. Install the inner or outer mounting bracket.
- Measure the required length of decorative panel. To do this, insert one end into the corner and snap it onto the base. At the other end, mark where the panel will be cut, approximately 2mm from the edge of the tabletop.
- Cut the panel to the desired location and snap it all the way into place. Place the plug on the end of the plinth and place it on the glue to be secure. If measured correctly, it should be flush with the end of the countertop.
- Install the remaining sections of the composite plinth structure in the same way.
Important! Some flat models of stainless steel borders have a special self-adhesive layer. They are “set” on acrylic silicone sealant. The only condition is a perfectly smooth surface of the kitchen apron (fastening only to the wall).
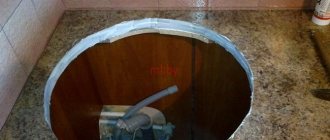
Borders made of artificial stone, marble or granite are installed by professionals .
Fitting and installation are carried out together with the installation of the countertop and the entire kitchen unit. It is not recommended to do this yourself: you need a special tool and experience working with stone.
Installation of baguette
When ordering a ready-made kitchen, the price usually includes assembly. This will include installing a kitchen baseboard on the countertop. If you want to save money or are putting together your own individual project, then you should figure out how to do it correctly.
The following assembly instructions will help you with this.
Checking the contents
Before you begin installing the frieze, make sure you have everything you need. Running to the store in the middle of work can be inconvenient.
It will be even worse if the missing part does not have a suitable color, for example. And half of the kitchen is already equipped.
So we should have:
- the base part of the baguette, installed on the wall and tabletop;
- the external part responsible for decoration;
- plugs;
End cap
- connectors for straight and corner joints;
- fastening accessories.
Installation procedure
By adhering to the following sequence of actions, you will get rid of unnecessary difficulties when installing the fillet yourself:
- We take measurements of the kitchen countertop. We cut the baguette according to them. For this operation it is best to use a hacksaw with a fine tooth. Suitable for any type.
- We take the base part and place it at the installation site.
Separating the base
- Using a hammer drill, we drill the attached part right through at the site of subsequent fastening.
- We hammer the plastic parts of the dowels into the finished holes. Then we screw in the metal parts, securing the base part of the frieze. It is most convenient to screw in with a screwdriver.
- If we attach the fillet to the tabletop, then we use ordinary self-tapping screws, as shown in the figure below:
How to attach a kitchen plinth to a countertop with self-tapping screws
An important point: when installing the base, it must be set using a level.
- We mount the decorative part, snapping it with special fasteners.
- We install end caps at the edges of the frieze. We fasten the corners with corner connectors.
Corner part of the fillet
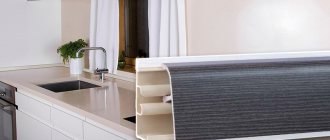
- Using silicone sealant, we treat the joints of the connecting parts. Also, if necessary, we treat the joints of the baguette with the tabletop, additionally securing it. In this case, it is very convenient to use wall rims. They serve as a kind of frieze for the frieze, tightly closing any possible gap.
Example of a wall rim
- Installation of the kitchen plinth on the countertop is complete!
Installation is complete