We process the edges of the tabletop with an edge
If the installation of the countertop in the kitchen involved a figured cut of the front part, then the edges must be covered with an adhesive edge that is the same shade as the countertop. An installation technician is not required, because a hand-finished countertop will be just as good.
To do this, follow the order:
- It is necessary to heat the iron to medium temperature so that the edge does not burn (check on a small section).
- Then the adhesive side of the edge tape is applied to the end.
- Heat the edge slowly to avoid creases. Creases not only spoil the appearance, but also accumulate water and dirt, which will quickly ruin the kitchen unit.
- After gluing, wait until it dries and cut off the excess with a construction knife.
- The cut edge is sanded to make the end smooth and rounded.
Interesting! If the purchased edge does not have a layer of glue, then you can take “Moment for Wood”.
How to install a concrete countertop
In the kitchen, you can install a concrete countertop, and then tile it or polish it to resemble artificial stone. In this case, production and installation are carried out simultaneously. Here's how it's done:
- The cabinets are aligned so that their height along the wall is the same, after which a base (made of plywood or chipboard) is laid on them. In this example, concrete is poured onto the old tiles.
- The base is securely attached to the top of the furniture, after which formwork is installed on its sides.
- The formwork is sealed with polyethylene, and reinforcement is placed inside it. The area where the sink will be installed is fenced off with a ring of metal strip.
- A cement mortar is prepared - cement M400, sand and crushed stone in a ratio of 1: 2: 2, and a plasticizer must be added to it.
- For countertops imitating stone, dyes are added to the solution.
- The solution is poured into the formwork, leveled (so that the height along the wall does not have differences) and covered with polyethylene. The solution is left to dry - this will take about a week.
- Finishing a concrete countertop begins with rough sanding, after which the tiles are glued and the seams are grouted. If an imitation of stone is created, the concrete is processed with a grinder, after which a foam filler is applied to it.
Support the project - share the material with your friends on social networks:
We install the end
To install end caps for the countertop, you must:
- Clean the surface from dust and apply silicone sealant.
- Then the sealant is applied to the end strip and secured with self-tapping screws. It is important that the bar protrudes no more than 1mm. around the edges. In order for the strip to sit tightly, you need to press down on the plate to squeeze out excess sealant. If the hole in the strip is small for the screw heads, then carefully drill it out with a drill with a diameter of 8 mm.
- After fastening, the end strip for the table top is cut with a hacksaw if the length is too long. The edges must be processed with a file so as not to get cut during operation.
How and with what to attach the tabletop to the cabinet or table?
Most often when assembling furniture, you are faced with attaching a tabletop or lid to a base in the form of a cabinet or a simple desktop. There are four ways to mount the top cover (namely, the tabletop) to the base of the furniture.
Through and through, with the help of confirmations (euroscrews)
This is the easiest way. Used in cases where the presence of through holes on the surface is not critical. For example, when the cabinet is above eye level and the tabletop acts as a lid. Or an overhanging (overhead) visor.
It's simple: the end of the base is drilled under the confirmation using a drill with a diameter of 5 mm. A hole is also drilled in the lid in proportion to the existing overhangs, but this time for a wide part of the confirmat 7 mm with a countersink for the cap diverging to 10.5 mm.
From the inside, to the corners
The method is no less simple. The only drawback will be the fasteners protruding from the inside.
Any corners can be used.
If you do not plan to move the furniture often or lift it by the lid, you can use plastic corners, as for fastening shelves.
Metal corners are much stronger, but look less aesthetically pleasing.
If the design of the cabinet or table is hollow, look for metal furniture corners on sale that can be closed with lids.
Fastening the tabletop with eccentrics (minifixes)
Installing an eccentric coupler requires some skill and precision. It is rightfully considered a more civilized, “invisible” fastener. Among the advantages, it is worth highlighting the possibility of repeated assembly and disassembly of furniture (removing the tabletop) while maintaining the quality and strength of the fasteners. What the same corners on screws or confirmations cannot “boast” of.
The difficulty of installation lies in the marking and preparatory preparation of holes. In order to install the minifix to attach the tabletop, you will need drills with diameters of 7 and 10 mm, as well as a cutter with a diameter of 15 mm.
Using self-tapping screws to the slats - this is how you attach the kitchen countertop to the cabinets
This method of fastening is possible if slats are included in the design of the table or cabinet. They are designed by laying the length from one sidewall to the other and a width of 80-100 mm.
The kitchen countertop is fastened in the same way - it is attached from the inside using long 3x25 or 4x30 screws. The planks are pre-drilled using a 5 mm thick drill. The only caveat for the kitchen countertop is the fastening of the slats in places where there is a need to cut into the sink or hob. In these cabinet tables, the slats are turned upside down so that they do not interfere with the cut-in. Or they don’t put it at all.
What is good about this method? It provides sufficient structural rigidity.
- The planks themselves strengthen long tabletops, preventing them from sagging under load.
- You can safely lift and move a table or cabinet by the tabletop - the fasteners will hold up.
- The fasteners also allow for repeated assembly and disassembly. You can always pull the tabletop from the inside in another place, and plug the previous holes, because no one sees them there.
When I design furniture - tables, cabinets, chests of drawers - I always lay strips under the tabletop. In my opinion, this is the simplest and most reliable method of fastening.
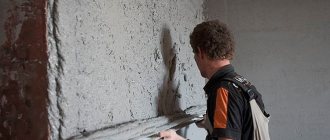
Installation of skirting boards
Installing a plinth will allow you to close the unsightly joint and prevent water from entering. The plinth can be glued or screwed with self-tapping screws. An adhesive composition is suitable for ceramic surfaces. For wooden ones, you can use self-tapping screws.
Kitchen 5 sq. meters: how to make a kitchen beautiful and functional, 110 best design options- Coffee machine repair: how to care for the device and avoid breakdowns
Laminate on the wall in the kitchen interior - 100 best photo ideas
The steps for attaching with self-tapping screws are listed in the table below.
| 1 | We measure and cut part of the baseboard. It is important to treat the edges with an abrasive compound. |
| 2 | The mounting location is lubricated with silicone to prevent water seepage. |
| 3 | The profile is installed and secured with self-tapping screws. The gaps between fasteners should be no more than 30cm. |
| 4 | The decorative overlay is inserted into the grooves until it snaps into place. |
| 5 | The corner and end parts are treated with silicone and covered with overlays. |
If you need to glue the baseboard, then use the same instructions, but instead of tightening the screws, degrease the surface and stick the profile.
Methods for connecting tabletop parts
Three types of connections for kitchen countertops are used:
- joint to joint without euro-saw;
- joint to joint using a euro saw;
- the use of a T-shaped profile made of aluminum alloy.
Euro-sawing is a method of processing the ends of a tabletop according to a pattern. That’s what it’s called – patterned. In this case, the ends are cut on a milling machine. Some manufacturers, in order to reduce the cost of the work carried out, use a format-cutting machine for this. The planes of the ends on such a machine turn out to be uneven with an allowance of a millimeter or more. Therefore, the result is an incomplete fit of the end planes and the appearance of gaps between the joined parts of the tabletop.
The ends processed on a milling machine may form a gap when joining, but it is very small - fractions of a millimeter. Therefore, it is not visible to the naked eye, and the surface appears solid. But this is achieved under two conditions: the milling machine must be level, and the patterns must not be worn out. In addition, on dark countertops the joint with the euro saw is practically invisible.
Connecting the tabletop using a euro saw
But these two types of connection have several disadvantages. Since the euro saw is a locking connection, it is impossible to rotate the parts of the plane relative to each other - the integrity of the structure will be interrupted and a gap will form between the parts. Therefore, if the corners in the kitchen are uneven, then when installing the kitchen set in the corner of the room there will be a gap between the wall and the countertop. If you try to close the gap by moving the plane, a gap will appear between the parts of the tabletop. You can hide the gap near the wall with a table furniture plinth. But if the curvature of the angle is large, then this device will not help.
But, if a U-shaped set was ordered for the kitchen, then it will not be possible to solve the current problem by any means. Sometimes, if the curvature of the walls in the room is small, then it is better to install exactly along the walls, and leave gaps between the parts of the tabletop. They will subsequently have to be covered with a T-bar.
Read also: Types of door closers for kitchen cabinets
The third method of connecting pieces of countertops using a T-shaped profile is carried out without a Euro joint, because the connection is closed from above with a profile strip. It should be taken into account that the main requirement for docking is tightness. Therefore, the vertical post of the plank and the ends are treated with silicone sealant.
The aluminum profile has another important advantage in comparison with the euro saw. Most often, the parts of the countertop are joined in the area where the sink is installed, which is usually mounted in the corner, because this is where the utility lines are installed. Eurozapil has the least protection from moisture, so there is always a possibility that the tabletop material will begin to swell at the joint. In this regard, the aluminum profile is excellent protection, because it is treated with sealant both at the joint and along the wings of the vertical strip. In addition, it is almost impossible to disconnect such a connection. It can only be torn apart. Therefore, if water gets under the profile, the wings of the horizontal bar will prevent the plastic from swelling.
Features of installing countertops made of different materials
Depending on the material, there are many options for countertops: stone, chipboard, MDF, wood, metal, glass. Knowing the characteristics of the materials will help you properly secure the countertop in the kitchen set.
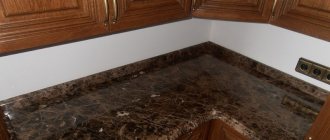
Stone and acrylic
A DIY stone kitchen countertop is attached with glue. However, it will take experience to properly cut the panel and install the heavy slab. On the positive side, they note that the surface does not scratch, does not absorb dirt and is easy to clean.
“Liquid stone” or acrylic is poured onto the surface while it is hot. The resulting coating is not scratched and can withstand high temperatures and water. However, acrylic is expensive.
Chipboard and MDF
Many people are interested in how to install a countertop based on laminated chipboard or MDF. The material consists of resins and wood shavings, so it is prone to swelling from moisture. The laminated coating does not allow water to penetrate the structure and deteriorate the texture.
However, the sides are often open because the surface needs to be sawed to fit. To prevent the ingress of moisture, be sure to treat all open areas with silicone sealant and install an end strip for the countertop.
Tree
It is not uncommon to install a wooden tabletop. How is a wooden tabletop attached? With self-tapping screws, of course. But it is important to treat all parts with water-repellent agents. To maintain the original appearance, constant restoration is necessary, but strength and long-term operation are guaranteed.
Metal
Among the metals used in kitchens, stainless steel is used. It is durable and resistant to high temperatures. But it is not scratch-resistant, so you need to use it carefully. The metal surface can have a matte or glossy texture.
Glass
It is not recommended to independently attach the tabletop to kitchen floor cabinets made of glass, due to its fragility. Although the glass for them is tempered using a special technology, you cannot hit it too hard to prevent microcracks from appearing. With careful handling, glass will last a long time.
How to properly replace a countertop
If we are talking about replacing the surface on an already installed headset, then you will have to proceed as follows:
- The old surface is dismantled without damaging the kitchen unit - the sink and baseboard are removed and all fasteners are removed.
- The new surface must be adjusted to the wall and to the existing dimensions of the furniture.
- The height is controlled very carefully as it is important that the structure rests evenly on the existing pieces of furniture.
- The resulting edges on surfaces made of chipboard, artificial stone, or wood must be sealed. This is especially important for laminated surfaces - moisture getting inside will lead to swelling and destruction of the structure.
- Fastening the tabletop also involves connecting several elements into one, so that their height along the wall is the same, and there are no gaps between the elements.
In this video, the master shows how to replace the surfaces of free-standing cabinets with a single tabletop without joints.
Photo ideas for countertops
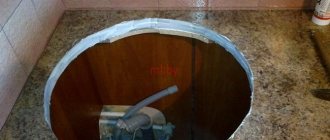
Installation of a mortise structure
First of all, a cutout is made in the countertop for the sink. To do this, use the template that comes with the sink. If there is none, then make it yourself. To do this, the sink is turned over and placed on a cardboard sheet. A line is drawn along its perimeter to indicate the shape of the hole. It can be round or rectangular.
Next, the same line is laid inward from the drawn line, showing the shape and dimensions of the landing area. Application distance is 1-2 centimeters. A hole in the cardboard is cut along the second line. After which the template is applied to the countertop at the exact location of the plumbing fixture, an outline is made on the surface, along which holes for the sink are cut.
The easiest way to cut is to drill many through holes around the perimeter of the marked line with a small drill with a diameter of 6-8 millimeters. A jigsaw blade is inserted into one of them, with which the material is cut around the perimeter. If the tabletop is made of laminated chipboard, then there is no need to make many holes, since it is a rather soft base, and a jigsaw will easily cut it.
Next, all cut planes are treated with silicone sealant, and butyl tape is laid on top of the tabletop around the perimeter of the cut hole. Both seals are designed to seal the joint and perform additional waterproofing functions. Now the most important point is attaching the sink from below. For this, a special metal bracket is used, consisting of two parts: a clamp and a holder. The first one has teeth at the end, which, when pulled together, will cut into the tabletop material and prevent the fasteners from moving. The other end is installed in the side of the sink, holds it, and when tightening the screw, presses the product to the plane of the table.
Both parts of the fastener are connected to each other with a screw, often spring-loaded. By screwing or unscrewing the screw, the clamp is strengthened or loosened, respectively. In this case, the connection between the two parts is hinged, that is, the lower clamp rotates relative to the upper holder, which simplifies the installation of the fastener.
The bracket is made of metal: stainless steel, galvanized. Today, manufacturers offer fasteners with plastic inclusions. It is clear that metal products are stronger. As in the case of overhead sinks, all threaded fasteners are screwed in with a screwdriver.