The entire preparation process consists of several stages:
- cleaning walls from old coating (paint, whitewash, wallpaper);
- cleaning the surface from dirt/debris;
- getting rid of cracks and irregularities;
- priming work;
- choice of wallpaper and glue.
Wall cleaning
The complexity of the process will depend on what is in the “source” - a completely new apartment in a new building, walls with remnants of old wallpaper or oil paint.
Preparing the walls in a new building
Entering a new apartment, the newly minted owner of square meters sees absolutely gray/rough walls, poorly installed sockets/switches - with this condition of the surface it is impossible to glue wallpaper right away. To prepare the walls for wallpapering with your own hands you will need:
- Spray - this way, absolutely all the unevenness/cracks/ on the walls are filled with liquid. The thickness of the spray on the walls should not be large - do not overdo it, the maximum permissible layer is 6 mm.
- Apply a primer to the surface - its layer should also be 6 mm, but if the walls are too uneven, then several layers can be applied. The main purpose of using a primer is to level the surface.
- Apply a finishing layer of plaster to the primed surface - its thickness is only 4 mm; finishing plaster is a thin layer that can be easily rubbed off.
- Sand the prepared wall with fine sandpaper to make the surface as even as possible.
Only after all the above stages of preparatory work have been completed before wallpapering in a new building will it be possible to begin finishing work.
Preparing a previously untreated surface
As a rule, the material of untreated surfaces is brick or concrete.
Preparing the concrete surface
- Try cleaning dry with spatulas first. Then clean (rinse and dry) the surface of debris, dust and dirt. Let dry thoroughly.
- Before plastering a concrete surface for wallpapering, it is recommended to use a deep penetration primer for monolithic concrete (concrete blocks and other non-absorbent smooth substrates). Let dry thoroughly. This kind of primer can be purchased at any self-respecting construction stores. There are also a great many companies producing it - both in the domestic and foreign markets.
- After deep penetration primer, cover the surface with ordinary gypsum or gypsum-lime plaster for walls. Let dry thoroughly.
- Sand the plastered surface with fine or medium-grain sandpaper.
- Apply a water-dispersion primer. Let dry thoroughly.
- Prime with diluted wallpaper glue (be sure to maintain the necessary technological pauses between layers of primer, indicated on the boxes with the selected wallpaper glue, so that the layers can dry). It is preferable to prime with the same glue that you will subsequently use to glue the wallpaper. Thus, glue for vinyl and non-woven wallpaper differs greatly not only in composition, but also in “behavior” on the walls. It is allowed to prime with universal wallpaper glue. The ratio of water and glue when applying soil is individual; it should be looked at on each pack of glue.
Preparing the brick surface
The principle and procedure for working with brick surfaces are similar. However, brick walls will require more layers of gypsum or gypsum-lime wall plaster. It is recommended to plaster a brick wall in several stages. At the first stage, all the cracks between the bricks are filled, at the second and subsequent stages, a general leveling of the wall surface is carried out.
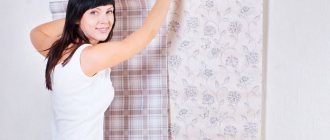
How to remove old wallpaper without much effort
If there are remnants of old wallpaper on the walls or they are completely covered with them, then you need to prepare a tool that will greatly simplify the preparation of walls for wallpapering. You will need:
- - spatula - it is optimal to have both a narrow and a wide one;
- — sprayer or roller/whitening brush;
- - ordinary water;
- - aggressive agents - vinegar, baking soda, dishwashing detergent.
Removing old wallpaper from the walls is easy - in some places it is enough to pull a corner with your hands and remove the sheets, but more often a spatula and water are required.
Wallpaper on the walls should be moistened with water (with a roller, brush or spray), then removed with a spatula. If vinyl/non-woven wallpaper was previously pasted, the process becomes more complicated:
- moisten the wallpaper on the walls with water - this needs to be done quite generously;
- using a spatula, remove the top layer of wallpaper - vinyl/non-woven wallpaper consists of several layers of paper;
- We wet the walls again with water and get rid of the remaining paper.
Fiberglass wallpapers are distinguished by their ease of use, original texture and durability. Craftsmen say that glass wallpaper has to be literally “gnawed out” from the walls - heavy glue is used when applying it. Removing fiberglass wallpaper can be done in two ways:
- using a special solution - it is not cheap, but the result will be achieved quickly;
- use a grinder (you can get by with a grinder) - every man has such a tool in his household, so no financial costs are expected.
If you need to get rid of liquid wallpaper, you will need to prepare a softening solution - dilute 2 tablespoons of any detergent in a liter of warm water. Moisten the surface with liquid wallpaper with this solution so that the naked eye can see how saturated the material is with moisture. It is easy to remove liquid wallpaper softened by the solution from the wall using a spatula. For liquid wallpaper, there is another option - simply sand it off with a special tool. But you need to take into account the nuances :
- To prepare the softening tool, you will have to press it tightly against the surface being treated - considerable physical strength will be required;
- There will be a lot of dust in the room - this is harmful not only for furniture and flooring, but also for humans.
In the process of preparing the walls, liquid wallpaper can be removed even after the surfaces are normally wetted with water - it all depends on how long the old coating has been in use.
You will find tips on how to quickly remove old wallpaper in the video review:
Non-woven based wallpaper gluing technology
I would like to highlight general points that will help you understand the principle of wallpapering walls with non-woven wallpaper:
- Wallpaper strips are cut depending on the height of the wall and the margin for adjustment.
For example, if the wallpaper is monotonous (without adjustment), then we only need to take into account the height of the wall and the margin for trimming at the ceiling and floor (no more than 10 cm), and if the wallpaper has a pattern that requires adjustment, then accordingly we need to take into account the height of the wall, and a margin for fitting, and a margin for trimming. The margin for adjustment depends on the vertical pitch of the pattern; If you are afraid that you may incorrectly calculate the length of the strip required for fitting, then cut the wallpaper in place. That is, you need to glue the first strip, then unroll the roll, match the pattern on the roll with the already glued strip, make a mark and cut off the strip of wallpaper - Wallpaper glue is applied to the wall with a roller to an area slightly larger than the width of the wallpaper strip; it is more convenient to coat the corners with a brush;
- Wallpaper strips are glued end to end. The strip of wallpaper begins to be glued from top to bottom, slightly leading to the ceiling, and at the same time it is aligned either along a vertical drawn line (if this is the first strip on the wall) or along the edge of the already pasted strip of wallpaper;
- Then the wallpaper strip is smoothed out; air bubbles and excess glue must be expelled. Movements must be made from the center of the strip to its edges. For smoothing, use a plastic spatula, a dry, clean cloth or a wallpaper brush;
- The glue protruding from the wallpaper joint must be removed with a damp, clean cloth;
- The wallpaper joint must be carefully ironed; a special roller is used for this, but you can also use a plastic spatula;
- Excess wallpaper on top and bottom is trimmed with a utility knife using a metal spatula.
Preparing walls with oil paint
If you have to make repairs in an old house or apartment, inherited from your great-grandmother, then you need to know how to prepare the walls for wallpapering if there is oil paint on the surfaces. It was this finishing material that was used 50-60 years ago for renovations, so you can still find a “miracle of design thought” to this day. What to do? Firstly, you can use a hair dryer - it heats the surface (the paint begins to bubble and rise above the wall), then the unwanted material is removed with a spatula. But keep in mind that heated paint releases toxic substances into the air, so you should keep the windows open while working.
Secondly, you can remove the paint from the walls with a sander, but in this case you need to close all the doors and plug the cracks so that dust does not get into neighboring rooms. You can only work in a special mask, because it is very difficult to breathe while sanding walls.
Thirdly, there are special solutions on sale for removing paint from walls - they are a little expensive, but they quickly get rid of the unwanted coating.
Sometimes none of the above methods for removing paint from walls “works” and in this case you need to either prime/putty the wall or make notches on the surface.
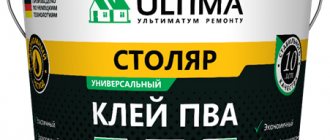
What types of glue are there?
Conventionally, the product is divided into three popular groups:
- Products for working with light types of coatings (this includes paper);
- Designed for heavy materials;
- A universal product that is suitable for both types.
Wallpaper made on non-woven material uses glue that is intended for heavy coatings. However, this is not the only product, because besides it, gluing can be done using universal glue, but it has one drawback: it is inferior to special products in terms of environmental friendliness.
On the shelves of a modern store there are hundreds of types of products, both from Russian manufacturers and foreign representatives. Each has advantages and disadvantages. In order not to get confused in the choice, professionals recommend looking at the brand of glue and coating; they should be similar; only in this way can a high quality finish be achieved.
It is important to understand that price is not the main factor in the quality of glue. So, some users claim that you can find a suitable product in every price segment. And often branded and expensive ones are inferior in some characteristics to budget models.
There are times when a buyer comes to a store, examines a product and sees the strange concept of “Indicator”. You should know that this additive affects the coloring property. That is, thanks to this, when the product is applied to the canvas, it begins to acquire a specific shade. With this property, it is much easier for the user to notice untreated areas.
The situation is completely opposite with mixtures intended for non-woven materials; such products rarely contain a specialized additive. Because there is a possibility that the color may show through the wallpaper, which will create more additional problems for the user than provide a ready-made solution. Therefore, adhesive products with indicator are more suitable for standard types.
Removing stains
Have you removed the old wallpaper, got rid of the paint, but found some stains on the surface of the wall? You definitely need to get rid of them! Otherwise, there is a risk that they will appear on the new wallpaper in exact accordance with the picture seen.
If the stains are mold/fungus, then you need to saturate the walls with several layers of a special primer. Ideally, check the quality of insulation on the outside of the walls, correct defects, or insulate the walls outside/inside.
Sometimes rust stains are clearly visible on cleaned walls - this is how rust appears from the metal frame of cast surfaces. There is only one way out - at the place where the stains appear, the entire layer of plaster is removed, the surface is treated with an anti-corrosion agent, then the plaster is applied again.
What to remember when working with glue
Choosing the right wallpaper glue is half the battle. It is important not to make mistakes when working with it. To prevent the wallpaper from falling off immediately after gluing, you need to remember the following points:
- Prepare the walls carefully. The surface must be cleaned of old finishes, and cracks and defects must be filled with putty, sanded and covered with primer.
- Dilute the glue strictly according to the instructions. The water can be cold or warm, but it must be clean. The material is added to the liquid little by little, without ceasing to stir, to avoid the formation of lumps. The mixture is left for some time until the flakes dissolve and the consistency becomes homogeneous.
- Apply the material from the center to the edges with a special brush or roller in a thin layer. It is convenient when the adhesive composition contains a colored additive. Then the unpainted areas are clearly visible.
- Do not throw away the remaining glue. It will be useful for gluing corners.
If you decide to save money, you can make glue from flour and starch. Only in this case you will have to tear the wallpaper off the walls almost with your teeth. It’s easy to avoid such hassle – buy special glue for a certain type of wallpaper. Considering that the stores have quite budget materials, the costs will not be so ruinous.
Getting rid of dirt and debris
After completing the first stage of preparing the walls for wallpapering, you need to thoroughly clean them of debris and dirt - use a vacuum cleaner or a broom with water. During the cleaning process, you may find cracks and falling plaster - these defects must be removed. If the crack is small, then it is simply covered with putty. If the crack is too wide, proceed as follows:
- clean the crack from dust/dirt, and if necessary, widen it - all falling off fragments of plaster must be removed;
- moisten the crack cavity with water;
- Apply putty to it and smear it thoroughly, trying to align the crack in one plane with the entire surface of the wall. Remember: when sealing cracks, the movements of the spatula with putty must be made in the vertical direction.
Criterias of choice
What criteria should be taken into account when choosing a suitable wallpaper adhesive:
- wall material;
- type of wallpaper;
- wallpaper weight;
- maximum room temperature;
- humidity.
When choosing glue, you need to find out how safe it is and whether it contains components that prevent the appearance of fungus and mold. Also, knowledge of the setting time of the glue cannot be neglected.
When choosing wallpaper glue, it is important to take into account many nuances - otherwise wallpapering may not go well.
Other important properties of the glue by which it is chosen are:
- density;
- moisture resistance;
- pH (it should be 6 or 7, otherwise stains may appear);
- life time;
- consumption;
- drying time of wallpaper;
- price per package.
It is worth considering a large number of additional criteria.
There are a number of mistakes made when choosing glue. For example, buying universal glue without knowing how to store it. There are detailed instructions for this, which can be found on the packaging - it is very important to take them into account.
If wallpaper is glued to a painted wall surface, then an adhesive should be suitable, which, in addition to methylcellulose, contains a large proportion of PVA.
For walls that have previously been covered with plaster and putty, it is better to take adhesive mixtures that contain carboxyl methylcellulose, which has very high tenacity.
When you need to hang wallpaper in the kitchen or bathroom, glue with a large amount of antiseptics and antibacterial additives is suitable. The reason for this is simple - these rooms have very high humidity, so without careful treatment, fungus and mold may appear.
Each glue has its own characteristics, so it is very important to study the composition and instructions for use and storage of the composition
Getting rid of unevenness
Take a closer look at the prepared walls - do you see irregularities, holes, “potholes”? You definitely need to get rid of them so that the wallpaper lays on the surface flawlessly. There are only two methods that can be used to level the walls:
- plastering - the process requires skill and some experience, and may take several days;
- installation of drywall - financial expenses will be required, but the installation process is simple, within the control of every person and takes little time.
If you are installing drywall, then prepare putty and reinforcing tape in advance - this will need to be used to treat the joints/seams of the drywall.
If you decide to plaster the walls yourself, watch this video review: a master class on plaster is conducted by a specialist:
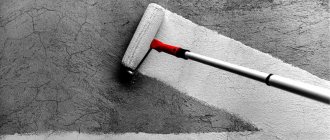
Whatever is chosen for leveling the walls, the next stage is primer, and it should not be ignored. When applying the primer solution to a cleaned and leveled surface, a thin film is formed - it serves as a factor in the strong adhesion of the wallpaper to the walls. Before priming, you need to clean the places where the putty was applied - this can be done with fine sandpaper manually.
It’s only after all the work mentioned above that you can prepare directly for wallpapering. But first you need to select them, and at the same time select the glue.
Rating of the best manufacturers of glue for non-woven wallpaper
Methylane Interlining Express
A popular German product that almost every buyer knows. The great advantage of the glue is its universal composition, which is suitable for almost every type of wallpaper, from embossed to heavy. In addition, the product shows high resistance to temperature changes. The clutch occurs quickly and efficiently.
The composition contains antifungal additives that will not allow the fabric to be destroyed, even in conditions of high humidity. Also, for high adhesion, the manufacturer added a unique composition to the product, which increases its properties several times and ensures reliability, even when applying the canvas to drywall.
Due to the fact that methylcellulose is present in the composition, the glue can be used to align joints, since the wallpaper is easy to slide, which makes it possible to instantly change.
The product is packaged in 250 g. If you dilute the glue in 10 liters of water, the resulting composition can cover an area of up to 80 square meters. m. To use the solution, only room temperature is required. The finished mixture can be stored for a week, but it must be in an airtight container. The shelf life of the dry composition is 48 months.
The average cost is 270 rubles.
Methylane Interlining Express
Advantages:
- Price;
- Reliability;
- Good brand;
- Strong degree of adhesion;
- Homogeneous consistency;
- Ease of manufacture;
- Quality.
Flaws:
- Not detected.
"QUALITY" non-woven
A good Russian product that is in demand among many buyers. According to users, the big advantage is convenient opening; just pull the tab and that’s it. In addition, the box can be easily secured with a lock that will prevent the mixture from spilling. The composition of the product is almost as good as that of foreign representatives. Manufacturing takes place in compliance with all European standards.
In stores you can find sealed packages whose weight does not exceed 200 grams. The maximum operational life is 2 years. In order to knead the glue, a person needs to spend about 10 minutes, which is also a big plus.
The average price is 100 rubles.
"QUALITY" non-woven
Advantages:
- Ergonomic packaging;
- Speed mixing;
- High adhesion;
- Price;
- No unpleasant odors;
- Clear instructions.
Flaws:
- Not detected.
"Moment" Nonwoven
Popular glue in Russia, the brand of which is known to everyone. The company produces a composition that is suitable for each type of non-woven wallpaper and will ensure high-quality adhesion for the entire period. The main advantage of the product is that it is affordable, so the user will buy 500 grams of the product for 389 rubles and will receive not a standard mixture, but a product containing various additives that prevent the development of fungus and mold.
The only drawback is that lumps may form if you deviate even slightly from the instructions. Therefore, the powder must be added in a timely manner and slowly.
On store shelves there are models that contain 270 and 500 grams. dry mixture, which makes it possible to choose the most suitable option. Shelf life is 4 years in packaging and 10 days in liquid form.
The average price is 389 rubles per 500 grams.
"Moment" Nonwoven
Advantages:
- Budgeting;
- Adhesion;
- Reliability;
- Famous brand;
- Prepares in 15 minutes;
- Easy wallpaper correction.
Flaws:
- Not found.
ECON Non-woven
One of the best representatives of the German brand, which buyers like for its accessibility and adhesion. In addition to the model designed for non-woven wallpaper, universal products are available that are suitable for all types. At the same time, the composition remains at the highest level. The mixture contains an antifungal additive, which provides the user with high reliability. To get the finished composition you will need water at room temperature and 15 minutes of free time. When mixing and adding dry matter correctly, the chance of lumps forming is almost zero.
The product is stored at a temperature of -20...+30 degrees for 48 months - in dry form and for several days as a solution. Moreover, in a couple of days the composition will not lose its adhesive properties and will easily cope with non-woven wallpaper of any type.
The average price is 102 rubles per 200 grams.
ECON Non-woven
Advantages:
- Low cost;
- Glues well;
- Convenient packaging;
- Reliability;
- Fungal supplements;
- Shelf life.
Flaws:
- Not detected.
Imperial Starch Novidon “Exclusive”
High-quality glue in premium packaging that will appeal to most users. The mixture is homogeneous, takes a minimum of time and does not emit unpleasant odors. Setting takes a couple of minutes, reliability is high. High efficiency is also an additional advantage, since one package of 283 grams is enough for 40 square meters.
The product is stored for 4 years at almost any temperature in dry form and a week in liquid form, while the quality remains unchanged on the first day and on the last.
The average cost is 250 rubles.
Imperial Starch Novidon “Exclusive”
Advantages:
- Quality;
- Package;
- Reliability;
- Positive reviews;
- Does not leave stains;
- Does not emit odors.
Flaws:
- Not detected.
Quelyd "Special Interlining"
An excellent product that is suitable for almost any type of fabric. At the same time, it provides high adhesion and durability. Regardless of the weight of the wallpaper, it will stick tightly and will not come off in a year or decades. When applying the composition to the surface there will be no traces, because the solution is completely transparent.
There is no need to use a specific wall for pasting; the mixture shows good results both on drywall and concrete. In addition, when the user gets tired of such wallpaper, he can remove it with one movement, and there will be no traces of glue left. To ensure high quality and durability, additives are used to prevent the development of malignant bacteria. There are two options on the shelves: 300 and 450 g. The dry mixture is stored in sealed packaging for 4 years under standard room conditions.
The average cost is 330 rubles per 450 grams.
Quelyd "Special Interlining"
Advantages:
- Adhesion;
- Reliability;
- Quality manufacturer;
- Durability;
- Good composition;
- High shelf life.
Flaws:
- Not detected.
Kleo EXTRA 55
The product is used to work with all types of non-woven wallpaper. Provides good adhesion to the surface and has high performance. Sold in 250 gram packages. To protect walls from mold and mildew, the composition uses appropriate additives that prevent their formation. You can start painting the wallpaper after 120 hours.
The average cost is 360 rubles.
Kleo EXTRA 55
Advantages:
- High adhesive strength;
- Does not leave a stain after application;
- Does not form lumps;
- Prevents mold formation;
- Safe for health.
Flaws:
- Not found.
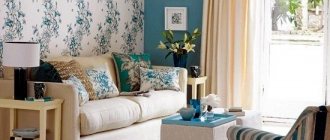
How to choose wallpaper and wallpaper glue?
We recommend reading: Calculating the amount of wallpaper
What experts recommend paying attention to when choosing the designated materials:
- Manufacturer - renovations are not done for a year (although there are those who like frequent changes), there will be people in the room all the time, so the quality of the wallpaper and glue must be at a high level. Only from well-known manufacturers can you get a quality guarantee and be sure of safety for health.
- Purpose - for each type of wallpaper you need to select a special glue, and you can find the markings on the packaging.
- Possibility of changing the design of the room - if you are a fan of frequent dramatic changes in styles, then it is better to hang wallpaper intended for subsequent painting. These are glass wallpaper - a relatively new finishing material, characterized by high quality, ease of application and long service life.
But even if the most expensive and high-quality wallpaper is purchased, and the glue is provided by the manufacturer itself, there is no guarantee of a successful final result. Everything will depend only on how the walls were prepared for wallpaper - following all the above steps, or ignoring some of them.
( 89 votes, average: 4.80 out of 5)
Interior decoration of the bath
How to glue cork wallpaper
Related Posts
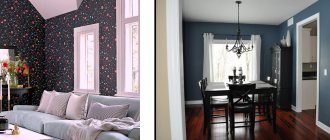
How to match wallpaper of different colors in the corner of a room?
This is one of the first questions that arises when covering walls with wallpaper of different colors. We will try to analyze it in as much detail as possible.
The method of joining wallpaper discussed below is called “trimming” or “trimming” the wallpaper in the corner.
The essence of the method is that the wallpaper is glued with a slight overlap, then a cut is made along this overlap, respectively, through two layers of wallpaper at once, the excess wallpaper is removed, and the joint is smoothed.
In my case, wallpapers of different colors are joined, so the boundary between the canvases should pass strictly along the corner of the room, and accordingly the cut is made along the corner, but if strict separation of the wallpaper in the corner is not required, then it is better to make the cut on one of the walls, stepping back a small distance from the corner (5-15 mm), this way the joint will be smoother.
An example of wallpaper joining in the corner of a room:
Step 1
. We need to draw two vertical lines on adjacent walls; this is done with a simple pencil. Since the width of the roll (in my case) is 53 cm, and the overlap needs to be about 5 cm, then you need to step back about 48 cm from the corner of the wall, in one direction or the other, and draw vertical lines using a building level or plumb line.
Step 2
. Then we need to apply glue within these lines. We take a roller and a tray of glue and carefully apply the glue to the wall, coating hard-to-reach places (corners) with a brush.
Step 3
. We take a strip of patterned wallpaper and carefully glue it from top to bottom, smoothing out the unevenness with a special plastic spatula, or you can also use a clean cloth or wallpaper brush.
In the photo below we see that the wallpaper is glued with an overlap on the adjacent wall within 5 cm:
To make it easier to fold the wallpaper onto an adjacent wall, you can make small horizontal cuts with scissors:
Step 4
. We cut off excess wallpaper that extends onto the floor or ceiling using a metal spatula.
Step 5
. Next, take a strip of “green” wallpaper and also carefully, aligning the left edge of the roll along a vertical line, glue the strip.
Step 6
. Carefully smooth out the wallpaper in the corner:
Step 7
. Next you need to take a utility knife. Using a metal spatula, carefully make a vertical cut along the corner of the wall to the full height of the wallpaper. Thus, we cut through two layers of wallpaper at once:
1. It is very important that the knife is sharp, then the joint will be neat and even.
2. It is much more convenient to make a cut with two people: one holds the spatula, the other cuts.
Step 8
. Removing cut strips of wallpaper:
In my case, the “patterned” wallpaper ended up under the “green” wallpaper, so I peel back the green wallpaper a little (photo above) and pull out a cut strip of the “patterned” wallpaper:
Step 9
. The wall under the folded wallpaper must be coated with glue using a brush, and then the wallpaper must be pressed tightly against the wall:
Step 10
. Smooth out the wallpaper at the joint with a plastic spatula. The wallpaper joint in the corner is ready:
If you use plain or striped wallpaper, then it is more correct to make the joint not in the very corner of the room, but on the wall, 10-20 mm away from the corner, this way it is easier to make a neat cut and the seam will be smooth
Pasting wallpaper in corners
As for how to glue wallpaper in the corners, this work is the most difficult for the master, as is the case with the area around the radiator and windows. But if you have to tinker with window and door openings, as well as with batteries, calculating, cutting and adjusting as accurately as possible according to the drawing, then with the corners the issue can be resolved faster.
The main thing is not to try to cover the corner with one sheet of wallpaper. This is a big mistake, since bulges and folds are sure to form in the corner. It is best to cut the strip so that it overlaps slightly at the corner. After it is thoroughly smoothed with a roller, you need to cut off the part that goes around the corner. To do this, you need to take a ruler and a stationery knife. On the other side of the corner, similar work is carried out. The result will be a joint along the corner line. It will not be noticeable, and no unevenness will appear in this area.