What you need to remove a crack on a mirror with your own hands
If a mirror cracks, it always upsets the owners. The search for a solution to the problem begins. There's just one caveat. It will not be possible to completely remove a crack in the glass. At home, not a single available remedy will help with complete restoration.
Some try to correct the situation with sanding, foil or even toothpaste, but all this will not make the crack disappear, but will only mask it for a while. For some, this will be an excellent way out of the current situation.
The question often arises - how to decorate a crack in a mirror with your own hands.
It is dangerous to carry out complex work at home, since a mirror is a rather whimsical object and only loves careful professional handling. But you can always find a way out of any situation.
If you can’t remove the crack, you can decorate it beautifully. This will not only save the mirror, but also refresh the interior. This may require various materials.
The most common techniques used for decorating a reflective surface are stencil designs, or their framing, the craquelure method, applying various designs and interesting frames. As you can see, there are really many ways and each of them is good in its own way.
On laminated chipboard or chipboard
To stick a mirror on laminated chipboard or chipboard, you can use mounting tape or liquid nails. The principle of operation is the same as with other surfaces. It is better to leave the glued structure overnight under a light load to create a stronger connection.
When it became clear how to glue a mirror to a cabinet, tile, metal, wood, concrete, or to walls with wallpaper, it was easy to carry out repair work yourself and decorate the interior. Pay enough attention to the choice of glue and follow the detailed instructions. You can't skimp on fasteners when it comes to large mirror plates.
What are the advantages of do-it-yourself mirror restoration?
There are several simple ways that anyone can do.
Not everyone immediately decides to restore a mirror with their own hands. This most often occurs due to ignorance of all the advantages of this process. But independent mirror restoration has a lot of positive aspects that can encourage you to carry it out. These include such aspects as:
- In small towns, or even villages, you can rarely find a master who can properly repair a mirror. Not everyone can restore amalgam. Decorating small flaws yourself is much easier than looking for a specialist restorer of this profile.
- Repairing damage to a cracked mirror is not a cheap pleasure. Most often, such a procedure will cost more than buying 3 new mirrors. And decorating with your own hands involves spending only on a minimum set, which often consists of one stencil.
- If a crack on a wooden surface can be easily covered with wax and this does not require special skills, then restoring glass is a completely different matter. Therefore, again, it is much easier to repair the crack with an interesting pattern that would match the interior. This definitely doesn’t require any special skills or knowledge, just paint and desire.
- It's no secret that a small scratch can turn into a big chip. This most often happens due to the transportation of the mirror to the workshop. And when the piece of furniture has already been delivered, it turns out that it cannot be restored. It is for this reason that it is better to leave the structure in its original place and take advantage of interesting ideas for independent restoration.
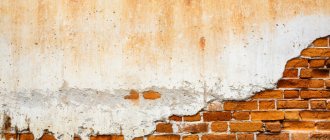
Even a slight blow is enough for a crack to appear on the surface of the mirror.
Required Tools
The following tools will be useful: sandpaper, mounting gun, pencil, ruler or tape measure. If you are going to screw the mirror onto the mount, then you will need a drill, a screwdriver, screwdrivers, regular drills, a diamond drill (to make a hole in the mirror), and a special mount for mirrors.
Which gluing option to choose is up to you to decide.
If you decide not to use “liquid nails”, but to attach them to the legs, then you need to make sure that they are manufactured accurately in height and, if necessary, install spacers.
How to repair a crack in a mirror with your own hands
Not everyone knows how to repair a crack in a mirror with their own hands. There are several ways to fix the problem. To do this, you will need a minimum set of tools, a little time and desire to bring the mirror into proper shape.
You can try to disguise the crack using various decorative elements.
Important! Since the methods involve the use of decor, you need to choose the right one for your interior.
How to remove using stencils
Stencils are a universal thing that can save you in different situations, and a crack in glass is no exception. There are many variations of stencils and they will suit every interior. To bring the idea to life, you need to purchase brushes of a suitable size, acrylic paints, a simple pencil, a regular sponge, masking tape, acetone (you can use nail polish remover) and, of course, a patterned stencil.
One of the most effective and simple ways to disguise small cracks in a mirror is to cover them with paint.
You can use this method as follows:
- Preparation of the workplace. It is necessary to lay out all the tools and materials in front of you at once so as not to be distracted by missing ones. Everything should be conveniently located so that work does not cause discomfort.
- It is more convenient to use ready-made stencils purchased in the store. If you wish, you can make them yourself. To do this, you will need the selected pattern and thick cardboard that will not allow paint to pass through.
- Before applying paints to the surface of the mirror, they are checked for color matching. It often happens that the shade in the jar is very different from the applied stroke. This can be done on any piece of paper.
- The stencil is attached with masking tape to the selected area. If the drawing suggests the presence of several colors. Then, for accuracy of execution, they are sealed with tape to prevent other paint from getting in. Without tape, only the place that will be signed first remains.
- There are two ways to apply paint: with a brush or sponge. Many masters who have already done this note that doing this with a sponge is much more convenient and faster. After applying all the colors, you need to correct the contour. A thin brush is used for this.
Now on the Internet you can find a lot of beautiful stencils with butterflies, flowers, patterns and various ornaments.
Stencils
As you can already see, the method with stencils is quite simple and effective. Under a layer of paint, cracks and even small chips will become less noticeable. The advantage of this method is that the stencils can be different, from flowers to cartoon characters. No special drawing skills are required, since the task will only be to paint a finished drawing.
This is one of the most effective and inexpensive ways. An undeniable advantage is that the drawings can be changed whenever you want. They can be easily washed off if you use acetone.
In order for the pattern to be clear and not smudged during the process, the stencil must be firmly glued to the mirror with masking tape.
Important! If the stencil is attached to the mirror with ordinary tape, then traces from it will have to be wiped off for quite a long time and using chemicals. They, in turn, can erase the applied drawing.
Craquelure
Craquelure is one of the most popular and beautiful methods. In addition to mirrors, it is also used for aging furniture. The method is suitable for those who are not afraid to add more cracks to the mirror surface, only this time artificial ones.
As you know, it is best to hide something in a visible place. You can also hide defects on the mirror in this way.
The craquelure technique is to give the mirror texture in the form of small irregularities. This way you can not only hide the resulting flaw, but also add an independent object to the interior, which gives it its own peculiarity and sophistication.
This is done using craquelure varnish and acrylic paint. The color of the paint should harmonize well with the wall or mirror frame. Although the technique does not involve complex machinations, it still requires caution in performing all actions.
This decoration technology is quite simple, but it must be performed with special care.
The first layer of paint is applied to the mirror surface. It must dry completely. Only after this the second layer of craquelure varnish is applied. The two components will begin to interact, forming artificial cracks. The mirror is not damaged in any way. It looks very beautiful, since the mirror surface will look out through the new irregularities, reflecting the light.
Removing a crack using a drawing
The method with a pattern is almost identical to the method with a stencil. Only here you will have to come up with the plot of the picture yourself and draw it.
Anything can be depicted on mirrors. These could be trees, birds, flowers or ordinary geometric patterns. If you used acrylic paints before, now you will need stained glass ones. They are made specifically for painting mirror surfaces.
You can also cover a crack or scratches on a mirror using a drawing.
Frame
If a crack appears on the side, then it can be covered in an original way using a frame. She can be anyone. There are no restrictions in this type of decoration. The main thing is to build on the possibilities of the mirror surface. It is better to refrain from decorating with large massive objects. And they won’t look very nice on a light reflective surface.
Materials such as buttons, beads, shells, decorative stones, clothespins, textured rope threads and even antique coins are often used. The pattern is arranged in such a way as to cover all defects. For fastening, it is better to choose reliable glue.
An original frame will help hide the damaged area on the mirror.
Glue "Titan"
In the market of construction mixtures and adhesives, this composition has established itself as the best and most reliable. It is designed to work with various types of surfaces. Including tiled flooring. The mixture is based on rubber and natural resins. Thanks to these components, tight adhesion of the contacting planes is ensured. Features of the adhesive composition “Titan”:
- formation of a seam that is resistant to moisture;
- ease of use and ease of application;
- high percentage of adhesion;
- high strength;
- availability.
How to remove scratches from a mirror
In addition to decorative designs, you can also use the good old traditional methods of getting rid of cracks. True, as has already been said, they will not remove it completely either, but will only disguise it.
You can use toothpaste and flannel cloth. The product is carefully rubbed into a shallow scratch. Then it dries and polishes. And for deeper cracks, colorless silicone sealant or foil is suitable.
It is quite possible to hide problem areas on your own.
Which one to choose for the cabinet door?
The interior of the room can be complemented in the most original and beautiful way by attaching a mirror to the closet door. This is not only a design decision, because in this way you can achieve an excellent result in terms of visually enlarging a room with a small amount of square meters. This solution requires the use of a certain type of glue.
- Experts recommend using a product called “Superfix MS”. The glue helps to attach the mirror to a wooden surface, as well as to ceramics and plastic, and does not have a negative odor, which makes it different from other compounds. Its components are not hazardous to health.
This type of assembly adhesive has certain advantages:- The composition is completely safe, both for the health of the consumer and for the mirror material.
The composition of the glue is not so powerful that it can be used even in the bathroom, because it will hold the product just as well and firmly.
- When used correctly, glue cannot be destroyed at all or succumb to any kind of mechanical damage.
- The glue dries completely within 24 hours.
- If you choose an adhesive for fixing a mirror on wood called Bostik 2750MS, you will be able to do it no less effectively and reliably. This product is an adhesive in the form of a sealant, which also emphasizes the relevance of using this adhesive in a bathroom with constant high moisture.
This sealant does not contain any solvents, and it does not have an unpleasant odor. In addition to bonding the mirror to wood, it helps to bond to glass as well as plastic.The most common benefits of this product include:
- The composition of the product is at the highest level. It does not contain silicone or other harmful components.
Ultraviolet radiation is not a hindrance or pest for this product.
- After the product dries, it retains little elasticity.
Beautiful ways to decorate a mirror
A beautiful mirror decoration will not only cover cracks, but will also interestingly complement the interior. For this you can use any means and materials. You can often find ways to decorate using shells. They look beautiful next to the mirror surface and give it a special mood.
They are not attached to the mirror itself, but to a specially made frame that will match the shape of the mirror.
Additional Information! By decorating with filled frames, the mirror can be visually enlarged or reduced. Its dimensions will depend on how exactly to place the beautiful frame.
In addition to shells, wine bottle corks can also be used. They are also placed on the mirror in any order, creating beautiful patterns. If you want to add a little depth to the mirror surface, then the plugs are attached in their original form without cutting. A mirror framed with hemp rope looks beautiful in all interiors.
In this process, it is important not to get carried away and not to overdo it with the number of elements so that the frame looks organic.
Fastening process: step-by-step instructions
So, you stocked up on all the materials and tools and purchased a mirror of the required size. It is preferable if its back side is protected with a special film, which, if the mirror breaks, will prevent fragments from falling off. Now let's get to work.
You can use fine sandpaper for better adhesion of the glue.
Before fixing the mirror, you need to place a soft layer, and then press the mirror with paws.
First, remove the cabinet door. To make it easier to work with, you need to place it in a horizontal position. Using a pencil, draw marking lines on the surface. Use a degreaser to clean the door, then the mirror. You can use fine sandpaper for better adhesion of the glue. Use a brush to remove all the dust.
Mirror care rules
The rules for caring for the mirror must be followed. Otherwise, there is a risk of re-appearance of various cracks and chips. It is important to follow the following rules:
- The mirror surface does not like humidity.
- It is better not to place mirrors in direct sunlight.
- Mirrors can only be wiped with soft, lint-free cloths (it is better to purchase a specialized one, this will reduce the risk of scratches).
- There is a thin layer of silver on the mirror, so the surface should never be wiped with products designed to clean glass. They contain ammonia, which harms the surface.
After familiarizing yourself with all the possible ways to decorate a mirror, everyone can easily repair a crack in a mirror with their own hands.
The result can pleasantly surprise and even bring some novelty to the design of the room.