The situation is simple and familiar to everyone; such breakdowns are far from uncommon and this situation is fraught with many troubles. Starting from the risk of flooding your neighbors from below to rising water bills.
Such phenomena can be avoided by constant monitoring of the operation and condition of plumbing equipment, as well as careful adherence to operating rules.
A kitchen faucet is not a very complex technical product, but it still functions under pressure. Despite the apparent simplicity of this mechanism, it needs increased attention.
What types of mixers are there?
Let's start with the fact that, depending on the design features, there are two groups of plumbing taps.
- Single lever. The water pressure and temperature in this case are regulated by just one knob, which rotates in two planes. Cartridges are used here as rotating mechanisms (they can be ball or disk).
How does a single lever mixer work? - Double lever (such devices are also called valve devices). Their distinctive feature is that the pressure is regulated by handles located on the sides of the mixer. Special valve axle boxes (they come with rotating ceramic plates or worm-type ones) serve as locking elements here. But we note that the service life of crane axle boxes is half that of the cartridges mentioned above.
Valve mixer
Important information! The repair process is largely determined by what type of dripping plumbing faucet it is. But we’ll talk about this in more detail a little later.
Possible leak locations
Long spout mixer
Repair of a two-valve mixer
Two-valve devices are inexpensive, have a simple design, but break down quickly. Repairing a faucet in a kitchen sink if it is leaking is as follows:
- We pry up the cap with a thin screwdriver or knife and remove this element.
- Unscrew the screw that is used to secure the flywheel. Let's remove this part.
- Under the flywheel we find a crane axle box. We unscrew this element counterclockwise and inspect it.
- Water leakage in two-valve mixers with worm axle boxes occurs through damage to the gasket. You can buy such a part in a store or cut it yourself from a piece of rubber.
- The faulty crane axle box is replaced completely. The parts are installed in the reverse order.
If the crane axlebox fails, it must be replaced. When choosing this part, it is important to pay attention to the diameter and size of the mounting thread, the dimensions of the device and other features. You should take the flywheel to the store (the splines on the old and new parts must match).
Before installing a new crane axlebox, carefully wipe the seat with a soft cloth, remove debris and other unnecessary particles. The part is screwed in manually, then the water is turned on. If there is a leak, the nut is additionally tightened with a wrench. At the final stage, a decorative cap and valve are installed.
Important ! If the faucet is leaking, it is necessary to fix the problem as quickly as possible.
Why might a faucet drip? Let's understand the reasons
As a rule, the cause of a leak can be easily determined by getting your bearings on the spot. Below are the most common causes of this problem.
Table. Why might a faucet drip? Common reasons
| Reason, photo | Short description |
| Poor installation of the device | If installation or assembly was carried out incorrectly, with errors, this will inevitably cause a leak (sooner or later). For example, if you tighten the nut very tightly during the process, this will damage the sealing gasket, which means it (the gasket) will wear out faster. A supply hose that is not secured tightly will cause a leak under the tap. |
| Ball cartridge clogged | The ball mixer has a by no means ideal design - the internal parts, which fit very tightly, react poorly to various types of impurities in the liquid. To eliminate a leak in this case, the faucet will have to be completely disassembled and thoroughly cleaned. |
| The oil seal is worn out | The main disadvantage of the oil seal (or, as it is also called, the oil seal) is that it wears out very quickly. This problem is easy to identify: if the tap is closed, then there are no signs of a malfunction, but if it is opened, water will immediately begin to flow from under the valves. This suggests that the reason lies in the wear of the oil seal. |
| Faucet wear | Any plumbing equipment has a limited service life, therefore, over time, users encounter problems such as wear of the threads or locking mechanism. In such a situation, nothing can be achieved by replacing individual parts or tightening the nuts - it is necessary to change the entire mixer. |
| Wear of the rubber gasket | Repeatedly turning the faucet on/off leads to wear of its elements (including the gasket). The material deforms, its dimensions change, and cracks appear on it. And if your faucet drips in the closed position, then the problem most likely lies in the gasket (it needs to be replaced). |
Leak between faucet and sink
Types of half-turn taps and types of their breakdowns
Currently, there are a great variety of types of cranes on the building materials market. When a person purchases this element of plumbing for himself, he pays more attention to the design, without being guided at all by the quality of the product, as well as whether this faucet option is suitable for the conditions in which it will be used in the future, especially if there is hard water in the faucet.
Scheme of a half-turn tap.
Most faucet breakdowns are explained by an increased level of water hardness and poor quality parts.
Many owners of semi-circular mixers very quickly encounter their breakdown and think about how to properly repair it.
As a rule, when these types of taps break down, they begin to let water through, which first flows in a thin stream, and then in a powerful stream. It’s worth saying right away that improper repairs lead to the fact that the half-turn faucet stops flowing water only for a short time, and then begins to leak again. The semi-turn mixers themselves are a fairly simple design, so repairs can be done independently, without the help of specialists.
Despite the great variety of types and forms of these taps, it is still possible to distinguish 2 main types: some of these faucets have ceramic axle boxes, others have regular axle boxes with rubber gaskets. The reason for the faucet leaking lies precisely in the breakdown of the axle box. Even though there is simply nothing to break in ceramic axle boxes, there is still a polyethylene gasket insert, which is responsible for the tightness of the ceramic inserts, which means its breakage is possible. Having decided on the type, you can understand what kind of repairs the crane will require.
Related article: Outdoor porch covering. We select suitable materials.
How to fix a leaking faucet
Let’s say right away that in most cases there are no difficulties in replacing a leaking faucet, but beginners still often encounter some problems. However, preliminary preparation and strict adherence to step-by-step instructions will help cope with leaks and significantly increase the service life of the mixer.
In principle, repairing a faucet yourself is not such a difficult task.
Preparing for work
Before you begin directly repairing/replacing the mixer, you must turn off the water in the riser. Otherwise, problems with the tap will be aggravated by flooding of the apartment (not only your own, but also the neighbors below). Only after turning off the water can further work begin.
Water supply risers
To carry out repair work, you will need the following:
- some kind of vessel (to collect water);
- rags;
- Adjustable wrench;
- sponge;
- silicone seals;
- cleaning agent;
- screwdrivers;
- wrench;
- fluoroplastic sealing tape;
- rubber gaskets (new);
- pliers.
Fluoroplastic tape
All these tools/materials are quite enough to deal with a leaking plumbing faucet with your own hands.
On a note! If the mixer was purchased recently and you even saved the packaging, then you may find the manufacturer’s instructions and even a repair kit in it. In this case, the work will go much faster.
Repair kit for mixer (AKVAREM)
Tips and tricks
The water supply system in an apartment or private house is a source of increased danger. Therefore, when operating it, it is necessary to adhere to certain rules to avoid problems. Let's list them:
- Have the ability to quickly turn off water from the riser.
- A set of tools for performing repair work should always be at hand.
- It is necessary to keep in the house a set of replaceable components for faucets and mixers that are in use.
- Be prepared to urgently call emergency water services in the event of a serious accident.
- And, of course, you need to know the rules and procedures for independently eliminating an emergency situation.
Method No. 1. Replacing the gasket
If the rubber gasket needs to be replaced, you need to proceed according to the following algorithm.
Step 1. First, the valve is disassembled - the plug is removed, then the screw located under it is unscrewed and the core is unscrewed using an adjustable wrench (you need to turn it counterclockwise) to remove the valve axle box.
Replacing the gasket in the valve mixer
Step 2. The gasket must be replaced and secured in the axle box.
Step 3. At the end of the removal, all the elements are installed in their places.
Prices for bathroom faucets
bathroom faucet
Step-by-step process for replacing the gasket
Valve mixer leak elimination diagram
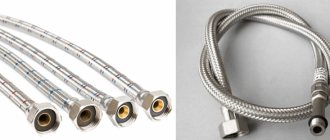
Note! If the faucet is leaking in the shower, then using the same adjustable wrench you need to unscrew the shower hose, replace the gasket, and then fasten it (the hose) in place. The gasket under the gander nut is also changed.
Unscrewed hose
Mixer body leaking
Method No. 2. Replacing the stuffing box seal
If the cause of a leaking plumbing faucet is wear of the seal, then you can fix the problem in one of two ways:
- unscrew the stuffing box nut, and then replace the stuffing box itself;
- make the liner yourself from fluoroplastic tape.
Another solution to the issue is to change the oil seal or the entire faucet.
If you do everything correctly and in accordance with our recommendations, the faucet will stop dripping and the valve will turn smoothly.
Video - How to repair a faucet
Method number 3. Ball valve repair
If the problem lies in the ball valve itself, then it must be disassembled and thoroughly cleaned, and, if necessary, the locking mechanism must be completely replaced. In this situation, you should act this way.
Schematic structure of a ball model of a kitchen faucet
Step 1. First, unscrew the screw and remove the lever.
Step 2. Then the threaded screw is unscrewed.
Step 3. The mixer dome is removed (along with its plastic part).
Step 4. The ball is removed and carefully inspected. If any defects or damage are detected, the ball must be replaced.
Step 5. The seals are removed and checked for wear and whether there is plaque on them.
Step 6. Dirt and deposits are removed from the seals, after which a special lubricant is applied.
Ball mixer disassembly diagram
Step 7. All parts are installed back. Connections are checked for leaks.
Touchless faucet with motion sensor
If the mixer is assembled correctly, there should be no leaks; the water temperature will be regulated by light turns of the lever.
Stages of installing faucets in bathrooms
Method number 4. Replacing the cartridge
We have already mentioned above that cartridges are more convenient to use than axle-box cranes, but if they break, then, alas, the entire mechanism will have to be replaced at once. Below is an algorithm of necessary actions.
Changing the cartridge
Step 1. First of all, unscrew the plug on the lever, after which the fixing screw is also unscrewed.
Step 2. Decorative elements are removed, then the nut that presses the cartridge is unscrewed.
Step 3. The mechanism is removed and carefully inspected (you need to find out what the condition of the gaskets at its end is). Note that they can be replaced.
Prices for kitchen faucets
kitchen faucet
How to remove a cartridge
Step 4. If it is impossible to replace the seals, a new disk element is inserted into the tap.
Step 5. All elements of the crane are put back together.
Scheme for self-installation of the cartridge in the mixer
Leaking faucets: how to fix?
In order to repair a kitchen faucet with your own hands, you need to prepare the following tools:
- narrow sharp knife;
- hexagons of different sizes;
- pipe wrench;
- Phillips and simple screwdrivers;
- new cartridge for ball valve;
- gaskets;
- spare axle box for screw mixer;
- special aerosol WD 40 (used to soften stuck parts).
You can destroy durable connections by tapping a hammer on the handle of a screwdriver, but using this method can damage the body of the device.
Before repairing the kitchen faucet, you need to turn off the water and install a basin to remove residual liquid.
What to do if the new faucet is dripping?
Sometimes even a faucet that was purchased and installed relatively recently begins to leak. In such situations, the reason, as a rule, is simple to the point of banality - the device has a manufacturing defect, which is difficult to identify during external inspection.
Important information! Cracks and chips inside the structure can hardly be eliminated on your own - even an experienced plumber will not be able to do this. That is why the only correct solution is to return the faucet to the store and ask the seller to replace the defective model.
New faucet
Finally, we note that the faucet in the kitchen or bathroom can start dripping at any moment. To solve this kind of problem, you can go one of two possible ways - to involve a qualified specialist in the work or to try to do everything yourself. However, if you know the exact cause of the leak and how to properly eliminate it, then no difficulties should arise.
Note! To prevent a leak from appearing at the most inopportune moment, regularly carry out preventive measures - change gaskets in a timely manner, check the condition of locking mechanisms. All this will significantly extend the life of the crane!