The kitchen is the room that falls into disrepair faster than others. Here, furniture and decoration are constantly exposed to temperature changes, high humidity, soot and grease. The facades of the furniture in the work area especially quickly lose their attractive appearance.
Buying a furniture ensemble for the kitchen is not a cheap pleasure. If it is worn out only externally, then you can bring it back to life yourself. What methods of restoring kitchen facades exist and how to work with them - read on.
Do it yourself or order furniture repairs at home?
Before you begin restoring kitchen furniture, you need to assess the amount of work and decide whether to do everything yourself or hire specialists.
Kitchen sets made from natural wood can be restored many times. Such furniture is not subject to significant deformation. Most often, wooden surfaces become covered with scratches, chips and abrasions during use. Eliminating these flaws with your own hands is possible even for a novice master.
It is more difficult with cabinet furniture made of MDF or chipboard with individual parts made of plastic, glass and metal. Remaking the body elements of bedside tables or cabinets that are swollen or have lost their geometry can be an overwhelming task, which means that the manufacture of new parts will have to be entrusted to specialists. But you can handle cosmetic repairs to the facade or countertop, adjusting or installing new hinges on the doors yourself.
Therefore, we have 2 ways:
- Carry out furniture repairs yourself. This option is suitable when you need to fix minor defects, you don’t need to make complex replacement parts, and also in a situation where you want to do without spending money. This path will allow you not only to save money, but also to bring your creative ideas to life.
- Contact a company offering furniture restoration services. This solution makes sense when damaged or lost-looking elements of the set cannot be repaired; a complete replacement of individual blocks, for example, facades and countertops, is required. In this case, you will have to spend money, but compared to buying new furniture, such a service will be inexpensive. The cost of replacing facades starts from 2200 rubles. per sq. m., countertops – from 4200 rub. per m.p.
During the repair process, it is useful to check and tighten all threaded connections: furniture assemblers often do not tighten them well enough, which leads to further loosening and distortion of the structure. And also lubricate all hinges and hinges to eliminate unpleasant creaking and ensure easy operation of these elements.
Price for restoration of kitchen facades
In each specific case, restoration of wooden kitchen facades costs differently. It may be necessary to make decorative elements, replace fittings, dismantle and install built-in appliances upon completion of work.
In general, when determining the price of a service, the following are taken into account:
- level of complexity of restoration work;
- order execution time;
- cost and quantity of materials needed;
- whether the restoration is carried out on site or in our workshop.
Obviously, the price for the service of restoring kitchen facades made of solid beech or other types of wood may differ from the restoration of kitchen furniture facades made of MDF, but not necessarily more. Only our experienced specialist can accurately guide you on the cost. We always offer the most profitable option based on the client’s capabilities.
What kind of work does facade restoration include?
Restoration is a process that requires professional skills. Three main methods are used for restoration:
- painting;
- updating the varnish coating of furniture;
- sticking the film onto the surface.
Painting and varnishing are most often required when restoring kitchen facades made of MDF or natural wood. As a result, you can not only restore, but also completely change the color of the headset. The quality of the result depends on the condition of the furniture and the professionalism of the craftsman.
The film is used to restore laminated chipboard furniture and PVC surfaces. In this case, a glossy or matte surface is obtained, depending on the type of film.
Important! A particularly complex process is the restoration of kitchen facades made of wood with paneling, milling and carved elements. Only a specialist can cope with updating the facades used for such kitchens.
Restoration of facades made of solid wood and MDF
A kitchen made from MDF or solid wood lasts much longer than budget furniture made from chipboard. This is due to the properties of the material - high homogeneity, strength, resistance to damage. Wooden and MDF boards hold fittings and fasteners better. From this point of view, repairing kitchen facades made of MDF and solid wood is quite justified - after the work is completed, it will last for many more years.
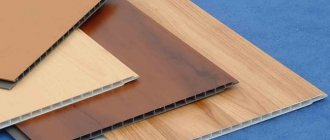
MDF boards are decorated with different materials:
- acrylic film;
- veneer;
- acrylic panels;
- melamine films;
- PVC film;
- enamel coatings.
Almost all coatings can be restored, excluding acrylic panels. If chips form on the glossy facade of a PVC sash, it will have to be replaced. You won't be able to restore veneer yourself either - it's a very capricious material. We will help restore the attractiveness of your MDF or wood kitchen in the shortest possible time!
We restore kitchen facades
If you are wondering how to inexpensively and effectively renew wooden kitchen fronts or where to order the restoration of damaged or worn MDF furniture fronts, you will find the answer here. We restore furniture of any type and in any condition.
Before restoration work begins, a designer will work on your kitchen. The specialist will give advice on selecting fittings, colors, and textures to accurately convey the style of the furniture in accordance with the design and your wishes. A professional assessment of lighting and the location of utensils will also be useful.
As for the master’s work itself, it begins with assessing the strength of the fittings and fastening mechanisms. If they are in order and do not require replacement, the restoration of the kitchen facades will affect the external coatings - any of them can be ordered at our production. We use only specialized varnishes, paints and films that are resistant to the adverse factors that we have already listed above.
By the way, if you are planning a redevelopment, or transporting furniture to a new apartment, we will help you not only update the set, but also arrange the items in the most convenient way.
Where can I order the restoration of kitchen facades?
If you order restoration from us, it will not require much time and large expenses. But at the same time you are guaranteed to get a high-quality result. Our workshop and factory Apriorimaster are fully equipped for the restoration of any type of furniture, replacement and repair of varnish, films, veneer. We have created optimal conditions for gluing and drying products. We have machines for the production of wooden elements. We maintain the required temperature and humidity, which affect the characteristics of natural wood. By trusting us, you make the right choice.
Methods for updating and restoring kitchen facades
Do you want to find a competent specialist to restore worn or damaged wooden kitchen facades? We have been specializing in this service for more than 10 years! Depending on the state of the kitchen and the tasks facing you, we will offer:
- Decoration method. It is appropriate in cases where the kitchen facade is slightly damaged: small scratches, chips, cracks. The cavities are filled with wax, then sanded, coated with paint and varnish.
- Pasting with film. Used to update the appearance or minor damage. In some cases, lamination and lamination are appropriate.
- Painting. We use various methods to achieve a spectacular design: aging, patina, gold leaf, glissal and others. We use special acrylic and polyurethane coatings, putties, primers, and varnishes.
- Full or partial replacement of veneer, enamel, plastic and acrylic cladding.
- Decoration with moldings and carved elements.
Restoration of natural wood facades
Reconstruction, repair or restoration of wooden kitchen facades is more difficult than working with MDF or laminated chipboard. But it is these types of sets that people most often try to preserve - natural wood lasts for decades with proper care. This furniture is of good quality, often passed on by inheritance and becomes a real rarity.
A special feature of updating kitchen facades made of wood is thorough cleaning of the old coating and repeated application of a varnish layer. It is difficult to do this at home due to the characteristic smell of paints and varnishes, and the mass of dust during cleaning.
We will help you fix:
- chips and cracks on panel inserts;
- cracks on frames;
- broken fasteners and hinges;
- peeling paint and varnish;
- broken stained glass windows and glass inserts.
Why is it so important to entrust this work to the specialists of our workshop? Solid wood furniture is assembled in a special way using thermal joints. If the slightest mistake is made in this process, the frame may simply warp and fall apart. In addition, it is difficult to choose the exact tone of stain or suitable varnish on your own.
We know how to properly repair your furniture. We provide a guarantee for our services, meet the deadlines of each project and do not inflate prices.
If you would like to know how much our services cost, or have other questions, please call the phone number listed on the website. You can place an order for a specialist to visit you right now
Door repair
A common defect in cabinet furniture is poor functioning of cabinet doors and bedside tables: they warp, do not want to close, and open spontaneously. The reasons are different: incorrect adjustment, defective hinges or magnetic latch, misalignment of the entire structure, swelling or delamination of the material.
Note: changes in the geometry of cabinets are often associated with the unsatisfactory condition of the back wall. The fiberboard sheet nailed there plays the role of a kind of retainer. If necessary, it is changed by cutting out the required fragment to size and attaching it with nails or small screws.
If the problem is in the loop, then replacing it is not always necessary: in most cases, adjustment helps. For this purpose, the design of the device has two screws: one is responsible for the fit of the door to the body, the second regulates its position in the frontal plane, moving it to the right or left.
A loop that has been torn out with meat can be put back in place using screws of a larger diameter. Another option is to drill holes, place wooden dowels in them using wood glue, and then screw fastening screws into them.
If the hinge breaks, it is replaced. Installation in old sockets is simple: mounting screws are screwed into the existing holes. It is more difficult if the hinge is installed in a new place or the door is changed. Assembly occurs in the following order:
- Sockets with a diameter of 35 mm for disc hinges are marked and cut with a milling cutter.
- A hinge plate is inserted into the slot located in the door perpendicular to the end and secured with a pair of self-tapping screws.
- The second plate is placed in the body, secured with screws through special holes in the bosses.
- Screw in the two adjusting screws to achieve the desired door position.
USEFUL INFORMATION: What color to paint the walls in the kitchen
Details of adjusting the hinges are shown in the video.
Spontaneous opening of doors occurs when the magnetic strip is faulty. In some cases, it helps to clean the magnet and the iron plate it attracts from contamination, adjusting their relative position strictly opposite each other. If these measures do not help, then the element is changed.
And one more video: a little trick that will solve the problem of adjusting a cabinet with worn out hinges without replacing them.
The Furniture Master workshop carries out orders for the restoration and production of wooden facades for kitchen sets made of solid wood, MDF and other materials with different finishing options in harmony with the interior of your kitchen. We work from home or in our workshop in Moscow. The cost depends on the amount of work, urgency, and the chosen repair method. You will find the price list for services on this page.
Refinishing wood or MDF kitchen drawers is a cost-effective alternative to replacing cabinet doors or purchasing a new kitchen kit.
Sanding wooden elements
In many apartments there is wooden furniture, often inherited from grandparents. In terms of workmanship and artistic value, it is superior to a cabinet one, but over many years of service, the surface becomes covered with numerous scratches, chips and stains. The easiest way to make cosmetic repairs is sanding.
You will need the following tools: a scraper, sandpaper or a sander. The technique of using the scrapers is not difficult: the scraper is held with both hands and progressively moved in the direction of the wood grain. The disadvantages of rough grinding are eliminated with fine sandpaper.
The restored surface is treated with a primer. It will protect the wood from moisture and ensure good adhesion to the varnish coating. The varnish will add shine to the furniture and protect against the appearance of mold or mildew stains. It is applied similarly to paint, using a brush.
Cosmetic repair of cabinet furniture
Small chips, abrasions or scratches can be eliminated by simple manipulations:
- The edges of the chips are trimmed with a chisel, after which the damage is filled with wax. When it hardens, the excess material is removed, the surface is sanded and painted over with a suitable felt-tip pen or a special furniture marker. A varnish applied over the top will protect the restored area.
If possible, it is better to buy furniture wax of the desired shade, which will help disguise any defects on the furniture.
- The procedure for repairing scratches is similar: a layer of wax, sanding, painting, applying a varnish coating. When using colored furniture wax, coloring is not required.
- Scuffs are painted over using a soft cloth onto which dye is applied from a felt-tip pen.
- The cracks are filled with PVA glue using a syringe with a thin needle, and then tightened with clamps.
The following video shows how you can easily mask chips on furniture made of chipboard using furniture wax chalk.
And this video shows the technology for repairing large chips on the surface of a tabletop using an enamel felt-tip pen, super-hard wax and acrylic varnish.
Replacing the end edge
A common occurrence is a peeling end edge. Having found an edge that matches the color, prepare the tools necessary for repair: scissors, iron, painting knife. To smooth it you will need a roller or cloth.
- Cut the workpieces with allowances of 1–2 cm in length.
- With the tabletop facing up, apply the edge and smooth it with an iron. The heat will melt the glue.
- The glued workpiece is pressed to the end and smoothed with a cloth or a piece of felt, directing the movements along.
- Excess edges are removed using scissors and a carpenter's knife.
- The joints at the corners are sanded with fine sandpaper.
Coating restoration
A mixture of linseed oil and alcohol will help restore the varnish coating in case of small amounts of damage. It wipes the damaged area, after which it is polished with cloth. The process will be facilitated by using a mixture of GOI paste with kerosene.
In case of large-scale damage, the varnish is washed off using special solvents. The softened composition is removed with a spatula, after which the surface is dried, sanded and re-varnished.
USEFUL INFORMATION: Ideas for renovating the kitchen floor (12 photos)
Repair with self-adhesive film
The self-adhesive film will give the headset a unique appearance.
Repairing facades using film is simple:
- The surface is prepared: the fittings are removed, the facade is sanded, degreased and primed.
- A piece of film is cut with an allowance of 2 cm on each side.
- The protective layer is removed from an area of 10–15 cm, the film is glued to the edge and at the same time smoothed with a piece of fabric.
- Next, gradually unwinding the roll, you need to fix the entire fragment on the facade, avoiding, if possible, the appearance of air bubbles.
- When pasting the ends and rounded areas, it is recommended to slightly heat the film with a hairdryer to make it more elastic.
- If it was not possible to avoid their formation, the bubbles are pierced with a needle or carefully cut to allow air to escape. All that remains is to smooth out the film.
- Excess material is carefully trimmed.
More details in the video.
The use of self-adhesive film during renovation often completely transforms kitchen furniture.
Repair of kitchen facades in the company Apriorimaster
Repairing paint chips, scratches and other damage to your kitchen façade yourself is not easy if you've never done it before. It’s not just about screwing in a light bulb or hammering a nail into a wall – it requires knowledge about the properties of materials and the peculiarities of furniture production.
So, when repairing wooden kitchen facades, you need to carefully select the coloring layer and type of varnish so that the repaired area is invisible. Often kitchen elements made of natural wood become deformed - then reconstruction or replacement of the element will be necessary.
It is impossible to find a suitable door in a store; you need to order it from a woodworker. Any elements of kitchen facades in Moscow are always in stock and can be ordered in our workshop!
Removing old film from furniture
A small peeling of the old self-adhesive film can be eliminated using PVA glue. The hardest part is getting to every hard-to-reach place.
But with large-scale damage you will have to do something radical: remove the film layer completely. This is done as follows:
- All fittings are removed. For convenience, it is worth dismantling the facade parts and working with them in comfortable conditions.
- The film is heated with a hair dryer, then removed with gloved hands.
- The surface is cleaned of glue residues, degreased, and then ready for further finishing: gluing a new layer of film or painting.
Furniture painting
It is often easier to paint the facade than to restore the old varnish coating. At the same time, you can radically change the design of your kitchen.
Proper painting includes the following operations:
- Disassembling the headset: removing fittings, hinges and drawers.
- Surface preparation: cleaning from dirt, grinding, removing dust, degreasing, priming. The latter is performed several times with breaks of 6–8 hours: this will reliably protect the material from external influences and ensure high paint adhesion.
If you plan to paint in different colors, the part of the surface on which a different shade will be applied is covered with masking tape. The same applies to elements that need to be protected from paint during the repair process.
It is best to paint using aerosol cans or a spray gun: this way it is easier to ensure uniform color and no streaks from a brush or marks from a roller will be visible.
Photo wallpaper is a new product for decorating not only children's rooms, but also kitchen utensils
A more interesting option than the previous one seemed to me to be a way to not only update the kitchen, but also radically change its appearance. Photo wallpapers today are in great demand for decoration in children's rooms and bedrooms. However, not only these rooms can be decorated in this way. The only caveat is the gluing of photo wallpaper onto the paint, which indicates the requirement to paint the kitchen unit. Among the tools you will need are: wallpaper glue, roller and paint, brush, scissors. To do the work yourself, you also need to take measurements, but for the renovation itself, you can use self-adhesive laminated options. They are more resistant to mechanical damage and are easy to wash.
Finishing the countertop in the kitchen
If your choice is traditional wallpaper, then do not forget that after gluing is completed, the entire set should be covered with several layers of varnish. It is somewhat more difficult to update a kitchen set with photo wallpaper than with vinyl film, but its appearance is more attractive. By the way, photo wallpaper can be made to suit your preferences, which means that you can even update your kitchen furniture with your own portraits or photographs.
Decoupage
This technique is a kind of appliqué made from various materials. Most often they use drawings cut out from napkins or magazines.
It is recommended to layer the paper so that the applique protrudes less above the general level of the facade. The further algorithm of actions is as follows:
- We prepare the surface: remove handles and other fittings, clean the paintwork, sand and repair defects.
- To achieve transparency of the varnish layer, mix white acrylic varnish and white paint.
- We paint the background in the direction of the wood grain.
- We place the prepared pattern, cut out and thinned, symmetrically relative to the facade and cover it with a layer of PVA.
- After letting the glue dry, we treat the surface with fine sandpaper, after which we apply a transparent varnish composition.
- After sanding the dried varnish, apply a new layer. And so on until the desired result is obtained.
A detailed master class on decoupage of furniture from chipboard is in the next video.
Another option for decoupage is the formation of ornaments using putty:
- Mix PVA glue and oil putty until the consistency of thick sour cream.
- We make a stencil of the future design from thick paper or cardboard.
- We fix the stencil on the facade, then apply the prepared solution with a spatula.
- After drying, we sand the ornament and coat it with varnish: first transparent, and then matte.
Decoupage can transform the most unattractive furniture. There are a great many options for the materials and technologies used. It all depends on the imagination and artistic taste of the master.
USEFUL INFORMATION: Do-it-yourself kitchen restoration: master classes, before and after photos
Restoration of straight facades
Let's start with furniture of the simplest form. First of all, remove all facades in order to work on horizontal surfaces. Do not forget to mark the location of each element (for example, on the inside of the facade) - this will simplify their installation later. Handles and hinges from the facades must be removed, also marking them if desired.
Whatever damage you encounter, believe me, in most cases you can fix it yourself. Restoration of unprocessed, i.e. If stains or shallow cracks appear on solid wood kitchen facades that are not covered with paint or enamel, the solution is to varnish, paint or cover with self-adhesive vinyl film. But before this, all removed facades must be thoroughly washed and dried.
For varnishing you need:
- in the case of cracks, first putty the surfaces with a special composition for wood, and then proceed to sanding and all subsequent steps;
- to remove stains, you need to sand the surfaces with coarse- or medium-grained sandpaper, and then with fine-grained sandpaper;
- degrease the surfaces and apply a transparent primer or stain to them to protect the wood, let it dry;
- we varnish the facade in 2-3 layers, with each layer reducing the amount of the tinting component and leaving the last layer transparent;
- After the varnish has dried, enjoy your work and put everything in its place.
You can radically change the look of your kitchen by painting the facades in a bright or any other color. The process for painting is similar: degreasing → sanding → re-degreasing → stain → painting. In this case, you can use stencils and apply a design to some or all planes.
If the wood on the facade is swollen, it must first be leveled, i.e. jointing - manually or on a machine. If the cabinets have become wider due to excess moisture and do not close, you can straighten them by cutting off the excess. In the case where the wood, on the contrary, has dried out and a gap has appeared, you can glue an overlay or plank, first leveling the surface.
If painted or enameled wood requires restoration, first of all it is necessary to remove this coating - chemically (solvent) or mechanically (sandpaper). After this, you can resort to the options described above or update your headset using self-adhesive film. The variety of textures and colors makes this material quite popular in the restoration of kitchen facades.
But we must warn you about the following:
- You should not purchase the most budget version of the film - it may not last long;
- take a little more material than you think will be necessary, because re-sticking the film is impossible, and if you are not a professional adhesive, you may need to practice your hand.
Restoration of countertops made of chipboard or wood
Areas of the tabletop that are swollen from moisture or chipped are quite easy to restore. The repair procedure will be as follows:
- Remove loose pieces of material.
- Thoroughly dry and sand the surface.
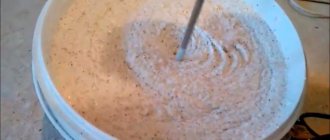
- Mix PVA glue with sawdust to form a thick mass.
- Fill the indentations with the resulting mixture, place the weight and leave for 24 hours.
- We apply a protective coating to the surface.
Coloring
Restoring kitchen facades using painting is the second most popular method. It is worth noting that it is far from being as simple as it seems at first glance. All facades are painted with the exception of MDF doors with acrylic panels.
Polyurethane enamels are preferable among kitchen materials. They are resistant to moisture and temperature changes, are not afraid of light, dry quickly and are safe. In addition, the palette of paints includes all kinds of shades and textures - from matte to high-gloss, literally with a mirror shine.
How to restore a kitchen set by painting?
- Remove all the fittings from the sashes, then remove the facades themselves.
- The finishing layer is completely removed and the surface is cleaned with sandpaper.
- The material is primed - it is recommended to use a water-based polyurethane primer. The procedure should be repeated and wait for the primer to dry completely.
- Apply paint using a roller and brushes of different sizes. The paint must be applied in several layers, first allowing each layer to dry completely. The carved parts of the product are especially carefully painted. Using a stencil, you can create a pattern, ornament or image on the sash.
- When restoring the facade, do not forget about the final stage - varnishing. No matter how good the enamel is, varnish will prevent its mechanical damage.
Coloring techniques are different. Depending on your own skill, you can simply paint the facade with one color, you can paint it, you can paint the kitchen set with “metallic” paint - it contains aluminum powder.
The fashionable aging effect is obtained in this way: the facade is covered in two layers with paint of different shades, and after drying, a solvent is applied to the surface. In this case, the top layer becomes covered with cracks. With the right skill, you can also achieve a “chameleon” effect: this will also require painting in two colors, but after drying, the facades are coated with glossy varnish.
Restoring a burnt countertop
Such damage is not uncommon for the surface of kitchen cabinets and tables. Replacing the countertop is a radical measure, but you can try to do without it by eliminating the damage yourself.
- Using a pencil, outline the boundaries of the defect with an allowance of 2 cm onto the undamaged surface.
- We remove the burnt area of the chipboard. A router is used for this operation. They sequentially remove layers of material: first along the intended line to one depth, then using a longer cutter to remove the next layer. And so on until the defective material is completely removed. The result is a stepped depression that looks like a miniature diamond and coal mine.
- Using a router, we make teeth along the contour of the cutout for better adhesion of the patch material to the base. This will also help make the transition smoother.
- Fill the hole with wood putty. We cut off a piece of the required size, knead it with our hands until soft and carefully compact it into the cutout. You need to work quickly, as the putty dries in a matter of minutes.
- We remove excess material protruding beyond the plane of the tabletop with a tool with a smooth edge. Some craftsmen use an old plastic card for this. To speed up the process, use a milling cutter with special grinding attachments.
- We polish the smooth surface using GOI paste with a soft-coated nozzle. This will add shine to the patch.
- All that remains is to paint the area to be restored, repeating the color and texture of the main part of the tabletop.
Making a tile countertop
What to do if the countertop is swollen or warped from moisture? The easiest option is to replace it with a new one, but there is no guarantee that it will not share the fate of the old one. Tile coating is more reliable, and it is not difficult to carry out such modernization of a kitchen set.
Tile countertop
DIY tile tabletop
Kitchen table with tiled surface
Countertop and splashback made of the same tiles
Work order:
- The basis of the new countertop is made up of sheets of expanded polystyrene, fixed with liquid nails.
- Protective elements are attached to the same composition. Metal skirting boards are best suited for these purposes: corner ones, connecting the surface of the tabletop and the wall, end and thin ones, serving as edging for the tiles.
- Tile adhesive is applied to the new base surface of the countertop.
- The tiles are being laid out. Its height should correspond to the thin baseboards around the perimeter of the tabletop.
- After the glue has dried, the joints are grouted. It is recommended to use silicone-based waterproof compounds. This will prevent moisture from entering the structure.
The result is a smooth and durable surface that is not afraid of water.
Countertop – replace kitchen unit or update it?
In the kitchen, countertops and tables lose their appearance the fastest. Therefore, every second person sooner or later asks the question: can you update or do you need to replace the old countertop?
Stone countertop finishing
A complete replacement should occur in cases where it is no longer possible to restore the element. The kitchen countertop needs to be removed before updating. Unscrew the fasteners and dismantle. Most likely, some effort will be required, since silicone is always used to better secure it - and, as you know, it does not lose its qualities after a long period of use. The choice of new material depends only on you, so you can safely experiment with shades and new sizes. If you decide to update your countertop, you can use materials such as paint or varnish. It’s very easy to design a kitchen set in this way, and for quality, follow this sequence:
- First you need to prepare the surface of the headset that will be painted. Use a sander or sandpaper
- Fill all chips and cracks with putty mixture. Once dry, use fine-grained sandpaper. To make the surface smooth and even. Only after this can you paint the countertop
- Alkyd paint is suitable for this process. Its first layer will be the primer of the material. Next, subsequent layers should be applied after the previous ones have dried. And for overall individuality, you can use various coloring techniques.
At the moment, you can buy or make your own various stencils, with which you can apply a drawing or pattern to the surface of the headset to be finished.
However, remembering the use of self-adhesive film for kitchen drawers, you can safely use it for the countertop. This method seemed to me the most acceptable, since with the help of paint we cannot imitate wood or stone, but self-adhesive has different textures. The film is applied very quickly, so it will not take a long time to update the kitchen set. As in the case of kitchen drawers, you will need to take measurements and then cut out the necessary pieces on the canvas. When cutting, leave a small margin, which will then be very easy to remove using a stationery knife. It will be much worse if you are missing a millimeter or two and this will be the most noticeable place.
Do-it-yourself countertop finishing
On my own behalf, I would like to add that self-adhesive film can be used to correct various defects not only on kitchen furniture. From my own experience, long before the kitchen and its furniture, I experienced the quality of self-adhesive material. When the washing machine lost its appearance, and the paint peeled off in some places, after which the machine began to electrocute, there was no paint at hand. I felt sorry for the money to buy a new device, since the functionality of the machine was not inferior to the new models. Then the idea of using self-adhesive film arose in my head. Carefully removing the lid from the washing machine, it was vertical and not frontal, I washed the surface of the pasting. After taking measurements, I cut out the required piece and very quickly glued it to the lid. This may not seem like the best option to some, but I have been using this washing machine for 2 years now, and the film on it has not changed at all. And I, in turn, saved money and am very happy about it.
Chair repair
Damaged coverings of old kitchen chairs can be restored using the above methods. The exception is furniture with soft seats: re-upholstering them without skill is quite problematic, although possible. But there is a simple option: make a cover. In this case, reupholstery will not be required, and the appearance problem will be solved.
Loose parts are strengthened using wood glue. In exceptional cases, self-tapping screws are used with mandatory drilling of holes for them. Painting and decoupage transform an old, unsightly chair into an original and beautiful piece of furniture.
You should not throw away old kitchen furniture that has lost its outer luster. With a little imagination, you can give it a completely new appearance, adding originality to the interior of your home.
Reasons for restoring the facades of cabinet furniture in the kitchen
Kitchen furniture is most susceptible to negative factors - high humidity, temperature fluctuations in the kitchen, cleaning with aggressive detergents. An unfavorable environment contributes to the rapid wear of facades, regardless of the quality of their finishing. The conditions for using a wooden set are made even more aggressive by fire on a gas stove and sunlight falling through the windows. The coating of the kitchen set cracks, loses its integrity, begins to absorb moisture, and continues to deform. As a result, the doors lose their appearance and aesthetics.
Depending on the base material and its finishing, the reasons for restoration may be as follows:
- the laminated layer moves away from the base;
- paint and varnish are cracking;
- swelling appears;
- As a result of mechanical action, chips and dents appear.
To restore the facades of kitchen furniture, you need to clean the base, eliminate any unevenness, and only then begin to cover it with new cladding.