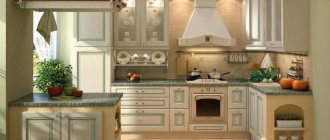
What does a home bar look like?
In a home interior, a bar structure is an elongated tabletop on supports, which is often an extension of the work area. As a rule, it comes complete with bar stools of the appropriate design. Their feature is the reduced size of the seat and the presence of a footrest.
Reference. The bar counter first appeared in the West, in fast food establishments, and was recognized for its undeniable convenience and practicality.
In addition to external aesthetics, bar countertops have a number of advantages that set them apart from other types of furniture. Unlike regular tables, they often include additional space for dishes and other kitchen utensils. Large household appliances (for example, a dishwasher or electric oven) can be built into the rack, which is especially convenient in a small kitchen.
In addition, a fully equipped stand is considered a multifunctional piece of furniture that saves space. It can include not only a dining area, but also a work area. A kitchen with such furniture looks modern and suits different design styles.
Selecting type and model
Owners of apartments with different layouts were able to appreciate the advantages of bar countertops; today there are many types of them. They vary in shape, location and configuration options.
There are ready-made furniture solutions or custom-made sets. At the same time, the bar counter must correspond to the size and main outline of the kitchen design - then it will be in harmony with the design of the entire room.
In small-sized apartments, the kitchen bar counter performs several functions at once: it serves to separate the kitchen from the dining or living area, while simultaneously serving as a dining table. The most common option in small rooms is a bar counter along the wall in the kitchen.
Racks in the form of a protruding peninsula will fit perfectly into medium-sized kitchens. The space below is used as a cabinet where a minibar or various kitchen items are placed. In such designs, the countertops are supported by pieces of chrome pipe attached to the cabinet lid.
Multi-level bar counters, which are multifunctional, are popular. One side is used as a work surface, and the other as a place for snacks and drinks.
Sheathing the stand with plasterboard
The sheets are marked with a pencil and cut into individual elements in accordance with the drawing. After that, each of them is screwed to the finished slatted sheathing. It is better to place the attachment points in short increments of about 20 cm.
The evenly fixed sheet will have to be “passed” again with a screwdriver in order to recess the heads of the hardware a millimeter into the cardboard.
After covering the frame of the bar counter on all sides, the joints between the gypsum boards are glued with sickle tape. The outer and inner corners can be strengthened with additional plastic pads - but this is optional. All recesses at the attachment points are covered with thick putty. As soon as it hardens, the unevenness is removed with sandpaper, after which the drywall can be primed and proceed to facing work.
Types of typical bar counters
The type of room determines which version of the bar would be appropriate to place in it. Some designs are ideal for spacious rooms, while others are more convenient for small areas.
Classic (single-level)
Its design is shaped like professional bar counters in bars and restaurants. In the “domesticated” version, the height of the bar counter in the kitchen from the floor is 110-115 cm and is supplemented in the form of high chairs, stools or half-chairs with a comfortable footrest and armrests.
The stand in this style has a standard rectangular shape. It is recommended to give preference to the island model, however, there should be a lot of space in the kitchen for such a solution. However, classics always love large areas, so this point must be taken into account in advance.
Mini stand
With its modest dimensions, simple and laconic design, the tabletop can replace a traditional dining table. When there is very little space in the kitchen, place a compact bar counter against the wall in the kitchen.
Design and placement options for mini-racks:
- Narrow wooden models that are placed along the free wall of the kitchen look elegant. In this case, bar stools should be completely retracted under the counter so as not to clutter up the space. The height of the counter can be traditional (110-120 cm) or like a standard dining table (80-90 cm).
- Compact folding racks that attach to the wall.
- Original multi-level designs that can easily accommodate many small household appliances and kitchen utensils, bar utensils and cutlery.
- Retractable stands.
- Bar counters of an original shape with lighting, TV and many additional functions.
Combined with dining table
This method of arranging a bar counter is optimal for small kitchens. In this case, it is mounted against a wall or near a window; chairs will fit standard sizes.
As a rule, this design involves two height levels: the lower level serves as a dining table, and the upper one serves as a bar counter.
Island
The kitchen interior is built around this piece of furniture, which can be combined with the work area. Suitable for large rooms or those combined with a living room. These bar counters vary in shape: semicircular, U- or L-shaped. They represent a separate part of the kitchen set and are made in the same style, thereby creating an effect of integrity.
An island bar is suitable for large, spacious spaces. Depending on the size of the apartment, the configuration of the multifunctional unit may vary. If space allows, you can install a stove, dishwasher, sink here, or make the island a full-fledged work surface or dining table. The standard height of the kitchen unit is 75 cm and must match the height of the island.
With combined (level) countertops
This type of design has a feature - the presence of a multi-level tabletop. On average, a kitchen bar counter should be 0.9-1.1 m, but deviations are allowed. It will be perfectly complemented by chairs with standard dimensions.
Bar counter from the window sill
The window sill can serve as a bar counter, which is especially important in small kitchens. You will need to purchase chairs with footrests that are suitable in height. It is important that the distance from the seats to the bottom edge of the tabletop is approximately 30 cm.
The dimensions of the surface of the bar counter are selected individually in each case, but you need to correctly calculate its depth. Firstly, at least one cutlery must fit on it, that is, the tabletop cannot be narrower than 30 cm. Secondly, its edge should be moved forward at a sufficient distance so that those sitting at the counter do not rest their feet on the wall under the window.
Beam installation
This method of attaching the countertop should not be considered as an independent option, but if you simply need to immobilize it after laying it on the bottom row of cabinets, then it is quite suitable. Often, the cabinets of inexpensive kitchen sets are shallower than the countertops that come with them. This allows you to install them in one row along with the sink and stove, maintaining the gaps necessary for other communications. But as a result, the working surface just hanging in the air near the wall itself needs to be attached.
- Place the tabletop on the pedestals that have been pulled together and leveled, mark the line of the top edge on the wall, after which the slab must be removed.
- Measure the thickness and set the resulting millimeters down from the markings and draw the horizontal line using a level. This is the line that corresponds to the bottom edge of the tabletop, and the beam should be attached along it.
- Select a sufficiently strong beam, measure the height of its profile to determine the central axis - a third one is drawn under it below the two previous strips.
- Using the last marking, sockets are made for the dowels, and counter holes are made in the timber.
- After checking the horizontal position, the beam will remain attached to the wall with anchor bolts, and the tabletop will be laid on it.
Such a support better distributes the load of the working surface, but due to the small width of the contact it cannot be used on its own - only when supporting the tabletop with vertical supports (cabinet walls). It is advisable to impregnate the timber itself with an antiseptic, paint it or varnish it, since it will have to serve in conditions of high humidity. You can use a metal corner, but it is harder to work with, and its super reliability with this method of fastening will remain unclaimed.
Once the finishing work is completed, the fixed tabletop should be equipped with a small plinth. It will close the joint near the wall and make cleaning the kitchen much easier. Decorative slats can be made of any material, depending on the design of the work area. It is better to fasten plastic and wooden baseboards with self-tapping screws; tiles, metal or artificial stone just need to be glued with a transparent sealant.
Related article: How can you insulate the walls of a house inside?
Calculation of dimensions
If you plan to install a bar countertop, first of all determine what size structure is optimal.
Standard dimensions of the bar counter:
- height – 120 cm;
- length – 105 cm;
- width – 55 cm.
However, in practice, the height of a factory-made bar table according to GOST may differ: for example, 110, 125, 130 and 150 cm. Quite often, this product is a component of a kitchen set - in this case, the height is slightly lower and can reach from 86 to 91 cm.
This is due to the fact that the calculations take into account the standard dimensions of typical furniture: the height of the base and facade, the thickness of the tabletop.
Determining the optimal dimensions of this product must be approached individually. To understand which size is suitable for a particular kitchen, you need to consider several important factors.
The length of the tabletop can be influenced by:
- individual preferences and design ideas;
- dimensions of the kitchen area;
- number of people living in the apartment - the space for one sitting person must be at least 60 cm.
As for the width of the bar counter, the standard states that it should not be less than 30 cm. The most common options are 50 and 60 cm. Otherwise, those sitting will feel extremely uncomfortable.
When choosing the height of the bar countertop, it is important to take into account the height of the household, as well as its location in the kitchen. In addition, we draw your attention to the following nuances:
- If the counter is part of a kitchen unit, according to the standard its dimensions must correspond to the dimensions of all other elements. This way it can be conveniently used as a dining or work surface.
- If the bar counter is a separate integral element and serves as a partition between the kitchen and the living room, its height can be different and vary from 110 to 130 cm. A prerequisite is the presence of sufficiently high bar stools.
- In a small-sized kitchen with a bar counter near a window or wall, the tabletop has a small height - about 75 cm. It will harmonize perfectly with standard chairs.
- Another suitable option for a small kitchen is a wall-mounted counter. The height of such a structure can be from 110 to 130 cm, but the length is selected on a strictly individual basis, depending on the number of household members.
Important! The choice of suitable parameters depends on the dimensions of the room and the purpose of using the piece of furniture. By defining them correctly, you will ensure a high level of comfort while eating.
The total values may increase if built-in equipment and communications are installed. Sometimes additional installation of a raised floor is provided, which should also be taken into account when choosing the dimensions of the entire structure.
Mounting on brackets
This is the most common method of installing a work surface, when the load on the walls is transferred through a special profile. For a standard tabletop, a single bracket with a height of about 350 mm with a shoulder of 500 mm is suitable. You can take a couple of corner supports, but not so powerful, but it is better to preserve the length of the shoulder.
The longer the tabletop, the more brackets will need to be attached to compensate for its bending under load.
- Determine the installation location of the bracket so that it does not interfere with the furniture and appliances located below, but supports the tabletop at the desired height.
- Make a mark on the wall and use a level to lower a perpendicular from it - the vertical part of the bracket is attached to this marking.
- Attach the part to the resulting axis, mark the points for the screws. If necessary, they can be capped immediately.
- Drill holes in the wall and hammer dowels into the sockets.
Then everything depends on the features of the countertop. If it is a thick sheet of chipboard or a wooden panel, it is better to attach the arm of the bracket to its reverse side with short self-tapping screws (25 mm) - they should not go through the slab. Thin panels can be glued to liquid nails. Special strength is not needed here; it is enough to ensure the immobility of the surface resting on the bracket. All that remains is to attach the assembled structure to the wall and secure it with a pair of self-tapping screws - they will loosen the already driven dowels, and you will get a reliable anchor connection.
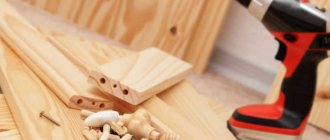
DIY bar counter installation
To install a bar countertop in the kitchen yourself, first select the material from which it will be made: chipboard, plasterboard, wood, brick or stone. After developing the project, choosing the type of structure and determining the main building material, the implementation of the project begins.
Tools
Among the tools you must have with you:
- level;
- perforator;
- screwdriver;
- sealant;
- paints and materials for working with it (brushes, roller).
Other tools must be available in cases where the work will be carried out:
- with wood: bars, cut and prepared boards, plinths, screws, screwdriver, varnish;
- with stone: selected stone, cement.
Decoration Materials
Let's take a closer look at individual projects made from various materials.
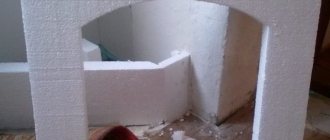
From plasterboard
Many builders love this material because any creative idea can be turned into reality with it.
A plasterboard bar counter is created according to the following scheme:
- Construction of a metal frame. Its durability will depend on the strength of such a structure. To make the frame more rigid, the corners are made from a solid piece of metal, that is, simply by bending it.
- Preparing the frames of two walls that will be connected by a transverse profile. The profiles are fixed using a cutter. Dowels are used for fastening to the wall and floor. After completing the frame, be sure to check it for strength.
- Covering the structure with plasterboard. If you plan to add lighting to the rack, route the cables before installation.
- Filling the gap using a mounting mesh. The gaps between the stand and the wall are sealed with sealant.
- Painting the workpiece.
If you don't want to use drywall, there are a number of other materials available. However, you should not completely abandon it. You can use it to make shelves, stands and other minibar design elements.
Made of wood
Kitchen bar counters made of wood are created using the same method as those made of plasterboard: first you make a frame, and then attach the wood. Only in this case the frame will be wooden. Make a mark on the floor where the structure will be located. Then attach the wooden blocks to the floor and wall. Sheathing the frame can be done using MDF sheets.
The tabletop should be prepared in advance: sanded, implement all design ideas (corners, “waves” on the side surface). Before applying varnish, the bar counter should be treated with materials to protect against flammability and corrosion protection. Seal the cracks with sealant, then varnish.
From stone
A do-it-yourself bar counter made of such material is considered a presentable option. Most experts recommend polished granite: it is resistant to impacts, temperature changes, and cuts. You can use several types of stone at the base, which will make the stand aesthetically attractive. The tabletop and base can be of different colors and even styles. To give it a finished look, the edges of the tabletop are covered with a decorative chamfer. To work with stone, you will need special tools, knowledge and skills, since the implementation of the intended design will be much more difficult than with chipboard.
If a bar counter made of natural material is your dream, but its cost is too high, there is an alternative in the form of artificial stone.
Lighting and accessories
Another addition to the bar could be lighting. This is what creates the atmosphere and immediately catches the eye. The simplest option is a separate chandelier under the ceiling above the bar. You can choose a designer chandelier so that the lighting does not seem ordinary. In addition, this option can be combined with another, weaker lighting method. Another solution could be a halogen lamp under the tabletop.
However, if your main material is stone, you will have to abandon this idea. There is an option to create an additional glass structure and place a lamp there. When the bar counter is completed, think about its configuration: dishes, coasters, decorative items.
Mounting methods
A kitchen countertop or hanging dining table can be mounted against the wall in different ways, which also imply different loads.
Fixing a table with or without support using angle brackets
This is the most common and reliable method of fixing surfaces experiencing different loads. This method uses a special device - a bracket, which is a metal corner. Creates sufficient reliability and strength of the connection. It is fixed to the wall part and the table using bolts.
The part must have a right angle. This corner fits snugly into the corner space between the table surface and the wall. It may have additional reinforcing elements that make the structure even more reliable and allow the surface to be fixed even without supports and legs.
To ensure high-quality fastening, the bracket itself must be sufficiently reliable. Therefore, when purchasing, pay attention to each detail separately. The brackets must be intact and in good working order, they must not have mechanical damage.
Step by step instructions for installation below using the corner below.
- Determining the location of fixation. It is necessary to decide not only on the location of the surface, but also on the location of the fastening elements. They should be evenly located along the entire lower part of the table, evenly absorb the load, and not interfere with the use of furniture. The longer the surface, the more fastening elements will be needed. This is necessary to compensate for the bending moment that acts on the horizontal plane.
- Marking locations for the location of fastening elements. Apply the necessary serifs with a pencil. These are the mounting locations. Such notches will not only make your work easier in the future, but will also help you install the parts correctly and evenly.
- Place fastening elements. If this is a corner type of fastener, then you need to attach the part to the wall part and make a few more notches for future nests. These sockets are the places where the bracket will be secured to the wall using bolts.
- Place a horizontal surface on the fastening elements.
- Check the reliability and quality of the work performed. Try to lean on the surface or shake it with little effort. If it is fastened securely enough, it should stay in place. If the fastening is poor, it will regain mobility.
Watch the visual instructions in the video:
Fastening the kitchen countertop to timber
This fixation option ensures immobility and provides additional stability when the countertop sag due to a mismatch between its depth and the width of the lower cabinets, if heavy kitchen appliances are supposed to be stored in the work area against the wall.
To attach the timber, markings are made on the wall along the top edge of the tabletop. From this line downwards its thickness is laid down - this is the lower edge and the upper boundary for mounting the timber on which it will subsequently be laid.
After selecting the thickness of the timber and also marking it on the wall, the places for the dowels are drilled.
Holes are also drilled in the timber. They fasten it to the wall with anchor bolts, after which the tabletop is laid on a beam attached to the wall.
Source: remont-volot.ru