Features of the production of MDF panels
The manufacturing technology of MDF panels is almost similar to the manufacturing process of fiberboard and chipboard, only the strength of the latter is much lower.
For the first time, such a building material appeared in the USA in the 60s of the last century, but its manufacturing technology was significantly different from modern ones. A little later, Swedish manufacturers slightly changed it, which contributed to the increasing popularity of these stoves. Their main production is now established in China.
The production of MDF panels proceeds in stages:
- Raw material preparation stage. The material used for production is the use of ordinary round logs, regardless of the type. First, the bark is removed from them on a debarking machine and passed through chipping units to obtain technical chips. In order to remove foreign impurities, washing is carried out. Steam heating is the process of preparing the wood chips for the next step.
- Fiber preparation stage. Grinding steamed wood chips in a defibrator or refiner produces wood fiber, which is a source of lignin, a substance that provides binding. The use of urea-formaldehyde resins is envisaged to strengthen it. Next, air is removed from the mass.
- Stage of molding and primary pressing. Using a forming device, the mass is compressed into a plate and pre-pressed to remove air bubbles. Otherwise, the slab may crumble.
- The pressing stage takes place on the main press. Initially, to form the surface of the slab, a working pressure not exceeding 350 MPa and a temperature of 200 - 230°C are set. Next, to warm up the central part, set the temperature to 190 - 210 ° C and the pressure from 40 to 120 MPa. At the final stage, thickness calibration is performed by exposing the material being processed to a pressure of 60 - 150 MPa, depending on the required thickness without heating. Next, the tape is divided into parts in the form of plates and cooled.
- Grinding stage. It is carried out to adjust the thickness and eliminate surface defects.
How can I secure the panels?
There are two ways to fix the material on the walls - using glue or a frame. The choice of method is usually made depending on the condition of the walls and the wishes of the master. Thus, the adhesive option involves installing panels using an adhesive composition such as “liquid nails,” but this method is only suitable if the surface of the walls themselves is not curved. This is the simplest method, but limited in scope of application. In other cases, only the frame method becomes relevant.
Liquid nails “Moment Installation”
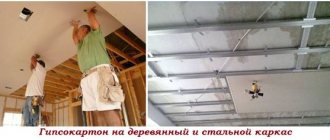
The frame method of fastening MDF is the creation on the surface of the wall of a sheathing-like structure made of bars or metal profiles. A similar frame is created when installing drywall on walls, only the crossbars will be positioned horizontally. The step between the horizontal supports is 50 cm, and between the vertical bars that serve as support for the horizontal ones - about 3 m.
The panels themselves are fastened to the sheathing using clamps. They are installed from the end of the panel so that they will not interfere with fixing the next panel on the sheathing, but will perfectly hold on it the one that was fixed with their help.
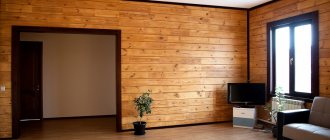
Wall panels are a quick and inexpensive repair, and at the same time a neat and stylish appearance of the room
Scope of application
This material has a wide range of applications due to its special properties and affordable cost.
The characteristics of MDF panels are as similar as possible to the parameters of wood, which ensures their demand among consumers.
The panels are used to make office and home furniture, trade stands, and doors. In addition, this is an excellent material for the front facade and speaker system housing.
Due to its resistance to elevated temperatures and light mechanical stress, this material is in demand in the furniture industry. Tables, chairs, armchairs, pianos, railings, steps are made from it. Furniture items made from veneered or laminated wood fibers are suitable for kitchens and bathrooms, as they are not affected by high humidity.
MDF is also used in the production of wall panels. It is possible to produce a variety of design options.
Pros and cons of using MDF panels in the interior
MDF panels are made from fibreboard. This material has distinctive positive aspects:
- It attaches easily to the wall and has multiple fixing methods;
- Acts as a sound insulator;
- MDF panels hide wires, pipes and other communications;
- They are easy to care for;
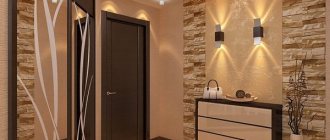
- Thanks to them, you can create an attractive design for your kitchen, living room, bedroom, loggia, balcony or hallway.
MDF panels are easy to attach to the wall and have many ways of fixing.
Like all finishing materials, MDF panels also have their disadvantages:
- They tend to burn and are subject to instantaneous combustion;
- They do not like moisture and become deformed in high humidity;
- To hang objects on these panels, you will need to use special fasteners (Fischer anchor).
MDF panels do not like moisture and become deformed in high humidity.
Advantages and disadvantages
Consumers note the following advantages of fiberboards:
- strength - this indicator is slightly lower than that of solid wood, and significantly higher than that of chipboard;
- high moisture resistance - this quality is achieved due to the absence of air pockets, which ensures a homogeneous structure and high density of the material;
- practicality;
- excellent sound insulation qualities;
- convenience and ease of installation;
- huge selection of shades;
- easy care;
- affordable price.
Among the disadvantages, it is worth noting such properties as:
- Highly flammable - contact with open flames and hot objects will cause a fire. It can occur due to faulty wiring located near MDF furniture;
- low resistance to strong impacts. Damage may be caused by a heavy object falling;
- the need to pre-drill holes for fasteners;
- the appearance of dust when working with panels (to prevent small particles from entering the respiratory system, you need to use a respirator during the procedure);
- recesses at the joints of panels.
MDF panel: methods of mounting to the wall
There are 2 methods to attach the cladding to a rough surface.
Each of them has its own characteristics. Fixation on a frame base. The cladding is attached to a metal or wooden sheathing. To do this, you do not need to thoroughly level the walls, but you do need to make markings and prepare the material.
Fastening panels with glue. To do this, the adhesive solution must meet a number of requirements relevant to this work. Otherwise the panels will fall off.
The cladding is attached to:
- adhesive solution;
- liquid Nails;
- polyurethane foam.
The positive aspects of this method:
- Installation time. It is faster to lay the cladding on a flat surface than to create a frame base and then attach the material.
- No screws are needed for fastening.
Flaws:
- Panels are not attached to curved surfaces. The wall needs to be made level.
- If 1 element is damaged, then the entire surface must be replaced.
- It is impossible to insulate a wall and hide communications there.
Knowing the installation features, there is precision in choosing the cladding fastening.
When choosing a fastening method, you need to calculate the time and resources spent. Assess the evenness of the surface.
Mounting to a wall on a wooden frame
The wooden frame is constructed in a dry room.
Treated wood is used for this. Advantages:
- installation is simpler than a metal frame;
- for the frame base you need slats of the same section;
- wood is an environmentally friendly material.
Flaws:
- do not install in damp rooms;
- do not use untreated bars;
- the tree is susceptible to small rodents and bugs.
Despite these disadvantages, well-treated and dried wood lasts a long time without deforming.
Sheathing using a metal profile
Metal lathing is made using profiles.
They are used to create a frame base in damp rooms, because the profile is coated with anti-corrosion material. Advantages of metal construction:
- no need to level the surface to create a frame;
- all communications are hidden under the metal structure;
- insulate the wall;
- If the panel is damaged, it is possible to replace it without dismantling the entire surface.
Disadvantages of galvanized profile construction:
- The area of the room is reduced.
- If you need to hang an object on a surface, use anchors that can withstand the load.
To create a profile lathing, you need to incur additional costs.
Mounting to a wall without lathing or frame using glue
The panels are attached to an adhesive base only when the surface does not deviate from the level and there are no significant defects.
Advantages of installing cladding with glue:
- Installation time. Minimum time spent on installation of cladding.
- There are no additional costs for fasteners.
- The space of the room or corridor is not reduced.
Negative sides:
- there is no way to hide communications. For wiring you need to ditch the wall;
- there is no possibility of laying waterproofing insulation;
- This method is not used in bathrooms due to dampness;
- If one panel is damaged, the entire surface must be dismantled.
To choose a method for attaching panels, you need to calculate everything and take into account external factors, such as humidity, temperature changes.
Types of panels and their technical characteristics
The fibrous material used for the manufacture of furniture and in the production of panels for front interior decoration is divided into three types.
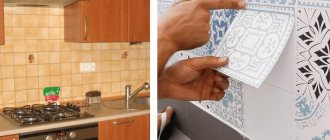
Laminated boards . During the manufacturing process, a thin film of paper, PVC, melanin, impregnated with a special resin, is applied to the surface of the material. Gluing is carried out under pressure under high pressure. To increase wear resistance, the laminate is applied in 2-3 layers. This material not only has a beautiful appearance, but also meets high technical characteristics, which makes it the most popular among consumers. Ceiling panels, frame structures, plinths, partitions, and facades are made on its basis.
Types and production of lathing
First, let's look at how to attach wall panels for interior decoration of MDF to the wall using lathing. We have already said that the sheathing can be made of wood or metal, so we will look at each of these options. Let's start with the most affordable in terms of finance - a frame made of wooden elements .
How to fasten wooden
Wooden sheathing
The manufacturing process is as follows. First we need to go to a hardware store, where we will need a wooden block.
The ideal option would be a beam with a cross-section of 3x3 cm. When choosing, you also need to pay attention to the condition of the beam itself - it should be smooth, without chips or visible deformations.
Humidity is also of great importance - this figure should not exceed 15 percent. Also in the store you need to purchase antiseptic fire protection - this is a special composition that allows you to protect wood from fungus and mold. In addition, this composition reduces the risk of wood fire.
Antiseptic fire bioprotection
The composition is applied to the timber using a regular brush. If something is unclear, then all the information you are interested in is indicated directly on the container with this composition. Now you can move on to measurements. Using a regular tape measure, we measure the width and length of the walls, so that we can then cut the bars to the desired size.
Remember that the length of the bars should be slightly less than the distance between the walls. If you make a mistake in these measurements, then the beams will have to be squeezed between the surfaces, and this will inevitably lead to damage to the material.
The lathing can have a vertical and horizontal direction. It all depends on how you will attach the MDF elements to the wall or ceiling. Here is MDF for the ceiling.
Remember that if the panels are mounted across the wall, then the sheathing elements should be positioned horizontally, and vice versa.
Next we move on to cutting our bars. The work is simple, but even here many beginners manage to make mistakes. To avoid this, position the hacksaw strictly perpendicular to the material - this is how you will achieve perfectly even ends.
The method of fastening the bars depends on the material of the wall surface. If the walls are wooden, then the bars are fastened with ordinary self-tapping screws.
Fastening with self-tapping screws
If the walls are made of brick or concrete, then you need to use dowels. The bars must be positioned strictly parallel to each other, so watch this moment.
It is also important that the bars are on the same plane, so check them using a level. After making the frame, you can proceed to laying the thermal insulation layer.
A good option would be ordinary mineral wool in rolls, which can be cut into pieces of the sizes we need.
Now you can proceed directly to attaching the panels to the sheathing. There are several ways to attach MDF sheet panels to the wall. The first method is fastening using clamps, which are similar to a bracket.
Kleimers
Can also be attached using 3x20mm self-tapping screws and small-head finishing nails. The choice of one option or another is a purely individual matter, because each person has his own preferences and skills. At the end of the work, corners are installed on the external and internal corners.
It is best to simply glue them to the panels, because any other fastening elements will be visible on the surface, which will worsen the appearance of the finish.
Glue mount
Metal fasteners
Now consider the option of using sheathing made of metal elements.
Metal sheathing
We start by attaching the wall profile. We mark a line around the perimeter, after which we attach the elements to the surfaces. They are also fastened with dowels or self-tapping screws - it all depends on the material of the wall surface. Next, mark the lines along which the profile elements will be fastened.
Profile fastening
Each profile strip should be at a distance of half a meter from the other. To ensure that the frame is level, straight hangers are installed along the marked lines, with the help of which not only alignment is carried out, but also strengthening of the entire structure. Next, elements of the main profile are inserted into the straight hangers.
Fastening is carried out with small self-tapping screws, and the ends of the hangers are bent. You also need to ensure that all elements are on the same plane.
The level is also used for these purposes. Installation of MDF panels to a metal profile is best done using clamps.
Single standard brick is the most common among all types of bricks. Here is its size.
Putty is necessary when carrying out finishing work. Here you will learn how to dilute putty.
To create concrete and cement mixtures, crushed stone of various fractions is used. By clicking on the link, you will become familiar with the weight of crushed stone.
We connect them to the profile using small self-tapping screws. It’s good if you have a screwdriver with a magnetic attachment, which will allow you to do all the work much faster. The final stage will be attaching the external and internal corners to the MDF panels. As in the first case, we glue them onto liquid nails.
Liquid Nails
Tools and material required for work
To install MDF panels, use the following construction tools and materials:
- a tape measure, a building level and a pencil - for marking the sheathing elements, their horizontality, verticality, and determining the required length of the panels;
- a metal corner that allows you to check the evenness of the corners;
- jigsaw;
- construction stapler;
- drill and screws;
- screwdriver.
The process of installing panels on a frame
Step 1. First of all, you need to inspect the walls and identify the most protruding place on them. This is what you will have to focus on when creating the frame. On the wall surface, you can use a pencil to make marks for the sheathing (the distance between the horizontal parts of the sheathing is 40-50 cm). You need to take a 20x40 mm block and cut it into pieces of the required length (this is usually the width of the wall).
The timber must be cut into pieces of the required length
Important! The frame slats are always attached strictly perpendicular to the panels, so if their orientation is different, then the frame lines will be drawn in accordance with their orientation (for example, not horizontally, but vertically).
Step 2. Next, the bars need to be attached with self-tapping screws to the wall strictly horizontally. It is important to understand that if the wall is concrete, then you first need to mark the holes for the dowels, drill them, install the dowels, and then attach the slats to them.
Fastening the bars with self-tapping screws
Step 3. It is necessary to secure all the elements of the sheathing, observing a step of 40-50 cm. Above and below, near the floor and ceiling, you need to maintain a small distance - about 3-5 cm to the base.
Recommended distances must be observed
Step 4. Before further work, it is important to make sure that the slats are fixed level. This can be done using a level.
The slats are checked by level
Prices for building levels
Construction levels
Step 5. If the wall is not level, then you can level the slats by placing pieces of bars of the required thickness under the required places for support. These pieces of bars must be secured with self-tapping screws.
Alignment of slats
Result of work
Step 6. It is important to secure the sheathing parts both along the edges of the walls and in the area of the doorways.
Attaching the sheathing to the doorway
Step 7. Now you can begin installing the first panel. It starts from the corner of the room - you need to attach the first panel to the corner of the wall and use a level to check that it is level. If necessary, the panels can be cut to the required length.
Installation of the first panel
The panel is checked by level
Step 8. Next, the panel needs to be attached to the sheathing slats using self-tapping screws. They are screwed only along the edge of the panel. Moreover, only the first panel or the last one is additionally fixed with self-tapping screws (in places that will be covered by baseboards, corners, etc.).
Screwing the panel with self-tapping screws
Another photo of the process
Step 9. To fasten the remaining panels you need to use special fasteners - clamps. The clamps should be installed like this: slide them into the groove of the previously installed panel and secure them to the sheathing with a construction stapler or small nails.
Kleimer
Using a clamper
Then the stapler is used
Step 10. Next you can install the second panel and the next ones. You need to insert the ridge of the next one into the groove of the previously installed panel.
You need to insert the ridge of the next one into the groove of the previously installed panel.
Installing a second panel
Step 11. Then you need to fix the panel using a clamp on the sheathing.
Fixing the panel using a clamp
Step 12. All panels are fixed in the same way.
Installation process of MDF panels
Step 13. If the panels need to be cut, then this is how it is done. First you need to mark the panel - how much it needs to be shortened or narrower. And then just saw off the excess with a jigsaw or hacksaw.
Trimming the panel
Step 14. Once all the panels have been installed, you can install the fittings to give the wall a finished look. You need to apply glue to the folding corner on the wrong side, then fold it and glue it into the joint between the walls, pressing it tightly. Excess glue should be immediately removed with a cloth. The installation of the panels is completed.
Glue is applied to the folding corner
Pasting the corner
Screwdriver prices
Screwdriver
Video - Wall decoration with MDF panels
Nuances of performing work
Preparatory work
Applying protective impregnations to the surface is the initial stage of preparatory work for interior finishing. Next, the fastening of the sheathing guides is marked. It is optimal if the distance between them is 40–60 cm. This will avoid sagging of the panels and obtain the strongest possible fixation.
When planning vertical installation of panels, the sheathing is mounted horizontally, and vice versa. Otherwise, the process will not be possible.
A mark is placed on each marking line at a distance of 0.5 m from each other. It determines the location where the sheathing is attached.
What you will need for installation
For high-quality finishing of MDF walls you will need the following materials and tools:
- Insulation (mineral wool, penofol, polystyrene foam or extruded polystyrene foam). We'll look at each type in more detail a little later.
- MDF panels. There are many models that differ in thickness, color and structure, so the choice is yours.
- Slats or galvanized profiles for installing sheathing. Width and thickness – 40 and 20 mm, respectively. The length is selected depending on the size of the wall.
- Self-tapping screws are needed to fasten the panels to the sheathing.
- Clamps are special elements necessary for fastening panels to each other and to the sheathing. Often available complete with panels.
- A plumb line is a nut or any other small metal object tied to a fishing line or thread.
- Building level.
- Yardstick.
- Pencil or marker.
- Plane.
- Metal corner (metal square). Needed for cutting pieces of panels for slopes.
- An electric jigsaw is used to cut MDF. You can also use a hacksaw or circular saw. The latter, due to its compactness, is very convenient to use. It can cut both wood and metal - simply by changing the complete wheels.
- Hammer drill with concrete drill.
- A screwdriver, drill or screwdriver with a screw attachment.
Toolkit in the photo
Drill
Circular Saw
Jigsaw
Locksmith corner
Plane
Building level
Rules for selecting and purchasing MDF panels for wall decoration
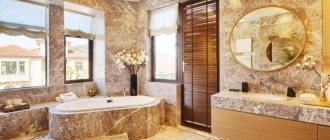
Manufacturers offer a huge range of MDF panels with different properties, so the choice is quite difficult. In the kitchen, bathroom, loggia, the use of moisture-resistant panels is recommended; for other rooms, material with average parameters is required. The purpose of the room and the decor of the panels must match each other. It is preferable to select slabs for walls and ceilings in the same style.
Covering with MDF panels is the simplest and easiest finishing method. Having completed the work at least once, you can learn how to efficiently and quickly cladding both ceilings and walls.
MDF panel how to attach to the wall
MDF panels are attractive in appearance. A wide selection allows them to be used in various rooms to create a unique interior. They have many positive aspects and a minimum of disadvantages. However, after making the decision to cover the surface, the question arises: “How to attach the MDF panel to the wall”? The cladding methods are described below.
Features and Benefits
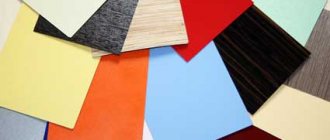
MDF for walls is prepared using the same technology, but the finish of their surface is always different, in this regard, several types of these panels for walls can be distinguished:
- Veneered ones are created using natural veneer coating as a decorative finish. The products are distinguished not only by their excellent strength and reliability, but also by their high price.
- Laminated MDF panels are the most popular and in demand of all types of material. To create these panels, pasting with melamine film is used. This allows you to imitate the structure of natural wood, which is so popular when decorating the walls of a room. To improve the appearance of the slabs, they are covered with a high-gloss film.
- Technical and office premises, workshops and garages are finished using painted MDF panels. In this case, the decorative coating is a layer of paint. On such models there is no imitation of the tree structure.
MDF panels have improved technical characteristics. When creating them, the manufacturer does not use harmful resins rich in phenol.
After grinding and processing the wood chips, the resulting dust is treated under high temperature in special ovens. The process lasts until lignin is released, which ensures the gluing of the raw material.
To give greater strength, the MDF board is pressed, and as an additional treatment, a melamine film is glued to its surface, imitating the structure of natural wood.
The main advantages of the MDF panel are:
- attractive price;
- possibility of use both for leveling the surface of walls and for decoration;
- ease of installation without the help of a qualified specialist;
- strength;
- reliability;
- resistance to mechanical damage;
- ease of care.
There are several ways to attach MDF wall panels during work related to decorating the surface of walls indoors. One of them requires the assembly of a frame and sheathing, while the other requires a special adhesive for wall panels.