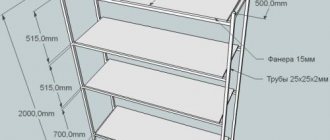
Features of greenhouse placement
Homemade greenhouses require the right choice of location for construction, because the harvest depends on it.
Do not place the greenhouse where there is shade
To do this, draw a diagram of the site and take into account the following factors:
- You need to build a greenhouse in an open space, the trees should be away from it so that shadows or broken branches do not fall on the plantings.
- It is advisable to have a fence to protect the greenhouse from the wind.
- You need to take into account the movement of the sun during the day.
- The transparent side of the pitched roof should be turned towards the south side of the site.
Diagram of the most favorable location of the greenhouse relative to the cardinal directions
Review of winter greenhouse projects for DIY construction
In fact, you can make heated greenhouses and greenhouses for your summer cottage with your own hands in absolutely any configuration. The main thing is that the structure is completely sealed and there is a heating system. Also another condition is the arrangement of the foundation. It is desirable that it be monolithic and raised above the ground by at least 15 cm.
Glass heated greenhouse
The best cladding material for such greenhouse structures is glass or more affordable and easy-to-process polycarbonate. At the same time, it retains heat indoors more effectively, which can also lead to air staleness. Therefore, even at the design stage, it is necessary to think through not only the heating system, but also ventilation for the winter period.
Types of roof
Before starting construction, you need to decide on the type of roof. There are:
- Gable - a greenhouse in the form of a house.
- Arched - in the form of an arch. It is easy to install, precipitation does not accumulate on the roof, which is why the greenhouse is less deformed. In addition, this shape provides light diffusion, which is beneficial for plants.
- Single-pitched - such a greenhouse is attached to a building or fence. Usually adjacent to them from the south. Calculate the angle of inclination so that the snow does not linger, but rolls down. With a wall location it is easier to connect communications.
- Sliding – the roof moves. If it’s hot, it can be moved to better illuminate the plantings with the sun. And in winter, this way you can disinfect the ground (snow will fall on it).
Exterior of the greenhouse
Typically, a greenhouse is designed according to the botanical species of the plant. Factors such as the light transmission capacity of the covering material and maintaining the required temperature inside the room are taken into account.
The shape of the greenhouse is:
- with one slope. This could be a winter garden or a greenhouse. A passage is provided along the entire length, usually adjacent to the southern wall of the house;
- with two slopes. This is the most common form throughout Russia. Offers a variety of interior design options;
- in the form of a drop. A fairly stable design, but difficult to install;
- domed. It has a very impressive appearance with a modest consumption of materials;
- polygonal shape. They look great in a garden plot and can easily withstand strong winds.
Read here - Railings for stairs: how to choose and install modern models of railings and fences (85 photos)
Types of coating materials
Main materials and their characteristics:
| Material | Characteristic |
| Polyethylene film | The most budget option. It is important to secure it well. It is destroyed in 2-3 years, and after a year it will take on an unpresentable appearance. You can't wash it because it leaves stains. After a year, the thermal insulation decreases. It rustles in strong winds. Plus, a person cannot get hurt. |
| Spunbond | This is a breathable non-woven material. It allows oxygen to pass through well and provides the necessary humidity. At the same time, it does not get wet and does not release heat. Cuts with scissors and can be washed. Suffer from wind, not durable. |
| Polycarbonate | Allows you to reduce the number of frame parts or completely eliminate them. It does not deform and does not allow wind noise to pass through. Service life is about 25 years. It has an aesthetic appearance, is quite durable - if it falls, it will not break. Dust is not visible - when it appears, it can be easily washed off with water. Provides excellent thermal insulation, light diffusion, and a special microclimate. Condensation flows over the surface rather than dripping. |
| Glass | A strong frame and base and protection from mechanical damage are required. If the installation is poor, the glass greenhouse will rattle. Requires careful handling - you can break and get injured by fragments. The rain leaves marks. Does not create a strong greenhouse effect or light scattering. Poor quality material creates the effect of a lens, and this harms the plants. |
Types of greenhouses
Structures can be permanent or collapsible. Among the huge selection of greenhouse projects, each owner of a plot of land will choose the most suitable one.
The most convenient and popular designs:
Thermos. The peculiarity of this type is that its body is completely immersed in the ground. Only the lid remains on the surface. Thanks to this, the greenhouse retains heat longer.
Breadbox. Opening the lid follows the principle of a kitchen utensil with the same name. With one movement of the hand, it tips over to the back wall and also returns to its original position.
We recommend reading:
How to make a utility block for a dacha - a step-by-step description of how to build it yourself and instructions for arranging a utility block (115 photos)- How to build a bathhouse from timber - 125 photos of the best projects and ideas on how to build a bathhouse correctly
Do-it-yourself canopy: step-by-step description of how to build a canopy correctly. The best ideas and beautiful design options (95 photos)
Arc greenhouse. The simplest design in terms of installation and dismantling. The frame is attached to the ground and covered with plastic film or a similar material with similar performance characteristics.
House. This is a raised gable roof. It is easy to construct: 2 battens are connected and fastened at the ridge. The frame can be covered with glass, polycarbonate or other heat-insulating material.
Butterfly. It has doors that open outwards. Thanks to this, you can approach the greenhouse from any direction.
Let's consider the process of constructing a greenhouse for a bread bin.
Foundation
The type of greenhouse chosen determines its foundation. First, markings are made - the sides form a right angle. For a seasonal structure, a wooden base made of timber (10x15 or 15x15 cm) treated with an antiseptic or water-repellent compound is suitable to last longer. Place it on the ground, but preferably on a cushion of compacted sand or on concrete slabs.
For a permanent building you will have to dig a pit. You can make a strip foundation - a trench 30x30 cm. Sand is poured onto the bottom, crushed stone on top (all 50-70 cm thick). They put up formwork from boards, lay roofing felt and fill it with concrete. It needs to be pierced with a shovel and knocked on top to remove the air. The base is raised above the ground by 20-50 cm. Support posts or pieces of metal corners are embedded in the foundation.
Greenhouse bread box
You need to find drawings on the Internet. They will indicate the exact dimensions of the greenhouse. After this, you can begin construction.
We recommend reading:
- Beautiful canopy over the porch - installation options, design options and installation tips (95 photos)
How to attach a terrace to a house - step-by-step description of the construction, design options, projects and installation instructions (115 photos)
- Building a gazebo with your own hands - the best design ideas and main stages of construction (115 photos + video)
Advantages
Why is the bread box greenhouse better than other models:
- the opening top simplifies the operation process;
- there is no need to create new paths to access the structure (it can be approached from any side);
- due to its lightness and small size, it can be periodically moved to a new location;
- ease of assembly.
Required Tools
Standard set of tools:
- screwdriver;
- drill with a cross-shaped nozzle;
- crosshead screwdriver;
- wrench No. 10;
- construction knife;
- level;
- roulette.
Assembly
Step by step steps:
- Carefully study the photo of the greenhouse drawing with your own hands, and use it to install the frame on a flat area. It is advisable to install it with the long part on the south side. This way the seedlings will get more sun.
- A bread bin does not require a foundation. It is fixed to the ground with strong pins or wooden beams and metal corners are used as support.
- Secure the lintels of the structure with screws.
- Cover the frame with heat-insulating material (thickness of at least 4 mm), secure it with self-tapping screws.
- If the roof is removable, it must be secured to a special bushing or hinges on the sides as a last resort.
- Place the handles for opening and closing on the screws.
- To reduce the gap between the cover and the frame, you can use a self-adhesive seal.
Such a greenhouse retains heat perfectly, even if there is a small gap left.
Types of greenhouses and step-by-step instructions for their manufacture
The best projects are automatic types of buildings based on Arduino. They have an actuator (linear drive) to automatically open the door and ventilate. Of course, it could also be a simple thermal drive.
But in general, such greenhouses are equipped with everything necessary for autonomous operation. It will be very difficult to do this yourself. There are other ready-made greenhouse projects.
We offer you several homemade options with step-by-step instructions.
Arched (semicircular) greenhouse
You need to act step by step.
Drawings of arched greenhouses
Draw a drawing. Here are examples of drawings of an arched greenhouse:
Foundation
Beginning of construction - erection of the foundation. For this use:
- wooden beams - placed at a distance of 120-140cm, for a frame made of polypropylene pipes;
- tape - done if the frame is made of heavy materials.
The reinforcement frame needs supports so as not to touch the bottom of the trench
Frame
Next, build an arch from:
- masonry mesh, which is attached to the posts at the bottom and tied at the top;
- plastic pipes - welded or connected with couplings, adapters;
- steel professional pipe 2x2 cm - leave a distance of 100 cm, the arcs are fastened by welding;
- fiberglass reinforcement (diameter 8-12 mm) – easy to install.
Coating
The selected material is attached to the erected frame:
- film or spunboard - must be secured on top with twine or rope;
- polycarbonate - the cut sheet is secured using special self-tapping screws with thermal washers.
additional information
Door:
- film - made with magnets (like a mosquito net);
- wooden frame;
- metal pipe - mounted on hinges.
Windows for ventilation:
- in the film - holes are cut, any location is possible;
- wooden frame - can be opposite the door, in the roof, side walls:
- in a metal frame - a welded frame from a corner, placed opposite the door or in the roof, or in the sides, depending on the design of the greenhouse.
All these options are wind-resistant and convenient for tying up plants. It is possible to make greenhouses of any size (mini for seedlings, small, large). Film ones are a cheap option; they are used in the industrial production of vegetables and in dacha farming (it’s good to grow tomatoes and cucumbers).
The most expensive and labor-intensive option is a metal arch frame and polycarbonate, but such a greenhouse will last longer and looks more aesthetically pleasing.
Examples of creating various arched greenhouses
House-shaped greenhouse
Another very popular roof shape is gable.
Drawings of a greenhouse-house
Foundation
The need for a foundation depends on the weight of the frame. If it is light, then they do not make a capital base, but use:
- Steel corners 4x4 cm, driven into the ground - holes are first made to attach the frame posts, painted or filled with bitumen.
- Wooden blocks - the structure usually has a size of 3x6 m.
Frame
- Beam - fasten the bottom frame, sides, roof. The corners are given rigidity with additional segments. The sharp parts are rounded and wrapped in soft material.
- Galvanized profile - assembled from ribs and tied together.
- Plastic polypropylene pipe, connected with fittings and adapters.
- Profile made of plasterboard - does not require additional processing and is easy to bend.
Covering material
- Stretch film (like food film, but thicker) - wrap the frame in several layers, overlapping. They start with the gables, then the rest. Move from bottom to top to prevent rain from getting inside.
- Film or agrofibre - wrapped or glued.
- Polycarbonate - secured with special self-tapping screws with heat washers.
- Glass, as a rule, double-glazed windows are used for homemade greenhouses.
additional information
The door is on hinges in the side wall. The film is wrapped, covered with glazing bead or lath and cut through. The window is made similarly to the door. A heavy frame made of frames or metal will require a foundation. Usually they make a tape one.
Step-by-step instructions for making a greenhouse-house
- Old window frames (almost a free option) - their size determines the size of the greenhouse. Attached to frame or posts. The cracks are covered or clogged.
- The door is made using one of the frames or a balcony door is used. The windows will provide ventilation. It is better to stretch the film on the roof - the weight of the building is less. If you use frames for the roof, you need to strengthen the structure by placing supports.
- Metal frame - attached to bolts installed in the foundation before pouring. A frame is made from a channel or a double corner, racks (1.6-1.8 m) are welded to it and fastened together with segments. The roof is connected to the racks, and at the top - to the beam. A window is made in the roof or opposite the door.
The glass is inserted into frames formed by double corners. To improve thermal insulation, double-glazed windows are used.
A structure made of glass and metal is an expensive and labor-intensive option, but durable. You can build different types of greenhouses by combining the materials that are available.
Examples of creating greenhouse-houses
Dome greenhouse
It consists of triangles and hexagons. A foundation is required. This is a rather complex project - heavy assembly, high cost, labor-intensive calculations.
The advantage is strength + such a greenhouse transmits light well.
The frame is made of wood, profiles or pipes, covered with film, glass or polycarbonate is inserted.
Drawings of a domed greenhouse
They are built using the following technology:
- prepare triangles;
- fasten them with self-tapping screws, forming a dome;
- assembly starts from the bottom - you get the correct shape;
- the upper triangle is folding, provides ventilation;
- door - polygon or regular shape;
- the film is stretched after assembly, this provides an aesthetic appearance.
Examples of domed greenhouses
Greenhouse thermos
A thermos greenhouse (buried structure) will require a deep pit - about 200 cm. Its total height is 180 cm, width - 200-500 cm. A trench is dug along the edge of the bottom and walls are laid out. They provide a descent for installing stairs, pipes for air access, wall insulation, and waterproofing.
Polycarbonate greenhouse
Perhaps the best greenhouse option for home use today. It has minimal weight and does not require a powerful foundation - a 0.3-0.5 m deepening into the ground is sufficient. We described the types of foundations for a greenhouse a little higher.
Ready-made polycarbonate greenhouse
Quite durable and easy to assemble, it is most popular today. The special structure of polycarbonate sheets with an air gap makes them excellent heat insulators. And from the outside, such a structure looks very aesthetically pleasing.
Frame assembly
Ready frame
Metal profiles or wooden blocks are used as a frame:
1The minimum cross-section of a metal profile for a standard greenhouse is 20x40 mm. It is better to use a stronger rectangular or square pipe. The thickness of the timber timber is from 50 mm. For small structures, it is possible to use a profile with a U-shaped section.
2The frame should be screwed to the bottom frame made of wooden beams only after complete assembly. It is better to assemble the greenhouse using self-tapping screws equipped with a press washer - their heads will cling less to the skin. To connect the profile pipe you will need bolts and nuts with washers.
3When using welding, additional protection of the seams from corrosion is required.
4Individual elements of the frame should not be immediately pulled together too tightly. The bolts are tightened until they stop only after adjusting and leveling the structure with a building level.
5First, the end parts of the frame are assembled, and then the side stiffeners are screwed on. The horizontal cross members are attached last.
6Do not skimp on material - to obtain a reliable structure, the distance between the stiffeners should be 50-75 cm.
7You can strengthen the frame using jibs - short slats attached at the corners.
How to bend a pipe
Arched structures or streamlined teardrop-shaped greenhouses are more practical. There is never too much snow accumulated on their roofs; it easily rolls down.
Pipe bending
Pipes of only a small cross-section bend easily. With a profile height of 40 mm or more, bending them without preheating is problematic. This can only be done with a special profile bender.
If you don't have a device, you can do the following:
1To protect against bulging and cracks, the pipe is filled with dry sand through a funnel, and its ends are plugged with wooden plugs. On the sides of such plugs it is necessary to select small grooves for gas outlet.
2Clamp one end of the pipe in a vice.
3Insert a pipe of smaller diameter into the second end, which will serve as a lever (“shoulder”).
4If there is a weld in the metal, turn the pipe so that it is located on the side. Otherwise it may fall apart.
5Heat the bend area with a blowtorch until it is red hot. For convenience, this place can be marked in advance with chalk.
6In order for the profile pipe to be located in the same plane after bending, without the formation of folds, the pipe must be bent in one smooth movement strictly in one direction.
7It is not recommended to heat the metal several times due to a decrease in its strength, but when creating an arch this does not always work. Sometimes you have to “afterburn” adjacent surfaces. But it is still necessary to reduce the amount of heating to a minimum.
You should not leave a half-assembled polycarbonate greenhouse. Due to the high windage of the material, strong gusts of wind can cause damage to the sheets. They must be fastened in calm weather.
Polycarbonate fastening
Lap joint
How to make a greenhouse from polycarbonate?
To ensure that such a greenhouse lasts longer, adhere to the following rules when assembling it:
- The protective layer on which the inscriptions are applied must be located on the outside of the greenhouse.
- To obtain the most durable structure, be sure (!) to pay attention to the location of the polycarbonate “honeycombs” - they should go only vertically, in inclined structures - parallel to the slope.
- When creating arches, keep in mind that polycarbonate sheets bend only in one direction - lengthwise, that is, along the line of the stiffeners.
- The joints of the sheets should be at the center of the frame post; the sheets are connected only in this way.
- This type of plastic is cut with a construction knife, jigsaw, or grinder. You can also use a hacksaw or a circular saw.
- To firmly connect the sheets to each other, special plastic profiles are used. Manufacturers do not recommend overlapping polycarbonate. In practice, when making a polycarbonate greenhouse with your own hands, it is not always possible to cut and fit the sheets perfectly. Some craftsmen even manage to do without connecting profiles, placing polycarbonate overlapping. The most important thing is that the joint must be in the center of the rack, and not sag in the air. Moreover, even with ideal installation, snow pressure can force the sheet out of the profile. In the case of overlap, this does not happen.
- It is not advisable to use a powerful drill for screwing in self-tapping screws - it will overtighten the fasteners and often slip off during operation. It is better to work with a regular screwdriver. Polycarbonate is drilled at low speeds with little effort. Next, turn off the tool, insert the screws and continue working.
- The distance between the screws to be screwed in is 25-70 cm. It all depends on the type of frame and the expected snow and wind load.
- When assembling polycarbonate structures, rivets are sometimes used instead of self-tapping screws. However, dismantling the greenhouse or replacing a damaged sheet in this case will be more difficult.
- When the temperature changes, plastic can change size. When making butt joints, a small space of a couple of millimeters in size is necessarily left between the sheets - a technological gap. Otherwise, cracks will form at the junction. For the same reason, the size of the holes for fasteners is made a little larger. To prevent the plastic from cracking, do not tighten them all the way.
- To compensate for expansion and protect against cold bridges, it is recommended to use special thermal washers for polycarbonate (screws are purchased separately). It is allowed to use EPDM roofing screws, equipped with a gasket or standard for metal with a rubber thermal washer, in which the threads have a small pitch.
The polycarbonate stiffeners are placed perpendicular to the ground so that moisture flows down. Otherwise, the water accumulated in the honeycombs will tear the sheets during frosts.
Estimate for a greenhouse with a wooden frame
The calculation is given for a wooden gable greenhouse with a width of 3 m, a length of 6 m, a wall height of 1.6 m, and a ridge height of 2.45 m.
Estimate for the frame
| Material | How much do you need | Price |
| Planed edged board for frame and roof 70 x 50 mm | 102 m | ≈ 80 rub. per linear meter. Total ≈ 8160 rub. |
| Beam for base 150 x 150 mm | 18 m | ≈ 3600 rub. |
| Planed edged boards to strengthen the roof 20 x 40 mm | 18 m | ≈ 25 rub. per linear meter. Total ≈ 450 rub. |
| Angle for fastening wooden structures 50 x 50 x 35 mm | 200 pcs. | ≈ 850 rub. |
| Piano hinges for doors and vents, 500 mm long | 6 pcs. | ≈ 50 rub. thing. Total ≈ 300 rub. |
| Screws 35 mm long | 2 kg | ≈ 500 rub. |
| Antiseptic for wood processing | 3 l | ≈ 300 rub. (for the cheapest) |
Total cost without coverage ≈ 14,160 rubles.
Estimates for different types of coating
| Coating | How much do you need | Price | Full cost of the greenhouse (frame + cover) |
| Set of glasses 4 mm thick | 96 m² | From 250 rub. per m². Total ≈ 24,000 rub. | ≈ 38,160 rub. |
| Polycarbonate 4 mm thick | 8 sheets measuring 2 x 6 m | From 1200 rub. per sheet. Total ≈ 9600 rub. | ≈ 23,760 rub. |
| Reinforced film with a strength of 100 g per m² | 1 roll size 6 x 25 m | From 8000 rub. | ≈ 22,160 rub. |
Do-it-yourself greenhouse with a permanent wall and heat accumulation
Winter greenhouses with the ability to grow seedlings, vegetables and berries even in cold weather have been known to gardeners for a very long time. But they have one significant drawback - high heating costs. How to solve this problem? Firstly, it is necessary to limit the loss of such valuable heat. For this purpose, in the greenhouse presented below, the northern half is allocated as a utility room, and between it and the beds there is a solid wall covered with mineral wool. In addition, the building is equipped with a heat accumulator.
Finished construction
This battery is a network of fairly thick pipes laid underground and with outlets to the outside. During the day, sunlight warms the soil in the greenhouse, which does the same to the air in the pipes. At night, the temperature in the greenhouse drops. Warm air, obeying the laws of physics, rushes upward, cold air - down into the pipes. There it warms up from the soil, the cycle repeats, the circulation of air masses begins, the temperature in the greenhouse remains within limits suitable for seedlings and plants.
Another option for a greenhouse with solar batteries and a solid wall - here containers with stone or gravel accumulate heat
Let's look at the construction of such a structure in the form of step-by-step instructions.
Step 1. A site is selected, measurements and delineations are made. A pit with a depth of 30 to 70 cm is dug, its walls and bottom are leveled. To speed up the process when building a large greenhouse, it is advisable to use special equipment.
Dug pit
Step 2. Formwork for the strip foundation is constructed along the edges of the pit.
Construction of formwork
Step 3. Concrete is poured inside the formwork and a strip foundation is created.
Pouring formwork with concrete
If necessary, foundation slabs are poured in the center and supports for columns are installed (here - sections of metal pipes, concrete is also poured inside) supporting the roof of the building
Step 4. The bottom of the pit inside the perimeter is covered with thermal insulation.
The bottom of the pit is covered with foam plastic slabs
Step 5. Horizontal pipelines are laid on top of the thermal insulation to ensure air circulation.
Laying horizontal air ducts
One of the options for such air ducts, in this image you can see it close up
Step 6. The ends of the air ducts are arranged, everything inside the foundation is covered with earth.
The area inside the foundation is covered with earth
Step 7. The frame of the northern and side walls of the greenhouse is constructed. Instead of wood, you can use brick or concrete blocks.
Construction of a wooden frame, the foundation is pre-covered with waterproofing
Frame construction process
Three walls are ready
Step 8. The central supports and ridge beam are installed.
Installation of supports and ridge beams
The same stage, but from a different angle
Step 9. The rafters are mounted on the north side of the building. This part, together with the canopy, will be used for household needs. If desired, you can adapt the entire room for growing plants, but then it must have a pitched roof.
Installation of rafters
The frame of the entire greenhouse is almost ready
Step 10. The roof on the north side is covered with corrugated sheeting. Fastening is done using roofing screws.
The roof on the north side is covered with corrugated sheeting
Step 11. The wall frame is being constructed on the south side. Vertical posts and a beam of the upper trim are installed. The wall dividing the building into two sides is covered with wooden panels.
The wall frame is being constructed on the south side
Step 12. The rafters are mounted on the south side of the building.
Installation of rafters on the south side of the building
Step 13. The south wall and side of the roof are sheathed with thick plastic film. Instead of film, cellular polycarbonate can also be used, since it is a more durable material. The side walls of the greenhouse are also covered with wooden panels.
The southern wall and roof slope are sheathed with thick plastic film
Step 14. The main walls in the greenhouse are sheathed with mineral wool slabs. It will reduce heat loss inside the building.
The main walls in the greenhouse are lined with mineral wool
Step 15. The interior walls are finished and the frame elements are painted. You can build shelving and bring in seedlings, for which the best conditions will be created.
Interior finishing of the structure
The structure is ready for use, view from the inside
We hope that the above descriptions, recommendations and instructions will help you create an effective and durable greenhouse for your summer cottage or garden.
Estimate for a greenhouse with a steel frame
The calculation is given for a gable greenhouse made of steel profile 3 m wide, 6 m long, wall height 1.6 m, ridge height 2.45 m.
| Material | How much do you need | Price |
| Profiled steel pipe diameter 40 x 40 mm | 30 m | From 100 rub. per linear meter. Total ≈ 3000 rub. |
| Steel corner with a section of 30 x 30 mm | 100 m | From 80 rub. per linear meter. Total ≈ 8000 rub. |
| Fasteners for fastening metal profiles | 200 pcs | ≈ 700 rub. |
| Piano hinges for windows and doors 500 mm long | 6 pcs | From 120 rub. per piece Total ≈ 720 rub. |
Total cost without coverage ≈ 12,420 rubles
If we take the cost of coating and the cost of the steel frame, we get the final cost:
- Glass – ≈ 36,420 rubles;
- Polycarbonate – ≈ 22,020 rubles;
- Reinforced film – ≈ 20,420 rub.
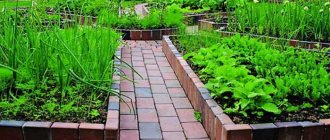
What are greenhouses for summer cottages?
While cultivating the land, man gradually found such a convenient way as growing berries and vegetables in a greenhouse. The method allows you to create a microclimate suitable for your vegetables in a confined space. Sometimes a large greenhouse is beyond the means of beginning farmers. Then a more simplified greenhouse structure - a greenhouse - comes to the rescue.
A greenhouse for a summer residence is an amazing design that will come to the aid of the farmer during the cold season and will protect the crops being grown from bad weather and frosts. In a closed space, you can create certain conditions that can be easily maintained constant for a long time.
There are a large number of types of greenhouses. Both ready-made ones and those that you can make yourself. They differ in shapes, sizes and building materials from which they are constructed.
Main forms of greenhouses:
- Hemisphere;
- Pyramid;
- Drop;
- Rectangular shape;
- Trapezoidal;
- Triangular;
- Oval shape.
The most common is the oval shape, because it is the easiest to construct.
Other costs
This is only the main part of the costs; a number of points need to be added to them:
- Since the floor in the greenhouse must be 50 cm below ground level, excavation work must be taken into account.
- Heating system equipment (if necessary).
- Conducting communications (if necessary: electricity - you will need an electric cable, sockets, lighting lamps, switches; water supply for drip irrigation - pipes (metal, metal-plastic, polypropylene, etc.), fittings, taps, and if the greenhouse is winter, then pipes must be located at a depth of at least 2.5 meters to avoid freezing.
- Racks for placing plants in tiers (they are not always made; sometimes plants are located directly in the ground on the floor).
- Protection against hail (especially relevant for greenhouses with glass coating; for this purpose, materials such as polystyrene foam, foam rubber, etc. can be used, which should always be at hand).
- Tool if it is not available.
- If it is planned to involve specialists for some work.
- Project development (if necessary).
Let's look at some points that improve the characteristics of greenhouses.
Arc greenhouse
The easiest structure to assemble and install. You just need to stick pre-prepared metal or plastic arcs into the ground along the made bed, thereby creating a frame for the greenhouse, which is covered on top with polyethylene or other material with suitable properties.
This design is quite easy to assemble and dismantle, it is very mobile - it can be easily moved from one place to another.
Heating of greenhouses
In harsh times, plants need to be provided with warmth. There are simple heating methods:
- Solar - based on the greenhouse effect created by the sun's rays. Occurs in summer with active sun.
- Biological - in the racks, a third of the container is manure or compost. The decomposition process provides heat to the roots and serves as fertilizer.
The technical heating option has several subtypes:
- Water - lay a double row of pipes under the beds and connect them to the boiler. If it is outside the room, then more uniform heating is provided. Heated with coal and wood. Sometimes a heat generator is used.
- Gas - burners or heaters. For a small area, gas cylinders are sufficient, otherwise you need to connect them to the heating system of the house. Fans are installed to distribute heat evenly.
- Stove - a chimney made of horizontal pipes (metal, brickwork). The boiler is connected to a water tank - a water furnace. For a large area you need two boilers. The pipe is raised 1.5 m above the roof, and the passage is well insulated.
- Electric – heating cable with a regulator to create the optimal temperature. Aluminum radiators or electric convectors are suitable (they do not dry the air, but force it to circulate). They are installed on brackets and the required indicators are set. You can use timers - they change the temperature depending on the time of day. The power of the devices and their number depends on the size of the greenhouse. They use infrared emitters, they not only heat, but also prevent plant diseases and create an optimal microclimate.
Pipes and heating devices are placed around the perimeter of the greenhouse.
Be sure to provide thermal insulation of the bottom. Additionally install:
- thermometers - determine the temperature of air and soil;
- thermostat – controls heating depending on readings.
Read the article about the best greenhouse heating projects.
Features of a thermos greenhouse
Construction of foundations for walls
After the pit for the greenhouse is ready, a strip foundation is created along its perimeter. To do this, a trench must be dug, then various actions are carried out, identical to those described earlier, where we were talking about the foundation for a winter greenhouse.
When the foundation is completely ready, the walls begin to be laid; we must not forget about installing one or two ventilation pipes. They are installed in the lower part of the end side of the building, opposite the entrance door, at a height of 0.5 m from the floor.
After installing the roof, it is customary to raise the pipes to a height directly above the ground, at least 1 m.
Greenhouse lighting
A year-round greenhouse requires additional lighting equipment, because... natural light will not be enough.
Use:
- Classic lamps - at the junction of the roof and walls or high on the side.
- LED lamps are the best option for large areas (saving energy). They are durable and safe to use. Mounted at the highest point of the ceiling - maximum area coverage.
Automation of switching on - a block with a timer. It creates comfort by simulating daylight - it gives commands to the lamps to start and stop working. This greenhouse option is suitable for professionals for growing vegetables, flowers, and exotic plants all year round, including in winter.
For a seasonal building, additional lighting is not needed.
Design features of greenhouses and greenhouses
The frame of a greenhouse or greenhouse is usually made of boards, and the useful volume is formed thanks to a lid in the form of glazed frames; they can be opened if necessary. This solution is optimal for growing seedlings and herbs, so that all this appears on the table as early as possible.
A temporary type of greenhouse, installed only for the period from spring to summer, is considered to be a combination of a wooden frame, plastic film, and fiberglass reinforcement. This solution will last for quite a long time if you disassemble the structure into parts in winter and store everything indoors. As a result, you will simply replace the film with a new canvas; it is not difficult and not expensive.
Some craftsmen install a greenhouse in a large old barrel; it is also used in the spring, but it is not necessary to remove it from the site in winter, because the structure can serve as a flower bed, or even an open bed.
The next solution requires forced heating, and is used immediately after the snow has melted. The structure is made of boards, metal-plastic reinforcement, covered with plastic film, and in order to look after the plants, you can go right inside.
A permanent greenhouse is equipped with various necessary parts and a certain microclimate is created inside it, which guarantees the operation of the building throughout the year. To do this, it is enough to make a not particularly deep foundation, then a brick base, and thoroughly insulate everything.
Such a greenhouse can even be attached to one of the walls of the living space, then it will be easier to connect the system to communications. It is convenient to care for plants throughout the year if you have access to the greenhouse from your home.
In order to save on heating in the winter season, you can install a kind of greenhouse-thermos; a pit is dug for it, the depth of which is 1.7-2 m, then everything is covered with a transparent roof. The solution is interesting, but the main thing is to take care of the ventilation system. Of course, this option is labor-intensive in its own way, but the resulting design guarantees savings in energy costs.
Which is better, a greenhouse or a country greenhouse: user reviews
Unlike the design of a greenhouse, a greenhouse structure is more expensive and capital. You need a more thorough and correct approach to its construction. Materials for the construction of a greenhouse must be chosen so that they can last you as long as possible.
A country greenhouse, reviews of which can be read on Internet sites and on the pages of the Odnoklassniki social network, is mostly a temporary structure, the use of which is impossible in the very cold season, because there is no heating.
What is the difference between a greenhouse and a greenhouse?
- The greenhouse is installed in one fixed place, and the greenhouse can be moved from year to year to different sides of your summer cottage;
- In fact, a greenhouse differs significantly from a greenhouse in size and internal equipment;
- The frame of the greenhouse is built thoroughly, taking into account the fact that it will always remain in place;
- Almost always, the greenhouse is installed on a foundation laid in advance;
- The top covering of the greenhouse should always be very reliable and of very high quality so that it can work flawlessly for you for a long time.
If, nevertheless, you decide to build not a greenhouse on your site, but a greenhouse, then you need to be prepared for the fact that it will take you a lot of time, money and effort.