Top 3 popular models
The desire to make a table on wheels arises among those who want to make their life easier:
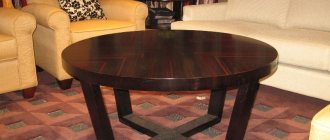
- The most commonly used piece of furniture in the home is the coffee table. Books, remote controls, keys, food, drinks and about a million other things are placed on it. Some people live at this table! If your favorite furniture is replaced or upgraded by attaching casters, then it will be easy to reach the remote control or your favorite book in one second, simply by rolling the table towards you.
- In second place is a table that is installed in an office or in a student’s room. The convenience of casters is that this table can be easily rearranged to improve the lighting of the workplace or to shade it. Often the rays of the sun begin to blind your eyes at sunset or sunrise, which is very inconvenient when working on a computer.
- In third place is the kitchen table.
- If you attach wheels to the legs of the dining table, you can easily move it from the living room to the kitchen, dining room or terrace. This is especially convenient at the dacha, and will also be useful for those hospitable people who are not able to carry heavy loads every time when guests unexpectedly arrive.
- A working kitchen table on wheels makes it possible to better equip a cramped kitchen when there is not enough space and it is inconvenient to prepare food. It can be easily pushed into a corner and then replaced if required.
What to consider when buying rollers
Furniture casters are wheels that are attached to the legs or table top, allowing the table to roll freely in any direction. There are several design points to pay attention to:
- how wheels are attached to a piece of furniture;
- what type and weight of the table;
- what is the desired type of movement on wheels (linear or directional);
- what kind of flooring;
- Are special functions required (locking rollers);
- what kind of table appearance do you need? There are two types of fastening, in one case the socket or cylinder is inserted into a piece of furniture, then screwed on. The second type is a flat piece of metal that holds casters and is attached to the bottom of a piece of furniture.
The important question is how to do it
calculation. When calculating, take into account the weight of the table. Once the rollers are found that fit in appearance and shape, find out how much weight they can withstand. The weight of the furniture is divided by this indicator, obtaining the number of wheels that will be attached to the table. If the table weighs more, you need to choose different wheels. When selecting casters, it is much safer to overestimate the weight by purchasing casters with a higher maximum total load capacity.
Example: The rollers you like have a rating of 50 kg. You attach 4 pieces to your kitchen table. This means that its possible weight is 200 kg (50 x 4). If the table weighs 65 kg, then these casters are suitable. It is important to consider whether the weight of the furniture is evenly distributed on the sides. If not, attach more rollers to the heavy side.
In addition to weight, consider the type of piece of furniture. Different types are treated differently. In some cases, the weight may only be transferred to the front 2 or rear 2 rollers. Think about how a piece of furniture should move. 360 degrees or in a straight line? Select rollers that support the desired type of movement. The type of flooring also affects which wheels to use. If the house has wooden or smooth floors (laminate or ceramic) that need to be protected from marks, scratches, and other damage, you need to use soft rollers made of polyurethane or rubber. If the apartment has carpet, choose hard rollers that do not interfere with movement on the surface every time. The thicker the carpet, the larger the wheels.
Tip: If the floors are uneven, to ensure that the table remains stable, purchase wheels with a locking mechanism. The furniture moves only when needed. In addition, such a choice is required if children and pets live in the apartment.
There are many types of casters: lockable, shock-absorbing, antibacterial, etc. Choose those that best suit your individual space. If the rollers are visible, then their shape is important. You may need a bright decorative design, or, conversely, one that does not give the piece of furniture any industrial or utilitarian look.
Models of coffee tables for connoisseurs of life
Coffee tables with wheels have been popular for a long time, the design has changed over time. If someone admires such furniture in a store, he can be sure that he himself will create any model quickly and for less money. In addition, she will develop and adapt a design for the existing interior.
Tables on wheels make them suitable for a traditional living room or a high-tech setting, creating an artistic focal point in the room:
- Decorated with metal, metal and wood are combined.
- Painted with bright colors such as red, white, blue and yellow to give the furniture a unique look.
- A great idea is a wheeled coffee table with a glass top.
- The model can be equipped with side compartments for storing things.
A rustic coffee table is usually made from improvised materials.
- Pallet is a common material for DIY furniture.
- Another cheap material for a wheeled coffee table is wooden crates.
Typically, rustic coffee tables on casters are shaped like a rectangle, but you can also build a funky square coffee table on large wheels that would suit an industrial-inspired living room.
Assembling the table frame
The first stage in making a serving table on wheels with your own hands is assembling the frame. The serving table consists of an upper and lower base, connected to each other by vertical posts.
First, let's prepare the foundations. To do this, use a circular saw to cut 4 pieces 86 cm long and 4 pieces 32 cm long.
Preparing blanks for the table frame
We join the boards according to the diagram shown in the figure below.
Diagram of the upper and lower bases of the table
For fastening we use screws, screw two screws into each joint.
Preparing holes for interlocking workpieces
We fasten the workpieces with screws
Now that the bases of the future countertops are ready, we connect them with vertical posts, as shown in the figure below. The legs, whose height is 78 cm, are attached from the outside of the prepared bases.
Wooden serving table frame diagram
For convenience, while fastening the frame with screws, you can secure it with clamps.
Assembling the table frame
Pallet table
Rustic pallet coffee tables have an eclectic look and their portability will add dynamism to any living space. Let's look at how to make a table on wheels with your own hands step by step.
Step 1 First, find a decent pallet, old, strong, not too broken, or purchase a completely new one. A Euro pallet measuring 120 x 80 centimeters is suitable. It is fastened with 78 special nails, but there are many more. Weight is about 22.5 -25 kg.
Attention! Every scuff and dent will add naturalness and give character to the new table.
Step 2 If the pallet is dirty, then the wood is cleaned and sanded. Start by wiping the tray with a rotating brush. The brush fibers remove the soft parts of the wood, leaving the harder ones, which creates a textured, durable surface. The wood is washed with soapy water using a hose, then dried. Step 3 Next, remove all rusty nails by disassembling the pallet into strips. The nails used at the corners are 12 centimeters long and difficult to remove. Therefore, use a crowbar or nail puller. Step 4 The level of cleanliness determines the level of the final design. Processing wood takes a long time. It's worth the effort to improve every corner, remove every chip, so that there are as few holes and cracks as possible. If necessary, the chips are glued using transparent wood glue. Water-based glue dries in 2-4 hours, but it is better not to touch the treated parts for 24 hours. Step 5 After individually cleaning and sanding the planks, they are recombined. A standard Euro pallet is too large, so they leave the width of the boards, shortening the length. Using a strong adhesive, such as construction adhesive, will eliminate the worry about screw length. The boards are clamped, glued and fastened. Step 6 For finishing, if there are children in the house, choose a water-soluble varnish and a colorless primer with a low content of pollutants. They are safe to use, designed for children's toys made of wood. Apply 3-4 layers of varnish. After creating each layer for adhesion, pre-sand the surface with 240 sandpaper.
The soft, matte finish provides protection against wood splinters and roughness. Therefore, there is no need to rush. You need to create thin layers, as applying too thick layers will cause the varnish to crack due to drying and shrinkage. After the multi-layer varnish coating is completed, the wheels are installed. Step 7 Drilling the holes and mounting the wheels is quicker than the sanding and painting process.
Advice. Before installing the casters, it is worth strengthening the corners (important for long, heavy tables) by nailing or screwing wooden blocks into each corner.
Next, holes are drilled and the rollers are fixed in accordance with the manufacturer's instructions.
To create absolute harmony and a truly cozy atmosphere in the apartment, it is very important today to pay due attention to various modern details. One of the details can be considered a piece of furniture such as an IKEA serving table.
Of course, it is unlikely to be used in the design of any apartment, but it is considered one of the most popular among most people.
When choosing such a table, it is very important to pay attention not only to its appearance, but also to a number of functions that it must perform.
What to look for when choosing a serving table?
Having decided that you definitely need a table in your interior, it is very important to pay attention to such characteristics as aesthetics, reliability of all accessories, and ergonomics. And of course it is important to dwell separately on the material chosen for its manufacture.
The maximum load on a serving table of any size falls upon the moment of delivery of ready-made dishes to the common dining table. It is for this reason that the stronger the chosen material, the better it is for you.
Various models made of valuable wood or expensive glass and metal are especially popular and in demand today.
Today, many consider wheels to be one of the most important parts for any type of serving table. The service life of the selected table will ultimately depend on how reliable they are.
The ideal option is when the manufacturer is so confident in the quality of its products that it easily provides a guarantee on all parts, including mechanisms for quickly changing the look of your table.
It is especially convenient if, immediately after using such a unique assistant, any housewife can quickly and compactly fold it. It is worth noting that the photo of a folding serving table in practice does not look so elegant, but at the same time it is functional.
When choosing a folding table or any other used for serving, it is very important, first of all, to proceed from the specific goals and objectives set for it. There is a huge difference between tables that should become assistants in organizing any celebration and those that are used only for tea drinking with the family.
In addition, it is very important to fit the table into the overall design of the room. That is, when choosing any table, personal preferences and financial capabilities will have a certain importance.
Glass table
This material has long been no longer considered as fragile as before. Today, you can actively use a table on wheels and not worry about breaking it.
For this reason, it is used quite often in the production of tables. It can be transparent or matte, or painted in any specific color at your request.
The peculiarity of tables made of glass is that they are quite heavy, but at the same time it will not be difficult for you to quickly wash them from absolutely any liquid spilled on them.
One of the main advantages is the ability to combine with any other materials: metal, wood or even high-quality plastic.
Finishing
Using a Kreg Jig, I made pocket holes on both legs on the back and left side. I also used screws and wood glue - some extra strength never hurts. You can also see that I got rid of the trim that was underneath the drawer.
Sweet snack in a hurry: make cake pops from honey and peanut cookies
Dream catch: a man was able to pull out a huge carp while fishing (photo)
I turn popsicle sticks into convenient toaster tongs: the technology is very simple
I now had a table with legs, but it still had no sides. That's why I decided to use wood for decoration. I used parts left over from previous projects. I cut them into the size I needed, sanded them and painted them. After leaving them to dry, I did the same with the interior of the table.
I also made a countertop. To do this I needed four thick boards, a miter saw and a sander. Do not forget to treat the wood so that it does not suffer from moisture and mechanical damage.
Wooden tables
The classic version of a serving table is wooden. It is not fragile, but at the same time it is not as heavy as, for example, glass.
Most often it is made in golden or chocolate shades using noble fittings.
There are options for using painted or carved patterns that give the table additional chic.
The only drawback of such a table is the need for regular maintenance, since wood is many times more capricious than, for example, glass.
When choosing a serving table for your home, it is important to take your time and evaluate as many different options as possible so that the final choice will please you for many years.
Photo of the serving table
How to make a mobile table on wheels with your own hands You can’t fit a lot of furniture in a small apartment. The more valuable becomes a table that can be used for different needs, for example, for a laptop or computer, which, if necessary, can be re-qualified as a coffee or dining table. This is exactly the kind of mobile table we will build today. It is a tabletop, with legs on wheels and a shelf. You will need materials: 2 carpentry boards of any type of wood - one 1.8 cm thick, the second - 2.5 cm 4 furniture plastic wheels Sandpaper with a grain size of 6-60 2 types of screws - the first type measures 4.5x35 mm, the second - 7.5x60 mm Wooden plugs for the screws Glue on wood Furniture varnish From tools Jigsaw Milling machine Grinding machine Screwdriver, which can also be used as a drill. It will be good if the drilling depth is adjusted on it Three types of drills - the first type with a diameter of 4.5 mm, the second - 7.8 mm, the third - 10 mm Clamps Square Ruler and pencil What parts need to be cut and their dimensions You need to make: Table top 120 cm long, 120 cm wide – 50 cm from a board 2.5 cm thick. In principle, you can make a part of any other size that is convenient for you. Shelf 83 cm long, 41 cm wide, made of 1.8 cm thick board. Legs in the amount of 4 pieces. The length of the legs is 62 cm, and the cross-sectional size is 5x5 cm. 4 upper drawers - front and rear should be 76 cm long and 7 cm wide, and two side drawers - 34 cm long and 7 cm wide. 4 lower drawers - front and rear should be 76 cm long and 4 cm wide, two side ones 34 cm long and 4 cm wide. 4 front and rear fastening strips 73.5 cm long and 2.2 cm wide 4 side fastening strips 31.5 cm long and 2.2 cm wide. The drawers and fastening strips are cut from a board of thickness 1.8 cm. How to cut and prepare parts for a mobile table. Mark each part on the board. You cut them out with a jigsaw. Regarding the legs - since the cross-section of the legs is 5x5 cm, and we have the thickest shield with a thickness of 2.5 cm, you cut out not four blanks, but eight. Then glue them together, holding them with clamps while the glue dries. Once you have cut out the drawers, make hidden spikes at the ends and round them off with sandpaper. The dimensions of the tenons for the upper drawers are 1x1x5 cm. For the lower ones - 1x1x3 cm. The drawers are cut out with a router, but if you don’t have one, cut shallowly with a hacksaw on four sides. Then secure the frame with a clamp and use a chisel and hammer to knock out the unnecessary parts. Cutting out the drawers In the legs, use a router to cut grooves for the drawer tenons. To find out where to cut, place the drawstring on the desired location and outline the tenon with a pencil. Sawing grooves for the drawers in the legs. Then, in the center of the groove, make a through hole with a drill with a diameter of 7.8 mm. From the outside of the groove, drill a hole with a drill with a diameter of 10 mm. The depth of the drilled hole should be 1.2 cm. You will press the head of the screw into this hole. Preparing the hole for the screw Regarding the shelf - once you cut it out, make a cutout measuring 4.5x4.5 cm in each of its corners. Drill holes in the fastening strips with a drill with a diameter of 4.5 mm. Attach them to the inside sides of the drawers with screws so that they are flush with the edges of the drawers. Assemble the table without fastening the pieces together to check that all the pieces fit together. If not, then bring them to mind. If yes, then move on to the next section. How to assemble a mobile table on wheels for a small room. Coat the grooves of the legs with glue and insert the side drawers into them. To make the connection strong: 1. attach two beams to the desktop tabletop, the distance between which is slightly greater than the length of the leg-tsar connection 2. install a drawer-leg connection between them 3. drive pegs into the gap between the leg-tsar connection and the bars so that the drawers are pressed against the legs very tightly 4. leave the part in this position until the glue dries. Insert the front and rear drawers into the legs in the same way. Screw the legs to the drawers with screws measuring 7.5x60 mm. You remember that we made holes in the grooves of the legs. Once screwed, insert the plugs. Sand all parts, then varnish. When the varnish is dry, sand the parts again and coat them with varnish. When the second layer of varnish has dried, use 4.5x35 mm screws to screw the tabletop and shelf to the fastening strips on the drawers. Turn the table over and screw on the wheels. The result should be a table like this.
In the modern world you can find a varied number of serving tables, which will differ in shape and design. This is an indispensable assistant during various events.
A serving table differs from a coffee table in that it has small wheels. They allow him to move around the room with ease, without having to worry about the dishes breaking. Such tables are usually used in restaurants or hotels as it is convenient to transport various dishes and cutlery.
A self-made serving table will simplify the process of carrying food. With its help, you can bring breakfast in bed for your significant other.
Detailed instructions for cutting blanks and assembling a serving table
- We mark the parts of the table top and bottom shelf on the wood block, having the same rounding radius (about 225 mm). We cut it out using a jigsaw or a router with a compass.
- When deciding how to make a serving table according to all the rules, we mill the blanks along the radius in several passes, each time going deeper by about 5 mm. Having cut out both elements, we round their edges with a milling cutter (radius 9.5 mm).
- Using a template, we select a round hole for the handle in the tabletop, installing a groove cutter and a copy sleeve on the milling machine.
- Take a blank for the side wall. We cut out a rotary stop from it, which will hold the folding element of the lid. For work we use a jigsaw with a fine-toothed file. We cut at high speeds, then the cut will be smooth.
- We drill holes for dowels in the ends of the side walls and in the table top. To create an ideal pairing, we use markers (for marking mating sockets) and a stencil jig (for precise drilling). Trying to make the serving table beautiful, we carefully sand the parts before assembly. We round the open edges with a cutter with a radius of 6.35 mm. We connect the tabletop with the lower shelf with the side walls, coating the dowels and the walls of the sockets with glue. First, we fasten the side panel with the cutout to the shelf, then install the second side wall.
- Before gluing the table top and side walls on dowels, we insert a rotary stop with a radius of 120 mm into place. We don't use glue here. A washer must be put on the lower dowel with a diameter of 6 mm.
- We assemble the drawers on dowels or connect them using the dovetail method. In the sides of the drawers, we cut out grooves for the bottoms using a milling cutter. We glue plywood parts into them. We attach telescopic guides to the outer side of the sidewalls.
- We cut out homemade rollers with a diameter of 140 mm. On the end side of the roller we cut out a groove 12 mm wide with a milling cutter. We will install an O-ring in it with glue, which will work like a wheel tire. The axles of the wheels are dowels ∅ 15 mm, recessed (also with glue) into the bottom shelf by 40 mm.
- We attach guides to the inner sides of the side walls. After this, we drill ∅ 25 mm handle holes in the front panels of the drawers. We put the boxes in place.
- To hide the piano hinge for folding the table top, we select 1.5 mm deep folds on the edges of the lid and the folding part.
- We are preparing a 4 mm thick template for bending the duralumin tube. We adjust the tube, bent along a radius of 200 mm, to the planned length of the fence.
- We put the racks on the duralumin arch. We insert the ends of the tube into 8 mm sockets drilled in the inner side of the table. At the same time, install the racks in the pre-drilled holes.
Making furniture with your own hands is not only a way to save money, but also a fun activity. You can bring your wildest ideas to life, for example, creating a coffee table. After all, this is not only a stylish accent in the interior, but also a functional element of the room.
The procedure for making a table at home is as follows:
- We take a beam with a cross-section of 5x10 cm, cut it into three parts, several pieces each. For example: the length of the first part is 130 cm, it is necessary to cut 9 pieces of beams with this length. The length of the second part is 21 cm - 12 pieces. The length of the third part is 34 cm - 2 pieces. You can start by making a drawing of the table.
- The timber is placed in three rows. At this stage, you need to leave a small gap so that you can place the table legs there later.
- Remove two rows from the top. We begin to move the rest of the timber. This will give the table an original appearance. Then we make markings for the transverse parts.
- We lay the outer bars of the second row and put marks for the cuts. The cuts can be made with a hacksaw or saw. After which we secure the bars with screws.
- Let's move on to the third row. We shift the parts a little and secure them.
- Empty spaces appeared under the tabletop. They are for feet.
- The table must be treated with a protective compound.
What is a serving table for?
Almost every housewife dreams of having comfortable furniture that can be used to ensure a comfortable stay in the kitchen, living room or even bedroom. Therefore, in such cases, the serving table will fit perfectly into the overall decor of the apartment. If you make it yourself, you can bring your wildest fantasies to life and unleash your creative skills. This table will perfectly complement your home decor and perform a number of tasks:
- will help organize an additional work surface in the kitchen;
- will serve as an excellent decorative stand;
- will be able to serve as a coffee table that can be placed in any convenient place;
- will help you change dishes during a banquet celebration without damage;
- With this table you can easily bring snacks, drinks, dishes and various tableware for your guests at the same time.
Important! The main advantages of the furniture are that it is multifunctional, ergonomic, and highly mobile.
Serving tables are made of natural wood, plywood, MDF, metal, or, as an alternative, glass and plastic. Such a product will complement and decorate the interior of any room. To make a table with your own hands, experts recommend using wood as a material with the addition of metal elements.
Pine is an excellent choice of wood, as it can also fill the air with essential oils. This is an environmentally friendly material that is completely compatible with human life and pets. It will not have a negative impact on health because it does not contain hazardous substances.
Original coffee tables
Every person wants to have an unusual table in their apartment so that it fits into the interior of the room and pleases the eye. This piece of furniture can be made from any material: wood, chipboard, drawers, etc. Let's look at several of these options.
Table made from waste paper
If there are old magazines and newspapers in the house, there is no need to rush to throw them away - perhaps they will serve you as material for the table. True, the interior design must be appropriate. By making furniture in this way, you can choose the table height you need and is comfortable for you. The process of making a table from old newspapers and magazines
height:
- We take waste paper and roll it into a tube, securing it with money rubber bands.
- We dilute the water-polymer emulsion. And put the rolled paper in it for 2-7 minutes.
- Then we dry the paper.
- We glue the bunch of cabinets with glue, you can use PVA. Dry it in a vertical position, securing it with thread in advance.
- We mark the strips and cut them.
- We glue the glass tabletop. The glass should be 12 mm thick.
Gallery: coffee table (25 photos)
Stylish table made of logs
This method is more complex in terms of execution than the previous one. The main elements for creating a table will be logs
.
The basis is a wooden box, preferably on wheels. After which it must be furnished with logs. A homemade surface planer is also used for marking. After sawing off all unnecessary elements, there is no need to throw away the sawdust. It is better to collect them in any pallet. After this, the round pieces are glued to the surface. Sawdust must be mixed on liquid nails. The mixture should resemble plasticine
. Using a spatula, it is necessary to rub all the cracks between the rounds. Then, the product must be removed from all sawings and dirt, sanded and varnished.
DIY coffee table (video)
Creative curved table
Making such a table yourself will be difficult, but still possible.
. The main thing is to follow the manufacturing rules. For the design you need to take any type of wood. You choose the height yourself. The basis is taken from the property of wood, such as softening during dry heating. After which the form is saved. More details about production:
This table option is for those who love functionality and beauty in one item. With the help of simple manipulations, he is able to change the height and appearance
.
When assembled, it is a regular table for various waste paper. One has only to lift the two sides with legs, and it changes its usual size and turns into a dining room one.
Another transforming system is based on metal frames-pedestals. They are attached to the tabletop. In their usual position, that is, when assembled, they lie horizontally; if you change the size, the lid rises and rotates on hinges and becomes vertical.
When unfolded, the size of the structure is 73 cm. This height is acceptable for a computer desk. Before making a transformer, you need to make a drawing.
How to make it yourself
A serving table is a necessary thing for a modern apartment, which will fit perfectly both in a country house and on a summer cottage.
Important! The design of the table in the classic version consists of two surfaces.
You should start by assembling the shelves for the serving table. The parts are fastened with screws. Glue is applied to the joints and allowed to dry completely.
Then the base frames of the tabletops are secured using vertical posts. In order to attach the legs, you need to drill holes on the outside, apply glue and screw in screws. It is on them that the wheels are attached.
You can finish the countertops at your discretion. The surface is coated with wood varnish to increase the service life of the item.
Every housewife dreams of comfortable mobile furniture that will make staying in the kitchen, living room, and yard comfortable. Therefore, a DIY serving table will be an excellent addition to your home decor. This functional item will help solve several problems:
- It will temporarily play the role of an additional work surface in the kitchen.
- Will serve as a stand for decoration.
- Turns into a coffee table in any place convenient for you.
- Deliver a change of dishes to the banquet table.
- Will help serve guests light drinks, snacks, and treat them to something tasty. After all, no matter how much you load the surface and shelves of the table, when delivering everything on wheels to the right place, you won’t knock over anything or feel heavy.
The main advantages of this type of furniture are functionality, ergonomics, and high mobility.
Serving tables are made of natural wood, MDF, plywood, metal, glass, plastic. You can choose a product model for any interior design. As for making tables with your own hands, mainly wood materials are used, sometimes they are supplemented with metal elements.
As a rule, mobile tables are a small two-tier structure, complemented by wheels and a handle. For greater safety and convenience, the shelves of the product are equipped with sides, and are also supplemented with various baskets, stands and special devices for placing bottles. Thus, a small surface can accommodate the required amount of dishes, glasses, dishes, napkins, etc.
Start making a wooden serving table. Even if your carpentry experience is not enough to create an elegant carved design, you can still appreciate the benefits and convenience of a simple, concise, neatly made device.
Table on wheels
If you have never made tables with your own hands, then you can try the simplest option
. Let's consider making a model from chipboard. To make it you do not need a lot of knowledge and skills and expensive materials.
You can order cutting of laminated chipboard.
To make the structure you will need: a table top, planks, a shelf, a bottom, wheels, plastic corners, self-tapping screws, confirmations. When you have all the necessary materials, you can start assembling:
- First you need to make a shelf.
- Connect the tabletop and planks to plastic corners. The result is vertical slats to which you need to attach the shelf using a confirmant. To make her hold on tighter. the same must be done with the bottom.
- We attach the wheels using screws.
- At the very end, you need to seal the attachment points using self-adhesives.
As we have already found out, making a coffee table at home is not difficult. The article presents options that everyone can handle. Over time, you will be able to create the most original designs.
The height of a coffee table according to GOST should not exceed 50 cm, but no one forbids adjusting it to suit yourself. For example, the height of the transformer can be 73 cm. It is also worth noting that the table should fit your interior. Making such a piece of furniture yourself is a fun process that will also save you money. A little imagination - and you already have an original product ready.
Make a wooden table on wheels that can be moved anywhere. It will be indispensable for outdoor recreation.
All materials are taken from cut down trees, so there is no need to destroy living trees specifically for this purpose.
All table dimensions are arbitrary - the article only describes the method.
Consider the height of the table before you start cutting the wood.
Tabletop
We cut the wood to the required thickness. Use a chainsaw, which will greatly speed up the whole process.
Table base
We cut off a small piece for the table top with a lid. We cut out small pieces at the same distance from each other, as in the photo above. We insert prepared boards of the same size into these slots. There is little space left in the center: the boards do not fit tightly together. Then we will put a “lid” on top.
The boards may not be enough for stability - install three boards for the legs.
We attach the rollers with regular bolts to the bottom of the legs.
In the center of the log in the upper part we drive an iron rod or screw; the table top will be attached to it.
Tabletop installation
The base must be stable and not tilt to one side, otherwise the tabletop will not hold up.
If the base is still a little uneven, do your best to correct it.
We fix the tabletop to the base using a rod or screw.
Finishing touches
The table is ready! It stands level, the tabletop is tightly secured to the base, and can be moved to any location on casters. Next, you can paint the table in any suitable color.
A serving table is a convenient and practical piece of furniture, in which functionality and decorativeness are used. The folding version can be used at home, in a restaurant, and in an office space. There are many models on sale, but it is quite possible to make a serving table with your own hands. How much it is really necessary and how successful a design idea can be - we will talk about this in this article.
Wooden serving table
Such a serving table on wheels will be useful in a modern apartment, in a country house, or in the courtyard of a house. Its production will not take much time and will not require any special professional skills. A list of materials, a drawing and a detailed description will make the work easier.
The design of the table traditionally consists of two surfaces. Their area is enough to accommodate breakfast for two people. Rotating roller wheels make it easy to move the structure, and a metal handle installed on one side will help you conveniently control the movement of the table. The bright red color will create a good mood and invite you to a treat.
Materials and tools
Make sure to purchase the necessary materials from a specialized store:
- Board 50x100 mm for creating a frame.
- Board 25x100 mm for two tabletops.
- Wooden slats 25x50 mm - for edging table tops.
- 4 roller furniture wheels on a metal base.
- Massive metal handle.
- Screws for fastenings.
- Nails.
- Putty.
- Primer.
- Paint (in a can).
The following tools will be useful: a circular saw, an electric drill, a set of drills, a pneumatic hammer, a grinder, a square, a pencil, and a tape measure. To avoid injury during work, use special equipment: safety glasses, headphones, gloves.
Start by cutting out the pieces for the serving table. Use a circular saw.
- 4 blanks for short tabletop sides, 32 cm long;
- 4 blanks for long sidewalls of tabletops, 93 cm each;
- 4 legs 78 cm long;
- 2 short strips of the lower tabletop 32 cm;
- 18 strips for the surfaces of the upper and lower shelves - 42 cm each;
- 4 long end strips 93 cm each.
Attention! Before starting assembly, sand the surface of the parts used in the design to remove burrs and roughness. It will be more difficult to complete this work in finished form. Use a sander.
Prepare a work surface for assembling the table. It should be smooth. Clean this area of contaminants.
Sequence of process execution
- Start by assembling the frames for the serving table shelves. From parts 93 and 32 cm long, assemble 2 identical structures. First prepare the holes for the screws. Widen it at the base so that the screw heads do not protrude above the surface of the part. Apply wood glue to the joints. Tighten the strips with 5 cm screws. Use 2 screws per connection. Part of the glue that protrudes on the surface of the joint must be removed immediately. Adhesive that has soaked into the wood or dried out will not allow for quality painting.
- Connect the finished tabletop base frames by installing vertical posts (78 cm each). How to correctly compose the parts is shown in the image below. To attach the legs, drill holes on the outside, apply glue, and screw in screws.
To ensure strong connections and the parts fit tightly together, fasten them with clamps until the glue dries.
- Now you can begin to form the upper and lower tabletops from prepared planks 10 cm wide (18 planks 42 cm long and 2 32 cm long). We lay 10 planks on the top frame. To ensure that the distance between them is the same, you can use a sliver of board as a stencil. Attach the planks to the frame using nails and glue.
- We install the boards on the lower base in the same way. Short strips 32 cm long are laid first and last (between the vertical posts).
- We install (using nails and glue) thin facade end strips, covering the ends of the boards of both tabletops.
- Start finishing work. Use putty to fill uneven areas and screw holes. Leave the table until completely dry.
- Sand the table surface to remove any excess putty. Wipe off the dust.
- Apply a coat of primer to the wood.
- Start painting the piece with red acrylic paint. Apply the substance to a dry surface. To achieve an even and rich color, paint in two or three steps.
- When the paint has dried, attach furniture roller wheels to the bottom of the table (with screws and glue). And at the end of the upper tier there is a metal handle.
Making your own table
To make a serving table with your own hands, drawings can be found in specialized magazines or on the Internet. Let's consider making a simple model, with two tabletops and a handle for transportation on one side.
First of all, you will need to prepare the following tools:
- Circular saw;
- Drills and drill sets;
- Screwdriver and screws;
- Pneumatic hammer;
- Grinding machine;
- Tassels;
- Roulettes;
- Pencil;
- Safety glasses;
- Respirator;
- Gloves.
To make a table on wheels with your own hands, you need to prepare the following materials:
- Board 50x100 mm - frame;
- Board 25x100 mm - tabletops;
- Rail 25x50 mm - edging;
- Paint;
- Putty;
- Finishing nails;
- Wheels.
Important! The lumber must be dry, otherwise the frame will cease to be strong and stable, cracks and gaps will appear in it.
Assembly
The serving table includes an upper and lower base, which are connected to each other by vertical posts:
- Using a circular saw, we cut out four pieces 860 mm long and four pieces 320 mm long. These will be used as a base.
Important! All workpieces require pre-treatment with sandpaper. After assembly, leveling the surface in some places will not be possible.
- Using the drawing, we join the boards.
- We screw two screws into each joint. In this case, you should first drill holes of a smaller diameter with a drill. This is done so that the lumber does not split when screwing in the screw.
- We fasten the bases with vertical posts.
- The legs, 780 mm high, are attached from the outside to the prepared bases.
Important! To make it more convenient to fasten the frame with screws, you should use clamps.
- We saw the lumber into twenty planks for table tops. The length of eighteen of them is 420 mm, two – 320 mm.
Important! To align the boards between the table legs, you need to temporarily secure a board of the same thickness using clamps.
- Ten planks are secured to the top base using screws or finishing nails.
- Eight planks are fixed on the lower base, in the middle, and shorter boards are fixed on the sides.
- We fix the edging along the long sides of the tabletops. The slats should have a length of 930 mm. For fastening we use finishing nails.
- We putty the formed recesses and holes.
- We sand the tabletops with sandpaper.
- Apply primer to the surface.
- We paint the resulting table.
- We fix the wheels with screws.
Important! In stores, swivel wheels are presented in a huge assortment. They are distinguished by design, material and construction. The recommended diameter is at least 80 mm.
A large, spacious kitchen and living room are the dream of every housewife. Spacious cabinets with space for all the necessary products, dishes, as well as long and wide kitchen countertops, a large dining table - this is what makes the daily bustle easier, and family dinners and receptions even more enjoyable.
Unfortunately, most of us have to make do with small kitchens and living rooms that double as dining rooms. In such rooms, every centimeter of space is worth its weight in gold. Then we are forced to take advantage of all the opportunities to gain additional space when serving food and drinks. In this situation, it is worth buying an inexpensive folding serving table on wheels, wooden, metal or glass. What is it, which model is better to choose - this will be discussed in this article.