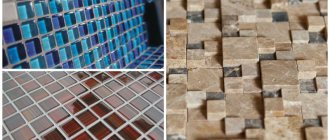
Note boards on the wall: possible applications
For people of the older generation, their acquaintance with the board on which they can write happened at school. You erase the carefully written chalk note and make a new one. And so on ad infinitum. Today there are many alternatives to the classic school board. And the scope of use has expanded significantly. Boards used for announcements, presentations, sketches, calculations, etc. are found in every office, organization, and institution.
The process of placing information on note boards is carried out by writing or attaching already filled media
Widespread distribution and versatility are ensured by the main operational quality - the ability to clearly demonstrate the content. The process of posting information is carried out in two ways:
- performing a recording;
- attaching already filled additional media (paper or similar).
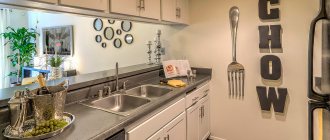
In addition to institutions, boards can increasingly be found in residential buildings. They are hung mainly in rooms where all household members periodically gather. Here priority goes to kitchen-dining rooms and dining-living rooms. A weekly note board is a great general organizer for the family. No one will forget about joint hikes, expected visits, and solutions to pressing everyday issues.
Some housewives skillfully use such common informants to create a menu - they invite family members to write down their wishes. You can find boards in offices, workshops, children's rooms, hallways.
Boards for notes can increasingly be found in offices, children's rooms, kitchens, hallways
Interesting ideas for creating note boards
If you have some kind of frame or just an old hoop at your disposal, try transforming it all into an original item. The empty space can be covered with fabric or tied in several rows with rope. In the latter case, the notes will be attached with clothespins.
Hoop note board
Do-it-yourself cork boards for notes look great. Wine bottle corks are simply glued onto a rigid base in a random or systematic manner. They can be arranged in a spiral, in square blocks, etc.
Cork board for notes
Cork covering for walls: basic qualities of the material
Boards for posting information can be made of various materials, in particular balsa wood. Before talking directly about such products, it is worth getting acquainted with the material in general. Its main advantages are environmental friendliness and presentable appearance.
Wall coverings are made from balsa wood. This can be wallpaper (a thin layer of cork applied to paper or non-woven fabric), rolls (2 mm thick canvas consisting of two layers), panels. The last option is slabs 30x60 cm thick. The cork panel on the wall also has two layers: the bottom one is made of pressed chips, the top one is a thin slice of tree bark - veneer. This coating has a number of significant advantages:
- the material is light;
- quite moisture resistant;
- not affected by temperature changes;
- resistant to mechanical stress.
If we evaluate cork material used as insulation for walls, it is worth noting its low thermal conductivity (heat is retained in winter and does not penetrate into the room in summer) and high noise insulation.
Original wall coverings are made from balsa wood: wallpaper, rolls, panels
Certain qualities of the material, namely lightness, resistance to damage and interesting appearance, have become the reason for the active production of boards from balsa wood for the wall.
Important! The top layer of balsa wood products may have a decorative coating. This allows you to choose an option that matches the interior of the room.
Cork board for notes: dimensions, application features
A cork board for notes is a square or rectangle with a frame. For office versions of the product, the frame is often made of aluminum - a lightweight and practical metal. Home models may have a more original appearance, both in terms of shape and frame material.
The standard sizes of factory-made cork boards are usually the following: 50x60, 60x90, 100x100, 90x120, 100x150 cm. These are standard options, but there are products with other dimensions. The technology for making the base of the boards is the same as for cork wall coverings: the bottom layer consists of pressed chips, the top layer is made of veneer.
The standard sizes of cork boards are as follows: 50x60, 60x90, 100x100, 90x120, but much larger products are also available
The top coating of note boards, made of cork, has the unique ability to pass through the surface and retain sharp objects. In this case, the structure of the material is not damaged at all. Pushpins and pins are used as fastening for such boards. The buttons should be in the shape of a stud. The hat can be either a standard metal one or a decorative one made of plastic.
Cork boards for residential premises are distinguished by more original frames made of wood, plastic, and artistically processed metal. At home, boards are convenient to use not only for notes, but also for posting photographs (mobile photo exhibition), children's drawings and other creative works.
The fastening buttons and pins do not need to be removed and returned to the packaging. They can be “stored” in one of the corners of the board. This makes it much easier to use.
Magnetic board
It differs from the previous type in that you cannot pin notes or pieces of paper on it. This has a plus: the needles will not be lost, but there is also a minus - the board itself, like the magnets, will be more expensive (when compared with similar-sized products made from cork). Usually it is hung on the wall in the room, a calendar with a daily to-do list, tables and other important things are placed on it.
Textile note board
Note board in Provence style
Note board in Provence style
This alternative to a wooden product will fit into a minimalist interior design.
Board for notes in the interior of the apartment
Burlap note board
DIY cork board: simple and original
Many people come to the decision to make a cork board for the wall with their own hands. There are several reasons for this:
You can purchase a frame for a cork board ready-made or make it yourself
- the ability to make a product of the desired size (it is not always possible to find a suitable option);
- give the board an original shape (manufacturers often offer standard rectangles);
- arrange in accordance with the overall design of the room;
- use high-quality material (Chinese-made boards have a too thin top layer, which becomes damaged over time even with proper use);
- desire to save money.
You can make your own cork board for notes on the wall in the following way:
- Purchase a panel of the appropriate size. The thickness must be at least 12 mm.
- Using a shoemaker's (or similar) knife, cut out the desired shape. If you plan to change the location of the board, it is better to supplement the structure with a base, for example, made of carbolite.
- Frame the product. You can purchase a ready-made one, since there is now a huge selection of both sizes and shapes, or you can make it from a cable channel (if the sides are straight), flexible plastic (if it has rounded outlines).
The advantage of making a cork board with your own hands is the ability to make a product of the desired size
Helpful advice! If it is not possible to find a sheet of the required thickness, you can buy and connect several thinner panels with special glue.
If you want to give the product an original look, you can cover the surface of the board with fabric. You should use a material with a sparse weave and a smooth texture. Using thick fabrics can cause the pointed parts of buttons and pins to catch and pull out threads.
Master Class
- Most often, cork base is sold rolled into a roll. The day before creating a cork board with your own hands, unroll it and press it with heavy objects so that the material straightens out.
- Measure the frame from the inside, transfer the markings to the cork. Clean the frame and coat it with paint or varnish. Leave to dry.
- Using the markings, cut out the required piece of cork sheet. While the frame dries, the measured section can be decorated with drawings, markings or paint.
- Frame a cork board, print out some nice pictures, family photos and attach to the board with pushpins. On this basis, notes also stick well on practical office sticks.
- Make several small boards and place them on the wall - they will serve as a bright homemade decoration for the room. Cork boards look harmonious in absolutely any room: in the nursery, living room or kitchen.
How to hang a cork board on a wall: tips and tricks
Particular attention should be paid to the process of hanging the cork board. Factory versions come with hinges or have specially reinforced holes. Here it is necessary to correctly and carefully insert nails, screws or other fasteners into the wall.
But when it comes to self-made products, you need to choose the best method to ensure reliability and aesthetics.
The easiest way to attach a cork board to a wall is to screw it with screws
- Alternatively, the board can be attached to the wall with through screws. Then you should decorate the cap and try not to squeeze the cork part of the product during the screwing process.
- To decide how to attach a cork board to the wall using overhead hinges, you need to evaluate the strength of the base (if one was used) and the frame. If there is a wide wooden frame, it is better to fix it to it. If there is no dense sheet backing, the hinges should also be attached to the frame.
- When fixing the loops, you need to ensure that their outline does not extend beyond the board either in the top or side parts. Otherwise the product will look rough.
- The board is usually hung on already decorated walls. Therefore, before starting work, it is necessary to make precise markings. The further the loops are removed from the edge of the board, the easier it is to hang.
When fixing, an important aspect is the choice of level. He must ensure that the board is accessible to all members of the family (or team) for whom it is intended.
An important aspect is the height of placement, since the board for notes must be accessible to all family members
Master class “soft French board for notes”
A cute and functional board for notes and notes can be made in a couple of hours from scrap materials. Every needlewoman has cardboard, fabric with delicate colors, ribbon, buttons and threads. Make not one, but two or three soft boards - a functional composition for notes and a designer highlight in your home. The main thing is to choose the right fabric to match the upholstery and overall design.
- hard cardboard, plywood or fiberboard;
- an awl or drill with a mini attachment;
- fabric with an interesting pattern;
- material for the soft substrate – synthetic winterizer or thin foam rubber;
- knitting threads (acrylic or iris);
- braid or thin satin ribbon;
- glue;
- "gypsy" needle;
- furniture stapler;
- buttons, beads or other decor;
- scissors, ruler and pencil.
- Take as a basis a square of thick cardboard or plywood of the desired size. The easiest way to work is with a cardboard base - for beginners, a 15x15 cm format is suitable.
- On the base you need to make markings in the form of a grid - the lines should run parallel to the diagonal of the square.
- At the intersection of the lines you need to make holes with an awl, a needle or a drill with a thin drill bit.
- Cut the padding polyester the same size as the base and grab it through the holes made so that it does not slip.
- You also need to prepare the fabric in size with a margin for good bends under the base.
- Cut the ribbon to the length of the grid lines, but with some extra room for hems.
- Place the fabric on top of the padding polyester, securing it on the back side with a stapler (or glue).
- Now, using thick acrylic knitting threads, we fix the braid at the intersection points through special holes. Make sure the tape has good tension.
- On the reverse side, the tape also needs to be glued or secured with a stapler.
- At the intersection we sew or glue beautiful buttons or beads.
If you leave the clean fabric without the braid, you will get an original soft sign for notes that are attached to it with pins. Photos, notes, recipes, business cards and other valuable pieces of paper such as postcards are placed between the fabric and the braid.
Ikea cork boards: product characteristics, prices
A large selection of cork boards is offered by commercial and industrial companies. The bulk of the products are standard square and rectangular options. Moreover, the latter can have two ways of hanging: the same model can be placed horizontally and vertically.
The external cork covering of Ikea boards varies in thickness and color. Buyers are invited to choose light brown, sand, and beige shades. Fans of darker tones will also find an option for themselves. The frames of the boards can be contrasting to the main covering or belong to the same color shade. Metal or plastic is used as the material for making frames.
Among the boards of this manufacturer there are many decorated products: the outer covering has a pattern. These are unobtrusive geometric shapes, zigzag lines, repeating patterns, etc. Engraved boards are of particular interest. The area of such products is divided into segments, each with an inscription corresponding to one of the calendar months.
The prices of cork boards for the Ikea wall can be very different. A small board 45x60 cm in a wooden frame will cost approximately 1000 rubles. A 60x100 cm product with decorative design (pattern) is offered for purchase for 1900 rubles. Standard stand options 120x90 cm can be priced at 3,200 rubles. The average thickness of the boards from this manufacturer is 1.4 cm. The price depends largely on this indicator.
Most cork boards come in standard square and rectangular shapes.
Almost every set of boards comes with a set of buttons with transparent heads. This universal fixation option is acceptable for any application of the product.
How to make a cork stand with your own hands
It is more profitable to make a cork board on the wall yourself. It will not cost too much and will fit organically into the room you need, since you will create your own design. This is how you make a cork board with your own hands.
Can you boast of an excellent memory? For example, remembering a bunch of current and future tasks, especially with limited time... Or easily remembering important information... And also not forgetting about the requests of your friends and loved ones... Your memory may not be “girlish”, but sometimes annoying things still happen failures. I also want to keep the little things I need in a visible place and be able to find them easily.
Today we will discuss this issue and offer a very useful tool: a collection of various boards for notes and trifles.
Most of them are options for children's and youth rooms, but the idea itself is good for a home office and kitchen.
We love this idea because it's colorful, convenient, and has a variety of options. For a home office, this is an ideal option to save desk space and make it easy to keep organized. And children quickly become accustomed to proper organization.
Look at examples of note boards and find something for yourself, or for a child’s room!
In fact, for these purposes, humanity has long invented all sorts of “sklerozniki” (diaries) and telephone books. But, as you know, the road to you know where is paved with good intentions. Therefore, we often write down information on whatever comes to hand, and it’s good if these are special writing sheets.
But one day their number exceeds critical limits, and it is no longer possible to figure it out: it’s high time to throw something away and move something to a permanent place (for example, a phone that will come in handy someday). But we won’t teach you proper organization and order: we and other sites have special articles for this. Today we are talking about a specific convenient tool: in all its diversity.
There are many options for children and youth here for one reason: this is a very easy way to teach children to properly organize their lives and studies. Reminder boards can be factory-made, but to save money, it makes sense to make them yourself. The ideas in the photographs that you will see in this gallery are not so complicated: look at everything in detail and create the same convenient devices yourself.
All photographs are divided into several categories:
1) options for different content - according to the functions of the board; 2) examples of original forms; 3) ideas for additional or main decor; 4) placement of reminder boards in the children's room.
What your board for notes and trifles might look like:
The reminder board can be a single whole or consist of pieces, like patchwork, the individual parts are simply attached side by side to a single base. There are many variations: wall or tabletop, any size - from 30x30 cm to 1.0x1.5 m, shape - depending on your imagination. Place the board next to your desk or in any other place convenient for you.
If you decide to make a writing board with your own hands, you may need:
Fibreboard for rigid base
Pieces of material with perforations (holes) and hooks for hanging small items - you can look for them in companies that manufacture commercial furniture
Small pieces of natural cork - easy to attach papers to using thumbtacks
Lightweight plastic or aluminum containers for small items that can be attached with double-sided tape or glue to the board
Envelopes made of thick cardboard or fabric (they are also convenient for folding packs of sheets)
Mini shelves for small items that can be attached to the bottom of the board or next to it
A rigid frame to combine the pieces of your patchwork into a single composition.
Special material on which you can write, such as a school board (mini versions can be found in children's stores)
Fabric, synthetic padding, ribbons (or wide decorative elastic) and buttons (or other mini-decor) - for a “soft” volumetric board: more about this in the “do-it-yourself” mini-course.
Unusual shaped note boards:
If we are talking about a children's or youth room, come up with a shape that your child will like. And for yourself, in addition to hobbies, you can also focus on the style of the room where it will be located (home office, kitchen, hallway).
How to decorate a note board:
You can start by choosing a spectacular material or make a laconic option, and then supplement it with interesting little things. Or even leave it up to the child’s discretion (let him decorate it himself), if we are talking about a children’s room.
With all the variety of choices in stores today, it is often quite difficult to find the right thing that will perfectly fit into the interior in design, size, and style at the same time. It is in such cases that there is a need to do something with your own hands.
Today's two master classes will be devoted to making a writing board.
Magnetic board on the wall: simple, convenient, interesting
An equally convenient option for both home and office use are magnetic boards. As for the shape and size, they practically repeat the cork or standard school options. This is a rectangle, or less often a square, decorated with a frame.
Attaching information on paper to them is even easier than to cork ones: you just bring the sheet to the desired location and attach a magnet.
Related article:
Cork flooring: types and properties of finishing, application features
Properties and features of finishing materials, advantages and disadvantages. Types of cork coverings, prices and reviews.
Magnetic boards on the wall for the home are also very popular because they have an additional function: you can write on them with chalk. In the offices of various companies, institutions and educational institutions, rotating boards are a common option: on one side they write with chalk, on the other they use magnets to place information.
Magnetic whiteboards on the wall are very popular because you can write on them with chalk.
Today there are a great variety of magnets on offer: IT-themed (emoticons), educational (letters, geometric figures), just nice flowers, butterflies, neutral round hats...
Helpful advice! It is very important to select magnets in accordance with the purpose of the board. The appearance of these additional elements significantly influences the creation of a certain mood in the perception of the posted information.
A magnetic board for children on the wall is a universal option. Using braces does not require any special skills and is accessible to every child. The ability to draw and write with crayons ensures comprehensive development: motor skills are improved, thinking and creative imagination are activated, and certain learning skills are formed.
Types of coatings for magnetic marker boards on the wall
Magnetic marker boards can conditionally be classified as an improved magnetic chalk version. The “sticking” function is retained, but notes are made with a marker, not chalk. Using the latter is associated with some problems:
On magnetic marker boards, notes are made not with chalk, but with a marker
- chalk must be wiped with a damp sponge;
- it crumbles, whitish dust appears on the floor;
- Even after using chalk for a short time, you must wash your hands.
Markers do not have all of the above disadvantages: notes are wiped with a dry sponge, do not litter, and do not leave marks on your hands.
The following materials can be used to cover boards on the wall for notes with a marker:
- Melamine. The models are inexpensive and have a limited service life of 3 years.
- Polymer paint. Products can be used for up to 5 years. Over time, microcracks may appear that prevent the inscriptions from being completely erased.
- Enamel. The surface is matte, durable, and does not crack. Provides 25 years of full use.
- Glass boards. Virtually unlimited period of use while maintaining integrity. Interesting appearance. Quite a high price.
- Metal ceramics. Expensive and most durable products.
Magnetic marker boards according to the type of design are divided into rotating, wall-mounted, mobile and flipcharts
Based on the type of construction, magnetic marker boards can be divided into:
- on wall (fixed permanently);
- rotating (fixed to an axis around which they can rotate);
- mobile (on wheels);
- flipcharts.
The last type deserves special attention. These are boards on tripods that look like an easel. Almost all offices are equipped with them. The main positive characteristics can be considered compactness and the creation of an intimate atmosphere (promotes the necessary working mood) due to the design features. Small flipcharts are often used for home use.
Making a magnetic marker board with your own hands
Anyone can make a magnetic marker board for notes with their own hands. The process does not require any special skills, and the necessary materials are freely available in all relevant stores. The tools you will need are cutting devices, a screwdriver, a hammer, as well as nails, screws, and fasteners. If the dimensions of the purchased sheet suit you, you won’t have to cut it at all.
Melamine can be purchased as the main fabric. It is worth choosing a material with a smooth surface. Sheet steel is best suited to create a magnetic field. Both layers should be attached to the plywood board. To ensure that the multi-layering is not visible and the product looks aesthetically pleasing, you need to decorate the board with a frame made of an aluminum profile or a cable channel - whichever is more suitable in size or taste.
Thanks to the free availability of appropriate materials for sale, anyone can make a magnetic marker board with their own hands.
Similarly, the board can be made not only from melamine, but also from plexiglass, Lexcan. The latter material is the most durable, although thin, does not crumble, and has a pleasant matte finish.
To understand how to make your own note board functional and durable, you need to meet two main requirements: the surface must be perfectly smooth and resistant to the chemical effects of marker ink. You can also make a durable coating yourself. To do this, several layers of paint, preferably white, should be applied to a sheet of steel (marker notes are more clearly visible on white), and then a matte varnish coating.
A few tips regarding the manufacturing process and use:
- It is necessary to apply subsequent layers of paint only after the previous ones have completely dried;
- if cutting is necessary, you should use saws for laminated materials (this advice does not apply to metal);
- For more accurate sawing without defects, you should apply a marking line using a ruler and a knife.
For a magnetic marker board to be functional, its surface must be perfectly smooth.
Important! The magnetic marker board should only be attached to a flat wall. The fixation should be as rigid as possible; shaking and distortions will not allow you to make visually high-quality recordings.
DIY note board
An IKEA cork board isn't very expensive, but how much more enjoyable is it to make it yourself! Of course, this will require some effort and investment, but if you make it yourself you will enjoy it much more than if you bought it. How to make a cork board?
To do this you will need:
- plywood – 1 sheet (size depends on personal desire);
- cork or cork backing - according to the size of the plywood;
- fabric - 2 cm larger in area than a sheet of plywood (it is better to take natural fabric
, for example, cotton); - (manual or electric);
- stapler for furniture;
- construction knife.
- a simple pencil;
- ruler;
- wooden slats or - for the frame;
- PVA and brush;
A DIY note board may require a man's strong hand during the manufacturing process.
Manufacturing process
simple enough:
- Place a sheet of plywood on the work surface and a cork on top of it. Adjust the size
of the base to the desired size: sometimes cork is larger in scale and needs to be trimmed, sometimes plywood. - Plywood is easy to cut with a construction knife, like cork, just make a deep cut and then separate it with your hands.
- Glue the plywood and cork together using a gun. Here you need to be careful, sometimes the cork has a pattern or relief, but they are not needed for the stand, so they should be positioned so that there is a smooth cork on the surface.
- The materials glue quickly enough, but to be sure, you can wait 1 hour
. - The front side is cork, and the plywood is the back.
- It is good to iron and steam natural fabric so that it does not become sweet or wrinkled.
- Lay out the fabric on the work surface, and place the glued panel on it so that the cork is on the fabric side, i.e. at the bottom.
- There should be a strip of fabric left around the perimeter - wrap it carefully and pin it to the plywood, i.e. on the back side.
- The fabric should be evenly stretched
, without folds and not sagging on the front side. - The stand can be deployed to check the uniformity of the fabric and its appearance.
- On the reverse side, the fabric must be glued to the plywood.
- Carefully and gradually peel off the fabric and coat it, and then evenly and carefully distributing it, glue it over the surface of the plywood;
- The glue must dry. Alternatively, you can use a furniture stapler instead of glue.
- The last step is to create a frame
. To do this, cut out parts of the frame from the slats using a jigsaw, having previously measured and made notes with a simple pencil. - Glue the parts of the frame together and glue it to the stand, and after drying, paint it with acrylic paint.
After creation, it is better to let the stand stand for a day
to allow the glue and paint to dry. How to attach it? Ready-made stands have special holes in the corners for fasteners. Those who made it themselves have several mounting options:
- screws, self-tapping screws or nails, but for this option you will have to make holes in the wall;
- liquid nails, this option does not require holes in the wall, but will have to be glued around the entire perimeter;
- double-sided tape, but you need the strongest tape that can withstand the plywood.
Important
! Instead of a homemade frame, you can use a ready-made frame from an art supply store.
Creating such a panel is not only a simple process, but also a creative one, because during it you can use your imagination and make something special.
Wooden note board: buy or make it yourself
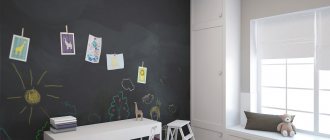
Note boards made of wood also do not go out of active use. Those, the prototype of which are the classic school ones, were once only brown, but are now green and gray. Despite their limited functionality (you can only write on them with chalk), they also have a number of positive characteristics:
- surface upgrade available;
- unlimited decorative possibilities;
- low price;
- the ease of creating such a note board with your own hands.
Both solid wood and wood boards can be used as materials for manufacturing. The main requirement for the material is a polished top surface. A wooden board does not always require framing; it already looks aesthetically pleasing if the cuts are processed.
Both solid wood and wood boards can be used as a material for making wooden boards
To hang the product, you can use traditional loops, openings, or drill two through holes in the upper part and thread a decorative rope or cord through them - the design will be very original.
The interesting design of the finished products should also be noted. They can be combined with key holders, photo frames, and shelves. Some models imitate easels.
When making your own note boards for the wall, you need to properly apply the top coating. It is best to use special Tikkurila paint for these purposes, which is intended for school boards. When applying, the following requirements must be observed:
- prepare the surface: remove peeling layers of previous paint, sand the remaining layers until matte;
- remove dust and degrease the board;
- Apply paint using a brush or spray and dry.
For the top coating of wooden boards it is better to use special Tikkurila paint
Important! Do not paint over a damp surface!
Note board: 3 super master classes
Many people are familiar with the situation when a note with an important entry disappears or it is difficult to find a pen and paper to quickly write down a phone number. A DIY note board solves this problem, and it can also become an interior decoration. It is very convenient to have a specific place in the house where you can leave a message, grocery list, business card, phone number or birthday date on a piece of paper.
Boards on the wall for notes and interior: how to place products correctly
Despite the simplicity of the design, finding a good position in a living space for a note board is not so easy. In terms of functionality, it should occupy a place visible to everyone, but making it the central element of the interior would be wrong. A few suggested tips will help you optimally place your home organizer:
- A cork board in an interior of any style will be organic due to one of its main advantages - the naturalness of the material.
- You should not hang the product on a wall where there are already paintings, reproductions and other flat decorations. This will cause chaotic oversaturation.
- A board installed in the hallway should be supplemented with shelves, hooks for keys, umbrellas, etc. Multifunctionality will create additional comfort.
- If you are afraid of bringing an “office feel” into your living space, you can cover the surface with fabric (see the section “Do-it-yourself cork board: simple and original”).
- It is appropriate to decorate note boards placed in the kitchen with elements of the corresponding theme.
- Note boards made from cork organically combine with wooden furniture in children's rooms, but they should only be placed in schoolchildren's rooms. Giving sharp objects (tacks) to children's hands is unsafe.
A board on the wall for notes should be in a visible place, but not be a central element of the interior.
Helpful advice! For a note board to truly become an interior decoration, it must “work.” Periodic change of information, creative works, photos, etc. is mandatory.
Cork Board Ideas
In addition to storing notes and photographs, a white cork board in the interior of a creative family can be a kind of inspiring stand on which sketches, clippings from magazines and newspapers, beautiful pictures, unusual fabrics and everything that brings inspiration to its author will be attached. In decor, such a board even got its name - inspiration board.
A wish card on a cork board can also be placed in a prominent place. It represents a kind of projection of the desired future, in the center of which you need to place your photograph, and on the sides of it are drawings and magazine clippings of how you want to see your life in a few years. According to psychologists, such visualization can maintain “morale” in moments of loss of strength and depression, and it also helps to clearly plan steps to achieve your goals.
Cork board on the wall: features of use and surface care
Any item in the living space must be cleaned, including the note board. If it is intended for writing on it with chalk or a marker, then the surface is wiped off regardless of cleaning. Additionally, only the frame is cleaned.
The situation is completely different with cork-coated boards fixed to the wall. Despite the ability to pierce the surface countless times, it is quite possible to damage it with a hard brush. When caring for cork boards, the following rules must be observed:
Clean the surface of the cork board only after removing all the buttons
- During use, periodically dry clean using a vacuum cleaner with a soft attachment or remove dust with a cloth.
- Perform wet wiping with a wrung out sponge (or cloth) after preliminary dry cleaning.
- The surface of the frame can be cleaned more intensively using products designed for certain materials: wood, plastic, metal.
- The surface should be cleaned only after all buttons (pins) have been removed.
- If chewing gum sticks to the board, traces of glue or other dried stains appear, you need to remove them with a thin stationery knife (or a regular blade), carefully cutting them off with a thin layer of cork. Washing and scrubbing should absolutely not be used in such cases.
The board for notes should turn into a panel for notes or a mini stand for interesting works and stories in the living room. By choosing the appropriate option and decorating it in an interesting way, you can get an element that complements the interior favorably. If we add functionality that helps preserve family traditions, organize everyday life with minimal problems and difficulties, and maintain contacts, the importance of this simple item will increase significantly.