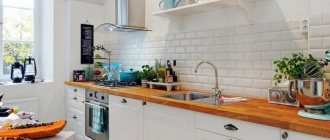
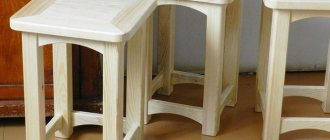
If wooden furniture has lost its former splendor after a few years, do not worry. Thanks to restoration, it is quite possible to return surfaces to their original elegance and aristocracy. Doing the work yourself is a labor-intensive process. However, if you strictly follow all the steps, the result will not be long in coming.
Restoration of a wooden surface without polishing
Even with the most careful handling of furniture, chips or scratches may appear on the surfaces. Restoration will help get rid of them. The easiest way to restore the shine to a wooden piece of furniture is to treat it with a composition containing orange oil. This is easy to do with your own hands: apply water to a clean sponge and heat in the microwave for half a minute. Next, using a spray bottle, spray the composition on the surface of the cabinet or table, then walk over it with a warm sponge. To protect your hands, you should first put on gloves.
If there is a large stain, you will need special tools and devices: retouching marker, wax, denatured alcohol. For restoration, the surface is cleaned with soapy water and dried. The next step is to wipe the lightened areas of wooden furniture with alcohol, most often this helps to restore the original color. In case of deep damage, scratches and stains are painted over with a marker and wax is applied to add shine.
For chips, you will have to use putty. It is best to purchase a light variety and complement it with color to obtain a shade that best matches the color of the surface.
Procedure:
- Cover the chip with the composition, including the area located nearby.
- Wait until dry.
- Clean with sandpaper.
Restoration of a wooden surface with polishing
The technology of updating the varnish layer is considered especially complex. But even this type of work with wooden furniture can be done independently. The restoration process begins with dust removal and degreasing. To do this, use a soap solution or dishwashing detergent.
After waiting until the washed elements are completely dry, proceed to restore the polishing:
- If the surfaces are dark, iodine will help disguise the scratch. To get the most accurate shade, you should dilute it with water. If the color is unusual, then it is better to choose a retouching marker.
- It is allowed to use shoe polish of a suitable color.
- To eliminate deep scratches, prepare a composition of softened wax and turpentine (proportion 4:3). The resulting product is applied to the polish using a soft cloth and rubbed in.
If a stain appears on the polish, the easiest way to remove it is with gasoline and a soft cloth. If the stain is ingrained, repeated treatment will be required, but as a result the damage will be eliminated. After this, the surfaces are polished with velor cloth until shiny.
Methods for working with different types of stains:
- When hot (white circles), wipe with alcohol, then polish with linseed oil.
- Deep damage from hot temperatures - lubricate the area with a mixture of alcohol and drying oil and polish.
To restore polished furniture, you can prepare simple but effective compositions. Mix turpentine, linseed oil and vinegar (proportions 2:2:1), apply to a natural wood surface. Wait for absorption. After this, polish with a piece of cloth. A composition whose components - beer and oil - are taken in equal quantities will help to put your table or cabinet in order. It is applied to a napkin, then passed over the facades and countertops, and allowed to absorb. Then polished.
How to Remove Polish from Wood Furniture
When doing renovations, you may find it necessary to remove polish from wooden furniture. Most often during restoration it is replaced with matte tinting paints.
There are several ways to remove the coating:
- Mechanical. With the help of a sander, all the work will be done very quickly. If you don't have the equipment, you will need coarse sandpaper. The varnish is carefully scraped off until the wood surfaces are visible. Then, using fine sandpaper, the elements are cleaned until smooth. The work is dusty, so protect your eyes with goggles, your mouth and nose with a cotton-gauze bandage or a respirator.
- Glass. The main tool is a piece of glass; work is carried out with gloves for safety. Use the sharp edges of the fragment to carefully remove polishing elements. If there are depressions, the coating is removed from them with special care. The final stage is sanding (fine spraying).
- Construction hairdryer. The device heats the varnish layer to high temperatures, it begins to melt. All that remains is to clean off the coating with a nozzle. The downside of this method is that when melted, the varnish emits a very unpleasant odor. In addition, working with a hair dryer requires certain skills and caution. Next, final cleaning is carried out using sandpaper.
- Chemical. The easiest way is to buy the composition, apply it to the facade or countertop in accordance with the instructions. Work is carried out only outside or with the window open, since the fumes are toxic. The product is carefully distributed over the surface, wait the required time, and clean off with a spatula.
How to paint furniture over polish
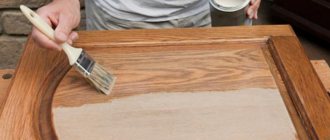
The first step is to clean the surfaces from dust. To do this, wipe them with a damp cloth and then allow them to dry. Next, apply a layer of putty; it will help disguise unevenness and defects. After drying, walk over the surface with sandpaper; it will remove excess putty and help achieve high-quality leveling.
Then a primer is applied. Its purpose is to protect against fungus and mold and ensure better paint application. After drying, proceed to painting. The main tools are a roller or brush. Paint on wood surfaces is applied in several thin layers. It is better to brush over the furniture several times than to apply one thick layer. This will help avoid smudges and achieve uniformity. The secret to successful restoration: paint is applied in different directions: first horizontally, then vertically. Do the same with varnish.
Sequence of paint application:
- inside;
- joints and edges;
- outside.
Whether or not to remove the varnish depends on the quality of the coating. Smooth, free from defects, allows direct painting. If the polishing is in poor condition, full of cracks and chips, it is better to remove it first.
How to restore veneer
Veneered furniture requires a special approach. The means are basically the same, the methods are different. For example, if after getting hit the veneer is swollen, fill a disposable syringe with PVA glue, pierce the bubble, and inject glue into the cavity. Place a piece of thick fabric on top and place a weight. If the surface is uneven (convex or concave), use a thick fabric bag with heated sand as a load.
Such veneer damage is restored in two stages. First, the swelling is eliminated, then the scratch is painted over and the coating is restored.
If the veneer is glued with alcohol glue, you can return the swollen part to its place by ironing it through a rag with a hot iron. But do not overheat the iron: the veneer may stretch. Heating level is medium.
If ironing with a dry cloth does not help, try repeating the operation with a damp cloth (wet it and wring it out well). There is a chance that the wood will swell and become more elastic. To reliably fix the swelling, you can introduce PVA there and then heat it with an iron.
If the swelling is cracked, you can also try to seal it with heating (through a rag). If it doesn’t work, tear off the peeled piece. You don’t cut it, but rather break it off: on veneer, breaks after restoration are less noticeable than cuts. Therefore, you break off the lagging piece. Remove the old glue from the damaged area and the piece of veneer (with sandpaper or a nail file, depending on the size). Next, the repair of veneer on furniture is standard: spread it with PVA glue, lay it down, aligning the fault lines, lay a thick fabric on top and place a weight until it dries.
Such veneer peeling can most likely be eliminated simply by ironing it with an iron.
Scratches and traces of restoration on veneer are removed in the same way as on wood: they are painted over with a furniture marker of a suitable shade. If the scratch is deep, a little melted furniture restoration wax is applied to it (with a spatula). After drying, the wax is ground, and if necessary, fine-grain sandpaper is used, but after this treatment, the restored piece is covered with a layer of varnish.
Do-it-yourself furniture restoration requires patience and accuracy. You have to act gradually and methodically: smear it, wait for it to dry, level it, smear it again, etc. Sometimes you have to try several methods: damage varies, as do the materials used in production (glue, varnish, etc.). But as a result, the furniture will look much better.
Restoration of wooden veneer furniture
Renewal and repair of veneered surfaces are quite complex and require the use of our own methodology. If moisture gets on wooden furniture and the veneer “swells,” you will need PVA glue and a regular syringe. The “bubble” is pierced and glue is injected into the cavity. A cloth is placed on the damaged area and a heavy weight is placed on it for better grip. If the work is carried out on a concave or convex part, then the role of oppression will be performed by a bag of sand.
Other ways to work with veneer when swelling:
- If alcohol glue is used: just iron the damaged area through gauze with a slightly heated iron. The detached fragment will return to its place.
- If the previous method did not help, pre-moisten the gauze. Before work, you can introduce PVA glue under the coating for reliable fixation.
Often, due to moisture ingress, surfaces can become cracked. Gluing onto PVA when heated with an iron through the fabric will help restore the veneer. If this method does not help, the damaged section of the coating must be broken off. It is impossible to carefully cut it off - after restoration, the fracture is less noticeable than the cut. Next, carefully remove the old glue from the separated element and the main surface and sand it with sandpaper. After this, glue is applied to the piece of veneer and placed in place, aligning the fault lines. The surface is covered with a cloth on which a load is placed.
Markers are used to remove chips and scratches on veneered structures; the main thing is to choose a shade that matches the tone. If the damage is deep, then a small amount of melted wax is placed into the gap using a spatula. You need to wait until it hardens completely, then walk over the surface with sandpaper with a light dusting. The final stage of work is varnishing.
If you cannot find a marker that matches the color of the veneer, the restored product can be painted. The paint can be transparent or colored. Acrylic compounds are often used for restoration; they dry quickly and have many shades. This coating protects wooden furniture from rotting and mold. There are also special options that repel dirt.
How to restore veneer
Veneered furniture requires a special approach. The means are basically the same, the methods are different. For example, if after getting hit the veneer is swollen, fill a disposable syringe with PVA glue, pierce the bubble, and inject glue into the cavity. Place a piece of thick fabric on top and place a weight. If the surface is uneven (convex or concave), use a thick fabric bag with heated sand as a load.
Such veneer damage is restored in two stages. First, the swelling is eliminated, then the scratch is painted over and the coating is restored.
If the veneer is glued with alcohol glue, you can return the swollen part to its place by ironing it through a rag with a hot iron. But do not overheat the iron: the veneer may stretch. Heating level is medium.
If ironing with a dry cloth does not help, try repeating the operation with a damp cloth (wet it and wring it out well). There is a chance that the wood will swell and become more elastic. To reliably fix the swelling, you can introduce PVA there and then heat it with an iron.
If the swelling is cracked, you can also try to seal it with heating (through a rag). If it doesn’t work, tear off the peeled piece. You don’t cut it, but rather break it off: on veneer, breaks after restoration are less noticeable than cuts. Therefore, you break off the lagging piece. Remove the old glue from the damaged area and the piece of veneer (with sandpaper or a nail file, depending on the size). Next, the repair of veneer on furniture is standard: spread it with PVA glue, lay it down, aligning the fault lines, lay a thick fabric on top and place a weight until it dries.
Such veneer peeling can most likely be eliminated simply by ironing it with an iron.
Scratches and traces of restoration on veneer are removed in the same way as on wood: they are painted over with a furniture marker of a suitable shade. If the scratch is deep, a little melted furniture restoration wax is applied to it (with a spatula). After drying, the wax is ground, and if necessary, fine-grain sandpaper is used, but after this treatment, the restored piece is covered with a layer of varnish.
Do-it-yourself furniture restoration requires patience and accuracy. You have to act gradually and methodically: smear it, wait for it to dry, level it, smear it again, etc. Sometimes you have to try several methods: damage varies, as do the materials used in production (glue, varnish, etc.). But as a result, the furniture will look much better.
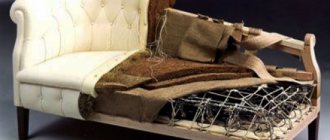
Time can make things unusable. Doors are also among those objects that sooner or later will have to be restored with your own hands. Scuffs, blisters and serious household damage all require attention. Restoration of veneer doors is carried out in several ways. If the owners of the house have an old, damaged door leaf at their disposal, it can be easily restored.
Before the door restoration process begins, it is carefully examined for damage. You should purchase materials and necessary tools only after this stage. It is often impossible to do without veneer paint. It allows you to quickly and effectively eliminate any abrasions.
Many people cannot understand how to update a product with their own hands, since the task is not considered simple. This requires accuracy and certain skills. Repair of veneer doors begins with preparing the surface with special compounds. Use wood putty, which helps to level the canvas and subsequently produce high-quality painting.
Quick and creative methods for repairing wooden furniture
You can make an unusual piece of furniture out of an old table, a battered wardrobe or a falling apart bed on your own. Modern techniques that can be used even by beginners will help.
Decorating and masking defects using decoupage
The decoupage technique is a common restoration method. Pieces of furniture will find a new life; all work can be done at home yourself. The essence of the technique is that wooden surfaces are decorated with drawings from paper napkins or wallpaper. The paper elements are immersed in an adhesive composition, and then glued to the facades. When the composition hardens, it is coated with varnish.
Tools and materials
You need to prepare:
- primary source - napkins or wallpaper;
- PVA glue;
- sandpaper;
- solvent;
- putty for woodwork;
- pencil;
- tape measure, ruler;
- stationery knife;
- brush or roller;
- varnish
Procedure
Having prepared the materials, you can begin restoration by decoupling. Algorithm:
- Preparation of wooden furniture: cleaning from dust and dirt, leveling with sandpaper. Primer.
- Taking measurements and preparing elements of wallpaper or napkins. It should be cut generously.
- Glue preparation. PVA is dissolved in water (proportion 1:3). The amount of composition depends on the size of the area to be decorated.
- Apply the resulting glue to the back of the napkin or wallpaper. Work with a roller or brush. If the composition is quickly absorbed, apply 2-3 layers.
- The canvas is laid out face up on the surface to be decorated. Roll over it with a roller to get rid of air bubbles. Leveling until a perfectly smooth surface is obtained.
- Dry the coating.
- Trim off excess base along the contour.
- Varnish coating. Apply in multiple layers, thoroughly drying each layer.
Tips and tricks
Surfaces to use this technique must be smooth. Dents, chips and other damage are unacceptable. You need paper wallpaper; vinyl and non-woven wallpaper are not suitable.
For beginners, it is better to start with small fragments; they are much easier to paste.
Decorating and masking defects using craquelure
When repairing furniture, the craquelure technique is used. This is a special coloring of wooden surfaces that gives them the appearance of old products.
The work involves several stages:
- Varnish removal, primer.
- Applying an even layer of acrylic paint. Metallized ones are often chosen.
- After complete drying, coat with craquelure varnish. It will create an unusual “crack” effect.
- When the varnish dries, apply another layer of matte paint, it will help complete the formation of a network of cracks.
For artificial aging, furniture varnishes, PVA glue, egg yolk, gelatin and vinegar are also used.
| Way | Short description |
| PVA | Apply a thick layer, dry, but do not dry. The glue is still wet and painted with water-based acrylic. When the compositions interact, the surface becomes covered with cracks. To dry it thoroughly, use a hair dryer. |
| Furniture varnishes (“PF283”) | Apply for 4 hours. When it forms a sticky film, it is painted with acrylic and dried completely. |
| Egg white | The product is painted with two layers of acrylic paint. Then coated with protein. Drying is carried out in natural conditions, the hair dryer is not turned on. The next step is to paint the surfaces in a contrasting color. |
| Gelatin | Used similarly to protein. The thinner the layer of food additive, the narrower the lines of the craquelure mesh. |
| Vinegar (9%) | The paint layer is dried and covered with vinegar using a sponge. A network of “wrinkles” will appear almost immediately. |
Remember that the described technique is quite difficult to implement, so you should try it for the first time on an inexpensive and non-valuable item.
Decorating and masking defects with painting
Another interesting creative renovation option is painting the facades and countertops of wooden furniture.
Even those who have not drawn since school can do this at home. The secret is simple - we will use a stencil. First, the surface needs to be prepared: cleaned, leveled, and coated with primer. Next, paint it in the chosen basic tone. The base is placed in several thin layers. You can use acrylic or water-based paints; they work well, are not afraid of dampness and do not fade. Oil paints, acrylic, even gouache or watercolor are suitable for painting.
There are several application methods:
- They choose the design they like, print it on paper, and then make a template.
- Buy ready-made stencils.
- Use lace or guipure to create an original design.
The template is applied to the facade or tabletop, fixed with tape, and paint is applied with a brush or from a spray can. You can remove the stencil only after it has completely dried.
How to glue veneer using an iron
Veneer most often suffers on the edges of countertops, doors, and drawers. If it is impossible to repair the damage or a fragment of veneer is lost, then the old veneer in the damaged area must be replaced with new one.
Replacing the entire surface with damage, that is, veneering large areas, at home, without experience, will not ensure uniform sticking of the veneer, its pressing and drying.
To repair the surface of furniture, choose veneer of a suitable tone; if this is not possible, use the lightest version of veneer, which you can then tint yourself, but when choosing, pay attention to the texture of the wood. Remove the damaged piece of veneer with a sharp knife. First mark the cut line, and then quickly cut a piece of veneer
If the wood or chipboard under the veneer is damaged, putty it and level the surface
First, mark the cut line, and then quickly cut a piece of veneer. If the wood or chipboard under the veneer is damaged, putty it and level the surface
Remove the damaged piece of veneer with a sharp knife. First, mark the cut line, and then quickly cut a piece of veneer. If the wood or chipboard underneath the veneer is damaged, putty it and level the surface.
Before gluing the veneer, prepare the following tools and materials:
- suitable veneer;
- PVA glue (or “Moment” glue, “Liquid nails”);
- sharp knife;
- iron;
- syringe;
- sandpaper, block;
- cotton fabric or cloth;
- paper;
- flute brush.
When repairing furniture at home, follow these instructions to repair damaged veneer:
Apply a small amount of PVA glue to the prepared underlying surface using a flute brush.
When cutting, try to keep the cut line slightly wavy and the piece cut with a slight allowance. Coat the cut piece of veneer with PVA glue.
Place the veneer in place so that the direction of the grain matches. After this, it is advisable to firmly press the veneer with a wooden block.
To speed up the gluing process, use an iron. To do this, place a cloth or sheet of paper between the veneer and the iron and press the iron against the surface for a couple of minutes.
If the original veneer is not damaged, but swelling has occurred, it can be returned to its place by ironing it with a hot iron through a damp cloth.
If the previous method did not help, it means that the adhesive properties of the glue have been lost. Cut the swollen coating and use a regular syringe to inject PVA glue under it. Press down on top with a weight and leave for a day.
How to repair minor damage to furniture
In case of minor damage to furniture, restoration can be carried out on your own, even without experience. For example, if a solid wood cabinet has lost its shine, it can be saved by treating the facades with a specialized product.
The inside of the banana peel will help remove scuff marks. A nail file will help eliminate small irregularities. Of course, they also use sandpaper, but it is rougher.
After the wood swells due to moisture, the situation can be saved with a mixture of olive oil and salt. The components for restoration are mixed and applied in a thin layer to the affected area, lightly rubbing in a circular motion. Leave on the surface of the furniture for half an hour. The salt will help draw out the liquid, and the oil will renew the wood fibers and make them more elastic.
Consolidate the result
The repairs made must be fixed using a special polish:
- Apply a small amount of the substance to a swab or cotton pad.
- Use quick circular movements to polish the surface until it is as smooth as possible.
- After the first layer has dried, repeat the operation 1-2 more times.
- Sand the surface with a stiff brush until the material shines.
With some effort, you can restore the aesthetic appearance of old furniture without resorting to the help of specialists and saving money.
Pros and cons of DIY furniture repair
Creative activity that gives the opportunity to show imagination and create an exclusive item is repair and restoration.
In addition, this is also an opportunity to save a lot of money, because specialists in restoring wooden furniture rate their services very highly. Other advantages include:
- Bringing your design ideas to life.
- Saving time and money. You don’t have to look for qualified craftsmen and pay for their services.
- Control. You will know exactly what materials are used and how carefully the work is done.
There are also disadvantages:
- Experience required. If decoupage of small surfaces is quite within the capabilities of beginners, then restoring the original appearance, and especially working with antiques, should be entrusted to professionals.
- You will have to buy equipment and materials. This is often a very expensive pleasure. Therefore, if you need to update, for example, just one tabletop, you should think about whether it makes sense to buy a set of paints.
- There are no conditions for full-time work in the apartment; there is not enough space. The room for renovation will need to be prepared in advance: cover the rest of the furniture with film so as not to accidentally damage it, cover the floor with newspapers.
- A waste of time and effort. Often, you have to upgrade your closets or chests of drawers on weekends or in the evenings, instead of taking a well-deserved rest. Therefore, interesting creative activities become tiresome and burdensome over time.
Materials and tools used
The set of necessary tools and materials depends on what kind of restoration work is being carried out. There is no universal list of everything needed to work with furniture. However, electric tools are often used to modernize wood surfaces. It can be bought or rented. It is better to work with a professional tool - it will help you get a better result.
Here is an approximate set of what is needed for restoration:
- grinding machine for removing varnish or polishing from furniture;
- screwdriver;
- construction hair dryer for drying wood surfaces after painting;
- jigsaw for quickly cutting out decorative and complex geometric elements;
- construction vacuum cleaner for dust protection.
In addition to professional tools, you should prepare in advance other materials important for restoration work:
- brushes and rollers;
- spatulas;
- sandpaper;
- protective clothing (respirator, gloves, goggles).
Depending on the specific type of work, consumables are also purchased: paints, varnishes, primers, putty, impregnation, wax.
Shellac varnish is often used for restoration. It helps to emphasize the sophistication of wooden furniture, giving it a new, but completely natural shade. It restores varnish well, but to obtain the desired effect you will need to apply 40-60 layers.
Nitrocellulose is used to restore large area varnished surfaces. This restoration composition is applied to furniture using a sprayer. Household sprayers do not allow you to obtain the optimal operating speed, so drops of the composition and smudges will appear on wooden surfaces.
Pentaphthalic varnish is another product popular in home furniture repairs. No additional tools or equipment are required for restoration. The composition is applied with a paint brush, in this case the wood surfaces become glossy. Those who want a matte effect need to apply the varnish with a swab. The maximum number of layers is 4.
What materials are needed to restore
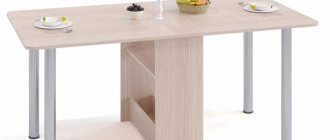
Undoubtedly, tools alone are not enough to fully restore a table. You will also need materials: for processing wood, sealing defective areas, cracks, and final finishing. These are putties, impregnations, stains, glazes, paint and varnish compositions. In critical situations, you will have to resort to replacing individual elements, making them from wood, and then gluing them in.
putty
A special material that is used to seal deep cracks, crevices in countertops, frames and legs. Most often it has an acrylic base and dries quickly. Hardened putty can be easily processed with sandpaper. Certain types allow you to disguise the material as wood types (pine, ash, oak). They make the table repair area unnoticeable.
Special products for wood
This group of materials includes impregnations. Including those that prevent rotting and destroy fungus (if the table has been in a damp room for a long time, in the attic).
Varnish
Varnishing is used when it is necessary to emphasize the noble structure of wood. In all others, it is successfully replaced by coloring. The use of varnish is justified if the table is made of natural wood. Modern paints allow you to achieve an equally impressive appearance for the table (if you choose them correctly).
Dye
The painted surface of the table is not afraid of water and looks good. By using several areas of different colors, bright mosaics achieve a complex range. Just like on expensive and rare tables.
Glue
In case of serious damage to the tabletop or individual elements, gluing in new parts cannot be avoided. For this, two-component mixtures, PVA or polymer, are used. The main thing is that after gluing there are no unsightly stains or marks left on the surface.
Wooden canvas
Wooden inserts are used in particularly difficult situations when it is impossible to do without “prosthetics”. In this case, the grade and color of the material (wood) and its texture must match.
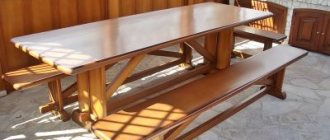
Self-repair of wooden furniture: step-by-step instructions
Let's look at the step-by-step repair process. The specific list of operations depends on the condition of the furniture and the owner’s plans:
- Dismantling the structure. Remove the hinged doors, remove the drawers and shelves. If possible, it is advisable to disconnect the frame element. It’s better not to touch the glued frame; there is a risk that you won’t be able to put it back together. They remove the fittings (handles, locks, hinges), place them in bags or boxes, and be sure to sign them. It is advisable to take a clear photo of the fastening points - this will make it easier to restore the structure upon completion of the work.
- Removing the top coating (varnish, polishing). The result should be a perfectly smooth, even surface, ready for further work.
- Elimination of visible damage (scratches, chips, peeling). Putties, grouts, furniture markers, and wax are used. These products help make various damage visually invisible. The choice of a specific composition depends on the magnitude of the damage. For small cracks, grout is suitable; larger damage is puttied or filled with wax.
- Preparing for the final coating. The surfaces are re-leveled and any remaining wax or grout is removed. The main tool for this stage is delicate sandpaper. After this, a soft cloth is used for polishing. Also, if necessary, prime at this stage.
- Coating. This can be varnish (helps preserve the texture of wood), oil, stain, wax. If you want to completely transform the product, it can be painted or enameled.
- Installing fittings into place. You can install old locks and handles or new ones.
How to speed up restoration
Restoration often takes considerable time. It can take months for antique furniture to find new life. The period also depends on the materials: varnishes, primers, and paints are applied to wood surfaces. You can begin further work only after complete drying.
To speed up the process, you should select a composition in advance that dries quickly. In addition, the work plan must be thought out in advance in order to immediately purchase the necessary equipment and materials and not have to go to the construction market several times.
These are the main points that will help you restore and repair wooden furniture yourself. The main rule is accuracy; haste is inappropriate.