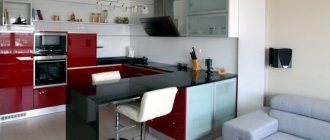
A washbasin built into the countertop looks much more interesting than one standing separately, without any decoration.
And it’s more convenient to use - cosmetic accessories or a razor can be placed nearby, rather than held in your hands.
Many users will be interested in a homemade countertop in a bathroom made of tiles - this will be discussed in detail below.
Advantages and disadvantages
The following arguments speak in favor of a homemade countertop with ceramic cladding:
- affordable price . Branded granite and marble countertops, especially those made to order according to consumer sketches, are much more expensive;
- diversity. There are countless types of tiles on sale with different textures, colors, patterns and surface types. This allows the home designer to create an exclusive product that fits perfectly with the bathroom interior;
- excellent characteristics. Ceramic tiles are moisture-resistant, durable, stable to temperature changes, and are easy to keep clean. Porcelain stoneware has the best characteristics: due to the absence of pores, it is close to natural stone in terms of strength, wear resistance and water resistance.
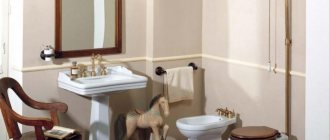
Stone countertop
This is a popular material. A countertop made of natural stone for a bathroom remains the only one that has great hardness and wear resistance to various damages.
Most often they are made from polished marble, then given a matte or glossy color. Marble countertops have many advantages, but only two disadvantages: considerable weight and high price.
Tools and materials
To make a tabletop you will need the following arsenal:
- drill with impact mechanism;
- jigsaw;
- tile cutter for shaped cutting (you can order tile cutting in the workshop);
- levels: rack and bubble;
- roulette;
- crosshead screwdriver;
- brush;
- spatulas for laying tiles: metal (solid and serrated), rubber.
The following materials are used:
- galvanized profiles for plasterboard structures: guide and rack;
- for supports: profiled pipe or brick;
- moisture-resistant plywood (FSF);
- moisture-resistant plasterboard (GKVL) or cement-bonded particle boards;
- tiled or porcelain tiles;
- tile adhesive.
You will also need a fungicidal grout (with an antifungal additive).
Sheathing with plasterboard
Only now we need to take measurements and cut the gypsum board. Some people advise immediately cutting a hole for the sink, but this is very inconvenient to do while hanging, and even with two sheets of drywall. Moreover, their sizes are different (one is sewn on top of the frame, and the second on the bottom).
Making a countertop for a rectangular sink is much easier
A sheet of plasterboard is screwed onto the top of the frame, which will be the front part of the tabletop. Then a contour for the washbasin is drawn on it. To do this, you can attach the washbasin itself or use a special model that usually comes with it. Don’t forget about the lintels, because they serve as additional support for the sink.
When the top plasterboard countertop in the bathroom is screwed in place, we attach the bottom sheet (its size will be slightly smaller than the top one due to the profiles). Now, using the existing contours, you can cut out a hole for the sink using a jigsaw. Moreover, it is cut through two sheets at once.
The sink is installed only after all finishing work has been completed
Next, all parts of the frame are covered with plasterboard so that the profiles are not visible at all. Do not forget to grab the gypsum board not only around the perimeter, but also in those places where jumpers are installed. Externally, the finished structure will be very similar to a plasterboard table.
It has probably already become clear that you don’t have to limit yourself to just one tabletop. And in its design it is very similar to a cabinet. You can make a plasterboard cabinet under the sink yourself using the same principle as a countertop. It will only be necessary to provide several shelves in the design, if necessary.
Tile sizes
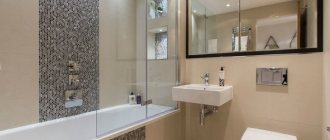
In ceramic cladding, the seams are a weak point, so it is advisable to use tiles that are as large as possible. But in a small room, large modules look bulky and emphasize cramped spaces.
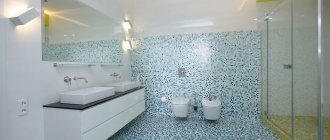
Mosaic tiles
It is recommended to use tiles of the following sizes:
- in a spacious bathroom: from 30x30 cm to 60x60 cm or mosaic (5x5 cm or less);
- in compact: from 10x10 cm to 20x20 cm.
Types of countertops in the bathroom
It is allowed to install different types of these structures in the bathroom. They differ in various ways. In this case, installation can be performed using two methods:
- hanging products are easy to clean, and they are fixed using high-quality brackets attached to the wall of the room, so there are no vertical supports, and the space under the sink can be used for any purpose, and usually a washing machine is installed here;
- floor-standing ones are installed on the floor of the room, and usually there are shelves at the bottom, closed by a door, so they can be used to store various items used in the bathroom.
Floor
Hanging
In a small bathroom, it is recommended to install designs that effectively save space, so wall-hung models are considered the most suitable for such conditions.
Frame preparation
The tabletop frame is formed as follows:
- markings are applied: on the wall 80 cm from the floor, draw a strictly horizontal line with a marker, having previously marked the extreme points using a bubble level; a rectangle is drawn on the floor, repeating the outline of the tabletop. A sign of the absence of distortions is the equality of the diagonals of the drawn figure;
- mark the position of the brick supports and remove the floor tiles in these places, having previously cut them along the contour with a grinder. The tool is equipped with a metal disk for dry cutting of stone (segmented);
- walls are erected from bricks to the level of the line drawn on the wall, fixing them with cement-sand mortar. Such supports are good because they allow you to install shelves and doors;
- The brick supports are plastered and a day later they are covered with tiles. It is important to do the finishing at this stage, since after installing the countertop it will be more difficult to implement;
- they make a frame from CD profiles for plasterboard structures. To make the frame stronger, each element is made of two profiles, inserting one into the other (they have a U-shaped section). The result is a prefabricated profile with a box-shaped section. Metal elements are fastened together with blind rivets or metal screws;
- Several cross members from the same profile are fixed in the frame to add rigidity;
- lay the frame on supports and screw one side to the wall using dowels.
In addition to stone supports, they use:
- racks made of profiled pipe with section dimensions 50x30, 40x40, 60x40 mm or purchased chrome;
- welded brackets from the corner, transferring the load from the tabletop to the wall (suspended version).
All metal parts are painted.
Making a tabletop with your own hands
The process of making a countertop can be divided into several stages: marking, assembling the frame, covering with plasterboard and final finishing. But you need to start with a sketch, which will allow you to choose the optimal size and shape of the tabletop. There are certain rules for arranging bathrooms: there should be a free space of at least 70-75 cm between plumbing fixtures, the countertop should be located at a height of 80-110 cm from the floor, the distance from the wall to the sink bowl should be at least 10 cm. However, these parameters have been developed for standard premises, so in each individual case you need to be guided by personal convenience.
Standard sink installation height
Performing markup
At this stage you will need a tape measure, a pencil and a sketch of the tabletop with exact dimensions. The area where the installation will be carried out is cleared of all unnecessary things, and debris and dust are swept away. The base must be inspected in advance, all defects must be eliminated, that is, there should be no cracks, crevices, loose tiles, or potholes in the floor.
Table top sketch
Step 1. Measure the height indicated in the sketch and mark a point on the wall with a pencil. At the same level, the length of the tabletop is retreated from the corner and a mark is also made. Then mark the width of the structure on the floor.
Advice. Since the sketch shows the parameters of the finished tabletop, it is necessary to subtract the thickness of the cladding and decorative layer, approximately 2.5-3 cm. If this is not done on the markings, after installation the tabletop will be wider and higher than planned.
Step 2. Apply a level to the marks and draw straight lines along which the guides will be attached. Carefully ensure that there are no deviations vertically and horizontally, otherwise the tabletop will turn out to be sloping to the side.
After the marking is ready, you need to cut the profiles into blanks in accordance with the dimensions in the sketch. Profiles are easily cut with metal scissors.
Frame installation
To attach the guides you will need a level, a drill with a set of drills, a screwdriver, dowel-nails and self-tapping screws.
Step 1. In each profile it is necessary to drill holes for dowels with a drill with a diameter of 6 mm. For convenience, it is advisable to number all elements of the frame or write them with a marker, so as not to confuse them when drilling and then not waste time searching for the required workpiece.
Step 2. The profiles are applied one by one to the marking lines and the locations of the dowels are marked through the holes with dots.
Step 3. Change the metal drill to a drill with a pobedit tip and begin drilling holes in the wall. To prevent the drill tip from sliding off the tile, it is recommended to lightly scratch the enamel at the marked point with something sharp, for example, the tip of a self-tapping screw. All holes are made only to the thickness of the tile, without going deep into the wall.
Drilling
Step 4. Change the drill to a hammer drill, insert a drill with a diameter of 6 mm and go through all the holes again, going deeper into the thickness of the wall to the length of the dowel. Holes for fasteners are made in the floor in the same way.
Installed dowels
Screwing a self-tapping screw into a dowel
Step 5. Take the profiles one by one, put each one in its place, align it so that the holes match, insert the dowels and tightly fix the guides to the base. During work, it is necessary to control the vertical and horizontal position of the profiles with a level.
Frame position control
Step 6. For a protruding rack, take 2 guide profiles, insert one into the other and secure along the joint line in several places with self-tapping screws. You can take a single profile, but a double one is much more reliable.
Step 7. Attach horizontal jumpers around the perimeter of the upper marking. They should also be double so that the tabletop does not sag under load. The jumper is attached to the protruding rack using a bracket made from profile trim; fastening to the wall is done with self-tapping screws, inserting the end of the jumper into the profile groove.
Vertical racks with jumpers
Step 8. After this, the frame is reinforced with spacers from the same profile: two should be located horizontally under the future tabletop, two on the sides between the racks. The upper lintels are laid so that the sink bowl can fit between them. To ensure that the spacers fit tightly to the frame, rectangular cutouts are made at the ends of the profile. The spacers must also be double, otherwise the tabletop will sag.
Box frame
Finally, check the horizontal level of the guides and the quality of the connections again to eliminate the presence of defects. There should be no gaps left at the joints of profiles protruding from the plane of the elements; when pressed, the structure should not move even a millimeter.
Sheathing with plasterboard
At this stage you will need:
- jigsaw or hand saw;
- screwdriver;
- self-tapping screws;
- marker and cutting template;
- waterproof primer;
- spatulas;
- tile adhesive;
- fine sandpaper.
Necessary tools for work
Step 1. Cut out two blanks for the tabletop of the same shape. Their dimensions must exactly match the size of the frame.
Example of markup execution
Step 2. Place one sheet on a flat surface, place a template on top (usually such a template comes complete with the sink bowl), level it and trace the contours with a marker.
Advice. Despite the simple steps, this moment is very important: if the template does not lie correctly, then the cutouts for the sink and pipes will not be where they are needed. This will complicate installation and may weaken the tabletop; for example, if you cut too close to the edge, the drywall may crack during use.
Step 3. The sheet with outlined contours is placed on top of the frame and screwed to the profiles with self-tapping screws. The second sheet is attached in the same way, but only from the bottom side. Self-tapping screws are screwed in increments of 15-20 cm around the perimeter and on both spacers.
Sheet fastening
Installing the bottom sheet
Fastening the bottom sheet
Step 4. Carefully cut a hole along the contour. For convenience, you can first drill through the drywall at one point to insert a jigsaw or hacksaw.
Step 5. Cover the front end of the tabletop with a strip of appropriate size, cut from plasterboard. Dilute a small amount of tile adhesive, apply it with a trowel to the end cut and level it with a thin, uniform layer, trying to fill the gaps between the sheets and the profile. Next, glue is applied to the back side of the planks and pressed firmly to the surface. They level it, check the position with a square, remove excess glue at the joints, and then additionally fix the strip with self-tapping screws to the frame in increments of 15-20 cm.
Step 6. Cut out the sheet for the side part adjacent to the wall. Its length should be 5 mm less than the distance from the floor to the inside of the countertop to prevent direct contact of the plasterboard with the floor covering. The sidewall is inserted into the frame, wedges are slipped underneath the sheet, and fixed with self-tapping screws around the perimeter every 15 cm.
Installing the side sheet
Side sheet fastening
Step 7. Start covering the second wall of the structure. Here you will need two sheets to cover the frame both outside and inside. Cut the drywall to size, take the outer sheet, level it so that the top cut is flush with the tabletop, and the side exactly coincides with the edge of the profile. Wedges must be placed underneath. After checking the evenness of the corners, screw in the screws. The inner sheet is attached in the same way.
The left wall is covered with plasterboard on both sides, on the right wall the master takes measurements
Sheet fastening on the right
Step 8. Close the side ends. Again, the plasterboard strips are cut out to fit the width of the racks, the ends of the structure are covered with a layer of glue, and the strips are applied and leveled. After making sure that they fit tightly and evenly to the racks, screw in the screws.
Installation of drywall at the ends
The installation of the structure is complete, there is very little left. Joints and cuts, including the hole under the sink, must be sanded with sandpaper and then treated with a primer. Now the tabletop is ready for decorative finishing.
Countertop and countertop sink
Finishing a plasterboard tabletop
When choosing a finish for a countertop, you first need to take into account the overall style of the bathroom and its color scheme. The tabletop should be in harmony with other furnishings, and not stand out as a bright spot. The most popular finishing option is cladding with tiles, glass or ceramic mosaics. You can also use natural stone; for example, a table top lined with colored pebbles looks very impressive. The main thing is the combination of materials in color and texture.
Pink mosaic
Mosaic in blue tones
Beige mosaic
Glass mosaic
Consider the option with mosaic. It is better to take it on a mesh, rather than by weight, as this way the work moves much faster. In addition to the mosaic itself, you will need tile adhesive, spatulas, and grout for the seams. There is no need to putty the tabletop, since all minor defects will be smoothed out due to the adhesive layer.
Step 1. The mosaic is laid out on the surface of the tabletop and aligned along the edge. Since the hole for the sink is round, part of the mosaic will have to be cut, and the cut line should be marked with a marker. Smooth cuts are made with a sharp mounting knife, semicircular ones with a grinder.
Step 2. Mix the tile adhesive according to the manufacturer's instructions and apply it in an even layer to the side wall of the countertop.
White cement glue
Mixing glue
Next, change the regular spatula to a serrated one and run it along the adhesive layer, forming grooves.
Applying glue, forming grooves
Laying the mosaic begins from the bottom of the corner, placing pegs under the modules. The material is pressed well to the surface and smoothed, excess solution is removed.
Mosaic laying
Step 3. After covering the side part, glue the mosaic from the ends on the counters and the tabletop itself, then move on to the horizontal surface. Here they do everything exactly the same, trying to match the seams as accurately as possible. The cut mosaic should not protrude beyond the boundaries of the hole for the sink, and there should also be no voids between the modules.
Continued installation of mosaics
End finishing
Tiling the box
Step 4. When the glue dries, take the grout for the seams and apply it to the mosaic. The grout is thoroughly rubbed along the seams with a rubber spatula to fill the slightest voids. 20-25 minutes after application, remove the remaining grout with a damp, clean cloth until the whitish stains disappear on the surface.
Step 5. After the seams have completely dried, insert a sink into the hole, connect the water supply, and coat all joints with colorless waterproof sealant.
Tiling is done in a similar way. The most important thing is to accurately adjust the seams so that the tiles lie flat, and control the plane of the finishing layer with a level. Read the link to install a boiler in the bathroom.
Gallery. The process of tiling a figured countertop with mosaics
Box
Drain hole
Primed surface
Applying glue
Gluing the mosaic
Covering the top of the table top
In curved areas it is more convenient to lay out the mosaic one by one
After grouting, wipe the mosaic with a rag
An example of finishing a countertop with mosaics
Mosaic tile finishing
Making a mosaic countertop for a washbasin, part 1
Video:
Sheathing
The base of the tabletop is attached to the frame, manufactured as follows:
- From a sheet of moisture-resistant plywood of the FSF brand with a thickness of 19 mm, cut out two identical blanks and glue them together, laying them on top of each other. If the design of the tabletop involves curved outlines, cutting is done with a jigsaw;
- lay the plywood base on the frame and screw it to it with metal screws;
- glue onto the top and ends of the plywood a material similar in thermal expansion coefficient to ceramic tiles. For plywood, this indicator is very different, so you cannot glue tiles directly onto it.
The following materials are used:
- cement particle board (CSB) with a thickness of 6 – 13 mm;
- moisture-resistant plasterboard sheet (GKLV).
When cutting with a grinder, the DSP generates a lot of dust. It is more correct to make cuts with a construction knife and then break the slab on the corner of the table. If necessary, the ends are ground. The DSP is screwed to the plywood with self-tapping screws, having previously countersunk the holes so that the caps are flush.
The following manipulations are performed with the gypsum board sheet:
- glue it to the plywood with tile adhesive and additionally fix it with self-tapping screws;
- apply two layers of nitro varnish diluted with nitro solvent on top and on the ends;
- fill the joints with silicone sealant “For aquarium” (excess is immediately removed);
- seal the joints with sickle tape;
- apply 2-component automotive putty (the cheapest one will do) with a thickness of 1-2 mm on top and on the ends with a medium-width spatula;
- After waiting for the putty to harden (it takes about an hour), sand it with coarse sandpaper, wrapping it around the block.
Next, an opening for the sink is cut out at the base using a jigsaw. In the case of using gypsum plasterboard, this is done before applying a protective coating of nitro varnish. Modern sinks are equipped with a template - the opening is cut out from it.
In the absence of a template, you will have to make it yourself. To thread the jigsaw blade, drill a small hole on the contour of the opening with a drill.
Due to the high drying speed, automotive putty should be prepared in small portions.
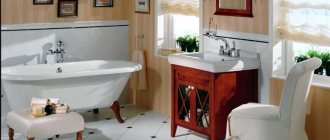
Features of wooden bathroom countertops
Bathroom furniture is subject to much greater requirements than products used in less difficult conditions. The air here is always humid, and the room itself is usually poorly ventilated, so:
- A wooden countertop for a bathroom should be made only from species where the wood contains a high content of natural antiseptics that can prevent rotting and contamination of the material by mold and mildew. We make our products only from oak, pine or larch, which are little susceptible to destruction under the influence of moisture.
- As additional protection, the surface must be treated with water-repellent impregnations, coated with special wax, oil or varnish. Especially if you install a wooden countertop under the sink, which is constantly in contact with water.
- It is also recommended to regularly renew the water-repellent coating so that the product lasts its entire intended life. How often this needs to be done is indicated on the packaging of the selected product.
Tiling
Tiles for countertops are selected according to the following criteria:
- type . The surface of the countertop is not subject to significant loads, so wall tiles are sufficient (there is an icon with a hand on the package);
- surface . Relief tiles look interesting, but they are difficult to keep clean: dirt is firmly held in uneven areas;
- color . All shades of blue, reminiscent of the sea, are always appropriate in the bathroom: azure, turquoise, sea green. You can add white or make the tabletop red and black.
Tiling is done as follows:
- treat the surface of the base of the tabletop with a latex-based primer - it will increase the adhesive strength of the glue. Work continues after the primer has dried, which takes a day;
- The glue is applied with a spatula with a straight blade. For leveling, notched spatulas are used, which have different tooth heights; this determines the thickness of the adhesive layer. Typically, tile adhesive manufacturers indicate on the packaging which spatula to use to apply the mixture when gluing tiles of different sizes;
- lay the tiles on the layer of glue, using a slatted level to mark the horizontal position. The method of gluing the mosaic depends on the type of flexible base: the synthetic mesh should be on the bottom, the paper mesh on top. After the glue has hardened, the paper is soaked and removed;
- Apply glue again and glue the next module, inserting plastic crosses into the seam between it and the previous one. Cross stitches ensure that all seams are of equal width. When gluing mosaics, select crosses with a width equal to the width of the seams between the chips. The glue that comes out of the seams is wiped off with a rag;
- continue to glue the tiles, leveling the modules relative to each other;
- The tiles adjacent to the sink are cut using a tile cutter for curved cutting. Tiles for gluing the ends can be cut with a regular tile cutter, a diamond glass cutter (if the thickness is small) or a grinder.
The ends can be decorated using a special part - an outer corner. The glue used is waterproof. Better - cement glue diluted instead of water on latex.
It is not advisable to use expensive and difficult-to-work epoxy adhesive, which is characterized by the highest water resistance, in this case, since the countertop is not constantly exposed to direct water.
If the product is going to be covered with glass mosaic, white glue is required.
Wooden countertop for the bathroom: reliable and durable
Many people will be surprised whether it is possible to install a wooden countertop in a bathroom.
High humidity has always adversely affected the durability of wooden products. However, modern finishing products and the right type of wood work wonders. The main task is to choose:
- A type of wood that is resistant to moisture.
- High-quality moisture protection products for surface treatment.
- Conscientious professionals who will carry out the work with full responsibility.
Grouting joints
The grout is also moisture resistant. Cement-based latex is also preferable; there is no point in buying expensive epoxy. An exception is if silver or gold powder is supposed to be added to the epoxy grout, as is done in expensive interiors.
Filling of joints begins a day after gluing the tiles:
- Remove glue residue from the seams using a special scraper coated with tungsten or diamond. In its absence, a construction knife is used;
- moisten the seams with a spray bottle or a damp sponge;
- Apply the grout to a rubber spatula and rub it into the seams, trying to fill them as much as possible. It is useful to press the mixture with the blade of a spatula and then go over the seam again, filling the resulting void;
- in 15 – 20 minutes. After starting work, return to the first area and wipe off traces of grout from the tiles with a rag or damp sponge. This moment is the most suitable, since the mixture has not yet dried and can be removed, but at the same time it has already hardened somewhat and therefore is not squeezed out of the seam with careless movement.
Contact of grout with water is allowed no earlier than after two days.
You should add an antifungal additive to the grout or buy a ready-made fungicidal composition.
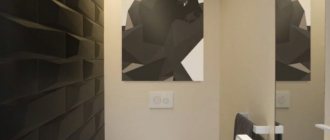
Glass in the bathroom
Glass surfaces are considered newfangled. The bathroom is no exception - the use of glass countertops is popular here.
Thick tempered glass is used for their production. It is not at all necessary that it will have any shade.
Built-in glass countertops in the bathroom look very nice. They seem to add lightness and tenderness to the interior.