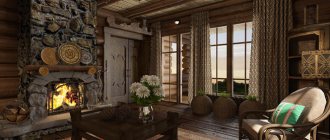
Features and Benefits
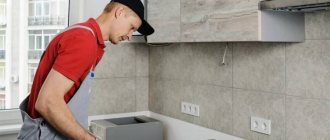
Plaster serves to protect the wood from rotting, getting wet and drying out, and damage from wood-boring beetles. A wooden surface requires a competent and responsible approach to work. It is necessary to properly treat the base before applying the protective layer, to clean out any unevenness and roughness. It is also important that the material is dry, otherwise the coating will crack when it shrinks.
Among the advantages, we note that plaster is a plastic material, easy to apply, and dries quickly. Finishing materials adhere well to it, and it promotes good adhesion to the base. Good plaster mixtures have a fine consistency and form a thin layer.
It is recommended to plaster the wooden beams used to construct the floor of a house no earlier than a year after its construction. This is necessary to prevent cracking of the plaster when the walls shrink.
Basics of creating a three-dimensional drawing
So we come to the main and most interesting part - creating a plaster panel with your own hands. First, let's look at such an artistic concept as “linear perspective.”
Perspective
Perspective is needed in order to show the depth of the drawing on a flat wall, i.e. reproduce the third dimension. In bas-relief this is not always used. Many simple plaster panels, such as flowers, can be made without resorting to the rules of perspective.
Simple rules of linear perspective:
- It is better to do distant objects (people, houses, trees) first, because nearby objects on the bas-relief can partially overlap them.
- The lines on distant objects should be thinner than on near objects.
- The height of an object shows the distance from it to us. In the background, all things are smaller than in front of us.
An example of a drawing with linear perspective.
What is important to observe when building a perspective.
The horizon line is always at the level of a person’s eyes, i.e. 160-170 cm from the floor. Let's say there is a picture on the wall of a street and people walking along it. The height of an adult is approximately the same; In order for the drawing to look harmonious, the level of all the characters, both those standing closer and further, needs to be done on the horizon line. Accordingly, a seated person or child will be depicted below this line.
The vanishing point is the place on the horizon line at which all lines running parallel to the ground converge: road, rails, roof level of the house, window sills, etc. (example of vanishing line in the picture below)
All straight lines on the facades of houses are directed to one point.
The vanishing point does not have to be in the center of the picture, it all depends on the perspective that we want to convey. There may be several vanishing points, for example, if we depict two adjacent walls of a house, i.e. We look at it from the corner.
Expert opinion
Marina Zanina
Interior designer
When marking a wall for a bas-relief, this technique helps: at the vanishing point, install a button or a nail to which a thread is attached. Then the thread is applied to all straight lines going into the distance.
Reinforcement of plaster (step-by-step example of bas-relief)
After the contours of the future bas-relief are drawn on the wall with a pencil, you need to think about which places will be the most protruding. They need to be strengthened to protect the plaster from chipping and cracking under its own weight.
To reinforce plaster paintings, ordinary soft wire wound onto self-tapping screws is suitable. This is done like this:
Step 1. Marking the wall. It is convenient to transfer the sketch by dividing it into squares.
Step 2. Drill holes within the contour of the pattern, insert dowels and tighten the screws, leaving about 10 mm on the surface. Then we wind the wire between the heads of the screws. This creates a kind of frame, which will then be covered with plaster mortar.
Step 3. We form the general details of the bas-relief, the reinforcement is completely covered with plaster. At this stage we work roughly, without sanding. All dimensions of the painting and the height of the relief are already visible.
Step 4. Smooth out the roughness with sandpaper and putty on the figure if necessary. We create all the small details and thin lines at this stage. After finishing the work, the panel must be primed before painting (if we paint).
Step 5. The bas-relief is fully or partially painted. For tinting, you can use varnish or wax for decorative plaster, tinted with color.
Cutting technique
This is a simple technique for working with sculpting stacks and chisels. Its essence is to sculpt the general contours of an object from plaster, and then cut through the details using the hardened plaster. It is more convenient to cut through than to sculpt from mortar, because the liquid material is drawn behind the tool, making it difficult to achieve clear boundaries of the bas-relief. But after hardening, gypsum plaster and putty perfectly retain their shape and do not chip.
Important! There’s not much you can do with cement plaster after it dries, it’s like stone. You need to cut on it 2-3 hours after application, until it has completely hardened.
You can work with gypsum materials the next day. To do this, they need to be moistened with water from a sprayer, wait 10-15 minutes until all the moisture is absorbed into the panel, and then work with a stack or chisel.
It looks like this:
A technique for cutting a design into wet plaster.
Layer-by-layer application
As was already shown above in the example of a three-dimensional Dragon made of plaster, complex drawings need to be done in several stages. If you throw a thick layer of mortar on the wall and try to sculpt small elements on it, it will turn out to be difficult - when forming the parts, the background will sag under the palette knife.
Therefore, you need to move from the general contours of the bas-relief to the details in several stages. Layer-by-layer application of putty to the picture is, as it were, the opposite of the cutting technique, because in this way we do not remove excess material from the wall, but add only the required amount.
An example of layer-by-layer creation of a gypsum panel. The material is squeezed out of the extruder (confectionery syringe).
How long should I wait before applying a new coat?
It is enough to wait for the plaster to set, i.e. did not stick to your finger and did not lose its shape when pressed lightly. On average it is 1.5-2 hours. You can leave the panel overnight and continue the next day.
Do I need to prime between coats?
It's not obligatory. If there is no dust on the surface of the bas-relief, then simply moisten it with water from a spray bottle and continue working. It is necessary to wet the base so that water from the fresh solution does not go into the already dried plaster. Otherwise, the material will dry out prematurely and may peel off.
Expert opinion
Marina Zanina
Interior designer
Advice! Avoid thin-layer application so that when sanding, transitions from one layer to another do not appear, otherwise you will have to correct it with putty. It is better to complete a single element of the drawing (leaf, flower, any object) at one time.
Often the work combines cutting out design elements and layer-by-layer application of plaster. An example of this is in this video lesson:
Coloring
A three-dimensional pattern on the wall can look attractive without additional painting. It is enough to correctly arrange the lighting in the room (on the facade), and the falling shadows will effectively emphasize the details and volume of the bas-relief.
A cool way to color bulk plaster is patination. With the help of patina, the tops and valleys of the relief are distinguished; as a rule, no more than two colors are used.
The rule for patination is simple - the recesses in the texture are made darker, the tops and protrusions are made lighter. For example like this:
The base color covers the entire wall and the pattern on it. You can use any interior water-based paint.
The application method can be any: wide brush, roller, spray gun.
After the base layer dries, a patina develops. This can be decorative paint with gilding, silver, copper color or another with a metallic sheen.
Apply the second layer only to the tops of the drawing. Use a wide brush or lint-free roller and apply a little bit of paint onto the tool.
Another way to bring out texture and volume is to darken the valleys the second time you apply paint. This is done when you want the main color of the composition to be light, and the details (recesses) to be dark. It's very easy to do.
- Apply paint to the panel, covering all the plaster in the desired base color. You can skip this step if you want to leave the regular white color of the plaster mixture.
- Apply tinted decorative wax or simply darker paint with a sponge into the depressions of the texture. Without waiting for the paint to dry, wipe off the excess with a sponge or cloth.
Gypsum flowers are covered with dark decorative wax. The wax was removed from the tops and remained only in the lowlands.
I recommend looking at other articles on the topic:
Simple and effective ways to paint decorative plaster
How to mix colors and select shades
What paint to choose for painting plaster on facade walls
Cool ways to decoratively plaster walls with regular putty
Types and methods of application
Types of plaster are determined by several indicators. If we consider from the point of view of location, then it will be façade and interior. The first is used for finishing the outside of a wooden house, the interior - indoors. The facade forms a durable coating that is resistant to atmospheric influences. Plaster for interior work is more decorative and forms a thin, neat layer.
The following types of plaster should be distinguished:
- Ordinary.
- Decorative.
- Thermal insulation.
- Waterproofing.
- Sound-absorbing.
- Special compounds.
Each of them is designed for specific purposes. They decorate wooden structures, protect against cold, moisture and noise, and serve as fire protection.
Plaster does not adhere well to wood, so it is applied in three stages:
- Spray. The liquid mixture is sprayed onto the surface and leveled. This layer improves the adhesion of the base. It is made 10 mm thick.
- Priming. This is the main layer, with the help of which a smooth surface is achieved, bumps and depressions are smoothed out, making it completely flat. The thickness of the layer depends on the quality of the wooden surface and varies from 5 to 10 mm.
- Covering. A thin finishing layer that completes the preparation of the surface for decorative finishing or wallpapering. Thickness no more than 2 mm.
When plastering wooden surfaces, nets are laid under the plaster or a lattice of wooden slats is filled.
Is it possible and why to plaster wood?
With the advent of new, modern components for plaster, the technique of applying rough finishing has also advanced. However, the processing of wooden surfaces has not changed much.
Plastering wooden surfaces has several advantages:
- This is a great way to level the walls and ceiling before applying a decorative layer;
- Additional insulation is created;
- Sound insulation increases;
- The finish has increased fire resistance.
Considering that wood is a natural material, additional coating provides protection against the appearance of pathogenic organisms and increases the operational life of the object to 30 years. Protected walls are less likely to be attacked by rodents. Plastering a wooden house on the outside protects it from natural factors.
For plastering in houses made of timber, experts advise waiting at least one and a half years after the construction of the building is completed. During this time, the building will shrink. In the future, the finish will not crack. For frame-type houses there is no need to wait; you can finish it right away.
For plastering in houses made of timber, experts advise waiting at least one and a half years after the construction of the building is completed.
Types of plaster solutions
The main components of plaster mortars for wood are cement, gypsum, clay, sand and special additives. Mineral chips of various diameters are added to decorative plasters of the “Bark Beetle” type to obtain convolutions on the surface that imitate the passages of the bark beetle.
Let's look at the composition of ordinary plaster.
Cement-sand mortar
This plaster mixture contains cement and sand. For one part of cement, take 3-5 parts of sand. The ratio depends on the brand of cement. Here is the most commonly used ratio of cement and sand in cement-sand plaster:
| Cement brand | Amount of cement in shares | Amount of sand in fractions |
| M600 | 1 | 6 |
| M500 | 1 | 5 |
| M400 | 1 | 4 |
| M300 | 1 | 3 |
| M200 | 1 | 2,5 |
All components are thoroughly and gently mixed until the grains of sand turn gray. Subsequently, the mixture is sifted, removing particles larger than 2.5 mm. Then add water. This is done in small portions until the consistency of thick sour cream is obtained.
You can make the plaster mortar yourself, or you can buy it ready-made.
Important! By purchasing a ready-made mixture, we will receive a composition with the addition of plasticizers. This improves the quality of the solution and facilitates the work of applying plaster.
Cement-lime mortar
The best composition for the first layer directly on a wooden surface. Adheres reliably to the base and has good adhesion to wood. The result is a frost-resistant and water-resistant coating. Used for interior and exterior finishing works. Has the following composition:
- cement grade M300 – 1 share.;
- sand – 4 shares;
- slaked lime – 1 share.
It is better to use slaked lime, which can be purchased ready-made. Here it is important to choose the right quality one, otherwise cracks will appear on the plastered surface.
Lime-gypsum mortar
Consists of a mixture of gypsum powder and dry lime. First, lime dough is prepared. To its 4 parts add 1 part of gypsum. Gypsum dries in about 30 minutes, so it is prepared in small portions and used quickly. It is useless to dilute dried gypsum plaster with water; it will not give a good result.
Plastering wooden walls inside a house is the main use of lime-gypsum mortar; you just need to exclude rooms with high humidity.
Clay-based plaster mortar
Clay has been used for plastering wooden surfaces for a long time. Currently, the composition has been slightly changed; modern components are added to it for strength, for example, non-woven glue.
The following composition is used:
- clay – 3 parts;
- straw or sawdust - about a liter by volume;
- sand - 7 parts.
It’s good to add a liquid glue solution (the preparation method is indicated on its packaging). When decorating the outside of the house, add 1 part of cement. This plaster can be used in damp areas.
The plasticity of clay plaster is determined as follows: roll a 4 cm ball, squeeze it between two planes and observe its condition. The appearance of 3-4 shallow cracks indicates its readiness. If the ball crumbles, you need to add clay. If the ball wrinkles like plasticine, increase the amount of sand.
It is convenient to use ready-made plaster mixtures for work. They have an optimal composition, which is difficult to obtain on your own. The additives used in them make it possible to obtain breathable walls, while at the same time maintaining their moisture resistance and vapor permeability.
Advice! When choosing a plaster mixture, you need to consider what kind of substrate they can be applied to in order to provide a durable coating that will not peel off.
Steps for applying mortar to wooden walls
Plastering wooden walls in the house
Experienced professionals use a trowel or trowel to perform these types of work. But not all beginners can handle such tools, so you can also use several long rods, pre-tied together (like a broom). Such a “broom” is immersed in a container with the prepared solution and with a sharp wave of the hand it is sprayed onto the sheathing. Of course, a certain amount of the mixture ends up on the shingles itself, but a larger amount penetrates between the cells of the shingles and fills the voids.
It is not advisable for the density of this layer to exceed 9mm (this is already taking into account the shingles itself). Only in the case when the log house is formed from logs, and the wall plane has holes, then in such areas it is allowed to apply a base base with a layer density of no more than 12 mm.
When processing the surface, your movements should be directed from the ceiling to the floor so that water does not flow onto the already formed surface.
This is not a fun activity and is quite slow. But, despite this, try to do all the manipulations carefully, filling all the cells of the shingles with the mixture. Don’t be upset if your base is not completely smooth and aesthetically beautiful. This is not problematic, and even better, because on such imperfect walls the primer will be able to bond better to the surface.
At the second stage of processing, when the base is well fixed, you can proceed to priming.
When applying the primer solution to the surface, do not throw the mixture anywhere. It must be smoothed over the entire wall, trying to immediately form a flat surface.
The number of primer layers can be either one or three approaches, but if there are several layers, each of them must be given time to fix.
If you only need to apply the primer in one layer, its density should not exceed 7 mm. But, more experienced builders do not advise exceeding this norm even for several layers.
Next, after the primer has set, you can apply the coating. For this layer, use the same mass as for priming, only in a more liquid form. This layer is intended only for decorating the surface and should not exceed 2.5-3mm.
Plastering a wooden wall in a room
To apply this coating, use a trowel or trowel. Your movements while leveling the layer must be strong so that the covering layer is immediately compacted.
To smooth out small defects and give the wall a finished look, use a wooden board with a smooth base.
If you want to diversify the interior of your room, when applying the coating, you can use various coloring pigments, which will give the plaster different shades and allow you to create a certain texture that imitates wood, stone, etc.
Wooden walls for plastering
After completing work with all layers of plaster, it should be given time to dry and this process should not be accelerated artificially, so as not to contribute to the formation of cracks on the surface.
Whether to plaster wooden walls is your choice, but be aware that a properly carried out plastering process is the best way to protect wood from wear and tear.
Tools and equipment for plastering work
Before starting the plastering process, it is necessary to equip the workplace. For ease of work, scaffolding, scaffolding or stepladders are used. Select equipment for preparing the plaster mixture: mixing tank, measuring containers - buckets or tanks of a certain volume. It is convenient to use an electric mixer; you can limit yourself to a drill with a special attachment.
Select a tool for applying plaster to the surface. They use spatulas of different sizes, graters and graters, a trowel, usually smoothers, mallets, a plumb line and level, and a tape measure.
Tools and devices for creating bas-relief
Craftsmen have a variety of scrapers and spatulas of different calibers, but a simple amateur will need a minimum set:
Hallway decoration Source strojka-gid.ru
- Palette knives (special small spatulas for artistic work) of different widths;
- A wood cutter is used to edit the image, giving completeness to the form;
- Pencil for drawing lines on a plane;
- Wooden box with plywood base;
- Polyethylene film;
- Varnish or paint for impregnation or creation of color. Choose a special glazing translucent paint; several layers give a beautiful deep color;
- Nails, screws, tile adhesive;
- Confectionery syringe with nozzles.
Ancient motifs Source strojka-gid.ru
A wooden box is mounted to create a mobile version of the bas-relief, which will later take its place in the panel, and after the next repair can be moved to another place.
A variety of palette knives for creating relief Source etudesite.ru
Surface preparation before plastering
Plastering wooden walls begins with preparing the base to ensure adhesion of the plaster layer to the wood. The easiest way is to make notches on wooden walls. They are applied at an angle of 450 with an ax to a depth of 1 cm.
Let's decide how to plaster a log wall. First you need to seal the depressions between the logs. To do this, use moss, tow or polyurethane foam. The surface is treated with an antiseptic to prevent the formation of fungus and mold. In wet rooms, foamed polyethylene film or a layer of roofing material is attached to wooden walls.
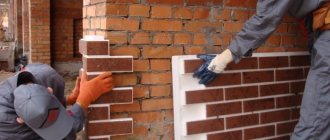
Significantly increases the strength of the plaster coating by applying wooden strips (shingles) to the wall. Modern technologies use reinforcing mesh, this is especially true if the walls are not level enough, and a thick layer of plaster is applied to achieve their horizontality.
To plaster the base of the house and its external walls, a metal mesh is used. It is attached to the wall with dowels; it must be well tensioned and not sag.
Instructions
To obtain high-quality coating, it is important to apply the right technology, adhere to the deadlines and sequence of the process. Here is an algorithm for how to plaster wooden surfaces:
- We fill in depressions, cracks and irregularities. This is important in order to prevent the possibility of moisture penetrating into the wooden structure. To do this, we use mineral wool, tow, moss or polyurethane foam.
- We fill shingles - wooden slats, make two layers, each at an angle of 450, resulting in a rhombic mesh. Instead of shingles, a reinforcing nylon mesh is used if the interior of a wooden house is being plastered, but for exterior work the mesh must be metal.
- We install beacons. This is necessary to visually assess the evenness of the coating. They are installed so as to obtain a layer 2 cm thick. We calculate the size from the top layer of shingles. We check the correct installation with a level.
- We make the first layer - spray. We spray the wall with a liquid plaster solution containing PVA glue (0.2 l/10 l). Cover all defects of the wooden surface, level with the rule, leaving a layer thickness of 1 cm.
- We prime the surface without waiting for the previous layer to dry. The surface is made smooth, leveling out all irregularities. Layer thickness – 0.7 cm.
- Next, we apply the final plaster layer, which can be a finishing layer. Modern decorative plasters can imitate various surfaces in the form of stone, wood and others.
Plastering wooden walls - the need for
Many modern types of plaster mixtures can be used not only for finishing brick and concrete, but are also suitable for the protective finishing of wooden structures. And yet, various restrictions apply to plastering work on wood: for example, shingles should be attached to them, and only then the mortar itself should be applied.
Why bother plastering wood at all if it involves so much labor? If there are doubts about the need for such actions, it is worth studying the list of tasks that can be easily solved by plastering wooden walls:
- preventing drying and cracking of logs;
- protection from precipitation, dampness, harmful effects of oxygen;
- prevention of rotting, mold, insect infestation, and rodent damage;
- insulation of the building and elimination of even the smallest cracks;
- improving sound insulation and increasing the fire resistance of walls;
- giving evenness to the internal walls for finishing.
Plastering wooden walls
Plaster reliably protects wood from inevitable rotting, which is associated with the absorption of moisture and its slow release. Without additional plastering, after 15-20 years, some rotten areas will have to be replaced. After applying plaster, rotting stops or is greatly slowed down, resulting in a longer service life of the building.
Drying plastered surfaces
Natural drying gives the best effect. This is especially important in the first three days after plastering is completed. Accelerating the process leads to uneven drying of the layers - the top layer dries out, but the bottom is still wet. This leads to cracks in the plaster.
The process of accelerating drying can begin on day 4-5. To do this, use additional heating of the room and provide ventilation. They increase the temperature inside the rooms by installing a heat gun and heating devices.
External plastered surfaces require special attention. They are affected by precipitation, solar heating and wind. To protect against these factors, a protective film is used to cover the facades with it.
Under what conditions can a wooden house be plastered?
A structure made of expensive timber impregnated with strong chemical compounds does not need plastering. However, only a few can afford such houses. In addition, they are far from environmentally friendly. Owners of houses made of classic timber or logs have to look for ways to protect the structure from cracking and rotting.
You can start finishing no earlier than a year, or even two, after the construction of the building, otherwise shrinkage will negate all efforts and investments. The exception is frame houses - rigid structures that do not change geometric dimensions.
The optimal air temperature is 10–20 °C. In case of frost or excessive humidity, as well as in the heat, the adhesion of the material to the base deteriorates. You can plaster interior walls even in winter if the house is heated. However, the treated surfaces must dry without the use of heaters.
A log house can be plastered, unlike a frame house, only from the inside. A layer of plaster and base will allow moisture to escape. If the wall is treated on both sides, vapors will accumulate inside and create conditions for the development of fungus and mold.
It is better to plaster a wooden house in spring or autumn
Features of plastering wood outside the house
Before determining how to plaster external walls, you need to take into account some features of this process. Basic operations are performed as for interior work, but some features should be clarified:
- external walls must be plastered after interior finishing work is completed;
- when multi-layer plastering of external walls, gypsum is added to the solution for the first layer to speed up drying;
- slaked lime in the plaster serves as an antiseptic against fungi and insects;
- plaster solutions for exterior use should not contain clay;
- If you add varnish to the finishing layer, you get a glossy surface.
For finishing plastering of facades, a more elastic composition is used. It serves for noise, hydro and thermal insulation of wooden surfaces. To give the outer surface of the house a beautiful, presentable appearance, types of plaster such as acrylic, silicate and silicone are used.
Plastering a wooden house outside
Exterior finishing of a wooden house is carried out after finishing the walls inside the house - this will prevent “locking” of moisture in the wood. The process begins with preparing the walls and filling the shingles. Large cracks and joints of logs are caulked with tow, mineral wool, and slats are hammered into the largest cracks. After they nail down the shingles (some builders replace them with durable plaster mesh), they install beacons, without which it will be difficult to achieve even walls. Apply the plaster in a layer of 15-20 mm, and make the solution more liquid than for interior work, and add a little PVA glue into it.
The plaster is allowed to dry naturally, but is protected from direct sunlight and freezing. To make it easier to comply with these conditions, work is planned for late spring or early autumn. To give the facade an attractive appearance, ready-made decorative plasters are subsequently used, which are applied in a thinner layer. The most common types of plasters are:
- mineral;
- acrylic;
- silicone;
- silicate.
Silicate decorative plaster for facades
The most durable and reliable, but most expensive materials are those based on silicone and silicate. Modern plasters are available in different textures and colors. In addition to decorative plastering, 28 days after the rough finishing, you can use natural or artificial stone cladding.
Which composition to choose
There are many materials that are suitable for protecting, insulating and decorating wooden walls.
- Cement-sand plaster
Cement-based plaster is inexpensive and will make the wall durable and resistant to precipitation/frost. For external rough finishing, a sand-cement mixture is often used in the following proportion: one part of cement and 4-5 parts of middle fraction sand. Ready-made cement-sand compositions are characterized by plasticity and are resistant to wear and stress.
- Lime-cement
- It is characterized by lighter weight, plasticity and greater vapor permeability, excellent resistance to mold and pests, and is used mainly for rough finishing. If the composition is applied as a facial, it is coated with a hydrophobic agent. Contains slaked lime, sand and Portland cement. To prevent the plaster layer from swelling, it is left for two weeks after extinguishing.
Lime is an excellent antiseptic, so there will be no mold in a house with lime-cement plaster
- Plaster
Gypsum, including lime-gypsum, compositions are used only for interior work, as they are not strong enough. They are produced in the form of soluble mixtures. The thick consistency is suitable for leveling walls and filling cracks, while a thinner consistency is suitable for finishing application. Gypsum plaster retains high plasticity for 30 minutes, is consumed economically, due to the presence of polymers in the composition - it demonstrates good adhesion to a wooden base.
- Clay
Clay plaster is an environmentally friendly, but rather finicky material: if you prepare it yourself, you must strictly follow the recipe. There are also dry clay mixtures on sale that will reliably protect the house from rain and wind. They differ in filler: sand, fiber, wool, felt, sawdust. A properly prepared mixture is easy to apply.
Clay plaster is used less often than others today