Do-it-yourself restoration of chipboard furniture: master class
Furniture made from chipboard, both modern and having served for decades, can be found in almost every home.
This material is always popular due to its low cost, practicality and durability. But with active use, various defects may appear on its surface. But it is not at all necessary to change your favorite table or cabinet; furniture restoration will help, and you can do it yourself. Old chipboard furniture does not have to be sent to a landfill; it can simply be restored and given a completely new and fresh look.
High-quality restoration of furniture is a labor-intensive and slow process. If the need arises, you can contact specialists, or you can study all the intricacies and do it yourself. By selecting the right materials and studying master classes, the updated table or cabinet will delight you with its appearance for many years to come.
Chipboard (chipboard) is made from shavings of coniferous and deciduous trees. Natural crushed material is mixed with synthetic resins and hot-pressed. The slab produced in this way is resistant to aggressive environmental influences and has excellent noise and heat insulation properties. The characteristics of the material must be taken into account if you decide to restore the furniture yourself.
What is the difference between laminated chipboard restoration?
Restoration of a laminated board is carried out using the same methods as conventional chipboard. However, laminated material is more demanding, which is why you need to treat the repair of such furniture with care. Laminated chipboard is the highest grade of particle board, as it is used for expensive and durable furniture.
Varnishes and stains are also used to paint chipboard furniture.
If we are talking about painting, then there is no need to peel off the melamine coating layer, as this may damage the surface of the slab itself. Lamination is applied to the sheet under high pressure, so removing this layer will not be so easy.
The varnish is used as an independent decoration or fixes the paint layer.
To paint a laminated surface, you must:
- Degrease the top layer with alcohol;
- Using fine-grained sandpaper, create a rough layer on the surface for better adhesion;
- Apply varnish or paint.
For a laminated coating, it is best to choose a varnish or paint with polyurethane components in its composition. This varnish has more advantages and creates a durable coating.
Old furniture can serve you for a long time after it has been restored.
You can also fix scratches on a laminated surface using wax, which is applied to the damage and covered with tinted wax or a special paste for laminate flooring. It is important to choose a color that matches the color of the leaf.
Sometimes you need not only to paint chipboard furniture with your own hands, but also to decorate it.
Restoring chipboard furniture with your own hands has great opportunities and advantages over correction in special workshops. Based on the intermediate result, you can evaluate the outcome and, if necessary, change the concept. The above restoration methods are inexpensive and simple, which means they are available to anyone who wants to update the interior of their home.
Repainting chipboard furniture
Figure 1. Tools for furniture restoration: self-adhesive film, furniture layout, iron, knife, scissors.
The easiest way to update a cabinet or desk is with a simple repaint. Such restoration of furniture will allow you to get rid of minor scratches and change the boring shade. If there are significant defects on the surface, it is better to choose a different method. Chipboard is a specific material, and it needs to be painted using a special technique.
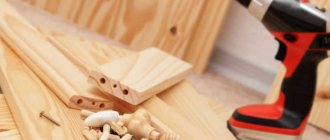
For work you will need the following materials and tools:
- sandpaper;
- putty knife;
- screwdriver;
- construction hair dryer;
- wood putty;
- water-based varnish;
- acrylic or alkaloid paint;
- spray gun;
- brush or roller.
Before starting work, you should disassemble the furniture. Remove doors and fittings. It is necessary to paint each element separately, this will allow you to more carefully work out all the joints and avoid the formation of drips.
Acrylic water-dispersion paint dries quickly and is easy to apply to chipboard furniture.
First of all, you need to get rid of the old coating. If the furniture has been previously painted, you can remove the paint using special solvents or sandpaper. It will be more difficult to dismantle the coating if the facades are varnished. You need to remove the unnecessary layer with a spatula, warming small areas with a hair dryer. A regular hairdryer will not work, as it does not heat the surface enough.
After this, it is necessary to carefully process the facades using medium-hard sandpaper. Apply a thin layer of putty to the cleaned surface and, after drying, sand it again with sandpaper. Each detail must be perfectly smooth, special attention should be paid to the corners and the most visible areas of the furniture.
Then you can proceed directly to coloring. It is most convenient to apply paint using a spray gun, but you can easily get by with a brush or roller. In order for furniture restoration to meet expectations, the coating must be applied carefully, avoiding the formation of gaps and smudges. If the defect was discovered after drying, the problem area must be processed again with sandpaper and covered with an additional layer of paint.
After drying, all parts must be coated with 2-3 layers of varnish and left until completely dry. After this, you can assemble the updated furniture and continue to use it with pleasure; the restoration is complete.
Updating facades using self-adhesive film
Often, a good-quality and reliable wardrobe is sent into exile to the country only because its design is hopelessly outdated. But any furniture can be given a second chance, just modernize its appearance, and external restoration will help with this.
Hard wax is used to repair chips on chipboard.
In order to breathe new life into an old closet, you will need (Fig. 1):
- self-adhesive film;
- furniture layout - decorative tape on a self-adhesive basis;
- scissors, knife;
- iron.
Even a beginner can restore furniture with his own hands using self-adhesive film. The main thing is to purchase high-quality materials, carefully study the step-by-step work plan and follow all recommendations. And the master class will help you navigate the renovation of furniture with your own hands - a clear step-by-step diagram.
- First of all, it is necessary to disassemble the furniture that will be restored. Remove all fittings, and after finishing the work, replace them with new modern ones.
- Thoroughly clean all surfaces. To do this, you can use dishwashing detergent dissolved in water.
- After drying, all facades should be wiped with a weak solution of vinegar. This treatment will remove a thin film of grease that will interfere with the adhesion of the slab and the self-adhesive film.
- Next you need to cut the film. Be sure to leave a margin of 5-7 mm on each side. These surpluses will allow you to avoid rework. And after finishing the work, they can be easily cut with a sharp knife.
- And only now does the actual restoration of furniture with your own hands begin. Before gluing, the surface of the chipboard must be sprayed with water; this will help lay the film more evenly, and if folds and creases form, it is easy to correct the defect.
- At the next stage, the film must be smoothed using a dry soft cloth. You need to move from the center to the edges, carefully removing air bubbles or drops of water. If the bubble cannot be corrected, it must be pierced with a thin needle and smoothed out. This technique ensures perfect adhesion of the film to chipboard furniture.
- The DIY furniture restoration is almost complete, all that remains is to bring the new coating to perfection. To do this, the facades need to be ironed through the fabric. The iron should be preheated to a moderately hot temperature.
- All that remains is to stick on the layout and replace the handles with new ones. The restoration is complete, and the cabinet or table can be used.
Features of repair of agglomerate countertops
The situation is more complicated with an agglomerate countertop. The rather expensive agglomerate countertop is very durable and almost not susceptible to scratches and chips, since it is 90% marble or quartz, and this is its main advantage. But if in some unimaginable way you managed to knock off a corner on it or make a chip, then it is easier and cheaper to replace it with a new acrylic one than to repair it.
Most often, defects on products made from quartz agglomerate are chips, which can appear when heavy or sharp objects hit the surface or the end of the product. Later in the article we will look at eliminating just such defects.
For restoration, special restoration materials are used.
If the chip is small (less than 1 mm), it is expanded so that the adhesive has the opportunity to bond with the structure of the stone after drying.
The adhesive composition is made on the basis of polyester resin, with the addition of quartz dust and coloring pigment. After drying, the remaining glue is removed with a blade, and then the treated area of the surface is wiped with alcohol.
The main causes of scratches
Before you start eliminating scratches, you should find out the reasons for their occurrence. This is necessary in order to prevent the formation of defects in the future. The main reasons include:
- Exposure to abrasive substances, including sand and dust. For this reason, minor and barely noticeable defects appear on lacquered furniture.
- Damage caused by pets' claws or various sharp objects.
- External mechanical influence. The largest and most problematic chips appear from impacts from furniture.
How to remove scratches
Detected defects can be removed using improvised or specialized means. If there is serious damage, it is possible to combine several methods.
Special marker
A marker has been created for processing a polished surface, which allows you to restore the attractive appearance of the product. The principle of operation of the marker is the penetration of microparticles into cracks and subsequent filling of the scratch. The marker is colorless and has a consistency similar to paints and varnishes. The applied substance on the surface is not washed off with water and creates protection against new scratches.
Furniture wax is a universal remedy for removing scratches on wooden products. Wax can be used on laminated and varnished surfaces.
Soft
Soft wax makes the wooden surface smoother and gives the necessary shade to the wood structure. The product does not require pre-mixing and is offered in a ready-to-use state. It is enough to apply wax to the damaged area, remove excess and after 15-20 minutes finish polishing with cotton material.
Solid
The hard type of wax is suitable for restoring wooden furniture with large defects. Unlike soft wax, hard wax is thicker and is applied to material previously melted with a soldering iron. After application, excess material is removed with a spatula, and the coating is thoroughly polished.
Shoe polish
Minor scratches on tables and other furniture can be hidden using shoe polish. It is important to choose a cream that matches the shade of the surface being treated. This method is suitable as a temporary solution to the problem, since after a few wet cleanings the scratches will be visible again.
Brewing black tea
Shallow damage can be masked with an infusion of black tea. Soak a cotton pad in a rich-colored liquid and wipe the damaged areas. The method of removing scratches by welding is suitable for processing dark-colored products.
"Stroke" furniture
A specialized product called “Stroke” was created for application to wood and laminated surfaces. To hide a defect on the surface of a countertop made of plywood, MDF and other materials, you need to select a “Stroke” of the desired shade. The usage process is as follows:
- the coating is pre-cleaned from dust and dirt;
- The product is thoroughly shaken and applied to the surface in several layers;
- 15 minutes after application, wipe the surface with a damp cloth.
Iodine or machine oil
Scratches on dark wood furniture can be removed with iodine or machine oil. It is enough to dip a cotton swab in one of the substances and walk over the defect. When working, you should use rubber gloves to protect the skin of your hands.
Additional ways to remove scratches
Unsightly cracks on polished furniture, if they are very shallow, can be removed with hot steam. To perform the procedure, you need to wet gauze folded in several layers, apply it to the worn area and walk over it with a hot iron. If you have an iron with a steamer, its steam can be used without applying fabric. But this method is not always safe for furniture. Before treating visible parts, it is advisable to try this technique on an inconspicuous area.
In the case of dark wood, sometimes covering the scratches with honey of a suitable color helps. It is applied in several layers until the desired effect is achieved. On the surface of light wood, you can mask imperfections with an ordinary walnut, crushed to a mushy state, by rubbing it into the coating. The pulp and oil of the nut do a good job of masking various damage. These methods are considered the most suitable for getting rid of scratches on your own, which often cover polished furniture used in all kinds of rooms.
Folk remedies
Various products have become popular among people that also effectively eliminate damage to furniture. Most of the methods described do not require any special costs and are easy to use.
Walnut kernel
When rubbing scratches with a walnut kernel, the damaged area is gradually filled with mass and becomes almost invisible. The procedure can be performed several times in a row to achieve a better effect. It is possible to replace the kernel with nut oil and wipe the scratches by applying the substance to a napkin.
Mayonnaise
The effectiveness of mayonnaise is ensured by its strong penetration into the wood structure. Mayonnaise should be applied to the damaged area several times with an interval of 2 hours. After treatment, the wood will swell and the crack will fill on its own. This method can eliminate defects on any wooden furniture.
Vinegar with vegetable oil
It is recommended to treat light furniture with a mixture of olive oil and vinegar, using the components in a ratio of 5:2. The damaged area is wiped with the mixture and left for a day for complete absorption. Then the furniture is polished with a rag.
How to hide deep cracks
Very noticeable damage to furniture cannot be easily hidden with improvised means. To restore the original appearance and restoration requires a comprehensive approach to solving the problem.
Preparing the site
Before starting work, you need to thoroughly clean the surface of the furniture from dust and dirt. The cleaned area is coated with a degreasing agent and allowed to dry. Also at the preparation stage, you need to decide what material will be used to hide defects.
Applying the material
The purchased material is applied with a suitable tool or cotton pad to the damaged area. When applying, try to ensure uniformity. Excess material is carefully removed with a spatula.
Grouting the surface
After treating the scratched areas, you need to wipe the surface. During this procedure, the furniture coating becomes smoother and more even. As a rule, fine-grained sandpaper is used for grouting.
Painting
A layer of paint is applied on top of the applied masking material, which matches the color of the rest of the furniture. Paint not only visually hides defects, but also provides additional protection against new damage.
Major damage
If you need expensive repairs of Italian furniture, correction of significant surface damage or complex mechanical breakdowns, you will have to contact a special company that performs furniture repairs at home.
The repair process in this case should be carried out by professionals with extensive experience. They will repair the walls of the cabinets or replace them with similar ones if repair is impossible, and replace worn out parts.
Some serious defects that affect the operational properties of furniture can be corrected independently; local repairs will not cause difficulties for a neat person. Constant changes in temperature and air humidity, characteristic of every working kitchen, cause cracks to appear, and table legs become unusable over time. Repairs should be carried out as soon as possible, before the deformation becomes very noticeable:
- Regular PVA glue is drawn into a medical syringe; for better penetration of the substance, the needle is removed;
- Putting the needle on a full syringe, carefully fill the crack with glue;
- The part is pressed tightly with a clamp, the remaining glue protruding from the crack is removed;
- After a day, the clamp is removed and the repaired part of the furniture is coated with varnish. This will extend the life of the furniture and protect it from further damage.
Putting glue into a syringe
Fill cracks with glue
Clamping the crack
Varnish
Features of working with glass surfaces
In order not to damage the fragile glass surface, you need to take into account a number of nuances during processing. The main rule is to be careful. It is also important to select suitable products that do not harm glass products to complete the work.
Paste GOI
Deep scratches on glass can be removed using GOI paste. If possible, glass should be removed from furniture for ease of processing. A small amount of paste is applied to the fabric and spread over the surface. Then rub the product in a circular motion into the damaged areas. Remains of GOI paste after treatment are removed with a damp cloth.
Nail polish
Minor scratches on the glass coating can be easily masked with nail polish. A prerequisite is the transparency of the varnish. The substance must be applied with a brush to the scratched areas and wait until the varnish fills the crack and dries. The remaining varnish is carefully wiped off the surface with a soft cloth.
Conclusion
This is all chipboard cladding used in industry. The goal of the article, to get acquainted with the types of chipboard and MDF cladding, has been completed.
Chipboard panels for walls are in constant demand when finishing vertical structures. This is explained by the fact that the product allows you to carry out work in a short time and obtain a beautiful decorative coating. There is a wide variety of products to realize your design ideas.
Restoration of wooden surfaces
No matter how carefully you handle the furniture, abrasions, scratches, and stains still appear. They are easy to eliminate. The main thing is to know how and with what.
- If the wooden surface has simply lost its shine, find a wood care product that contains orange oil. Take a clean sponge, dampen it slightly and microwave for 20-30 seconds. Spray the product from a spray bottle, then wipe with a hot sponge (hands should be wearing rubber gloves with a coating on the inside).
A hot sponge and orange oil will restore the shine of wooden furniture
Such transformations are possible using a marker, alcohol and wax.
Restoring polishing
Restoring a layer of varnish is a complicated matter. Any furniture restoration begins with cleaning and degreasing, and repairing the varnish coating too. We use dishwashing detergent diluted in water: safe and reliable. After drying, we proceed to refinishing the polish.
- On dark furniture, a scratch can be painted over with iodine, achieving the desired color in a number of layers or diluting it with water. If you have furniture markers, you can use them.
- Deep scratches that have turned white cannot be painted over like this. There are other methods:
- Make mastic from 4 parts melted wax and 3 parts turpentine. This paste is applied to the polish and rubbed with a soft cloth.
If you have shoe polish of a suitable color, you can cover it with it and then polish everything with a cloth.
Scratches are painted over, then the coating is restored
You can simply refresh the faded polish on furniture using mixtures you prepare yourself:
- Two parts each of linseed oil and turpentine and one part vinegar. Mix everything, apply with a swab, wait until it is absorbed and polish.
- Mix oil and beer in equal parts and wipe the furniture with this mixture. After it has been absorbed, rub.
- The surface will be more shiny if you boil beer with a piece of wax, cool it and apply it slightly warm to the furniture. When the composition is absorbed, the surface is rubbed until shiny.
A few more recipes in the video.
How to remove polish from furniture
Quite often you have to remove the polishing: it is not the most fashionable finish. Modern furniture is most often painted with opaque or tinted paints, and the surface is matte. In any case, the polish must be removed. There are several ways. Since varnishes come in different compositions, you have to select them experimentally. But one of the methods should work.
- You can remove old polish from furniture mechanically. If you have a sander, the process will go faster; if not, take coarse-grain sandpaper and remove the varnish layer until wood appears. Then take a fine grit and sand it to a smooth surface. Mechanical removal does not always work. Sometimes even a grinder does not give results: the polish does not come off, but begins to melt and stink. Then they change tactics.
- You will need a piece of old glass. Put on gloves and break it into several fragments. Use the sharp edges that have formed to scrape the coating down to the wood. If there are chamfers and recesses, it is convenient to scrape them out with sharp edges. After the main layer of polishing is removed, everything is brought to a smooth state using fine-grain sandpaper.
Often, restoring furniture with your own hands requires tough measures: some types of polishing can only be scraped off with glass
How to paint polished furniture
If old furniture was prepared for painting, it must be cleaned of dust, wiped with a damp cloth and allowed to dry. Then level everything with putty, smooth out all the unevenness, wait until it dries. Take sandpaper and sand again, first with medium, then with fine grain. Next, apply a layer of primer and wait for it to dry.
Applying varnish with a brush when restoring furniture polish
You buy a primer for the paint you are going to use, or you can dilute the paint with a compatible solvent and coat it instead of primer. After drying, you can paint.
You can paint with a roller or brush. Usually several layers are needed: do not try to apply a lot of paint at once, as drips may appear. It is better to apply several thin layers. This way the surface will be smooth and uniform. Another trick: for uniform coloring, layers are applied in different directions - along, then across. This also applies to applying varnish.
Some types of varnish are easier to work with when they are warm. They are heated a little and then applied with a spray gun or brush. When heating, you need to be careful: vapors may flare up.
In order of painting: first paint the internal surfaces, edges and joints, then move on to the external ones. With this sequence, there is less chance of getting dirty or touching an already painted surface, ruining it.
If the varnish coating is smooth, without defects, and it needs to be painted over, you can do without removing this layer. There are special primers for complex surfaces. Apply them to the surface and paint after drying. They have components that penetrate even the varnish layer. Therefore, the paint will apply well and last a long time. But such soils have a disadvantage: they are expensive. But they save significant time.
Some secrets of painting wood (including brushing and painting in two colors) are in the article “How to paint lining.” Watch the video for a few secrets to applying acrylic paint evenly.
If the restoration does not bring the expected result, maybe you need to change the appearance? How to remake furniture in a new way is described here.
How to restore veneer
Veneered furniture requires a special approach. The means are basically the same, the methods are different. For example, if after getting hit the veneer is swollen, fill a disposable syringe with PVA glue, pierce the bubble, and inject glue into the cavity. Place a piece of thick fabric on top and place a weight. If the surface is uneven (convex or concave), use a thick fabric bag with heated sand as a load.
Such veneer damage is restored in two stages. First, the swelling is eliminated, then the scratch is painted over and the coating is restored.
If the veneer is glued with alcohol glue, you can return the swollen part to its place by ironing it through a rag with a hot iron. But do not overheat the iron: the veneer may stretch. Heating level is medium.
If ironing with a dry cloth does not help, try repeating the operation with a damp cloth (wet it and wring it out well). There is a chance that the wood will swell and become more elastic. To reliably fix the swelling, you can introduce PVA there and then heat it with an iron.
If the swelling is cracked, you can also try to seal it with heating (through a rag). If it doesn’t work, tear off the peeled piece. You don’t cut it, but rather break it off: on veneer, breaks after restoration are less noticeable than cuts. Therefore, you break off the lagging piece. Remove the old glue from the damaged area and the piece of veneer (with sandpaper or a nail file, depending on the size). Next, the repair of veneer on furniture is standard: spread it with PVA glue, lay it down, aligning the fault lines, lay a thick fabric on top and place a weight until it dries.
Such veneer peeling can most likely be eliminated simply by ironing it with an iron.
Scratches and traces of restoration on veneer are removed in the same way as on wood: they are painted over with a furniture marker of a suitable shade. If the scratch is deep, a little melted furniture restoration wax is applied to it (with a spatula). After drying, the wax is ground, and if necessary, fine-grain sandpaper is used, but after this treatment, the restored piece is covered with a layer of varnish.
Do-it-yourself furniture restoration requires patience and accuracy. You have to act gradually and methodically: smear it, wait for it to dry, level it, smear it again, etc. Sometimes you have to try several methods: damage varies, as do the materials used in production (glue, varnish, etc.). But as a result, the furniture will look much better.