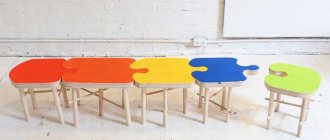
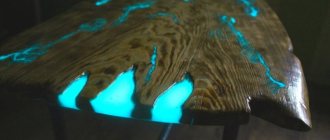
Original table options
In some cases, you can decoupage a children's table. This will save you from working with wood, and will also save an old piece of furniture. It is enough to sand it well, replace old bolts and fasteners, properly decorate it, and it will last for many more years. Now there are a large number of children's tables and instructions on how to make them. Therefore, you can make a folding table with your own hands, which will not take up much space. In addition, it has some internal space where you can put away your child’s things or toys.
For decoupage, you can choose any picture you like
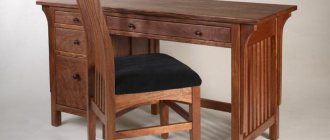
A wooden table will never go out of style. Even in a bright children's room they look quite appropriate and original. The countertops are very durable, easily withstand damage, and can also be easily cleaned. Such a table can also be assembled for a playground, the main thing is to strengthen it and apply protective paints so that weather conditions do not spoil its appearance.
You can also build a table for the street
If the table is needed only for decoration or as a doll option, then you can use ordinary cardboard and glue. For strength, the inner sides can be made of wood and the tabletop made of cardboard. It is worth noting that even this version of hand-made tables is quite durable.
A table made from plastic bottles will fit perfectly into a playground.
Plastic bottles have recently also become popular among lovers of original furniture. They are glued together with tape into strong bars and laid out in the form of a table. Next, you just need to wrap the structure beautifully and the table in the form of a tube is ready. Wooden plywood can be placed on top to level the surface.
Privacy Policy
This document “Privacy Policy” (hereinafter referred to as the “Policy”) represents the rules for the use by the owner of the website stul-zhiraf.ru (hereinafter referred to as “we” and/or the “Administration”) of data from Internet users (hereinafter referred to as “you” and/ or “User”) collected using the site stul-zhiraf.ru (hereinafter referred to as the “Site”).
1. Processed data
1.1. We do not collect your personal data using the Site.
1.2. All data collected on the Site is provided and accepted in anonymized form (hereinafter referred to as “Anonymized Data”).
1.3. Anonymized data includes the following information that does not identify you:
1.3.1. Information that you provide about yourself independently using online forms and software modules of the Site, including name and telephone number and/or email address.
1.3.2. Data that is transferred in anonymized form automatically, depending on the settings of the software you use.
1.4. The Administration has the right to establish requirements for the composition of the User’s Anonymized Data, which is collected using the Site.
1.5. If certain information is not marked as mandatory, its provision or disclosure is at the User's discretion. At the same time, you give informed consent to access of an unlimited number of persons to such data. The specified data becomes publicly available from the moment it is provided and/or disclosed in another form.
1.6. The Administration does not check the accuracy of the data provided and whether the User has the necessary consent to process it in accordance with this Policy, believing that the User acts in good faith, carefully and makes every effort to keep such information up to date and obtain all necessary consents for its use .
1.7. You understand and accept the possibility of using third party software on the Site, as a result of which such parties may receive and transmit the data specified in clause 1.3 in anonymized form.
1.8. The composition and conditions for collecting anonymized data using third-party software are determined directly by their copyright holders and may include:
- browser data (type, version, cookie);
- device data and its location;
- operating system data (type, version, screen resolution);
- request data (time, referral source, IP address).
1.9. The Administration is not responsible for the procedure for using the User’s Anonymized Data by third parties.
2. Purposes of data processing
2.1. The administration uses the data for the following purposes:
2.1.1. Processing incoming requests and communication with the User;
2.1.2. Information services, including distribution of advertising and information materials;
2.1.3. Conducting marketing, statistical and other research;
2.1.4. Targeting advertising materials on the Site.
3. Data protection requirements
3.1. The administration stores data and ensures its protection from unauthorized access and distribution in accordance with internal rules and regulations.
3.2. Confidentiality is maintained in relation to the received data, except for cases when they are made publicly available by the User, and also when the technologies and software of third parties used on the Site or the settings of the software used by the User provide for open exchange with these persons and/or other participants and users of the Internet .
3.3. In order to improve the quality of work, the Administration has the right to store log files about the actions performed by the User while using the Site for 1 (One) year.
4. Data transfer
4.1. The administration has the right to transfer data to third parties in the following cases:
- The User has expressed his consent to such actions, including cases where the User uses settings of the software used that do not limit the provision of certain information;
- The transfer is necessary as part of the User’s use of the functionality of the Site;
- The transfer is required in accordance with the purposes of data processing;
- In connection with the transfer of the Site into the possession, use or ownership of such third party;
- At the request of a court or other authorized government body within the framework of the procedure established by law;
- To protect the rights and legitimate interests of the Administration in connection with violations committed by the User.
5. Changes to the Privacy Policy
5.1. This Policy may be changed or terminated by the Administration unilaterally without prior notice to the User. The new version of the Policy comes into force from the moment it is posted on the Site, unless otherwise provided by the new version of the Policy.
5.2. The current version of the Policy is located on the Website on the Internet at stul-zhiraf.ru The current version of the Policy is dated 05.11. 2020
Selecting a method for fastening parts
Before directly assembling all the parts, you must choose the method by which they will be attached to each other. There are several such methods:
- with spikes;
- using glue;
- using nails;
- wedge method.
The last method is the most popular. To do this, you need to make a cut on the tenons that are located on the crossbars along the entire length, 5 mm wide. The wedges should be about 5 mm shorter than the grooves, but it is recommended to make their width 0.5 mm larger. Before inserting the crossbars into the grooves, the wedge must be mounted into the resulting cut, and then assemble all the parts with a mallet. This will cause the wedge to expand the tenon and the chair will not be in danger of loosening.
What should the ideal chair be like?
Both ordinary citizens who have already tried this item and orthopedic doctors strongly recommend buying a growing chair for a child; the reviews speak for themselves. But it is important to choose the right model of such a chair so that it best meets expectations and fully meets the baby’s needs.
First of all, you should pay attention to the material from which the chair is made:
- , as a rule, have two seats at once - an upper and a lower one, which is used as a footrest. Both levels are easy to move in height over a fairly large range, which makes it possible to use the chair by children from 1.5 to 16 years and older.
- Plastic looks impressive, weighs less, but will not last as long. The most durable options are those with a wooden frame and plastic seats.
The next thing you need to pay attention to is the age of the child. Some models, in particular those made of wood, can be used even by adults, while less durable plastic ones are more suitable for children of a younger age group. The same applies to design: bright chairs with plastic inserts are better suited for children, and for universal options “for growth” it is better to choose a model made of neutral-colored wood.
Advice: to make it even more comfortable for your child to sit on a chair, you can add a soft back or seat, which will also add individuality to the appearance.
Ease of use and transformation of the chair plays an important role. In particular, some models allow you to change the position of the seat using a system of grooves on the frame, while others use a more durable bolt-on mounting.
The stronger the fastener, the longer the product itself will last, and its operation will be safer.
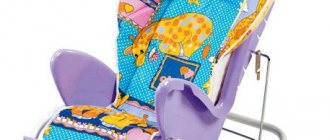
For the youngest children
Children of the youngest age still sit on a high chair for only one activity - eating food
Teaching a child to eat while sitting, and to sit in general, particularly at the table, is important and necessary. However, the peculiarities of its development at this stage do not allow the use of ordinary chairs for this purpose.
The problem lies in the fact that a simple chair does not have a back with arms, and a tiny child himself will not yet be able to sit on it straightly and will simply fall.
Such furniture should be comfortable for both the child and his mother - for now the child cannot eat on his own, so the mother will have to feed him with a spoon. For the convenience of this operation, the chair is made at a normal height, or even a little higher - so that the mother does not bend over. The actual lifespan of such a chair is about a year, so if you have one child and the family is not planning a second one at all, you can choose not the most durable materials for manufacturing.
In terms of manufacturing, a high chair is perhaps the most complex - it has the largest number of parts. The relatively small seat is raised high above the floor, which forces the installation of additional stiffening ribs between the legs for improved stability of the structure.
Taking into account the specifics of a child of the appropriate age, both the backrest and railings are simply necessary - they must completely exclude the possibility of the baby falling. Moreover, there should be a barrier in front, although it also has another useful function - it plays the role of a countertop on which food will be placed. The space under the tabletop is left free - the baby will stick his feet there.
Cutting and assembling such a chair is quite simple. First, two identical side halves are cut out according to the drawing, which are then connected to each other by the seat, back and stiffeners using grooves, glue or self-tapping screws. Before assembly, all individual parts should be sanded to a perfectly smooth state, the finished product is varnished or painted - ready.
Chair assembly instructions
We draw your attention to the fact that at the age of 2-4 years, your child begins to form a “personal comfort zone” and our high chair, along with personal belongings and favorite toys, can become the center of such a zone. That is why we try to make the RostOk high chair as convenient and comfortable as possible for your baby, and we ask you to respect and understand everything that constitutes the personal space of your little one.
Assembled dimensions: w44.5 cm x d49.5 cm x h79.5 cm Package dimensions: 87 cm x 48 cm x 10 cm Package weight: 7-7.5 kg (depending on configuration)
- To assemble the chair you will need:
— 10 M6x50 screws and 10 barrel ties (included)
— 4mm hex key (included). To speed up the process, you can use a household screwdriver with a 4mm bit
- flat screwdriver for fixing barrel ties
— 15-20 minutes of time (independent assembly), 15 minutes — all evening (together with the child)
– 1 m² of flat surface, free from children’s things and toys
- Installation of backrests. Align one of the backrests with the holes in the top of the side post so that the dowel (wooden pin) on the backrest fits into the blind recess, and the through hole on the post aligns with the hole on the backrest. Insert the barrel tie into the backrest and secure it with a screw. If necessary, hold the barrel with a flathead screwdriver. Do not tighten the screw all the way! Repeat the operation with the second backrest. Attach a second side post to the backrests.
- Installation of screeds. Insert both tie bars into the corresponding holes on the side posts, oriented so that the holes for the kegs are facing up, then install 4 kegs into the tie bars and secure them with screws. Do not tighten the screws all the way! After this, rotate both slats 180 degrees so that the barrels in the ties are pointing down.
- Installing the back strip. Install the back bar at the bottom of the side posts with the barrel holes on the bar facing “inward” of the chair. Secure the bar with the screws without fully tightening them.
- Installing the seat and footrest.
5.1. The seat and footrest are installed so that the protruding rounding is in front (see diagram).
5.2. Insert the seat (the smaller part) into one of the pairs of slots on the side posts located above the center brace, adjusting it:
- in height: having seated the child on a chair and moved him to the table at which he will usually sit, make sure that the level of the table is below the chest and the child can comfortably put his hands on the table
— in depth: the front edge of the seat should protrude a maximum of 3/4 of the child’s thigh. The lower back should touch the lower back of the chair.
5.3. Insert the footrest (the larger part) into one of the pairs of slots on the side posts located between the ties, adjusting it:
- in height: the child’s legs should be on a stand so that the thigh is horizontal and the knee has an angle of about 90 degrees.
— in depth: the front edge of the stand should approximately coincide with the front lower edge of the side posts. To prevent the chair from tipping over, it is strongly recommended not to extend the footrest too far forward.
- Installation of a feeding table (optional). Place the table in the grooves on the side posts located between the backs of the chair, adjusting its depth so that it is convenient for you to seat the child in the chair. Then pass the included strap through the slot on the table, wrap it around the center buckle and secure the free end of the strap in the buckle. This will protect your baby from slipping under the table.
- Final assembly. Once you have the seat and footrest in the desired positions, tighten all 10 screws on the high chair tightly. Make sure all parts are securely in place. To avoid deformation of parts of the highchair, do not use excessive force when tightening the screws.
- Congratulations! Your RostOk chair is ready for use! We remind you of the need to check the tightness of the screws every 2-3 months and check and adjust the correct fit of your child every 5-7 months in accordance with the recommendations above.
Note. Without a doubt, you can assemble our high chair yourself, but we recommend involving your child in this process - then just a pleasant pastime for you will turn into an exciting game, learning new skills and a wonderful opportunity for joint creativity for you and your child.
PS When your child grows so much that he no longer needs a footrest, and the seat becomes small, do not rush to part with your favorite chair: just remove the seat and install a footrest instead - you will receive an “adult” version of the RostOk chair, which Can be used for many years to come!
The manufacturer's warranty implies the absence of any manufacturing defects in the product. Issued for a period of 10 years, subject to compliance with the assembly and operation rules.
The assembly order is determined by the instructions published on the website www.rostok-stul.ru
The manufacturer's warranty applies to the chair if:
- the rules of assembly and operation specified in the instructions were followed
- the chair was used indoors, at normal temperature and humidity
- the chair was used only for its intended purpose
-if you have this warranty card
The warranty does not cover defects caused by exposure to extreme factors such as: temperature, direct sunlight, humidity, fire, water; mechanical damage: scratches, chips, potholes caused by improper use of the chair.
The RostOK chair is certified and meets the safety requirements for furniture products.
How to do it yourself?
Let's take a closer look at the furniture manufacturing process.
Chair
- Preparing the legs. Since a children's high chair is furniture with small dimensions, then, accordingly, its parts should be small. In particular, the length of the legs should not be more than 30 cm for a 70 cm high chair. All legs need to be cut down and adjusted with sandpaper to the same length. Of course, the planks must also be sanded.
- Prepare strips for the legs and jumpers for the seat. This is done for the subsequent stable and strong construction of the chair.
- Connect the entire structure. At this stage, you need to carefully check all the connections of the parts.
- Glue the structure. It's best to use furniture glue for this, but superglue from the hardware store will work just as well.
- Securing the seat and legs. This can be done with self-tapping screws or a simple hammer and nails. Lately, spikes have gained relative popularity. The part is “slung” onto the spikes and the whole thing is held together with glue. It turns out to be a fairly reliable mount.
- Processing with sandpaper. This process is necessary in order to remove all potentially dangerous nicks on the wood and give the high chair a pleasant appearance.
Table
First of all, you need to use a tape measure to measure the length of all the legs. If there is a difference in their length, then they need to be adjusted. A child's wobbly table can cause a lot of inconvenience, especially when feeding the child. This is done using a hacksaw.
Drill slots in each of the legs with an electric drill. You need to make a groove at the end of the part, and then make it rectangular.
Measuring the depth of the grooves. Next, you need to measure a distance on each of the bars equal to the depth of the grooves.
Correction. To do this, you need to saw each of the wooden blocks on all sides, and remove the excess with a knife or sandpaper.
Connecting parts
At this stage it is important to check the accuracy of the angles; they should all be straight.
Bonding the structure. The final stage, in which all parts, if they are tightly connected to each other, are glued together with wood glue
For greater structural stability, you can use a hammer and nails.
How to assemble a children's high chair "Agu"
All children's stores sell children's furniture in disassembled form, except in cases where the last piece is left on the display. To assemble the Agu model high chair at home yourself, you need to remove all the components from the box, including the Euroscrews with a special key for them. Small parts are already assembled into large parts, which makes the task easier. The easiest way is to start assembling the chair and then move on to the table.
Diagram of a high chair with dimensions.
The chair has two armrests with triple vertical wooden rods. The edge to which the rods are closest is considered the front. Connect the armrests with a transverse wooden strip, screwing it with two bolts in front of the armrests, from below. After this, the base for the high chair will be stable. Next, you should install the soft seat of the high chair into the base so that the limiter strap is in front and below. The wooden slats are already screwed to the bottom of the upholstered seat.
Related article: Photos of canopies made from a profile pipe with your own hands
Its seat is secured with four bolts, and the back to the armrests with two. Now all that remains is to install the plastic tabletop, which is placed on top and snaps into place with grooves in its bottom on the armrests. On the left armrest there is a plastic adjuster for the distance of the table top. It's time to move on to assembling the table or high chair stand.
To do this, you need to connect two identical parts, reminiscent of the Roman numeral II, perpendicular to each other. On them, the places where the bolts are connected are marked with dashes. Then place the resulting structure on legs and screw the remaining part with a solid wall to form a stable structure. Connect the legs with two jumpers and secure them with bolts. This completes the assembly.
To make the high chair higher, you need to turn the table with the table top backwards and place the chair and plastic table top on top. To make a set, lower the chair to the floor again, remove the plastic tabletop, and move in a table with a wooden tabletop.
Return to contents
How to decorate a chair
New furniture, even the highest quality, made by your own hands, is unlikely to attract the attention of a child without an interesting design. There are many options for decorating a children's highchair made of wood.
To perform some decorating
you might even
attract
the future owner of the chair.
For example, you can paint a chair with
your child at his discretion.
Most common ideas
staining:
- Using several bright
shades; - Imitation rainbow;
- Application of patterns;
- Images of your favorite characters
from fairy tales, cartoons, etc.
The second option for decorating a chair is a special cover,
which you can purchase or also make yourself.
There are no restrictions in this regard either. The cover can be the most ordinary - made of plain fabric
or
with drawings
and other decorative elements.
You can imagine in the form of a bird, animal,
flower, car, and also make original ones.
Another idea is gluing
on the sides of the seat are bright strips of fabric,
decorating
the back with all kinds of elements (
ribbons,
artificial flowers, beads, etc.).
Use your imagination,
and most importantly, don’t forget to ask your child’s opinion
.
For inspiration, here are some design
children's chairs:
For more information on how to make a children's chair out of wood with your own hands, watch the video:
Making it yourself - regular or for feeding, is not such a difficult undertaking. Even if you don’t have much experience working with wood. The basic design is simple, there are a lot of options for the degree of complexity, and the work does not require any special tools.
The main thing is to determine how much weight the product should support.
The choice of material for is determined by the financial capabilities and skills of the home craftsman. It is much easier to make a seat from plywood, and if for some reason the workpiece turns out to be unusable, duplicating it will not make a hole in your wallet.
Solid wood – beech is considered the best. Its wood is dense, medium hard, but much easier to process than oak. If the cost of the material is high, then you can use solid birch or pine. Preference is given to deciduous tree species.
Before manufacturing, it is recommended to subject pine to a procedure such as de-resining. Wood contains quite a lot of resin, this will interfere with work, and in the future may cause resinous dirty spots to appear on the surface.
- Plywood is a multi-layer material made from the veneer of deciduous and coniferous trees. Perfect for a children's highchair, as it is light in weight and very easy to handle. With minimal skill, a plywood chair can be made very beautiful, with slotted carvings. In addition, plywood bends easily, which allows you to make the back curved.
- Chipboard is the most budget option and the most short-lived. The strength of the material itself is quite sufficient for the loads to which children's furniture is subjected, but the ability to hold fastenings - screws, nails - is low for this material. As a rule, flat parts such as a feeding table or seat are made from chipboard.
The selected material must be available in the following form:
- bars - 20*40 mm on average, or more - up to 50*50 mm;
- boards – 25 mm thick;
- furniture panel, if the material chosen for the seat and back is solid wood, or sheets of plywood and chipboard.
The product is best mounted on dowels - wooden bushings. They are inserted into holes when joining parts and hold them together. This is the most reliable way. But self-tapping screws, nails and even metal corners can also be used.
Quite a few hardware stores offer their services for cutting wood materials to size. If you have little experience working with wood, it is better to take the help of professionals.
If you plan not only to assemble the parts, but also to completely make a wooden children’s chair with your own hands, then you will need the following tools:
- jigsaw or wood saw for making blanks;
- screwdriver if metal fasteners are used;
- a sanding machine or sandpaper of varying degrees of grit - all parts of the children's chair must be sanded and polished to prevent injury;
- hammer - used to seal the joint;
- brushes, varnish or water-based paint.
Is your child still very young? Then the following video will help dad create a high chair for him:
Materials and colors
The chair, which grows with the child, is made from high-quality, environmentally friendly materials. Typically wood, metal and plastic are used for these purposes. Each option has its own characteristics:
- Tree. Products made from solid birch, beech, and oak are popular. All of them are moisture resistant, not susceptible to damage, and do not cause allergies. The surface of the furniture is coated with water-based varnishes or acrylic paints. Advantages: practicality, durability, safety for the child’s body. The downside is the high cost.
- Metal. Today, real works of art are created from this material, giving the interior a special charm. Advantages: strength, durability, reliability, environmental friendliness, harmonious combination with any style, from baroque to modern. Disadvantages - heavy weight, risk of damage to the floor covering, cold surface, the child may be injured.
- Plastic. The most common and most economical option. Advantages: long service life, practicality, ease of transportation and storage, wide range of colors. Disadvantages: artificial origin, susceptibility to mechanical damage, incompatibility with classic and luxury interiors.
Designing and assembling a stool with your own hands, decor options
Tree
Metal
Plastic
A growing chair for a child from different manufacturers always has the same design. The differences affect only sizes, textures and colors. There are a variety of shades: from classic black and white to bright blue, pink, and light green. Most wooden models are painted in natural colors: apple tree, oak, wenge. Rich colors are popular - purple, mint, deep blue, red, orange.
The trending shades are “wet asphalt” and “dusty rose”, which look organic in modern interiors.
The chair can be made more original by using cushions for the seats and backs. Accessories are decorated with a variety of prints: polka dots, stripes, thematic pictures. Unusual engravings and images made using the decoupage technique will help decorate the models.
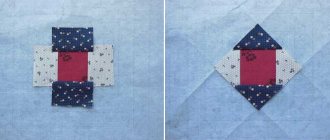
DIY children's furniture + drawings and details
Solid beech is produced in the form of furniture panels. The sellers have a program for cutting the product according to the numbers provided, so they will definitely help you decide on the number of panels. Their standard size is 800 by 400 by 20 millimeters, so for a one-year-old child, 2 blanks are enough, which will have to be tormented with a jigsaw.
You cut out:
- 2 sidewalls 450 by 400 mm;
- the same number of parts for the back and seat, measuring 340 by 340 mm.
The seat and back will have to be sanded with a machine or sandpaper, and the sides of the future chair will have to be slightly rounded. It’s still difficult for children to avoid right angles, so let’s take care of their health.
Circles under the elbows can be created using saucers, outlining the edges. But it’s best to take a large lid: then the curve will be perfect. If you have a narrow saw, use it to make the sides rounded.
For an older child, you can see the chair drawings below.
Model Configurations
Growing chairs can be adjusted to the individual parameters of each child. Models are classified by user age. Based on this indicator, three configuration options are distinguished:
- For preschoolers. Initially, parents purchase a high chair for feeding their baby, planning to continue using it, but as standard furniture. The main design features are the presence of small tabletops, cushions on the back and seat. Restrictors and seat belts are used as additional devices. Some models are equipped with pockets for toys and books, special pads on the legs or wheels.
- For schoolchildren. The optimal solution is to use chairs that are adjustable for height, as well as for the height of the work table. Under 12 years of age, it is not recommended to use products with armrests, since this element can cause problems with posture.
- Universal chairs. Relevant for both kids and high school students. If necessary, they are used as a stepladder and can withstand weights of up to 100 kg, sometimes more.
How and how to reupholster a chair with your own hands, step-by-step procedure
The optimal seat width for preschoolers is 250 mm. Parameters for schoolchildren are selected depending on height. Standard sizes range from 270–360 mm.
Schoolchildren spend a lot of time at the table, so soft seats are recommended for them.
For preschoolers
For schoolchildren
Universal chairs
Step-by-step instruction
So, the model has been chosen, let's start manufacturing.
Step 1. Making drawings. To do this, we depict furniture parts on plywood. Since there are many of them in pairs, you can first draw them on paper, newspaper or tracing paper and transfer them twice to plywood to accurately maintain symmetry.
Step 2. Cut out each piece with an electric jigsaw. You can, of course, do it manually, but it will take more effort and time.
Step 3. We make a radius template to make the corners of the tabletop rounded. The easiest way is to use a round object, such as a jar lid, or cut out a template circle of the desired size from cardboard yourself.
Step 4. Then we apply the form to the corner of the part, outline it and use a jigsaw to cut off the sharp part of the corner along the contour.
Step 5. Remove smaller irregularities with a milling cutter.
The tabletop should look something like this:
Similarly, we cut out other parts of the table.
And we do the same with the parts of the chair.
Step 6. Take a wood moulder for the router and remove the edges of all parts. It is very convenient in this type of work to use part clamps to keep them immovable, as in the photo below. But it is quite possible to cope without them.
This is what we got using our diagrams.
Step 7. Use a screwdriver to make filler holes for the ties (confirmations).
Step 8. Create a selection for eccentric couplers. This can also be done with a screwdriver using a Forstner bit.
Step 9. We pre-assemble the kit items to make sure that everything is done correctly.
Assembled chair.
Step 10. We begin to assemble the table from the bottom.
Assembled table.
Then we disassemble the furniture and sand each piece well with sandpaper inserted into the holder. We first use sandpaper size 120, then 180, and finally the finest sandpaper - 240.
How to assemble a baby high chair “Baby” with your own hands
Parts for assembling a high chair.
Initially, you need to remove all the feeding parts from the box and lay them out on the table. It can be immediately noted that there are much more individual parts than in the previous example, but each of them is numbered - table parts with numbers from 2 to 9, chair parts from 11.
Euroscrews with a key should also be included in the kit. To start assembling a high chair, you need to arrange all the components in numerical order into table and chair parts separately. Then you need to align and bolt the parts with holes numbered with the same numbers, starting with 12. Then connect the parts with mark 13. Next, fasten the holes numbered 11 and 14, respectively. After this, you should get a part consisting of four separate elements.
Assemble the second part in the same way, alternately connecting the same configurations of numbers, then connect these parts with a crossbar.
Now you can assemble the high chair by screwing a soft seat to the resulting wooden base, while the crossbar should be under the child’s legs, and the limiter strap should hang down. The seat is secured with six bolts. The last step in assembling the high chair is to screw the wooden tabletop with two bolts to the armrests. An additional hole in the armrest will allow you to easily adjust the position of the tabletop in the future by moving it away or moving it closer to the child and twisting it.
Related article: How long does it take for a self-leveling floor under laminate and tile to dry?
Scheme of connecting parts with a Euroscrew.
Thus, the high chair is assembled, all that remains is a stand or table for it. The logic for collecting is the same. Select four elements with cell numbers 3 and screw them together. The result should be a part in the shape of the letter H. The second similar part should be twisted in the same way from four elements according to the numbering of cells 3. Only the attachment of the last element of the part will differ, it will be numbered 2 and will not be twisted joint to joint, but as a result of superimposing one strip on another.
All that remains is to assemble the feeding table by connecting all the large parts. First, you need to combine the table top with the leg, twisting the cells with numbers 5. Add the third part and twist the cells with numbers 6. Secure the resulting structure with two wooden planks with cell numbers 4. After assembly, be sure to check the strength of all connections, additionally tightening them with a wrench. It is not recommended to tighten the bolts too tightly, as this can shorten the service life of the product and increase wear on threaded connections.
To make a high chair for feeding a child, a chair with a soft seat must be placed on a table, and its table top should be under the legs in front or behind, as the parents wish. And to get a set of furniture, you need to lower the chair, for convenience, unscrew the small tabletop from it and move a large table on the floor.
Return to contents
How to decorate a chair
New interesting decorate
You can even involve the future owner of the chair to perform some decorating methods. For example, you can paint a chair with your child at his discretion.
The most common coloring ideas:
- Using several bright shades;
- Imitation rainbow;
- Application of patterns;
- Images of your favorite characters from fairy tales, cartoons, etc.
The second option for decorating a chair is a special cover, which you can purchase or also make yourself. There are no restrictions in this regard either. The cover can be the most ordinary - made of plain fabric or with drawings and other decorative elements. You can get creative and sew a cover in the shape of a bird, animal, flower, car, and also make original seats.
Another idea is to glue bright strips of fabric to the sides of the seat and decorate the back with all sorts of elements (ribbons, artificial flowers, beads, etc.). Use your imagination, and most importantly, don’t forget to ask your child’s opinion.
And for inspiration, here are a few examples of the design of children's high chairs:
For more information on how to make a children's chair out of wood with your own hands, watch the video:
Basic design
The design principle of all growing chairs is the same. The design includes a seat, the position of which can be changed, and a footrest on a reliable support. The advantages of furniture include:
- Strength, durability. Chairs that grow with the child are designed for 8-10 years of use. For production, materials are used that can maintain performance properties for a long period of time.
- Convenience. Children can sit comfortably on these chairs due to the presence of back and leg support. The parameters of the models are adjusted according to the height of the users.
- Safety. High-quality furniture is made from environmentally friendly materials. The design is characterized by excellent stability, which eliminates falls and overturns.
- Joint dinners with family. The children's chair can be installed next to a standard kitchen table, which makes kids very happy.
Among the disadvantages of “growing” furniture are high cost, limited range of modifications, and bulkiness.
Office-type children's chairs are considered one of the varieties of “growing” interior items. The products are equipped with a set of fasteners to change the position of the elements in depth and height. If necessary, the angle of the backrest can be changed, providing the most comfortable conditions.
The process of assembling a high chair
To assemble furniture parts, it is best to use confirmats. Their standard size is 5 x 70 mm. This fastener does not require preliminary preparation and is suitable for fastening parts of any design.
Holes in the plane must be checked with a diameter of 8 mm. As for the ends of the parts, the dimensions of the holes are limited to a diameter of 5 mm and a depth of 50 mm. Often, plugs are placed on confirmations for a more aesthetic appearance of the product. However, some believe that it is better not to do this for children's furniture. Otherwise, a child who manages to remove the cap may swallow it.
To summarize, it should be noted that a self-made children's chair has the following properties:
- environmental friendliness;
- beauty;
- comfort;
- strength;
- sustainability.
And all thanks to your desire to make safe and comfortable furniture for your child that promotes his physical development. The chair can be decorated with children's stickers or drawings.
Purchased furniture for a child’s room, especially made from natural materials, can be quite expensive. In a store or online, you don’t always find exactly the option you like. You can create a children's high chair and table from wood yourself. The work will not be difficult if you prepare all the necessary parts and tools, use your ingenuity and imagination. The reward for the work is a unique product, as comfortable as possible for the baby and practical in home life.
You can create a children's high chair and table from wood yourself.
A DIY chair will cost much less, and one made according to your own sketch will meet the intended parameters and the required degree of comfort for the baby.
The reward for the work is a unique product, as comfortable as possible for the baby and practical in home life.
All natural wood parts can be purchased in specialized departments of construction stores. They will select boards and bars of the required sizes for you.
A DIY chair will cost much less.
A child's high chair, created with one's own hands, is high-quality furniture for a child. In the process of work, you take into account the dimensions of the seat and backrest, which are as comfortable as possible for a growing baby, and check the strength of the structure directly at home.
All natural wood parts can be purchased in specialized departments of construction stores.
A wooden chair you create with your own hands can be decorated to your liking, rather than being satisfied with a ready-made solution for purchased furniture.
They will select boards and bars of the required sizes for you.
Materials, tools for work
To make a comfortable and practical model of a table-stand and high chair with your own hands, you need to prepare:
- A wooden beam with a cross-section of 400x200 mm, the legs of a chair, table, crossbar will be made from it. When choosing wood, make sure that there are no resin stains or knots on it. Such defects significantly complicate the processing of parts of future furniture.
- A small board (about 250 mm thick) from which the armrests will be made.
- A sheet of fiberboard or plywood will serve as the seat material.
- Plywood for table top.
- Drill.
- Clamps.
- Hacksaw.
- Tape measure, square, compass.
- A pencil will help you mark the wood.
- PVA glue.
- Varnish or paint.
- If you are making the seat and back soft, use foam rubber, upholstery fabric, and a furniture stapler to secure them securely.
High chair: step by step instructions
To make a highchair with your own hands, the dimensions must be measured accurately; an error in the details can lead to the fact that it will not be possible to assemble the furniture or it will be defective.
A baby high chair made by yourself must be safe and strong.
First you need to take the selected material and draw drawings on it with a sharpened pencil. Then you should carefully cut them out.
Markings must be made carefully and only on the reverse side, since it is virtually impossible to erase inscriptions from untreated plywood. An important role is played by the part that is responsible for moving the steps on the high chair.
You can take several steps at once, and the baby himself will put his feet where it is more convenient for him. Or you can make one step and rearrange it as the child grows
An important role is played by the part that is responsible for moving the steps on the high chair. You can take several steps at once, and the baby himself will put his feet where it is more convenient for him. Or you can make one step and rearrange it as the child grows.
The steps should be secured with self-tapping screws, which will be recessed into the material, but you should not close the holes with plugs.
Necessary materials and tools for assembling a high chair
In order to assemble a transformable high chair of the “Agu” or “Baby” type, you will need the following materials:
- Wooden crossbars.
- Soft seat.
- Tabletops small and large.
- Euroscrews.
One assembly tool:
- Key for Euroscrews.
All tools and materials must be included with the high chair. Details on how to assemble the chair are indicated in the instructions, if included.
Manufacturing process
Furniture production can be divided into 3 stages: preparation of material, cutting and assembly of the product. A fourth option is also possible – finishing. The sequence is the same when making any model, but the work itself will depend on the complexity of the design and the selected material.
The following video will help you make a beautiful and bright highchair:
Preparation and production of parts
Often these stages are carried out in parallel to each other. The material in the store does not always have a sufficiently low degree of humidity - 12–16%. Therefore, it is advisable to dry the wood additionally. Also, any of the wood materials must be acclimatized. Therefore, before starting work, it is recommended to leave wood, plywood or chipboard in the room for at least a day.
Cutting bars, boards and sheet material can be done independently, or to order in a workshop at the store. A standard drawing of a high chair includes the following elements:
- legs for table and chair - 4 pcs. for each part of the product. The bars are cut to size using a jigsaw and must be treated with sandpaper;
- upper and lower crossbars – 2 pcs. also made from bars;
- crossbars – 3 pcs. for a chair and 4 for a table. The bars are sawed on a workbench or on a table, held in a vice. A miter box is used to cut 90 degree corners;
- roundings - 4 pcs., cut from the board. In this case, the wood fibers must be perpendicular to the bending angle. Otherwise, the part breaks easily due to internal stress;
- The tabletop and seat are cut from a sheet of plywood, wood or chipboard to size.
If the chair is made entirely of plywood or chipboard, then all the parts - the sides, the partition connecting them, the seat and back - are first drawn on a sheet and then cut out with a jigsaw.
The following video will tell you how to make a children's chair from chipboard:
Product assembly
The best option is to connect with dowels. The latter are easy to make yourself from a board. The bushings are rectangular in shape, their edges are sanded.
- Holes are made in the parts of the product for dowels: first, with a drill of a smaller diameter - up to 6 mm, then widened with a chisel to 8 mm.
- The parts are attached with glue - carpenter's glue, PVA, etc. Before the final connection, it is advisable to carry out the installation without glue to ensure that the dowels and holes are at the desired level and the angles are respected.
- For the most durable fastening, proceed as follows: place the parts on a dowel, tap with a hammer to fit the elements as tightly as possible, and then secure them in a clamp for a day. Making the chair will take longer, but its reliability will be much higher.
All parts according to the drawing are connected to dowels using the described method. If we are talking about a plywood chair, then its elements are cut out with tongues and grooves, and connected in the same way - with glue.
Bright children's homemade chair
Chair finishing
- The easiest way is to open it with water-based acrylic varnish. The color and gloss level of the varnish are determined at will.
- You can paint the product with water-based acrylic paint. Although it is not as stable as the oil composition, it is completely safe.
On the seat, and sometimes on the back, a soft insert is made of foam rubber and a fabric cover. It is better to choose a fabric that can be easily washed, as it will get dirty quickly.
Still don't know how to design a highchair yourself? Our article will help you understand all the intricacies of folding this irreplaceable piece of furniture. You will see that assembling children's high chairs from wood with your own hands is not difficult.
The best manufacturers
Representatives of well-known furniture companies know exactly what customers need. That is why high-quality products contribute to the healthy development and growth of babies. The ranking of the best manufacturers includes:
- "The Little Humpbacked Horse". The Russian brand produces furniture designed for ages from 3 years. Safe materials are used for the manufacture of structures - birch plywood, solid beech. The surface is covered with water-based paints and varnishes. For safety, reliable support and Teflon coating on the legs are provided. Maximum load - 100 kg.
- Stokke. The Norwegian company specializes in the production of growing chairs from solid oak, beech, and ash for users over 3 years old. Furniture is coated with environmentally friendly water-based paints. The structures are equipped with additional skids that prevent overturning. Maximum load - 110 kg.
- KidFix. The Russian factory produces furniture for babies from six months of age. The structures are made of solid birch and treated with water-based varnish. Distinctive features: increased support area, double orthopedic backrest. Maximum load - 120 kg.
- Kotokota. A domestic company whose products can be used from the age of six months. The products are made from birch plywood and coated with water-based varnish with a wax effect. The furniture has a large support area and a straight back. Maximum load - 100 kg.
- "Belmarco". A Russian company produces growing chairs for babies from six months of age. The manufacturer uses birch plywood and water-based enamel. The back with orthopedic properties ensures the correct position of the back. Maximum load - 100 kg.
Products from popular brands usually turn out to be the most reliable and durable, which is explained by the use of natural materials and high-quality fittings. Large companies care about their own reputation, so they carefully control the entire production process.
A growing chair from any of the listed brands is a universal piece of furniture that can be adjusted to the individual parameters of each child. All models are comfortable and safe for the youngest users; they form correct posture and maintain back health.
"The Little Humpbacked Horse"
Stokke
KidFix
Kotokota
"Belmarco"