Types of portals
It is believed that arches and portals are used only to frame the entrance to a house or an interior passage. However, you can often find an unusual use of such a design in the interior, for example, as a decoration for a fireplace.
Today, portals are classified according to their installation location:
- design for a doorway;
- frame for a window opening;
- product in the opening under the outer door;
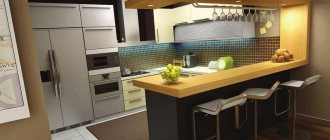
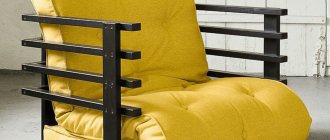
- decorations for a fireplace or hearth (example in the photo).
To make such arches, the entire range of existing materials is used: from polymers to natural stone. The most popular portals are made of wood and plastic; recently, structures made of wood-based materials are often found. Among wooden arches, products made from pine and other conifers are more common: they are resistant to moisture and are cheaper than other materials.
How to install an interior portal
Interior portals
are able to decorate a room and give it a finished look, but unlike
doors
, they both divide the space and at the same time unite it into one.
Based on my experience, I can tell you that most often portals are installed
instead of a kitchen
door
, as well as in doorways blocking the corridor space. One of the advantages of the assembly, which makes it easier for the installer, is that the portal can be placed in any opening, regardless of whether it is a standard size or not. But if there are doors or other openings nearby, it will be more aesthetically pleasing if they are all the same height.
an interior portal instead
.
Where to begin? From dismantling the old box. We remove the platbands using a nail puller, a pry bar or other available tools.
For convenience, and also in order to save strength, nerves and time, we saw the box beam in the middle. Without this cut, removing the box can be very difficult and there is a risk of damaging the floors or walls.
The opening is ready. In our case, the interior portal
will be assembled from additional panels and platbands, the same as those that will be on the neighboring doors.
We saw the side planks to the size of the walls. In this particular case, one wall is 10.5 cm thick, and the second is 9.5. This also happens, but since there are no plans to repair the walls, we do it according to the size of what we have.
The photo shows an ordinary circular saw, slightly modified and turned into a miniature sawing table.
It is necessary to check the floor level, using a building level or a laser level, if there is a difference, the left and right strips of the interior portal
you will have to make them at different heights.
It is important to install the top bar of the portal
strictly horizontal. This is a kind of politeness of the master, as well as an indicator of his level of professionalism.
Calculate how wide the portal
and saw off the top bar.
Since the left and right side bars are of different widths, the top bar will not be a rectangle in shape, but a trapezoid.
Well, all the parts are cut exactly to size, let's start assembling.
We drill two holes for self-tapping screws (3mm drill bit).
We connect micron to micron.
This is what the finished connection looks like.
We twist the second corner of the product, and the blank for the portal appears before us in all its beauty and splendor.
To install an interior portal
strictly vertically and horizontally, I use a hot glue gun, widely known in narrow circles and unfamiliar to many, and cut-to-size blocks.
The portal is set according to level.
Let's foam.
We install platbands. The technology is the same as when installing platbands on an interior door. And the portal is ready.
You can ask questions, clarify details and invite a specialist to come to you here.
Did you like the article? Share with your friends!:
join us
Selecting a portal form
The most popular shape for a portal is a rectangle. To decorate such a design, you can use decorative elements. In modern interiors, the shape of the opening can be almost any. Adherents of the traditional style will like the classic arch.
It visually makes the room taller. If you don’t know which portal will be appropriate in your apartment or house, use the following tips:
- For rooms with low ceilings, it is recommended to use rounded arches with a corner radius half the width of the opening. This value makes the arch bend gentle. This form does not rest against the ceiling, but visually lifts it.
- In rooms with high ceilings, a classically shaped arch with a radius equal to half the width of the opening is used.
- In addition to the arch, there are non-traditional door portals in the shape of an ellipse, irregular polygons and others. Their design assumes a slope in one direction.
The easiest way to get an arched opening is to purchase a ready-made set of racks and panels.
Advice! If you do not want to weigh down the walls of the room, pay attention to plasterboard portals. They are indistinguishable from stone products, but at the same time they are very light in weight.
Dimensions
The dimensions of the doorway can be either standard or non-standard. Most often, the parameters of the entrance door are 800 x 2000 mm. Thus, the size of the box is 870 x 2020 mm. These are the parameters that are encountered most often.
If you decide to replace an old door, you need to take your time with the purchase. After all, entrance openings in houses with old and new layouts may differ. Often, non-standard dimensions of the door frame are found in buildings with an old layout.
The dimensions of doorways are regulated by GOST, as well as building codes and regulations (SNiP). In accordance with GOST 6629-88, the width of the doorway can be 670-1872 mm, height - 2071-2371 mm.
Features of assembly and installation
If constructed correctly, the portal design can visually expand or narrow the room in height and width. In addition, arches visually make rooms feel freer due to the absence of unnecessary interior structures.
The functionality of the portal is determined by the materials from which the product will be assembled. You need to be able not only to select raw materials, but also to prepare them.
Note! To ensure that the installation of the portal does not cause unnecessary difficulties, choose high-quality and dry wood. Otherwise, the portal may crack or deform from moisture and stress.
When choosing wood for a portal, use the following tips:
- Structures made of hornbeam, mahogany and oak look very advantageous in the interior. The wood of these species has very noble shades and texture. But the cost of such materials is extremely high.
- The cheapest option for interior arches is pine. Wood is durable and easy to process, which cannot be said about the materials described above.
- The most affordable option in terms of cost is construction made from particle board materials. Portal elements can be covered with a special film imitation wood or painted with any paint.
- Another inexpensive design option is an opening made of chipboard with a laminated coating. It does not require finishing.
Advice! When assembling the portal with your own hands, make sure that the raw materials are dried. Humidity no higher than 15 percent is considered acceptable.
Where to start finishing a door jamb?
How to make a door jamb? Roughing is the first stage of finishing. This labor-intensive and dirty work includes:
- alignment;
- insulation.
The first stage is carried out using a special solution, a spatula and metal corner profiles, which serve to level and additionally protect the corner. As for insulation, it is not required for interior doors; the presence of insulation is only appropriate for finishing the door jambs. The easiest way is to use regular polyurethane foam, but if this option is not suitable for some reason, finishing with mineral wool or polystyrene foam will do.
Preparatory stage
Before installing the arch, it is necessary to prepare the walls in the openings. The optimal material for cosmetic finishing is gypsum plaster. For novice builders, it is recommended to install perforated corners. They will make it easier to level the opening.
During preparation, special attention is paid to installing the first corner. It must be perfectly aligned on all axes. Otherwise, the entire portal will be skewed after installation.
The distance between the corners is filled with special compounds. For such work, some builders use putty followed by painting. However, if you plan to install a portal in this place, then it is better to use special compounds.
Internal slopes
On the inside, it is also necessary to finish the slopes. There is a large selection of materials that can be used for these purposes. Most often they prefer:
- Plastic.
- Tree.
- Drywall.
- Plastering.
Plastic
This material is often used to finish window openings, but door jambs are covered with this material very rarely. Most often this material is used when installing plastic doors.
Tree
This material is the most popular for finishing internal slopes. The advantage of this material is that it fits harmoniously into any interior. Unfortunately, under the influence of aggressive factors, this material can quickly lose its appearance. In the future, there will be a need for restoration work.
Drywall
This material can easily correct serious unevenness around the door. It is quite easy to install.
Plastering
The easiest way to finish internal slopes is to plaster the surface. In addition, the surface of the slopes can be subsequently painted in any suitable color. You can also simply and easily change the color of the slopes in the future.
Installation of accessories
In most cases, ready-made MDF boards covered with decorative film are used as additional elements in the manufacture of a door jamb. In the standard version, their size is 80x550 mm.
Additions allow you to make the door frame more aesthetically pleasing and stronger.
According to traditional technology, additional elements are installed “in a quarter”, that is, they are inserted into a special groove on the inside of the door frame. Therefore, such a device visually enlarges the door frame.
When additional elements need to be mounted on a door already fixed in the opening, add-on (adjacent to the frame) and underlay (substituted under the door frame) extensions are used.
To attach extensions to the door frame, proceed as follows:
1. Place the door frame with the inside facing up on 4 chairs. We align the corners to rectangularity, checking with the diagonals: they must be the same length. To do this, we temporarily nail to the bottom with small nails a wooden strip with a length equal to the length of the top strip of the door.
2. If the jamb does not have a quarter for the extensions, then we cut out the quarter with a milling machine. The depth of the quarter should be equal to the thickness of the additional board, and its width should be equal to the depth. For example, we have an additional board with a thickness of 16 mm (standard MDF thickness). Then you need to choose a quarter 16x16 mm.
3. Along the perimeter of the door frame, we attach strips of plywood or drywall to the outside so that they protrude upward to the width of the additional board. A continuous frame is not needed; two scraps are enough for the top bar and 3-4 for the sides. We nail the plywood with nails, and the drywall with self-tapping screws.
Drywall is attached to the outside of the door frame
4.Cut the extensions to size. The top trim strip should lie between the side ones, so we cut it to the size of the top quarter, and the side strips to the size of the sides of the box. Apply liquid nails or any wood mounting adhesive to both edges of the quarter.
5. We insert the additional boards into place and wait for the glue to set. We remove the temporary bottom strip that kept the extensions from falling out of the plywood, and put the door frame in place. We align it in width using wooden spacers, and check the verticality of the sidewalls with a plumb line.
6. Under the sidewalls of the wedges, we ensure that the top door strip is horizontal. We fill the cracks with foam and plaster them flush with the wall surface. We nail the baseboards, cut them to size and glue the platbands with liquid nails - the door with extensions is ready.
Since the box can be called a door lock on hinges, its manufacture must be done with all diligence. Even minor deviations from the rules will result in the door frame being too small for the opening.