Garage projects
Number of projects 43
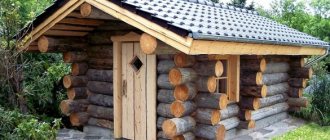
Project Garage “Owner’s Dream”
- To favorites
- 26² Total area
- 6 x 4m Construction area
from 100,050 rub.
Construction time individually
Canopy project "Martinique-3"
- To favorites
- 31.8² Total area
- 6 x 5m Construction area
from 429,300 rub.
Construction time individually
Canopy project “Canopy 1”
- To favorites
- 42² Total area
- 5 x 9m Construction area
from 567,000 rub.
Construction time individually
- 2 rooms
- 1 bathroom
Garage project Happy Occasion
- To favorites
- 192.58² Total area
- 19 x 9m Construction area
from RUR 2,599,830
Construction time individually
Project Garage Kama 57
- To favorites
- 57² Total area
- 9 x 7m Construction area
from 600,000 rub.
Construction time individually
Project Canopy for 4 cars
- To favorites
- 89.79² Total area
- 12 x 7m Construction area
from RUB 1,212,165
Construction time individually
“Hovel” canopy project
- To favorites
- 24² Total area
- 6 x 4m Construction area
from 324,000 rub.
Construction time individually
Timber Garage Project
- To favorites
- 40² Total area
- 8 x 5m Construction area
from RUR 404,596
Construction time individually
Project AS-2001
- To favorites
- 44.8² Total area
from 604,800 rub.
Construction time individually
- 2 rooms
- 1 bathroom
Repka garage project
- To favorites
- 105.8² Total area
- 12 x 6m Construction area
from 1,428,300 rub.
Construction time individually
Project Garage “True Friend”
- To favorites
- 24² Total area
- 6 x 4m Construction area
from 198,900 rub.
Construction time individually
Canopy project "Caguas"
- To favorites
- 11.7² Total area
- 3 x 4m Building area
from RUB 157,950
Construction time individually
Project Garage with a residential floor
- To favorites
- 158² Total area
from 2,133,000 rub.
Construction time individually
Caracas canopy project
- To favorites
- 20.6² Total area
- 6 x 4m Construction area
from 278,100 rub.
Construction time individually
Project Garage "Texas"
- To favorites
- 76.95² Total area
- 8 x 11m Construction area
from 881,400 rub.
Construction time individually
Canopy Project
- To favorites
- 32² Total area
- 4 x 8m Construction area
from 432,000 rub.
Construction time individually
Available at the exhibition
Project Carport for two cars “Station for two”
- To favorites
- 33² Total area
- 6 x 6m Construction area
from RUB 170,350
Construction time individually
Garage project “8 wheels”
- To favorites
- 33² Total area
- 6 x 6m Construction area
from 140,850 rub.
Construction time individually
Project Garage "Autoport"
- To favorites
- 36² Total area
- 6 x 6m Construction area
from RUB 166,150
Construction time individually
Project Garage with gatehouse
- To favorites
- 37² Total area
- 10 x 5m Construction area
from 499,500 rub.
Construction time individually
View all projects
During operation, any, even the highest quality and durable concrete coating in a garage is subject to erosion and collapses under mechanical loads. Concrete is a porous material. Its pores are filled with water, air, and particles of unbound cement that did not react during the process of making the solution. When the top layer is destroyed, they turn into dust.
Regular cleaning does not help, as the next layer begins to collapse Source beton-house.com
Cement dust rises into the air and settles on cars, shelving, tools, clothes and shoes. It gets on the skin and into the lungs when breathing, which is very unsafe for health. Therefore, many in such a situation are puzzled by the question - how to cover the concrete floor in the garage so as not to create dust?
There are different materials and technologies that can solve this problem. Some of them are designed for use only during the manufacturing process of the coating, others are universal and are used both for fresh screeds and for long-used floors.
Method 1 – impregnation treatment
This is the simplest and most affordable universal way to strengthen a concrete floor. It is used both on a fresh two-week-old screed and on an old dusty base. And also to prepare the surface for subsequent finishing - painting, tiling, etc.
Impregnations (primers, modifiers, primers) for concrete are divided into 2 groups: organic and inorganic based. These are liquid compositions that are applied to the surface with a brush or roller.
Treatment of garage floors with impregnation Source bg.aviarydecor.com
- Organic impregnations are made on an acrylic, polyurethane or epoxy base. Their molecules penetrate the pores of concrete, where they polymerize, making its surface hard, durable and waterproof. Depending on the characteristics of the composition, the strength of concrete increases by 2-10 times, and the result lasts for several years. If you are choosing floors in a garage - which are better and cheaper on a limited budget, then a concrete screed treated with a special organic-based impregnation will be the best option.
Epoxy primer Source beton-house.com
- Inorganic-based compositions affect the surface differently: penetrating into the thickness of concrete, they interact with it, creating additional crystalline bonds. Strength can increase by 50-60 times. One such treatment is enough to forget about dust on the concrete floor forever.
Advice
. Pay attention to the instructions on the packaging. Not all compositions are suitable for strengthening low-quality or severely damaged concrete.
Types of polymer coatings for garages, their advantages and disadvantages
There are two main types of polymer coatings for garages. Each of them has its own advantages and disadvantages. Let's look at them in more detail.
- Modular covering. An option similar to tiles, but differing in the installation method. The modules have special locks, thanks to which they are assembled like a mosaic. The advantages of this solution include good resistance to aggressive environments and ease of installation. However, there are more disadvantages. Firstly, the design with locks may not support a heavy vehicle. Modules may come out of the slots. Secondly, such a coating becomes more contaminated. Thirdly, installation will be quite long. This solution is much closer to tiles than to a polymer coating. Accordingly, it has similar disadvantages.
- Self-leveling floor . To create it, bulk polymer materials (polyaspartic polyurea) are used, which are poured onto the prepared base and leveled. The only drawback of this solution is the difficulty of dismantling. The advantages are obvious: shock and chemical resistance, ease of maintenance, reliability and durability.
The GarageTek company offers its customers self-leveling floors, which are filled with compounds from the USA. The materials used to create heated floors can withstand temperatures ranging from -40 ºС to +80 ºС. Filling can be carried out not only on concrete, but also on wood or metal. Arrangement is possible both in the garage and in an open area. We complete the filling in just one day. The very next day after filling, you will be able to put the car in the updated box.
Method 2 – painting
If you need to decide what to cover the concrete floor in the garage to not only remove dust, but also add color, the easiest way is to paint it. But this requires that certain conditions be met:
- The paint must be intended for use on concrete surfaces. It is best if o or similar is present on the packaging. Such coatings are adapted to operating conditions; they have anti-slip and antistatic properties.
Wear-resistant paint for garage Source strmnt.com
- Before painting, the surface must be treated with a primer.
- The primer and paint must have the same base. That is, if a polyurethane decorative coating is chosen, then the concrete should be primed with a similar composition. The same goes for acrylic and epoxy paints.
Before covering a concrete floor with paint, it must be sanded, removing the old decaying layer, as well as complex stains from fuels and lubricants, paints, and grease. The resulting debris and dust are carefully removed using an industrial vacuum cleaner and a damp cloth. Only after this can a primer be applied to the floor.
It is important!
No more than 2 hours should pass between cleaning and priming, otherwise dust will settle on the surface again and damage the quality of the impregnation.
The primer is applied in 2 layers with an interval of 10-12 hours between them. After it dries (the time is indicated on the packaging), the floor is also painted in 2 layers with the selected protective and decorative composition.
On our website you can get acquainted with the most popular garage projects - from construction companies presented at the exhibition of houses "Low-Rise Country".
Making a wooden floor in the garage with your own hands
And in the case of a wooden floor in a garage, there will be no differences at the first stage: you need to remove the fertile soil, level and compact the bottom of the resulting pit. Then it is fashionable to lay a layer of waterproofing (roofing felt, waterproofing, film, membrane) on the bottom, and a layer of sand or gravel on it. Sand and gravel need to be compacted, but the density is not so critical, but bringing the bedding “to the horizon” is important - check how evenly the “cushion” lies using a level, but not small, but no less than a meter.
With insulation
Logs are installed on this bedding - large cross-section timber. The step is no more than a meter. It is advisable to arrange it so that the car wheels are above the joist or not far from it, and the rest can be distributed as it turns out.
Before laying, the logs are impregnated with a protective impregnation against rotting (for wood in direct contact with the ground), and then treated with fire retardants (reducing flammability). To prevent rotting, logs can be impregnated with mining, but their flammability will only increase. So this is not a very good option, although it is cheap. You can also use sleepers. They are already impregnated, but have a persistent characteristic odor.
Logs are laid on compacted crushed stone. In this case they were laid lengthwise, but more often they are laid across
Next, the space between the joists can be filled with insulation. The best option is polystyrene foam. If your budget allows, take extruded with a density of 35 kg/m3. It does not rot, fungi and microorganisms do not multiply on it, and mice do not eat it. In addition, it does not allow or absorb water. Insulation and waterproofing in one fell swoop. Layer thickness is at least 5 cm, but preferably 10 or more. If there is still space, you can fill in broken bricks and expanded clay. These materials are not the best solution, as they are hygroscopic (absorb moisture). Instead, you can use a new material - granulated foam glass. It is many times “warmer” than expanded clay, does not absorb water, and is not so expensive. In principle, you can only fill foam glass (in granules or broken glass) between the joists. It will be good too. But in any case, you don’t need to fill the entire space, right under the boards. A ventilation gap of at least 5 cm is required. Then the boards will not rot.
Finished wood floor
Boards are laid across the installed joists. This is a regular edged board with a thickness of 40-50 mm. When laying, do not try to pack them very tightly. It is better if there is a gap of 3-5 mm between the boards. That's all, the insulated wooden floor in the garage with your own hands is finished.
Logs on posts
There is an option for a “cold” wooden floor in the garage - on posts. A layer of gravel is poured onto the leveled soil and compacted. Brick columns are placed on the gravel with the expectation that logs can then be laid on them. The distance between the posts is about 1 m. That is, if the width of the garage is 4 m, then there are two posts at the edges and two in the middle. Since the distance between the logs is also 1 m, such rows of columns are located every meter. After two weeks, the solution will set and logs can be laid on the posts.
One of the options for installing columns
Ruberoid is laid on each column in two layers. It can be replaced by coating with bitumen mastic (twice). If the height of the posts is not the same, pieces of wood, plywood and other similar materials can be laid between the joists and posts. It is important that they are held tightly and that the logs are level. Next is laying the floor boards.
Method 3 – rubber paint
When you need to get rid of dust and waterproof your garage floor, what is the best coating material? A relatively inexpensive material for this is rubber or latex paint.
Rubber paint for concrete floors Source www.stroi-baza.ru
It is resistant not only to moisture, but also to aggressive chemical liquids, tolerates low and high temperatures and temperature changes, and has good covering characteristics.
Before applying rubber paint, the concrete surface does not need to be primed, but it is necessary to remove flaking areas and dirty spots. How to seal large potholes and cracks. After removing the dust, the floors are washed first with a soda solution, then with clean water and dried.
This paint is sold ready for use and does not require dilution with solvents. But exceptions are possible, so reading the instructions is mandatory. Before application and during operation, it is stirred periodically. Apply in 2 or 3 layers with a roller or brush at an ambient temperature of at least +5 degrees.
Rubber paint cannot be applied in one thick layer; it is better to apply 2-3 thin layers. Source tgorlovka.com
Concrete screed
When building a solid garage, you should also take the choice of flooring seriously. Concrete floors are perfect for long-term use. This type of coating is considered the most reliable and durable. The main disadvantage is low abrasion resistance and moisture separation.
When a garage is used intensively, a lot of dust is generated. To increase service life, the surface should be coated with water-repellent materials. All the shortcomings of a concrete floor can be minimized by finishing it.
Before you make the floor with your own hands, you need to start from what kind of foundation is in the garage. With a monolithic slab, there will be little work, and if the surface is not level enough, you will first have to compact the soil well and coat it with clay, which will serve as waterproofing. The concrete screed is laid on the prepared base.
The sequence of layers, starting from the ground:
- Drainage. Gravel mound. Removes excess liquid and prevents it from reaching the concrete.
- Sand or soft clay. Responsible for removing excess moisture from concrete and transferring it to the drainage layer.
- A layer of concrete mixture for strengthening.
- Waterproofing.
- Insulating layer.
- Concrete screed, reinforcement.
- Self-leveling fluid, optional.
How to calculate a concrete screed?
When performing a concrete screed yourself, and even if the work is performed by a qualified team, you will still have to calculate the amount of materials needed. The amount of cement-sand mixture requires accurate calculations.
There are two reasons why it is worth doing the calculation:
- there should be enough materials to form the screed in one approach;
- building materials are not stored for a long time, so excess is not needed.
The above reasons are enough not to miss the moment of counting materials. There are two options for counting. The first involves ready-made fiber-reinforced mixtures.
On the construction market you can easily find ready-made mixtures that come with instructions. From the practical experience of builders: per square meter with a screed level of 50 mm, on average 2 bags of 50 kg of mixture are consumed; 1 ton of mixture will be used for 10 square meters of screed.
The second option is to independently calculate the amount of materials and prepare the mixture.
Scheme of self-leveling floor.
The algorithm is as follows:
- We measure the thickness of the future screed and the floor area, multiply the resulting values, and multiply the result by a consumption coefficient of 1.02.
- Find out how much building material is needed in kilograms. For one cubic meter of solution you need to take 490 kg of cement. We multiply the number obtained in the first point by 490 kg and get the required amount of cement, then multiply 3 more and find out how much sand is needed. For 1 bag of cement there are 3 bags of sand.
Calculating everything yourself is not at all difficult, as it might seem at first glance, so without much effort you can do everything yourself. In this case, there will be no extra materials left and you won’t have to buy anything else if you carry out the calculations correctly.
Pit for screed
Before starting concrete work, you need to make sure that there are no wet spots. Such defects can lead to problems during operation and during further use of the floor. Before starting work, you need to compact the pit trough, which, as a result, will compact the top layer of soil.
Concreting
Scheme of a concrete floor.
Garage owners most often choose the traditional option – concrete. This option is attractive due to its advantages:
- affordable price;
- strength;
- reliability;
- durability.
All minor defects that appear over time - cracks, potholes or chips - can be easily eliminated.
Before concreting the surface, reinforcement is carried out. A mesh is laid on the floor, the thickness of the rods is 5 mm, after which beacons made of wooden slats are mounted. Then a solution 10-12 cm thick is poured. If necessary, a finishing screed is applied. As the solution dries, you need to water it with water.
This completes the rough pouring of the garage floor. After a month, you need to do the whole procedure again. After the floor has completely hardened, it is recommended to paint it periodically. For thermal insulation, mineral wool, roofing felt, polystyrene foam, astratek and other materials are used.
Final leveling of the concrete floor
The finishing leveling technology depends on differences in the level of sound insulation, timing and type of floor covering.
Floor plan for a garage.
Final alignment can be performed in one of the following ways:
- Cement-sand screed. Used for differences of 5 cm on almost all types of surfaces. The solution consists of a proportion: part cement, three parts sand and PVA instead of water in a ratio of 1:4. Wet screed requires additional care. Starting from the next day after installation, it needs to be moistened with a roller.
- Dry screed for final leveling. The work can be done in several stages. Suitable for all surfaces and performed with differences of 4 cm. First, you need to lay waterproofing material, then lay strips of film with an overlap of 10-20 cm. An edge strip made of porous material is laid along the walls.
- Self-leveling floor for leveling. Used to equalize small differences from 5 mm. Perform using mixtures:
- self-leveling liquids - spread on their own;
- not self-leveling - smeared with a spatula.
Alignment is best done with two people.
Finish coating for garage cement screed
The floor itself is already subject to use. But for longer and more effective use it is necessary to complete the finishing according to its intended purpose. Today, the construction market offers many options for compensating for the shortcomings of cement screed.
Before installing the final garage floor covering, it is checked and the moisture level is compared.
To give the floor additional properties and provide a finishing coating, use:
- tiles;
- rubber floors;
- painting;
- impregnation for concrete;
- polymer floor.
Floor arrangement diagram.
Let's consider the features, advantages and disadvantages of each option.
- Tile. You can use ceramic tiles, which will make the floor more durable after tiling. Only certain types of slabs should be used that can withstand low winter temperatures and heavy loads. Such slabs include: porcelain tiles, clinker tiles, ceramic floor tiles. When laying tiles in the garage there will be virtually no dust, the floor does not absorb moisture and is resistant to chemical and mechanical damage. The only disadvantage is the cost of such installation.
- Rubber floors are a durable and not too expensive option. The material is easy to install and does not require operation. The advantages also include good sound and vibration insulation, resistance to the influence of aggressive environments.
- Painting a concrete floor will improve its quality and also give it an aesthetic appearance. After painting, the floor stops producing a lot of dust and suffers less damage. This option is one of the cheapest and most accessible, and it is also easy to apply the paint yourself using any paint tool.
- Impregnation for concrete floors is the most budget option for combating dusty surfaces. You can use silicate or polymer impregnations. They are absorbed to a depth of 2-3 cm and do not wear off for many years.
- Polymer floor. To create it, bulk mixtures are used, which include a polymer resin and a hardener. Self-leveling flooring is not only practical, but also beautiful, since the coating is perfectly smooth, matte or glossy. This type of coating is used in large parking lots or car washes because it is too expensive for a simple garage.
Method 4 - installation of rubber coatings
Another option for making a floor in a garage if the concrete has begun to gather dust is to lay a ready-made rubber coating on it. Moreover, you can choose rolled materials, slabs of different shapes and sizes, or so-called rubber asphalt.
- Rubber asphalt is a coating created from crumb rubber mixed with polyurethane glue or other polymer binder. Mixing is carried out immediately before laying, and to give the desired color, dyes are added to the still dry crumbs. The finished mixture is immediately applied to the prepared floor, primed with polyurethane glue, quickly leveled and rolled with a roller.
Video description
In the video about seamless crumb rubber coating:
On our website you can find contacts of construction companies that specialize in the construction of garages and other small forms for a country house. You can communicate directly with representatives by visiting the “Low-Rise Country” exhibition of houses.
- Roll coverings are laid according to the linoleum principle - they are rolled out on a prepared floor, pre-lubricated with polyurethane glue.
- Rubber plates are manufactured in the form of modules with locking connections around the perimeter. From them you can assemble multi-colored coatings, alternating modules in different sequences. Polyurethane glue is also used for fixation.
Laying modular rubber covering Source sroirk.ru
Note
. The main disadvantage of rubber coatings is their high cost. Moreover, it directly depends on the thickness of the rubber, which can reach 5 cm. For a garage this is a lot, a layer of 1-1.5 cm is quite enough.
Concrete floor
Concrete
Reinforced concrete coating will become a reliable foundation for the garage. This coating is resistant to moisture, can be washed with a hose, does not burn, and is resistant to mechanical damage. The low cost of the material is also of great importance. For floor equipment you will need: sand, crushed stone, cement, reinforcement.
The upper part of the soil is removed by 30 cm. Crushed stone is poured into the pit in a layer of 10 cm and leveled. It is covered with a 10 cm layer of sand on top, well moistened and compacted. Next, the pillow is leveled with a thin layer of screed with a low cement content. After it dries, waterproofing is performed. Liquid bitumen mastic, polyethylene film or roofing felt are used. The material is laid on the walls.
The next stage is reinforcement, a mesh is tied from rods with a diameter of 10 mm in increments of 15x15 cm. It should retreat 5 cm from the walls and edges of the inspection hole. The mesh is raised above the base by supports of 2 cm (granite, metal, plastic). The horizontality of the screed is ensured by beacons. To install them, use an aluminum profile or wooden planks. Beacons are placed at a distance of 1.5 m from each other. Leave 2–3 cm between the walls and the future screed for possible expansion. The future floor should have a slope towards the door. The solution is poured between the slats and leveled using the rule. After a day, the beacons are removed, and their place is filled with solution. The screed is covered with film and periodically moistened. It will take a month for the concrete to fully mature.
Electric heating cable in a screed
Note! To heat the garage, you can lay an electric heating cable in the screed.
The disadvantage of this coating is dust. You can avoid peeling by painting the floor. Another option is to lay rubber tiles on top, which are strong and durable, or apply a special coating.
Method 5 – self-leveling floor installation
If the financial side of the question of how to cover the floor in the garage is not of great importance, we can recommend strong, beautiful, durable and extremely resistant to any external influences self-leveling floors. These are plastic fluid mixtures that can independently spread over a surface and level it in a horizontal plane.
There are several types of self-leveling floors depending on the composition:
- concrete;
- epoxy;
- polymer.
Concrete mixtures, which are most often used for garage flooring, have the most affordable price.
Mixtures for self-leveling floors Source ar.decoratex.biz
This might be interesting!
In the article at the following link, read about the hood in the garage.
To reduce the consumption of the finishing coating, the floors are carefully leveled before pouring, filling all dents, potholes and cracks. The prepared base is primed with compounds on a base identical to self-leveling floors to ensure their maximum adhesion.
The finished mixture is poured in portions onto the floor and spread over the surface with special mops or spatulas, and then rolled with a needle roller to release air bubbles. It is not necessary to strive for perfect evenness, since the solution spreads on its own.
Ceramic tile
Porcelain stoneware is chosen as a floor covering by those who count on high strength and anti-slip coating
Wall or floor tiles are not used to install the floor in the garage. The technical characteristics of these products do not meet the requirements. Only porcelain stoneware with a thickness of at least 6 mm is considered as a floor covering. But this is not the only choice.
For garages and car repair shops, a special class of ceramic tiles is produced - technical. These products are highly durable and have an anti-slip surface.
Main characteristics
Ceramic coating has all the necessary characteristics for covering a garage floor:
- Compressive strength – at least 20 MPa.
- The abrasion coefficient of porcelain stoneware is 3-5 units. according to the PEI scale.
- High resistance to temperature changes.
- The anti-slip effect corresponds to class R10.
- Water absorption no more than 8%.
Advantages and disadvantages
The undoubted advantage of ceramic coating is a wide selection of products with different technical characteristics . For garages that will house one passenger car, 6 mm thick porcelain tiles are suitable. For those designed for truck transport, more durable products with a thickness of 8-12 mm are needed. Those car owners for whom the design of the room is important are given a wide scope for choosing colors, patterns and textures of ceramic tiles with an anti-slip surface.
Advantages:
- moisture resistance;
- easy to clean surface;
- strength;
- durability;
- maintainability (if the tile is damaged, it can always be replaced with a new one).
Flaws:
- relative fragility, due to which chips and cracks may appear on the tile from an impact;
- for garages with earthen or wooden floors, a concrete screed is required;
- tile seams absorb fuels and lubricants, dirt, and gradually crack;
- tiles often begin to “bounce”, which requires repair and replacement;
- Despite the presence of a textured surface of the tiles, it will not be possible to completely get rid of the sliding effect.
On a note! Despite the apparent ease of replacing one tile with another, this work is labor-intensive and does not always bring the desired result. The tiles often stand up unevenly, and soon “bounce” again.
Which garages are best suited for?
Ceramic coating is relevant for all garages. It is chosen in order to obtain the following effects:
- protect concrete from destruction;
- get rid of concrete dust;
- for easy removal of stains from oil and other liquids.
Many craftsmen who have repeatedly fulfilled orders for laying floor ceramics in the garage advise against this method of floor installation. They consider this solution impractical, despite the traditional choice. The opinion of the craftsmen coincides with the opinion of car owners who, for one reason or another, have had problems with ceramic coating.
Method 6 – topping (ironing)
This method is used only for fresh concrete screed, creating a protective layer almost during the process of pouring the coating. It requires the use of special mechanisms, and since it will not be possible to make a high-quality garage floor without them, it is better to entrust the installation of topping protection to specialists.
Definition!
Topping (ironization) – strengthening the top layer of a concrete floor. It is produced at the last stage of production and consists of spraying a hardener onto leveled concrete and rubbing it into the surface.
Topping mixtures contain high-quality Portland cement, dye, plasticizers, various mineral additives - quartz, corundum, basalt, silicon carbide and others. Sometimes metal particles are introduced into it to increase strength.
Scheme of a concrete floor with topping Source styazhka-pola.su
The process of strengthening the floor with topping looks like this:
- 3-4 hours after pouring the screed, when it stops being pressed when walking, the topping in the form of a dry mixture is poured into a distribution cart and distributed evenly over the entire area;
- the powder soaked in moisture from fresh concrete is rubbed into the screed with a trowel until no dry substance remains on the surface;
- the rubbed floor is once again sprinkled with topping, soaked in concrete milk and rubbed into the surface again;
- finishing grouting is carried out after the screed has hardened, and then the floor is treated with impregnation or other water-retaining composition.
Video description
How it looks in practice, watch the video:
The result is a very durable, dust-free and moisture-resistant surface that will not require repairs during its entire service life.
Helpful advice
. You should not experiment and try to solve the problem of a dusty floor using liquid glass, PVA glue and other similar materials. They are not intended for this purpose, and if there is a positive effect, it will not last long.
This might be interesting!
In the article at the following link, read about racks for storing wheels in the garage.