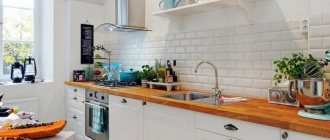
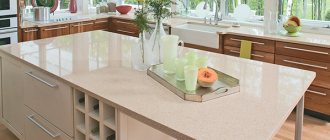
Corner kitchen is the most common furniture arrangement option in standard apartments. Not because it's convenient, no. But because the wall, 2.4-2.8 m long, is too short to place all the necessary kitchen furniture and appliances along it. You have to place cabinets along two walls, in an “L” shape. Alas, getting utensils out of the hard-to-reach “nooks and crannies” of corner cabinets by getting down on your hands and knees is still a pleasure. But a corner countertop is a completely rational solution. Let's talk about how to join the tabletop parts neatly and securely.
Preparing the room for installing a corner kitchen ↑
Theoretically, the inner corner of the room where the “L”-shaped kitchen should be installed should be strictly straight, 90º. In practice this is not always the case. And if in panel houses, which are assembled from ready-made elements like a designer, the design dimensions are observed quite accurately, then careless builders can install a brick partition crookedly.
Often, arranging furniture in an “L” shape in a standard room is the only way to place the necessary equipment and utensils, leaving room for a table
If the corner countertop is joined at 90º, but there is no right angle in the room plan, a gap will appear on one side of the kitchen between the furniture and the wall. The gap between the tabletop (working surface) and the wall, not exceeding a few millimeters, can be closed with a plinth. But you can't hide a wide gap. You can, of course, install the furniture not at a right angle (see below for how to do this), but this is not the best solution, and this is not possible for all types of countertops. It would be more correct to correct the builders' shortcomings, if any, before installing the furniture.
This can be done by plastering the shortest wall with layers of varying thicknesses. Or by performing leveling cladding with sheet material (gypsum plasterboard, OSB, etc.).
The presence of a strictly right angle at the installation site of a corner kitchen will help to avoid problems when ordering and installing furniture
How to choose?
In the process of choosing a countertop, in addition to the material, you need to pay attention to other points.
- The design of the model is important. It is best to choose monolithic options, as they are protected from moisture getting inside and therefore last much longer. This is why many people choose models made of artificial stone, because they do not have any joints.
- Product form. It is necessary to pay attention to the configuration of the countertop, the length and width of the elements, the presence of rounded or sharp corners, etc. There is no need to choose too narrow options in order to save space in the kitchen, since it will not be very comfortable to work on such a surface.
- In order for this element not to stand out, but to fit harmoniously into the design, you need to take into account its external characteristics . Color scheme and texture are important when decorating a kitchen. There are no clear recommendations here, but everything should be done in a single color scheme in order to thus support the style of the interior.
- If you buy a product made of stone , then you must check its thickness, as well as the possibility of restoration if there are scratches and other problems. Sometimes scratches and chips appear on such a surface, resulting in grinding. The thicker the tabletop, the more times you can restore the product.
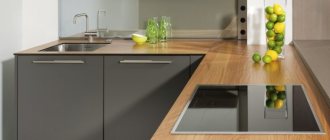
- , options for corner countertops combined with bar counters have become increasingly popular This solution will be excellent for a room that does not have a lot of free space. In this case, the bar counter can easily replace the dining table. With this arrangement, it is better to give preference to a tabletop without seams to create a monolithic surface.
How to connect two parts of a corner tabletop using a seamless joining method, see the video below.
Corner tabletop configuration ↑
Bearing in mind that the vast majority of our readers are owners of standard apartments with rectangular kitchens, we will consider only the two most common configurations of corner work surfaces:
Joining rectangular elements at right angles ↑
- A right angle is formed by two elements located strictly perpendicular to each other. This is the most economical way to cut material.
Joining elements at right angles is simple to perform and economical in material consumption
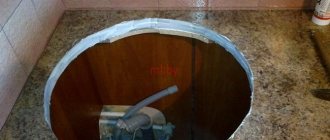
For small kitchens, an inner corner is a convenient place to place a sink. It should be taken into account that the sink should not cross the line where the parts meet. For corner installation, you should choose a sink that is not very deep; the hole for it should not intersect with the fastening elements (clamps, see below). It is better to cut the hole itself only after the working surface is completely assembled and fixed.
A place in the corner is well suited for placing a sink; it can be placed anywhere in an element adjacent to the wall.
On the part of the table top that faces the adjacent element, it is not recommended to place holes for built-in appliances closer than 30 cm from the joint
Working surface with a trapezoidal element and two joints ↑
Another option for the configuration of a corner working surface is when another, trapezoidal one is placed between two rectangular elements, forming an additional plane of the facade, turned at an angle of 135º to the other two.
Corner tabletop with trapezoidal insert has two joints
However, it should be borne in mind that the standard laminated chipboard used for assembling kitchen tables has a width of 60-62 cm. And the dimensions of the trapezoidal element are approximately equal to 90x90 cm, if you install a door no narrower than 40 cm on the cabinet located underneath it. With a smaller door access to the closet will be very difficult. How to make such a trapezoidal segment? There are three solutions:
- Purchase a ready-made element; some manufacturers of laminated tops offer such “trapezoids”. But this solution has disadvantages: the choice of factory trapezoidal parts is limited in color and size, and they are not cheap.
If desired, you can find a ready-made trapezoidal part for a corner table with two joints
- Assemble a “trapezoid” from elements made from a standard 60 cm wide slab. In this case, closer to the wall you will get an additional joint, which is ugly and inconvenient.
The trapezoidal segment is made of two elements 60 cm wide. A not very beautiful joint is clearly visible behind the sink
- The option is similar to the previous one, but the difference is that the part of the “trapezoid” farthest from the front (closest to the wall) is installed a few centimeters above the working surface. This allows you to avoid joints on a flat plane, and the resulting shelf serves as a convenient place for placing detergents.
The corner trapezoidal element is made from a standard slab, and the wall part, which did not have enough standard width of 60 cm, is raised
The trapezoidal corner element serves as a convenient place for placing a special sink that has a corresponding shape.
Sink designed for installation in a cabinet located under the trapezoidal element of the corner kitchen work surface
Methods for connecting tabletop parts
To connect the joint of a kitchen countertop, use one of 3 types of work:
- joint to joint without euro-saw;
- with euro saw;
- using a T-shaped metal profile.
Joining butt to butt without a euro saw does not require special tools or knowledge. It's simple and economical. The parts of the tabletop are installed to each other at an angle of 90°, the surface is leveled using a building level. If done correctly, the seam will be almost invisible.
However, such a connection is not airtight and is susceptible to moisture and temperature fluctuations. Over time, the ends swell and become unusable. The connection itself is fragile - heavy objects cannot be placed on it.
Important! If parts of the furniture are initially deformed, it will not be possible to fit them together smoothly.
When eurosawing, the ends are processed according to the pattern. The cuts are made using a milling machine. To reduce costs, manufacturers process furniture on a format-cutting machine, thereby obtaining uneven planes of the ends with an allowance of 1 mm or more. As a result, they do not fit tightly, and gaps appear between the parts being connected.
When joining parts processed by a milling machine, the resulting gap is a fraction of a millimeter, which is invisible to the naked eye. Visually the surface is solid. This result can only be obtained with high-quality equipment, and the machine must be installed perfectly level and the patterns must not be worn out.
Reference! If the countertop has a dark finish, it will be difficult to find a connection with a euro saw.
This connection is lockable, so the parts of the table top must be located in certain places. They should not be rotated so as not to disturb the structure and not lead to the formation of a gap. The corners of the room must be correct. If they are uneven, a gap is formed between the wall and the tabletop, which is best closed with a furniture plinth. If there is a large curvature, this will not help and you will have to straighten the corners of the room.
When installing a U-shaped set in a room with uneven walls, cracks form along each surface. Covering them with a plinth will not work. In this case, the set is installed as close to the walls as possible, leaving gaps between the parts of the tabletop and closing them with a T-shaped strip.
When joining a tabletop using a T-shaped aluminum profile, the locking fasteners are not cut out; the seam is covered with a strip . To make the connection airtight, the vertical upright of the profile and the ends of the furniture are treated with silicone sealant. This connection is more practical than a Euro saw.
The countertop is usually connected near the sink, which is mounted in the corner. Water from the sink getting into the gap causes the Euro saw to swell. At the same time, the metal strip treated with sealant is impermeable to liquids - it preserves the appearance and service life of the countertop. If moisture gets under the profile, its horizontal wings will prevent the furniture from swelling.
Corner table top made of laminated chipboard ↑
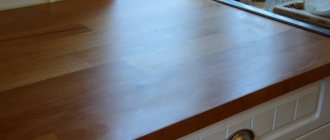
Laminated countertops (postforming, top), made of chipboard and covered under pressure with wear-resistant laminated plastic laminate) are the cheapest and therefore the most popular. Top width - 60 or 62 cm.
Advice! If in the room it was still not possible to ensure the presence of a strictly right angle in the place where the joint of the table parts will be placed, you should choose a wider top, 62 cm. If necessary, the tabletop can be moved back a little, beyond the cabinets and the back surface can be planed a few millimeters, which will allow you to place the work surface close to the wall if the discrepancy does not exceed 1.5 cm.
Another point to consider is that plastic coating is waterproof, but not chipboard. If moisture gets into a cut area that has not been edged, it will penetrate into the chipboard, causing it to inevitably swell. To avoid such a nuisance, it is necessary to carefully cover the “bare” ends of the slab with a waterproof sealant; the most affordable is universal or plumbing construction silicone.
Note! It is better to use a colorless composition. All sawn ends should be sealed: the corner joint of the countertop, the side ends, cutouts for the built-in sink and stove.
Can a corner countertop for a kitchen be assembled with your own hands by a non-specialist, a “teapot”? Yes, but this will require some persistence, accuracy and special tools.
Tools and materials for assembling a corner tabletop ↑
In addition to pliers, a screwdriver, a 10 mm wrench and a hacksaw blade for metal, which are available in almost every home, you will need a drill with a set of regular metal drills and a hand router with an 8 mm end mill. And also a 35 mm Fostner drill, which furniture manufacturers and assemblers use to make recesses on doors for installing hinges. You can rent a milling cutter and a drill, but you’ll have to buy or borrow a Fraser drill (not cheap, by the way), if you have one.
For those home craftsmen who are going to independently install kitchen and built-in furniture, it makes sense to purchase an expensive Fostner drill with a diameter of 35 mm for personal use; the costs will be recouped as a result
In addition to the postforming itself, you will need the following materials:
- A connecting aluminum strip (you can do without it, see below for this installation option), corresponding in shape to the direction of rotation, cross-section and thickness of the laminated board.
Types of aluminum strips for postforming joints. In our case, we will need a corner one. The slats differ (right, left) depending on the rotation of the table parts
The strip must be selected in accordance with the postforming section, taking into account its thickness and the diameter of the roundings.
The cross-section of the plank must completely correspond to the profile of the tabletop
- Special ties-clamps for connecting parts of the working surface, you will need 2 pieces per tabletop joint. If the kitchen has a standard configuration, use ties 100 mm long.
A clamp-type tie allows for a reliable connection of tabletops; it presses both elements against each other with force, eliminating their subsequent horizontal displacement
- Transparent sealant for insulating unprotected ends of the slab from moisture.
Preparing the bottom row of furniture for installing the top ↑
When exposing the bottom row of cabinets, several conditions must be met:
- The junction of laminated boards should not “hang in the air”. There must be reliable support underneath it on both sides in the form of cabinet walls.
- All cabinets must be positioned strictly horizontally in all planes, forming a single, even base of the working surface.
- The cabinets must be connected to each other with special screw ties.
- A method for attaching the countertop to the cabinets should be planned in advance. Furniture manufacturers who do not skimp on details install strips (ribs) in front and behind the top surface of cabinets, which not only give the furniture additional rigidity, but also serve to secure the tabletop. If there are no planks, you will have to screw steel corners to the side walls of the cabinets, through the holes in which you can screw screws into the slab from below. By the way, the presence of stiffening ribs for cabinets with retractable drawers is mandatory.
The worktop must be firmly attached to each of the lower kitchen cabinets. If the cabinets have stiffening ribs, fastening is carried out through them. If there are no ribs, you will have to use steel angles; they should be installed in advance
- The corner cabinets of the bottom row should not touch each other. A gap is left between them and an insert 3-5 cm wide is installed. The same strip is placed on the front surface of the adjacent, perpendicularly located cabinet. If this is not done, the doors will not be able to open fully. If it was not possible to align the walls of the room in such a way as to obtain an angle of 90º in plan, in the place of the gap covered by the insert, you can rotate the rows of cabinets to the desired angle, placing them close to both walls.
Corner cabinets should not touch; the gap between them is closed with an insert. In the photo, the insert is prepared, but not yet installed
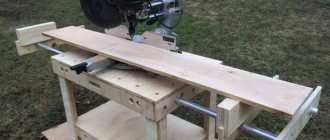
Cutting laminated boards to the required size ↑
Both parts of the tabletop should be marked and cut to size (length), if the cutting was not carried out by the seller of the materials. Using a joining strip will allow you to close small flaws and chips that may occur when sawing postforming, but the slab still needs to be cut as carefully as possible using a circular saw. Theoretically, you can cut with a well-sharpened hacksaw with fine teeth or even a jigsaw, but in this case it is difficult to ensure that the sawn end is perpendicular to the surface of the slab.
The resulting gap in the corner of the table elements is the result of the fact that the end of the slab is not sawed down perpendicular to its surface, while the plank is pulled to the unevenly cut end with screws
First, it is better to cut off that part of the tabletop that will adjoin the end to the inner corner of the walls, and only then, having temporarily installed it in place, try on and cut off the second part. If the top elements cannot be joined at 90º, the end of the second half of the table will have to be cut at an angle. Therefore, it is especially important to measure seven times before cutting.
The photo shows the process of cutting a laminated board using a circular saw, the guide for which is a ruler secured with clamps. Please note that the postforming is positioned with the laminate facing down, this results in less chipping
Drilling and milling recesses for screeds ↑
The next stage is marking, drilling blind holes and milling grooves for placement of tie-clamps. The recesses for the ties should be dumbbell-shaped. There are two halves of the “dumbbell” for each of the joined elements. It is necessary to place two ties at one joint.
The distance from the front and rear edges of the top to the dumbbell axis is chosen within 70-150 mm, taking into account the design of the lower cabinets and the presence of reinforcing strips in them. The distance from the end of the tabletop to the blind hole is 55 mm when using a 100 mm long tie.
Scheme for marking drilling and milling blind holes and grooves for tie rods in corner tabletop elements
When determining the distance from the edge of the tabletop to the blind holes, it is advisable to take into account the shape of the connecting aluminum strip. Most likely, it already has grooves for passing the tie. They can be narrower or wider; there is no single standard for their location. If you can't get the tie screw through the hole in the strip, it's easy to make a groove in another place on a fairly soft aluminum plate.
As a rule, the aluminum docking strip has grooves for passing the tie-clamp
The depth of the cut for the screed should be at least 20 mm, but on a tabletop 30 mm thick you should not drill or mill deeper than 25 mm, and on a top 40 mm thick - up to 30 mm. It’s easy to limit the depth of milling by setting the overhang of the cutter, but you should install a limiter ruler on the drill, which comes with all decent tools.
The drill limiter will not allow you to drill a blind hole deeper than intended
The groove for the tie is ready
Using clamp ties, you can join the slabs at any angle. If we are talking about assembling a corner tabletop, turned at an obtuse angle and including a narrow element, where it is impossible to place the ties at the same distance from the edge of the tabletop, the grooves for them are made staggered.
Using ties, you can assemble tops of complex shapes, joining elements at any angle and length. On the short corner element, the ties are placed staggered, at different distances from the inner corner of the table
Assembling a corner tabletop ↑
The sequence of actions for assembling a corner tabletop should be as follows:
- It is necessary to make sure that both parts of the postforming are ready for assembly: grooves for the screed are made, the ends of the slab opposite from the corner are processed.
- We install it in place, but do not yet screw the slab, which is adjacent to the wall in the corner, to the cabinets.
- We treat the end of the second element of the top, which is not protected by plastic, with sealant.
It is necessary to apply silicone sealant to the end of the board that is not protected by plastic and carefully distribute it over the entire surface, leaving no chance for moisture to penetrate the chipboard.
- We screw the strip to the sawn end of the slab with screws. There is no need to wait for the silicone to set.
- Apply silicone to the second part of the top. It is needed not for protection, but to prevent dirt from getting under the bar. We install the second plate in place, joining the table of two parts through the bar. In this case, you need to manage to insert a tie-clamp into the groove. Remove excess sealant.
Both parts of the tabletop are joined through a strip
- We move under the table and use a wrench to firmly tighten the bolts of both ties.
- We make sure that the joint is made carefully, the table elements are firmly connected, and the top is in place. We fix the tabletop to the lower cabinets.
- We make holes for built-in equipment. When marking holes, you need to make sure that they do not affect the fasteners - ties.
- Cover the joint between the top and the walls with a plinth. The corner tabletop made of laminated chipboard with a joint covered with an aluminum strip is ready.
The work surface can be connected using a strip not only at a right angle, but also at an obtuse angle. Up to 135º the joint looks quite neat
Connection of a laminated tabletop without a strip ↑
The advantage of connecting work surface elements using a strip is the ease of installation and preparation of the slab. The plank helps hide small cutting defects by covering small chips. Cons: the bar protrudes above the surface, it is not very attractive and makes it difficult to clean the table.
Both parts of the kitchen top can be neatly joined without a plank by making a “Euro-saw” on both laminated boards being joined. The end of one slab is processed, the longitudinal edge of the other is processed. The peculiarity of the “euro saw” is that the cut, straight along almost the entire length, at the place where the edge of the slab is rounded, radially extends to an angle of ½ from the angle of joining of the elements.
Eurozapil provides for the processing of both joined elements
Aesthetically, corner countertops connected using a Euro saw look noticeably better than a joint covered with an overlay strip. And it’s more convenient to use a smooth work surface without protrusions. The seam is practically invisible; it can only be revealed by the difference in the pattern of the laminate.
On a not very light tabletop with a uniform texture, the seam at the junction of two elements with a euro saw is practically invisible
On a corner top with a linear pattern, it will be noticeable where the elements meet
Euro-sawing is very difficult to make locally; this can only be done by a highly qualified carpenter using professional tools. It is better to order Euro-sawing of abutting slabs at a good factory that has the appropriate equipment.
Assembling a corner tabletop with a euro saw is carried out using the same technology as with a plank: using ties-clamps. The difference is that when joining the elements, both ends are coated with sealant and after connecting them, very carefully ensure that the surfaces of both parts of the table are strictly at the same level until the tie nuts are tightened. Installing a top with a euro saw is more difficult and more expensive than connecting through a bar. Using a connection made using Eurosawing technology, you can seamlessly join elements at almost any angle.
The diagram clearly shows the difference in the principle of joining the elements of corner tabletops using a strip and a euro saw
Connecting tabletops at right angles (90 degrees) without a strip
Let's consider the technology of connecting tabletops at right angles without a strip. The technique is the most successful, is actively used and allows you to obtain a reliable connection of tabletops and an invisible joint. The work is labor-intensive; it requires milling the so-called “ Euro saw ” and milling holes for the ties. Typically, the last two services are provided at enterprises engaged in cutting chipboard and countertops.
| Rice. 1. Connecting tabletops at right angles |
An alternative to a seamless connection is the use of metal connecting profiles. Yes, such profiles are easy to connect, but they disrupt the smooth surface of the countertop, which makes cleaning difficult and, over time, the decorative coating on the connecting profile begins to wear off.
| Rice. 2-3. Connecting worktops using a connecting strip |
The joints of the countertops, as well as the corner joints of the countertops, must be made airtight, not only for aesthetic reasons, but also to avoid the penetration of moisture, and this leads to swelling of the countertops at the joint.
Please note that even at the kitchen planning stage, you must try to maintain a distance of at least 300 mm from the mortise sink or hob to the corner joint. In a small kitchen it is problematic to maintain such parameters.
| Rice. 4. How to plan the location of the sink and oven in the corner kitchen |
The connection of tabletops at an angle of 90 degrees is made using fastening systems and using fixing auxiliary elements (shaped dowels) and gluing.
To tighten tabletops at right angles and more, a fitting called 100 or 150 mm countertop connection
| Rice. 5. Connection for worktops |
To install the screeds, holes are milled from the non-front part of the tabletop and grooves to these holes.
| Rice. 6. Elements necessary for high-quality tightening of tabletops |
| Rice. 7-8. Milling holes for table top ties |
When the tabletops are pulled together, it is difficult to achieve alignment of the tabletops in one plane, in order to eliminate such play it is necessary to make a groove at the end of the joint, install shaped dowels or lamellas in the groove during assembly, two pieces are enough for a width of 600 mm
| Rice. 9. Shaped dowel used when connecting tabletops |
To mill the groove, a special milling cutter is used; the milling for the groove should not be carried out to the edges by 30 mm. Milling depth 13 mm.
| Rice. 10. Router for milling a groove for a shaped key |
| Rice. 11. Groove for installing a shaped key |
Often such a groove is not made for a shaped key, but it is a necessary technique, try it.
| Rice. 12. Milling holes for tie rods, without a keyway groove |
Corner tabletop made of wood ↑
Wood is a material that lends itself well to processing and gluing. The stronger work surface will be the one that is entirely assembled in the workshop, and the corner joint is made on dowels and glued together under a press. However, if the wooden tabletop is large in size, it is difficult to deliver it assembled. In this case, assembly can be done on site. On the already mentioned dowels or the familiar ties-clamps.
High-quality wood glue is applied to the joint. For those who decide to assemble a corner tabletop made of wood themselves, we recommend ordering completely finished elements, precisely sawn and trimmed to size already in production.
The cut and joint of the elements of a wooden corner tabletop is made at right angles, the junction is noticeable due to the perpendicular direction of the wood structure
The elements are sawn and joined diagonally. With this design, material consumption increases, but the wood pattern fits well
Docking with a segment
A tabletop segment is essentially the top table for a segmented base cabinet. The standard dimensions of the segment are 900 by 900 mm, with a width of 600 m. Along the front, the edge of the segment can be straight or semicircular.
Related article: At what height to hang kitchen cabinets
Since the ends of the joining of the table tops are sawn off smoothly, wood glue is used for joining. If such fastening seems insufficient, use special metal connectors for countertops (see photo).
By the way, similar parts are used for household trimming of countertops.
Corner countertop made of stone or tiles ↑
Stone, natural or artificial, is a very expensive but effective material for kitchen countertops. It is supplied in large-format slabs, from which elements of the desired configuration are cut out in production. Technological restrictions on the shape of the table are minimal - pay money and almost any of your whims will be fulfilled. Countertops of complex shapes are easier to make from artificial stone; a glued and polished joint on the top is almost impossible to notice.
A stone corner countertop for a kitchen, the price of which is very high and the manufacturing technology is complex, should be installed only by specialists, and the maximum possible part of the processing should be carried out on stationary equipment in the workshop.
Rounded table top made of artificial acrylic stone. There are joints on it, but they are completely invisible
A tiled work surface is a beautiful, but difficult to implement and expensive technical solution. Therefore, it is rarely found in domestic kitchens. How to make a tile countertop for a kitchen is a topic for a separate article. We will only note the crucial importance of having an ideal right angle between two walls in a room. The slightest inaccuracy - and the mistakes made will be immediately visible along the tile seams.
In order for the seams on the corner tile countertop to meet, the lower cabinets must be set strictly at right angles. Accordingly, an exact angle of 90º must be maintained between perpendicular walls
The methods we described for joining laminated chipboards are the most common due to their ease of execution; a home craftsman can assemble a table using similar methods. However, there are advanced professional technologies that make it possible to achieve ideal joint quality and high joint strength.
How to join a tabletop without an aluminum strip?
This operation is performed in the same way, except that the ends are glued together with sealant. After pressing the two planes, the excess is removed with a sponge or clean rag. But many people refuse to use this type of countertop connection. The seam between surfaces will not be protected. Connecting a countertop without a strip with sealant is only temporary and unreliable protection. Over time, such sealant will come off due to frequent and constant mechanical stress.
Materials
But these are not the only possible options. Corner countertops can also be made from the following materials:
- Acrylic stone (“weak point” – sensitivity to high temperatures);
- Glass (extremely rare);
- Natural wood (impractical and expensive);
- Marble or granite (the most expensive solutions, but they are also leaders in quality);
- Metal (an interesting and practical option, which is also rare - an example can be seen in the photo below).
There are also ceramic and plastic countertops. As a result, the optimal choice in terms of price and quality ratio can be considered a corner countertop made of postforming : despite the fact that such material is susceptible to swelling under the influence of water, this happens in approximately one case out of three hundred, and in the vast majority of such incidents the owners themselves are to blame. With proper care, this countertop will last a very long time. You can find out about kitchen folding oval tables here.
Despite the fact that postforming can withstand high temperatures and will even survive reckless slicing of bread on it (with little effort), plastic is easily damaged by spilling paints, hydrogen peroxide, any acid, and even... a strong solution of potassium permanganate on it.
How to choose a kitchen countertop:
Connecting tabletops at an angle
A solid kitchen countertop is an ideal plane without joints, which is guaranteed to last longer. But in L-shaped kitchens such a countertop cannot be installed, so you will have to assemble it from two parts adjacent to each other at an angle of 90 degrees. Parts of a straight tabletop are joined even if its length is large and the product cannot be carried into the apartment through a narrow flight of stairs. The process of joining tabletops is carried out using different technologies. The main thing is to create the illusion of a single plane.
Methods for connecting tabletop parts
Three types of connections for kitchen countertops are used:
- joint to joint without euro-saw;
- joint to joint using a euro saw;
- the use of a T-shaped profile made of aluminum alloy.
Euro-sawing is a method of processing the ends of a tabletop according to a pattern. That’s what it’s called – patterned. In this case, the ends are cut on a milling machine. Some manufacturers, in order to reduce the cost of the work carried out, use a format-cutting machine for this. The planes of the ends on such a machine turn out to be uneven with an allowance of a millimeter or more. Therefore, the result is an incomplete fit of the end planes and the appearance of gaps between the joined parts of the tabletop.
The ends processed on a milling machine may form a gap when joining, but it is very small - fractions of a millimeter. Therefore, it is not visible to the naked eye, and the surface appears solid. But this is achieved under two conditions: the milling machine must be level, and the patterns must not be worn out. In addition, on dark countertops the joint with the euro saw is practically invisible.
Connecting the tabletop using a euro saw
But these two types of connection have several disadvantages. Since the euro saw is a locking connection, it is impossible to rotate the parts of the plane relative to each other - the integrity of the structure will be interrupted and a gap will form between the parts. Therefore, if the corners in the kitchen are uneven, then when installing the kitchen set in the corner of the room there will be a gap between the wall and the countertop. If you try to close the gap by moving the plane, a gap will appear between the parts of the tabletop. You can hide the gap near the wall with a table furniture plinth. But if the curvature of the angle is large, then this device will not help.
But, if a U-shaped set was ordered for the kitchen, then it will not be possible to solve the current problem by any means. Sometimes, if the curvature of the walls in the room is small, then it is better to install exactly along the walls, and leave gaps between the parts of the tabletop. They will subsequently have to be covered with a T-bar.
The third method of connecting pieces of countertops using a T-shaped profile is carried out without a Euro joint, because the connection is closed from above with a profile strip. It should be taken into account that the main requirement for docking is tightness. Therefore, the vertical post of the plank and the ends are treated with silicone sealant.
The aluminum profile has another important advantage in comparison with the euro saw. Most often, the parts of the countertop are joined in the area where the sink is installed, which is usually mounted in the corner, because this is where the utility lines are installed. Eurozapil has the least protection from moisture, so there is always a possibility that the tabletop material will begin to swell at the joint. In this regard, the aluminum profile is excellent protection, because it is treated with sealant both at the joint and along the wings of the vertical strip. In addition, it is almost impossible to disconnect such a connection. It can only be torn apart. Therefore, if water gets under the profile, the wings of the horizontal bar will prevent the plastic from swelling.