54477
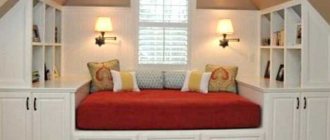
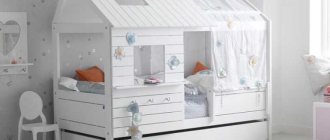
The Scandinavian style for children's rooms is gaining more and more popularity, and a do-it-yourself bed-house is a real manifestation of parental care, skill and imagination. An original bed design, made taking into account the size of the room and the age of the child, is beautiful, safe and economical. Adults can be confident in the reliability of the bed’s design, and children can have a place to rest, just like the heroes of fairy tales.
How much did it cost me? And how long did it take?
So here's how much money I spent:
It cost 1,300 rubles for bars and boards, 450 rubles for paint, primer and brush, 200 rubles for screws, 150 rubles for sanding discs.
Total – 2100 rubles! Agree - excellent result!
By the way! I suggest you download all my drawings with the dimensions and developments that I used! Roughly speaking, I give it for a bottle of lemonade with chips. If you want to make the same crib in the form of a house for your child without unnecessary hassle, with all the dimensions and errors already taken into account, download from the page:
Believe me, these drawings will save you a lot of money, time and nerves!
Time passed: I did everything in the evenings, after work. It took about 4-5 evenings of leisurely work.
The child is delighted! And I'm proud that I did it with my own hands!
Decor variations
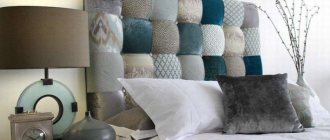
A simple bed with drawers usually does not require any special design solutions. As decoration, you can choose original handles for drawers or make a carved headboard. You can also paint the bed in your chosen color, highlighting the design of the rest of the children's room. The option of painting the headboard or legs, using special decorative stickers and other decorative elements is allowed.
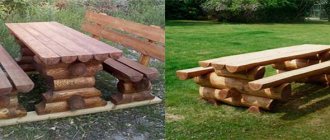
You can emphasize the classic design of a children's bedroom with the help of carved legs or sides.
If you have certain skills, the sides of such a bed with drawers can be made in the form of the walls of a car, resulting in a car bed that is popular today. For girls, you can make a sleeping place in the form of a carriage. However, many young representatives of the fair sex also like the options with cars, except that the colors are better in more “feminine” colors.
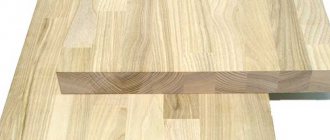
Solid wood children's bed
Children's bed with wall mounts
Carved handrails and slats can be used to decorate a bunk bed. A more complex option is to decorate a bunk bed or loft bed in the form of a castle or fortress, or a tree house. To do this, it is enough to cut out the facade of the appropriate type and paint it in accordance with the sketch.
Whatever bed you decide to create with your own hands, remember: you are creating furniture for a child. Approach the task responsibly. There are no small details in creating furniture - the safety of those who will use this furniture depends on the grinding of every corner and the strength of every joint. Put maximum effort, care and love into your product - and such a bed will give your child good dreams, and you - joy and satisfaction from the work done.
UPDATE after half a year of using the crib
So guys, hello everyone! About half a year has passed since I started using the crib. I report - everything is great! The crib is strong, the child is happy. We can fit three of us into it without any problems (two adults + a child) – no problems.
Now I have a 3-year-old child, a boy. He is not yet accustomed to sleeping in his own separate room, but more and more often he himself asks to sleep in “his own crib with a chimney.” So you can safely, after 2 years, already think about a full-fledged bed for your child. By the way, by painting the crib white, I made it universal - it would also be suitable for a girl.
This is what it looks like now:
My crib drawings with all the diagrams and dimensions (links above) have already been downloaded by many people! But unfortunately they do not share their successes. I kindly ask everyone who will make a bed in the form of a house - leave a review here in the comments, post photos of your beds. It is very interesting to me!
Article Rating
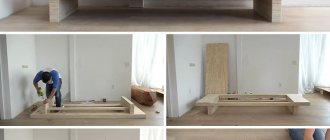
Main stages of work
There are a lot of options for how to make a bed-house. In terms of construction work, everything is becoming more standard; it is important to draw up a diagram of the proposed product, preparing the necessary materials.
Tools
House walls
First of all, drawings are made for the bed-house using a simple pencil and a square. To build the walls of the described bed, four wooden beams are taken, each of which is 1 m 20 cm. These will be the supporting parts for the vertical structure of the house bed. To add aesthetics to a gable roof, the edges of all supports are sawn off from above to form an angle of 45 degrees.
Marking
Details of the walls of the house
The edges of the supports are sawn off at an angle of 45 degrees.
Roof
This part of the bed-house will also require four bars and the same steps, including finishing the edges at an angle of 45 degrees. All processed bars are assembled, the upper ridge is attached using wood glue. The parts can also be secured with a self-tapping screw, which should be screwed in at a distance of 3 mm from the border of the junction of two wooden parts. We advise you to follow some rules when working:
- It is recommended to clean all cuts with sandpaper;
- the self-tapping screw must be screwed in slowly so as not to delaminate the wood;
- When drilling, it is recommended to use a vice to secure the product;
- Optimal modern drills and a slow process are the key to quality work.
When two slats are fixed to the two supports of the future bed, the end result is the frame of the house. Repeating the procedure will lead to the appearance of two equal frames - the end walls of the bed.
Gluing parts
Connecting parts
End frame attachment
To complete the manufacture of the end frame of the bed, an 8.2 cm block is screwed at the bottom to support the vertical posts and stabilize the entire structure. For bed assembly, an eccentric tie of the side components is preferable. It is very important to make an accurate design for the desired hit. Self-tapping screws will help make the task easier. The structure is also attached to simplify assembly and save time with flat corners - squares with a side of 3 cm. All accessories for the procedure are available at a hardware store.
When making this tie, drill holes in the crossbar with a 10mm drill bit. They should be located on its midline, not through and have a depth of 12.5 cm. The diagram shows how to fix their outer edges 3.5 cm from the edge of the crossbar.
A 6mm drill bit helps create the hole on the side. It is fixed exactly in the middle and falls into a pre-prepared recess. The eccentric then firmly secures the required appearance of the screw. It is also possible to use wooden parts on long self-tapping screws with pre-gluing. We should not forget about stabilizing the connection using corner brackets.
Attaching the end crossbar
Finished end frame
Assembling the basis of the structure
Two thick bars are prepared as the sides of the bed. The inner side of the beam accommodates thin strips using self-tapping screws and involves screwing in the screws at an equal distance from each other. These parts will support the frame of the future bed of the house, which will make it possible to secure the slatted bed bottom.
For accurate work, it is important to make a template measuring 6 cm with holes for self-tapping screws - 2.5 cm. Use a pencil to mark the positions of the holes on all racks so that the upper edges completely coincide with the crossbar. A 6 mm drill is an assistant in organizing through holes in the marks. The procedure is fourfold: in this way, all the posts are connected to the sides of the bed.
Next, prepare the hole for the eccentric on the longitudinal post inside. Long self-tapping screws are screwed in from the outside, which should smoothly connect the side components of the bed and the vertical support with possible gluing of the joining area. The eccentric is inserted into the holes from below and the bolts are then tightened. Repeat the procedure to connect both frames to the sides of the bed.
After fastening the sides of the product to the ends of the house bed, the frame is supposed to be fixed, thanks to the three longitudinal components of the roof. Three beams according to the size of the sides are attached using an eccentric or self-tapping screws and glue. When choosing the latter, the bed-house must be strengthened with corner fasteners.
For assembly you will need two thick timbers
Thin strips will support the frame
The frame is assembled using an eccentric tie
Connection of side supports with crossbars
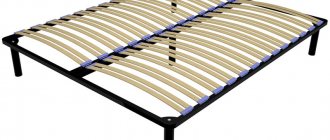
Slatted bottom
The slats are screwed to flat strips, which in turn are secured to the frame sides. It is important to carry out the correct tightening to hide the screws. The interplank interval is on average 7 cm, 13 parts go to the bottom. The remaining slats will be suitable for the safety side, assembled using corner brackets, but this is not necessary.
These slats can be borrowed from other sleeping places. There are new types of bed slats on sale. There are also ready-made models that are inserted directly into the bed frame. This option is suitable for standard size beds.
Lamels
Fastening the slats
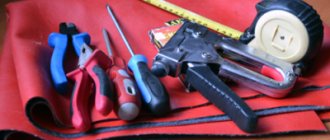
Preparing all the tools
In addition to lumber, you will need the following tools for manufacturing:
- Saw or hacksaw.
- Self-tapping screws, screws, possibly nails.
- Wood glue.
- Metal corners.
- Be sure to have a tape measure, rulers of different lengths and squares for marking right angles.
For work you will need a saw and other tools.
In addition, in order to create a high-quality product, you need to purchase varnish for wooden surfaces. But keep in mind that for baby furniture you should prefer water-based mixtures that are environmentally friendly. This is a prerequisite to keep the baby healthy.