Such a table can be very useful if there is a shortage of storage space and if you do not work with wood every day, but on occasion.
I just took it apart, worked on it, and put it away. The author has thought out devices for working with length gauges. Despite its compactness, the table is capable of a lot. The successful use of stiffening ribs in the design makes the table quite light, but at the same time durable.
Further from the author in machine translation.
How to update a worn board?
Regardless of your neatness, sooner or later the work table in the kitchen will lose its original appearance and you will think about updating it or buying a new set. The easiest way to update a wooden panel is to paint it. For this:
- clean the board with sandpaper or a grinder;
- correct all defects with wood putty;
- prime the surface with paint containing alkyd resin and apply several layers of such paint over the primer;
- the painted part can be decorated with a pattern (draw something yourself or using stencils).
There is also a simpler and cheaper option for covering a wooden tabletop - this is to cover it with a self-adhesive film, which can be painted to resemble wood, or create the illusion of a surface made of stone, metal, leather or marble.
On a note! If you choose the option with film, remember that its area should be slightly larger than the area of the table. In addition, when gluing the coating, attention should be paid to the absence of drills and folds. You can smooth the film with any flat plastic tool.
Features and Limitations
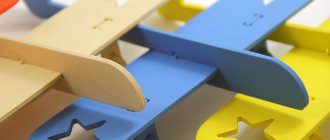
Working with plywood is easy because it is a malleable building material whose strength indicators are not particularly high. Therefore, it is not recommended to make a product if it will experience heavy loads during operation. It is better to make a folding table from multilayer material. Sometimes small children's tables are made from plywood.
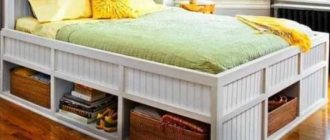
Originality is the main virtue that extols homemade plywood furniture. If you make a table at home, you can decorate it with shelves and other additional elements. For these works, it is best to use sheet material: with it you can make a strong and reliable tabletop. It is recommended to coat the finished product with a layer of varnish, but you need to know: the kitchen table is prohibited from being treated with this solution, since food may become saturated with it.
Types of countertops
Before you buy a plywood and epoxy resin table or make one yourself, you need to understand the variety of choices. There is nothing worse than being disappointed in your purchase after finding a better option. Although epoxy tables come in a wide range of models, there are not so many varieties of plywood models. The fact is that, despite all the advantages of the material, natural wood or stone is traditionally valued.
Plywood is good for its ease of processing and inexpensive cost, however, the smooth surface of the veneer indicates complex wood processing, while many craftsmen focus on its original appearance (presence of bark, knots, peculiar texture).
The first type of countertop is made from plywood board. As a rule, its thickness is about 2 cm. This plate is quite strong and can withstand loads. But plywood impregnated with epoxy resin looks more preferable as a tabletop. The resin gives additional rigidity to the fibers. Ordinary plywood can be deformed, and if the load continues for a long time, the sheets may not recover their original shape. On the other hand, everyone knows how wood is affected by changes in humidity, and in a kitchen you can’t do without a protective layer for furniture. The function of such protection is precisely performed by epoxy resin.
Impregnation of plywood with epoxy resin is quite labor-intensive work; it represents the main manufacturing process. The difficulty is that impregnation takes a long time. It is necessary to apply a layer of resin and then wait until it is absorbed. The end result is a durable board coated with a thin layer of epoxy. It gives the surface a gloss and protects the wood from scratches or chips.
Useful to know > How to fill an insect with epoxy resin, simple technology
Despite the fact that the veneer has a texture, the design can only be partially called beautiful. Therefore, before pouring the finishing layer, the surface is painted. Such countertops are not famous for their original design, but they are widely used, because in a certain interior the key elements are plain pieces of furniture.
The second type includes epoxy countertops with a plywood base. Here the plywood board is used exclusively as a load-bearing element. It is located at the base of the tabletop, and a layer of resin about 3 cm thick is poured on top. The transparent mass is rarely left in its original form. Typically, decorative elements are placed in the thickness of the resin. The exception is options using dyes.
You can use artificial flowers, natural materials, precious stones, jewelry, metal jewelry, coins and even photographs as decorative elements. Similar solutions are also found in models where the base is made of solid wood or slab. Plywood gives a smooth surface without additional processing, and we should not forget about its relatively low cost.
The third type of plywood countertops is characterized by the complexity of its structure. Usually thin sheets of veneer are used, which are held together with epoxy resin. If each subsequent sheet is slightly larger or smaller in size than the previous one, then when they are superimposed on each other, three-dimensional pictures are formed.
The size of the sheet of lower plywood may not coincide with the size of the entire tabletop, that is, such models are not considered tabletops with a base.
The most popular option is to imitate the depths of the sea. It looks like this: plywood, laid in layers, plays the role of rocks. Since they do not have smooth boundaries, the sheets of plywood must be different in size. Blue-tinted resin is poured into the remaining space.
Visually, the picture resembles a body of water, a sea depression, and if the layers of resin can be tinted zonally, then the “water” can be made darker at greater depths.
Useful to know > How to make a gear knob from epoxy resin with your own hands
Basic principles of working with a plywood table
In order for a product to be functional and durable, you need not only to select high-quality material, but also to assemble it correctly. If the product is assembled from pieces, then the assembly process begins only when the pieces are thoroughly dry; excess glue must be removed immediately after application so that the appearance of the product does not deteriorate in the end.
An important point is the correct drawing of the table. The distinctive feature of a plywood product should be its perfect symmetry. If you are going to cut plywood into pieces, then consider whether your jigsaw is suitable for such work. Don't forget that you will need to leave gaps for sanding and getting rid of sharp corners. When you process the material, sand it so that the surface is smooth. An important point is that, in addition to high-quality processing of the material, it is necessary to firmly fasten the parts together. To prevent cracks when screwing in the screws, drill the holes for them a couple of millimeters narrower.
To ensure that the parts are held in place as securely as possible, you can use wood glue. When you have sanded all the parts, clean them from dust, lubricate them with glue, press the parts tightly together, secure them with clamps and leave them in this position for several days until the glue has completely dried.
How to restore the surface?
If the worktop cover in the kitchen has not only lost its original appearance, but has begun to collapse, you will have to carry out more serious restoration work. Under the influence of moisture and temperature changes, the table cover may become deformed (one half will become higher than the other), and the wood may swell and delaminate.
The recovery process looks like this:
- Remove all damaged areas of wood using a special tool;
- Dry and sand the lid with a machine (if you don’t have a machine, you can use sandpaper, but you will have to sand very carefully);
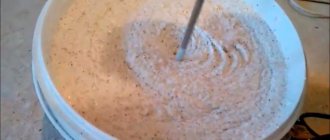
- Make a mixture of fine sawdust and polyvinyl acetate-based glue (you can use putty instead);
- Fill with this mixture those areas from which damaged wood and voids that may have occurred during sanding have been removed;
- Place the product under the press and dry for one day (this is the minimum period, more is possible).
How to cover a wooden tabletop after the adhesive has dried? An oil- or silicone-based product, or a special varnish, is also suitable here.
Important! The protective layer needs to cover the entire area of the product, and not just the restored areas.