Newborn babies spend most of their time in their cribs. Many parents want to protect that little corner by using a canopy. A lightweight cape performs practical and aesthetic functions - it allows you to protect the baby and decorate the children's room.
To fix the canopy, a special holder is used, which can be purchased at the store or made independently. It allows you to install the canopy over the crib easily and safely. Modern designs are almost invisible under the fabric, reliable and durable.
Canopy styles
The canopy covering the playpen protects the baby from excess light, dust and anything that irritates him. It makes the sleeping area more comfortable. Moreover, such a device does not interfere with the circulation of fresh air. The canopy provides the child with a sense of protection from the outside world.
All curtains perform the same function, but do not think that they are all the same. They are distinguished by style, material, and method of fastening. Parents choose the style taking into account their preferences and the interior of the children's room. The main thing is that the fabric did not interfere with putting the baby in and out of his sleeping place. The length of the free edge is also important: the material should go down to the very sheath of the playpen in order to cover it.
Of course, they choose based on design and color: the shade should be soft and cozy. It’s good if the color of the canopy matches harmoniously with other furniture in the children’s room.
Recommendations for caring for canopies
This item needs constant care. It needs to be washed and ironed. The more often the better. This is especially important if parents are prone to allergies. In this case, the abundance of dust that the fabric collects can have a bad effect on the baby's health. When washing, avoid products with strong odors. The washed product must be thoroughly ventilated beforehand.
Please note that material with numerous ruffles and decorative inserts may lose its original appearance after frequent washing.
The canopy will help keep the child calm and create a fairy-tale atmosphere.
Mounting location options
Canopies also differ in how they are installed.
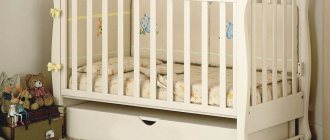
- You can install a long canopy on a baby crib. This allows you to easily take your baby out of the playpen or put him back. The product will cover the entire playpen. This fastening method is more suitable for babies, since it protects them from the outside world as much as possible.
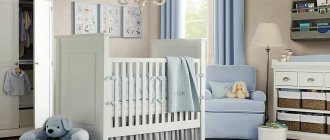
- By width. The product is attached to the headboard. The canopy is placed over only part of the arena. This is a lightweight version of the canopy for inquisitive and active toddlers who are already interested in what is happening outside their bedroom. This canopy looks light and elegant.
- Along the perimeter. Another mounting option for newborns. Assembly is convenient in cases where the baby has to be taken out and put down frequently. To attach the canopy around the perimeter, a frame is attached to the crib, and then the canopy itself is installed.
Canopy functions
Having looked at the definition of the term in different dictionaries, we can conclude that a canopy is an elegant stationary or portable canopy used for various purposes. More than a century has passed since the appearance of the first prototypes. During this time, the curtains have undergone a lot of changes. Their design has changed, the variety of fabrics used has increased significantly, and the methods of fastening have changed.
The first portable models were used in Ancient Babylon to protect rulers from the scorching sun while they were moving along the street. Nowadays it is almost impossible to find such structures, except on a film set or at a carnival. Most people associate a canopy exclusively with decoration above the bed and perceive it as a luxury item.
From a practical point of view, a canopy is a good protection against annoying insects, drafts, and does not allow dust to pass through. From an aesthetic point of view, it acts as a decoration. Allows you to transform a room and make it exclusive. This item gives the room solemnity and romance; it can be located around the perimeter of the entire bed, or decorate only the headboard.
The canopy is used not only in the bedroom, but also in the living room and attic. They cover sofas, armchairs, ottomans. With its help, you can perform zoning of the room, for example, combining an office and a bedroom in one room. This technique is perfect for decorating a studio apartment.
Holders
This is an element consisting of a tripod (adjustable tube) and a ring on which, in fact, the canopy is held. The strength and reliability of the entire structure depends on it, so it is better not to choose cheap plastic elements - they are not very durable and break quickly.
The loop can be solid or separable. So, if it does not come apart, then the fabric is tied with ties - usually in this case Velcro is used, you can also take elegant ribbons and tie them with bows. Sometimes the ties are included in the kit, sometimes they are not, then you sew them on yourself. The ring can be disguised using various decorative elements. Sometimes they create entire fairy-tale decorations with hanging toys.
If the ring is separated, then the upper part of the canopy fabric is attached to its “antennae” - it has compartments or pockets. Then the ring is attached to a tripod tube and its ends are connected. After this, the holder is attached to the arena, which is what the screws are for. Plugs cover the mounting points.
The element that will hold the canopy can be made from scrap materials. Thick wire can be used as such an element. It must be twisted into a loop, that is, given a round shape, and then secured with a hook to the canopy wire at the headboard.
DIY holder guide
The cost of a finished holder varies up to 500 rubles. They are mainly made of metal and plastic. However, you can always create your own alternative.
To assemble the structure, you will need a minimum of materials:
- pipe blank (plastic or metal will do);
- fastening ring;
- fabric for the canopy itself;
- decorative elements (optional).
The choice of fabric is an important point. It should not be too dense, but light cotton materials will not work here either.
They will not cope with protecting the child from external factors.
The length of the fabric should reach the end of the mattress. You should not buy a canvas that is too large, because in this case it will drag on the floor, collect excess dust, and interfere with the movement of the crib.
The metal base is pre-treated. It's worth using white metal or painting the finished stand to match the crib and its surroundings. The pipe must be shaped like the letter “G”. The mount should be at a height of about a meter, in the center. Fix the structure in at least 2 places to give it the necessary stability. The metal base can be replaced with a plastic one, then pre-processing of the workpiece will not be required.
To create a ring, you can use available tools. For example, a hoop of suitable diameter. The bigger, the better. The canopy will look more magnificent. The split design is a great option for fabric with drawstrings.
In addition to the hoop, dense wire is used as the basis for fastening. You can create a ring of any diameter from it and adjust it in the future. The ends of the wire should be processed to avoid mechanical damage.
Types of fastenings
You can hang a canopy on a crib in different ways, depending on the type of attachment.
The mobile holder is most often used: it is the easiest to install, and neither the walls nor the ceiling are involved in this. Many people choose a mobile element for this reason. The mobile model is easy to fix and weighs little. The structure is completely hidden under the canopy.
But there are also disadvantages: the movable structure is difficult to fix in a certain place, and there is also a risk that the tripod holding the canopy will fall into the playpen. If the holder is not very secure, the child will be able to swing it or pull it in his direction.
How to assemble and install a canopy on a crib
Features of the holder assembly
The holder is necessary for fixing the canopy over the bed.
The purpose of the holder is to securely fix the canopy over the crib. It is a bracket consisting of the following parts:
- curved pipe;
- straight pipe with adjustable length;
- bed clip;
- canopy ring;
- fastening that allows you to fix the ring.
Before assembling the structure, you should choose the length of the holder. To do this, the bracket, assembled at full length, is tried on the bed and adjusted until the optimal position is achieved. As the child grows, the length of the bracket should be increased, gradually removing the canopy from the crib.
The length of the bracket can be adjusted as the child grows.
The height of the bracket can be changed according to the age of the child.
Fastening and installation procedure
Before attaching the canopy to the crib, you need to mark a suitable location. The next steps are as follows:
- Attach the tripod tubes to each other.
- Attach the canopy fabric to the ring. If it separates, then the material is strung; if not, it is secured with tapes or Velcro.
- Attach the ends of the top of the holder to the tripod.
- Using the appropriate fasteners, secure the tripod in the selected location and tighten the screws firmly.
- Close all connections with plugs.
- Spread the fabric along the edges of the crib.
Fixing and installing the canopy will not be particularly difficult.
After installation, all elements must be checked for strength to prevent the structure from collapsing.
Mounting methods
Stationary models are attached either to the wall or to the ceiling so that the canopy hangs in folds and covers the playpen on all sides. It looks elegant, and the little one will be protected from external factors that irritate him.
Mobile structures are secured in different ways: for example, you can attach such a canopy to a crib only in the center of the side or only at the head. Each location option has its own advantages. So, if you place the canopy at the head of the bed, the material will only cover part of the crib. This is convenient for older babies who are starting to explore the world outside their crib. If you attach the canopy holder to the crib along its long side, the coverage will be wider; the canopy will cover the entire playpen.
Advice!
When fixing the structure on the long side of the crib, you do not need to lean it against the wall, otherwise, when the playpen swings, it will damage the wallpaper.
The perimeter mounting of the arena looks very attractive. However, this option has a serious drawback: for installation you will have to use a large number of supporting elements. It is quite possible that, as the child grows up, he will begin to study all this, and then he may collapse the structure.
Fixed mount
A stationary mount is more difficult to install than a mobile one, but it usually comes with instructions, so it will be easy for parents to do the installation themselves. As a rule, the canopy comes with fasteners or a profile that needs to be mounted on the wall or ceiling. Then all that remains is to attach and elegantly position the canopy.
Another option for attaching a canopy in this way is to attach four slats to the ceiling around the perimeter of the crib, which will hold the fabric. Another way is to use a hook as a holder. You need to check that the hook is strong, strong, and large, otherwise the fabric, especially dense ones, will not hold well. However, this installation method has a significant drawback - the canopy on a holder in the form of a hook is difficult to adjust and straighten.
Whatever you choose, do not begin installation before you have marked the ceiling. This will make it easier for you to decide exactly how to secure the holder.
Important!
Owners of a stretch ceiling should take into account that with such a coating it will not be possible to attach the structure. The profile or holder will need to be installed on the wall.
Another important nuance for permanent ceiling mounting is the length of the material. The material should be long enough to cover the crib almost to the legs. Otherwise, the canopy will reach the crib, but will not be able to cover it.
As for installation tools, the structure is mounted with screws or self-tapping screws.
If it is assumed that the baby's crib will never move, then the canopy can be fixed to the ceiling using a bracket - this is the most reliable type of fastening. Neither a child nor pets can turn over such a structure.
Installation process:
- Mark the ceiling, mark the place where the cornice or metal profile is attached.
- Install the curtain rod.
- Then put on the canopy (try to put the canopy on the crib so that it falls in beautiful folds).
- Hide the attachment point with a lambrequin.
- Adjust the length of the canopy with bows.
Using the same scheme, the canopy is attached to the wall. The bracket is installed at a height of at least a meter from the side of the crib.
Mobile mount
The stand (that is, a tripod) is attached to the crib, and the fabric is hung on the loop. The tripod can be metal or plastic. A metal product is considered more reliable.
The mobile structure is mounted using brackets. The height of the tripod can be adjusted so that the holder does not reach the floor, the canopy should cover the crib. When the tripod is secured, you need to insert the “tendrils” of the loop into the pockets located on the canopy. A properly installed canopy should have graceful folds.
Sometimes the ring (loop) is solid because it does not have split ends. Then the fabric is put on in a different way: it is secured to the ring with Velcro or tape. If they are not available, then the fabric is simply sewn on.
When the installation of the canopy is completed, it should be adjusted and straightened on all sides. The main thing is that the canopy does not interfere and allows you to conveniently remove the baby from the crib and put him back.
Canopy on a stand
The next option is a canopy on a stand. The design consists of a base, interconnected tubes for adjusting the tripod height, and a ring on which the fabric will cling. It is somewhat more difficult to install such a structure:
- First, assemble the frame: it is assembled from all its constituent elements that need to be connected in series.
- Then attach the supporting part.
- Install an oval or round loop.
- Set the structure to the desired height, hang the canopy and straighten it.
How to hang a canopy on a ceiling or wall structure
Ceiling and wall canopies are more stable and safe. Basically, the holder is a strong oval or round wire, firmly attached to the ceiling or wall. Self-tapping screws, small metal rings, etc. are used for this. The canopy material can be attached to the base of the holder using ribbons, ropes, and Velcro, with which the canopy is tied. You can hang a canopy on a ceiling structure by stringing fabric onto an oval.
On the wall, the canopy structure should be placed a little more than 1 meter from the back (side or at the head) of the crib, so that the baby feels comfortable and can easily move around his sleeping place. The material on the base of the holder must be well attached so that the child does not get scared when he pulls it towards himself.
Back to contents
Assembly Tips
If you buy a holder separately, choose universal models that fit all cribs. When purchasing, look carefully at the fasteners: it is better if they are metal.
If the fastening is broken, you should not try to fasten it again, since such a design will not be reliable. When you install the holder in the middle of the playpen, you need to check that it is located exactly in the middle: the thick fabric canopy should be distributed evenly if you do not want everything to fall on the baby.
How to install step by step instructions
Fastening and assembly of the rack takes place in several stages:
- The tripod consists of 3-4 hollow tubes that are inserted into each other.
- The fabric is simply threaded onto a split ring or attached to a closed loop using rings, Velcro or tape.
- A rim with strung fabric is connected to a tripod.
- The canopy is attached to the base of the crib from the side, at the head, near the feet. All brackets, screws and bolts are included in the kit.
- The canopy stand is ready, all that remains is to straighten and drape the fabric.
Important! Not all children need a small intimate space to feel comfortable and protected. Some kids, on the contrary, feel anxious when they are deprived of visibility and sunlight. In addition, heavy draped fabric can impede air circulation.