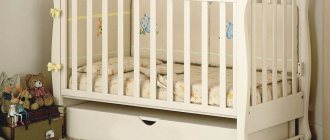
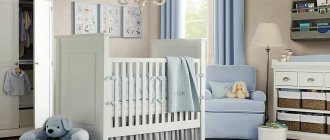
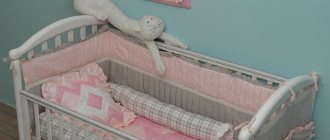
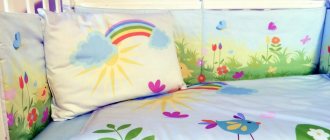
Sides are flat soft products that are placed around the perimeter of the crib to protect the baby from impacts. They are also called children's bumpers. This protection is intended for newborns, one-year-olds and children under 3 years of age. The pillow sides can also be used in the future, for example, as toys. Parents have a wide choice of protective barriers for children. There are 3- and 4-sided options, low and high models. If the sides are small, the child will be constantly in sight, which will allow the mother to remain calm about his condition. Tall options are useful for older children, as they are restless and more independent. Those who want to save money or test their sewing skills can make a children's bumper themselves. High quality materials are available for sale. You can also find many interesting implementation options.
Purpose of the sides
Sides are placed on all sides of the bed. Their main task is to promote the safety of the baby and protect his body from diseases. Bumpers protect the child from falling out of the bed, hitting its elements and drafts. If there is no place to place the bed except next to the window, then the sides must be used. Curious children also love to stick their arms and legs between the sticks. This is another reason for using special devices. The additional significance of this protection is to facilitate falling asleep and comfortable sleep, since nothing will distract the baby. The bumpers perform a developmental function. Multi-colored drawings in the form of people, animals and various objects will become a subject of study for the baby. The child will soon begin to recognize these objects and details in the world around him. He will learn to concentrate. It is important that the picture does not irritate him. Removable parts on the protective pads will develop hand motor skills.
Advantages and disadvantages of hand-sewn borders
Self-made bumpers are more versatile. In the case of manual production, you can ideally calculate how much material is needed for a specific bed. Unlike store-bought products, which often have a specific unpleasant odor, homemade barriers are created from the right material. The uniqueness of the bumper as an educational toy also deserves attention. In addition, they are multifunctional. When the baby grows up and “changes” the bed to a larger one, the pillows will decorate the sofa or play area. They can be crafted with this in mind. The side can be made into a full-fledged decorative detail, made in any style you like. It is selected taking into account the gender and age of the child. The disadvantages, as in the case of factory products, are the reduction of space inside the bed and the feeling of being “compressed”. It is worth noting the complexity of the work process and high time costs, which can be avoided by purchasing a ready-made bumper. In addition, it is more difficult to create an interesting design on homemade pillows.
What fabric to sew from?
The quality of soft fencing pads depends on the fabric chosen. Its main characteristics are density and naturalness. It is necessary to choose “breathable” materials. You need to make sure that the fabric is environmentally friendly and hypoallergenic. Natural fibers are better than even the highest quality synthetic fabric, because it is poorly breathable and can cause an allergic reaction. You should choose among canvases made from cotton. Suitable materials are chintz, calico, linen, flannel, flannel. Before cutting the fabric, you will need to wash and iron it. When choosing a material, you should immediately determine whether such a drawing is suitable or not, whether it will be interesting to the child. Density for protection from the cold and strength are important for fabrics, because small children love to touch and explore all the objects around them.
Choosing fabric for sides
When choosing bed rails, you should start by studying their composition. After all, no one wants the presence of harmful substances to negatively affect the health of the child.
First you need to analyze the fabric of the thing. She must “breathe” to maintain the air temperature in the crib, which, in turn, must influence the baby’s temperature. Also, such fabric is necessary so that if a child rests his face against it, he can breathe relatively calmly. There are several optimal choices:
- Chintz.
- Calico.
- Satin.
Filler selection
In this case, preference should be given to synthetics. Previously, natural down was considered a good option. Nowadays these are polyester, hollcon, periotek, holofiber, synthetic winterizer and foam rubber. The last two materials are more traditional. All of these options make sewing and washing easier. The best option is synthetic winterizer. In products, it is additionally stitched around the entire perimeter to avoid the appearance of lumps. Such pillows wash well and do not lose their properties afterwards. It tolerates washing and foam rubber well. However, this is not the safest material for children, despite its ability to hold temperature well. Holofiber is also worth noting: with the load inherent to the sides, it will not lose its original shape over many years, in addition, it is hypoallergenic. However, it is a relatively expensive material.
You have decided to create the bumpers for your crib with your own hands – where to start?
Still, the creative side of the mind took over, and you decided not to buy something that can be found in everyone, but to make a bumper with your own hands? Then let's take a closer look at all the upcoming actions.
First, let's assume that pillows will be used as a side, in other words, the classic version. In this case, you need to decide on the number of bumpers. It all depends on the desired size of the future product, but the most common volume is 2 pads on the small side and 4 on the large side. Therefore, if you plan to cover 2 sides of the rods, you will need 6 pieces, three - 8.
Next you need to select a filler. Doctors prefer certified synthetic material in order to avoid allergic reactions in the baby, as is often the case with wool fibers. Typically, dense fiber is used to help soften impacts. In addition, it is suitable for children of any age and does not deform when washed. An alternative is padding polyester as a softer option.
Now let’s calculate the fabric format for sewing a bumper for a baby’s crib. As a basis for further calculations, we will take the standard crib size – 120*x60. The sides of the pads are 30*30, and taking into account the allowance - 34*34. A regular piece of fabric is about 160 cm in length. That is, from a single piece of this kind 4 squares will come out. The remaining material can be used to make plain ties, which will later be used to attach the bumpers to the rods.
On a note! By the way, it’s better to buy several different colors, because it will be even more original!
Once you have decided on the size and filling, buy the fabric. It's time to think about one of the main points - its quality. The main thing is naturalness, i.e. the material must be environmentally friendly, without dyes. Softness and hypoallergenicity are also important. Preference should be given to flannel, flannel and chintz fabrics.
Previously, a calculation was given for a protective side with a height of 30 cm, however, this is not the limit. The minimum bumper is 20 cm, and the maximum is as much as you wish. But when choosing, consider the size of your own crib and the opportunity to see your baby.
Types of sides
There is a wide variety depending on the characteristics. Depending on the type of construction, there are removable and non-removable sides. The first subtype is much more common and is characterized by a greater choice of placement methods. Fixed ones are either solid or with openings. This type of protection will completely protect the child from the possibility of injury. Products can be intended for boys or girls. In the first case, they are made in cool tones or yellow. For girls, any color is suitable, except dark, primarily pink and pastel shades. According to the method of fastening, there are 2 types of protective pads: with ties and with Velcro. In the first version, the fastening elements are located at the edges of the product. In the second case, the clasp is hidden, so the baby will not pay much attention to it. The sides of the crib also differ in height (high, low). There are bombon models with soft squares and a braid, which is easy to make yourself.
Bumpers for a crib for newborns 65 photo ideas
We bring to your attention a photo gallery of children's crib bumpers for inspiration and ideas.
Step-by-step master class
The main stages of making a side for a crib with your own hands:
- Calculation of the number of products, their sizes.
- Preparation of tools and materials.
- Cut out the fabrics.
- Sewing.
- Decoration.
First you need to decide on the role of the protective partition. Preferred height is key. The same applies to the configuration: solid around the entire perimeter or on 3 sides, so that the child can always be seen from one side (for example, from the side of the bed where the mother sleeps). The number of elements is also important in order to provide all the amenities for the baby. To create the product you will need fabric and filler, as well as all the tools used for sewing. The fabric material is carefully prepared: ironed and, if necessary, washed beforehand. Next, patterns are made. They are then transferred to the material. But if you have enough experience, the required dimensions are immediately applied to the fabric. After this, the sides, ties and decorative elements are sewn. The process will be much like making pillows. At the end everything comes together - the product is ready.
How to calculate the number of products and their sizes
It is necessary to determine the optimal height of the side. For babies under 4 months they are made low. This is to ensure that parents have enough visibility. For children struggling to stand up, more secure tall options are needed. With a bed length of 120 cm and a width of 60, the total length will be 360 cm. The length of the protection is also calculated depending on the location. This figure for U-shaped sides is usually 190 cm. The height of the bumper is a matter of priorities. It is recommended to choose a lower side so that the baby is visible and can grab the bars when he gets up. A height of 30 cm can be considered optimal. The side is made so that the baby cannot stand on it. As for the number of products, the classic protection consists of 4 parts: 2 with a height of 30-55 cm and a length (width) of 60 cm, 2 of the same height and a length (width) of 120 cm. Thus, a barrier of individual pillows around the entire perimeter is high 30 cm includes 12 elements.
The whole thing will take up to 3.6 m of fabric, but it’s better to take more for decoration and the ability to correct mistakes!
Required materials and tools
First of all, you will need fabric and filler. It is preferable to choose natural canvas. Among the fillings, it is better to choose synthetic roll filling. It is hypoallergenic and washable without loss of properties. You will need a sewing machine. However, if you have the skills and patience, you can sew the borders by hand. You will also need such devices and tools as tailor's pins, a long ruler or “centimeter”, a needle, and scissors. For cutting, you should get a marker or pencil, as well as soap or chalk - one of your choice. You need paper to create patterns, but with enough experience you can do this directly on the fabric. You also need threads in the same color as the main fabric. Other necessary accessories: zippers or buttons, ribbons, braid, decorative elements (felt appliqués, lace, etc.).
Preparing and cutting fabric
You need a clean, ironed cloth. Patterns are made in advance, and then they are carefully transferred to the fabric. Leave 1-1.5 cm for the seams. For bumpers with covers, you will need to cut two sets of fabric - a lining and one for the covers. If rolled padding polyester is chosen as the filler, then cutting is carried out in the same way. The dimensions of the samples, however, are reduced by 1.5-2 cm (depending on the thickness of the material) so that the filler fits into the case. If the sides are made in the form of pillows, cutting will not be necessary. You just need to cut out squares of a certain size. For an ordinary rectangular crib you need twelve pillows measuring 30x30 cm. Pillows in the form of houses can be made according to the same pattern. The size is selected depending on the various parameters of the crib. The dimensions of the stock are carefully measured so that necessary adjustments can be made if anything happens.
Sewing process
These works include 3 processes:
- Sewing the sides themselves.
- Creating ties.
- Sewing decorative covers.
The work begins by folding the lining fabric from the outside inward and sewing the cover together. A hole is left for the filler. The cover is then turned inside out and the required material is inserted into it. The hole is carefully sewn up, ideally this is done by hand and with a hidden seam. This procedure is carried out for each security element. The ties are sewn using 2 methods - regular or with Velcro. Ribbons and braid can serve as simple ties. Basic material will also work. The number of ties and their sizes is an individual matter. As a rule, two dozen fasteners are required: 4 for the headboard and footboard, 6 for both sides. It is recommended to sew more fasteners for a more secure fit. If you are creating pillow sides, then at least 2 ties are needed for each. In the case of decorative covers, you need to mark in advance the location of the fasteners and baste them.
How to sew a frill into a border
To do this you will need to know some nuances. Firstly, for the frill you will need a strip of material with a width of 7 to 15 cm. The length can be changed if necessary. It should be at least one and a half times larger than the part. In this case, the folds will not be very voluminous. If the length of the frill exceeds that of the part by more than 2 times, the pleats will be fluffy. Using a sewing machine, the frill can be easily assembled. The ruffle will need to be assembled by hand. For this, a regular needle is used. First, a needle and thread of the required length are taken, then the material is laid out like an accordion and pierced. After this, all that remains is to distribute the pleating along the entire length of the thread. For instant basting, you will need to place the frill between two layers of material. When making the sides, it is better to make a frill for all sides of the crib and connect them at the corners.
How to calculate the number of products and their sizes
There are recommendations regarding determining the parameter for 1 element depending on the type of soft fencing structure. This makes calculations and presentations easier for beginning needlewomen.
How to make calculations and make a choice:
- If the fence consists of pillows, then you need to make 2 pillows on the headboard and a symmetrical part of the bed. There can be 4-5 pillows on the sides.
- Classic sides consist of only 4 parts, so it is important to know only the length and width of the sides of the crib.
- If you make shaped products, then focus on the quantity and parameters on pillows.
You might be interested in this: Creating a pattern and instructions for sewing a corset with your own hands
Size according to diagram
Much depends on the shape and dimensions of the sleeping place and crib. Therefore, you first need to take measurements, and only then ask the price for the quantity and size of each element of the soft furnishings. Take measurements from the crib. You need to write down the height, length and width parameters of each piece.
Methods for decorating the finished product
For this purpose, frills, appliqués, large buttons, bows, ribbons, etc. are intended. If the pillows are decorated along the entire length with lace or frills, then they need to be basted or sewn into the main seams. The decor can also be located on the front side of the case. The bumper and the frame next to it are also decorated with applications, patterns and designs. For safety reasons, the sides are made very soft and decorated with fabrics of similar softness (for example, felt). Such products are also called shockproof boards. Stickers with designs, including furniture stickers, are also used to decorate sides and rods. They should be placed on the outside of the pillows and the inside of the bars of the crib to prevent the child from unhooking the parts and being in danger because of this. Small objects like pebbles and rhinestones are not suitable for decorating borders.
How to wash the sides of a newborn crib
You cannot do without maintaining cleanliness. The sides are washed regularly along with a change of linen, at least once a week. It doesn’t matter whether they are washed by hand or in a washing machine. A good filler like foam rubber will not lose its shape, will not get knocked down or damaged.
Synthetic padding is recommended to be washed by hand. When washing in a machine there is a chance of lumps forming. Children's hypoallergenic powders are used for washing. Washed bumpers are dried on the street or balcony. Foam rubber takes a long time to dry, so there is no rush to return such bumpers to the crib until you are sure that they are completely dry.
Advice! For machine wash, set to delicate cycle.
Master class on sewing pillows in the shape of animals for sides
There are many interesting options for making bumpers in the shape of animals. These can be exotic African animals or animals living in temperate climates. Popular varieties of bumpers are “cat”, “elk” and “owl”. To make such a beautiful bumper, the first thing you need to do is prepare tools and materials. This is a standard set of pencil or chalk, scissors, pins and thread. Fabrics are bought with interesting patterns, in several different versions. Patterns of parts of the face are also created for transfer to fabric. They are made large and expressive. The animal's body is made of one or more parts. It is recommended to combine monotonous and variegated fabrics. When the elements are sewn to the front part of the product, the connection of all the fabrics and the filling of the cushion-side begin. At the very end, ribbons are attached to the bumper. When the baby grows up, they can be removed to use the pillow as a toy.
Cat shaped pillow
First we make a pattern and transfer it to the fabric. The samples should show the dimensions of the cat itself, its ears, nose and cheeks. On the fabric, to the pattern of the upper body, you need to add 1 cm around the entire perimeter for allowances. The lower part is made measuring 34x17 cm, taking into account allowances. Using chalk or a disappearing marker, draw a mouth, nose, mustache, and eyes. Symmetry must be maintained. Next, we sew the bottom strip to the upper part of the body and iron the seams in one direction. Then the nose, cheeks and ears are cut out of felt. The details are sewn on with a small zigzag. We embroider the mustache, mouth and eyes with thread using a straight fine line two or three times. We fold two 50-centimeter ribbons in half and attach them to the product with pins. The back part of the product is cut out in the same size as the front. Then they are connected, the pillow is turned out and stuffed. The hole is sutured in a hidden way. The cat should be decorated with bows.
Elk pillow
You will need to make patterns for:
- spout;
- ears;
- horn;
- heads;
- lower body (less than the head).
You will also need cotton material in 2 colors, white fabric, satin ribbons 60x2.5 cm, filler, floss threads for the mouth and eye, pencil or tailor's chalk, scissors and pins. First of all, the body-shaped patterns are attached to white fabric and the necessary element is cut out with scissors, taking into account allowances. You need two of these parts. Horns, ears and nose are cut from various fabrics (felt, etc.). There is no need to make allowances for the nose. Then a white material is taken in the form of a head and eyes and a mouth are made on it using floss threads, and the cut out nose is also attached and stitched. The lower part of the body (made of colored material) is carefully sewn to the head. Then the horns are attached to it and its upper part is stitched, including the length of the edges of the horns. The next thing to do is pin on the ears. After this, the tapes are attached. The halves of the product are sewn and filled.
Owl pillow
To sew an owl border, you will need a beautiful colored fabric (you can take green), preferably with a repeating pattern. For one element, we take a canvas measuring 50x75 cm. It is cut into two parts of 50x37.5 cm. Squares of 36x36 cm are drawn on them, which will “go” onto the owl’s head. The remaining areas are needed to create the ears; they will also need to be drawn on the fabric. Next, you will need a piece of white fabric 27x20 cm to create the eyes. They are made with one figure, with a transition. The wings are cut from a material of a different color. Gray goes well with green. You can take calico, gray with white polka dots. A rectangle 14 cm wide and 16-17 cm long is marked on it. An arc is drawn on this fragment. The beak can be cut from the same material. It is placed under the eyes. All parts of the front side of the pillow are attached and stitched using a sewing machine using a zigzag seam. Then the eyes are drawn with a pencil in the form of corners lowered down. Then they are decorated with gray threads. At the end, the front side and the base are connected and filled with padding material.
The process of sewing classic sides
After all the preparations, determining all the pros and cons, one unresolved question remains - how to sew the sides into a crib using the classic version of the shape and size? Classic bumpers consist of 4 separate parts, where the longest ones are located along the crib, and the remaining 2 are located at the headboard and end. These are rectangles that are attached to the corner bars of furniture.
If we consider the general algorithm, then the step-by-step instructions will be the following steps:
- Patterns are made from the very beginning. Transfer the dimensions onto paper and draw out the blanks for transfer to the fabric.
- Prepare the base for the filler. Sew a rectangle on three sides. After the 4th, add filler. Sew up the part completely.
- Having removed the parameters from such elements, sew covers for them. You need to think about the clasp. Usually these are tapes or Velcro.
- Sew tape or Velcro onto each corner of the parts, with the help of which the parts will be attached to the rods.
Pattern for sewing classic skirts
To somehow diversify the simple shapes, you can sew a ruffle from the same fabric along the top of each part or come up with similar other decorative inserts. To make the task easier, you can use a special scheme.
How to sew bumpers for a boy
For a boy, you should choose cool tones of green, blue, cyan or purple. Additionally, you can use various additional materials. Usually these are ribbons and a small amount of other fabrics. Several design options:
- There are no restrictions regarding the choice of design. You can make a fence in the form of houses with a fence.
- The ideal option would be sides in the form of cars or a steam locomotive.
- Animals will become a universal design. These could be dogs, hippos or pandas.
You might be interested in this Master class on sewing skirts from old jeans
Option for a boy
The complexity of tailoring does not depend on the choice of a more original shape or design.
How to sew bumpers for a girl
When you sew the bumpers for a baby crib yourself, you definitely choose the design and color yourself. If this “gift” is being prepared for a girl, then you need to take into account several points:
- Typically, pink or powder-colored fabrics are used.
- Satin, lace, and satin ribbons can be used as finishing.
- Girls respond well to images of animals, so you can make fences in the shape of different animals or simply sew faces on classic borders. Usually this is a cat, rabbit, elephant or cartoon character.
- The fences, which are made in a royal theme, look original.
Option for girls
The main thing is to choose delicate colors and natural materials. Additionally, pay attention to the preferences of the baby.
Sides - bombons
The product will consist of pillows 60x30 cm with small squares measuring approximately 10x10 cm. If you plan to protect the crib on 3 sides, you will need 4 pillows, and if on 4, then 6. The bombon side squares are made from pieces of 17x17 and 10x10 cm. In the first case it is a colored fabric with a pattern, in the second it is white (you can take calico). Cuts of about 5 cm are made on small square fragments. The edges of large colored pieces are attached with pins to small ones, in places where the corners of both fabrics meet. Next, folds are formed, which are also secured with pins. Each side is stitched at a distance of 0.5 cm from the edge. This is how 18 parts are made for one 60x30 cm pillow. The squares are sewn together and stuffed with filler on the back side. It is necessary to alternate elements of different colors (ideally, at least 5 color options are used). The rest of the pillows are made in the same way.
It is better to use ribbons as fastening elements; they should be placed at a distance of 30 cm from each other.
Braided side braids
It is better to choose something dense as a fabric, for example, cotton velor. Holofiber will perfectly cope with the role of filler. 1 braid 120 cm long will take approximately 1 kg of this material. First, the complexity of the product is determined: the side braid can be made not only in 3, but also in 4 strands. It's worth trying a more complex option. The length of the strands is calculated based on their number. Since the side of the crib is usually 120 cm long, a strand of braid of four elements will need 147 cm (120 cm multiplied by a factor of 1.22). The required width is 19 cm. All 4 pieces of different colors are connected and then folded in half. These actions are performed using a machine. Next, the resulting sleeve is tightly placed on a 1.5-meter pipe and holofiber is stuffed into the far end of the material with another, thinner pipe.
Further actions:
- The free end of the fabric is sewn up with thread around the circumference. The closed one is steamed and stitched in the same way.
- Creating a braid begins by forming a center from the 1st and 3rd joints.
- The two remaining free ends are connected with a thread.
The length of the braid can be adjusted by increasing or decreasing the tension.
Features of sewing side bolsters
Fabric for rollers is taken in 2, 3 or 4 different colors, including 1-2 canvases with patterns. It is better to choose holofiber as a filler, since the shape of the sides implies a strong impact on the product. If the crib has the usual dimensions (120x60 cm), then the shorter ones are made 60 cm long, and the longer ones - 100 cm. The optimal width of the bolsters is 12 cm. For 60-centimeter products, a rectangle of 60x40 cm and a circle with a diameter of 13 cm are required. Accordingly, for 100-centimeter rollers you need a 100x40 cm rectangle and the same circle (13 centimeters). From the wrong side we sew the rectangle into a ring with the large sides. Next, a circle is sewn to one of the holes of the roller. Another circle is attached to the other edge, leaving 5-7 cm open. Then the product is turned inside out and filled with stuffing. The hole is sewn up by hand.
Types of sides for a round, oval or classic crib
The choice of types of bumpers is determined by the shape of the crib and the overall tone of the bed linen.
It’s not so easy to make a choice among the abundance of assortment in stores
You can choose four-sided sides - they conveniently cover all the walls. Half covers will not cover everything, but only part of the surface. Soft wall-pillows have differences in design and shape, quality, and number of pillows in the set. There is also different filling inside, and different types of fastenings are offered.
Popular geometric shapes: square and rectangle. Such textile accessories will fit perfectly into a standard rectangular crib. In this case, the rectangular and square sides will fit tightly to each other, without gaps.
The convenience of square walls lies in their ability to be combined with each other
The original designs of the pillows are interesting: animals of different shapes, fairy tale characters, figures, symbols. Their shape fits the description of “square or rectangle”, which is undoubtedly convenient.
Dimensions and design variations of the shape of the sides of the crib
Mostly sets of 2 or 4 parts are offered. If the baby is overly active, then protection on each side of the walls will provide excellent protection from bruises. The differences in such textile devices are not limited to the number of pillows in the set: different sides have significant differences in wall thickness. The sides are a kind of bumpers that should fulfill their function and not interfere with the comfortable existence of a tiny person.
Flat pillows are suitable for babies
For older babies, you can purchase a bumper that is more voluminous, and it is also convenient to use as a mini-chair. The height and width of different walls differs. For a lying baby, eye contact with the mother is important, which is why low sides are created. The child will be able to look at the outside world without any problems. But the high walls will be useful for nimble children who have already begun to sit up and move along the crib.
If possible, you can purchase both a low and a high set in advance
The width is also variable. When choosing sides for a standard crib with a length of 80–95 cm and a width of 45–50 cm, there are no difficulties. For a round or oval crib, choosing a set that suits all parameters is somewhat more difficult. To do this, darts corresponding to the size of the bed are sewn into the kit. The height usually matches the height of the walls.
For oval cribs, cushion-shaped sides without much volume are well suited.
The round crib looks great in the interior, and a wide selection of textiles allows you to choose the best for your baby
Fabric and filling material for crib bumpers
The fabric for external decoration should be only natural and not difficult to care for. High-quality material will be resistant to mechanical damage. Ordinary, well-proven fabrics exclude any synthetics from their range: only calico, cotton, flannel, chintz or flannel. Synthetic material can cause an allergic reaction in the baby and interfere with air exchange.
The fabrics listed above are pleasant to the touch for both the child and his parents.
Unlike natural materials of external textiles, the filler is often artificial. The leader in the list of fillers is synthetic winterizer: its low price and ease of maintenance and care are pleasantly complemented by its drying speed and excellent recovery after washing. Foam filling has similar characteristics. Do not worry about contact of children's skin with foam rubber or padding polyester. Such fillers are often placed in a separate case.
Fiber is more expensive: it is denser, more voluminous, and serves well as a filler for both babies and older children. Sometimes natural wool is used. Its advantages include the ability to retain heat, and its disadvantages include the possibility of an allergic reaction in the baby.
Sides in the crib for newborns according to the color and print of the pillowcase material
The design is selected only according to the taste preferences of the parents: it will not be difficult to find bumpers that fit perfectly into the color scheme and interior of the children's room.
The choice of textile accessories is truly great - young parents can spend a lot of time before choosing a set for the crib
The colors should ideally be perfectly combined with the tone of the bedding and not contrast with the design of the room. Although, if desired and the special taste of the family, you can choose completely unusual shades and combinations. The main thing is that these are not irritating colors. If the apartment does not amaze with its wide space, or the children's room is combined with the parents' bedroom, then it is better to stick to neutral tones and discreet patterns - this way there will be no obvious emphasis on the children's area in the room.
Advice! The sides look good, they match the tone of the curtains on the windows.
Finding the perfect color combination, as in the photo, is an art.
Options for soft sides according to the method of attachment to a crib
Safety can only be ensured by securely fastened bumpers. Several types of fastenings are offered: Velcro, ties, lock, buttons, hooks, buttons.
Important! The fastening must be strong, otherwise the awkward movement of a sleeping baby may cause the side to fall on his face.
It is better if the fastening is invisible. You should always take into account the ingenuity of young children: loosely sewn buttons can be torn off and happily swallowed. But there will be no pleasure for parents at all.
Additional details of pillow sides for a baby crib
An additional element, although optional, is the canopy. This is not just a decorative curtain, but a kind of light separator of the crib from another area.
Mosquitoes do not fly through the canopy, and it also protects the sleeping baby when the windows are open.
The second interesting addition can be called pockets. They are within the child’s access area, and he is interested in putting the contents out of them and inserting toys into them.
How to sew pockets for a crib
You will need the following materials:
- 2 pieces of tape 1 meter long;
- padding polyester, 60×50 cm;
- striped fabric, 60×60 cm;
- 2 pieces of white fabric, 100x60 cm each.
The width of the pocket is consistent with the characteristics of the bed. Usually it is 60 cm. The depth can be made a little smaller, about 50 cm. We fold the striped fabric in half and iron it. We do the same with the white material. Then we put striped fabric on the folded white fabric. We place both with the free edges down. Then we sew the product along the borders of the striped fabric, but leave the line in the middle free, only dividing it into two halves. Next, the back element of the pocket is sewn. It is reinforced with padding polyester. We fold the fabric over this filler and pin it. We sew the top and sides. Then we fold both main parts right sides inward and stitch the bottom and sides. After this, we turn the product inside out and straighten it. At the top along the edges we attach 2 ribbons. Now you can put toys and other items into the product.
