How to repaint lacquered furniture with your own hands
Furniture tends to lose its attractiveness over time.
To update a product, many resort to painting it - this is an inexpensive and effective method of correcting external defects. In addition, when repainting, you can transform interior items beyond recognition, make them original in appearance, and change color. All owners of antique cabinets with drawers, chests of drawers, tables and other products should figure out how to paint polished furniture. The savings will be significant.
Materials required for painting lining
The following equipment is required for work:
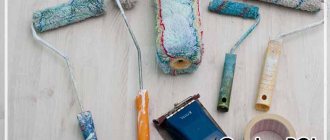
- Roller;
- Drill operating at low speed;
- Construction mixer for paints;
- Plastic bucket with a volume of about 30 liters;
- Rags;
- Polyethylene for covering furniture.
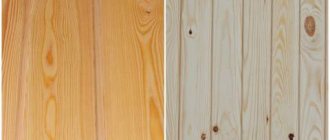
First of all, we need to cover the floor and furniture with a protective material to avoid damage or damage. Next, we calculate the volume of color required for work. It's easy to do. We multiply the area of the required surface by the paint consumption per square meter (the manufacturer indicates this information on the can), and the finished figure is displayed. If all the required paint is not in one can, but in several, or even in dry form in bags, it is advisable to move everything into one container. This is done so that the color of the lining is uniform, without the slightest shades. The next stage is the preparation of the lining itself. It is very important to do the work carefully and efficiently so that the paint goes on evenly and the wood does not begin to rot in the future.
The first step is to clean the boards from accumulated dirt and dust. We do this using fine texture sandpaper. Movements should be circular, smooth, aimed at making the surface perfectly smooth and even. After cleaning, the lining should be treated with stain. You can make it colorless, or you can have a lightening effect. Stain is needed to extend the life of the boards, and it is quite simple to use. If you have a tree in front of you that has already been painted, first you need to determine the condition of the old paint. If, by all indications, the paint is still suitable for use (has not changed color, has not peeled off, or cracked), then we only need to wash the surface of the wood with a soda solution (2%, dosage: 10 liters of water, 300 grams of baking soda). If the paint has already become unusable, you should not start laying the next layer; it is necessary to completely eliminate the outdated coating.
After stain treatment, protective agents are applied.
Next, putty is laid. Please note that you can only use putty that says it is for use on wood. It is applied with a plastic spatula, not iron, since the latter can damage the top layer of wood.
To further protect the lining from the effects of the external environment, the wood is treated with drying oil. To enhance the effect, you can add a pigment such as mummy ocher, red lead and others to the container with it. After the lining has dried, it must be coated with a primer, which has the properties of protecting the material from sudden temperature changes and is a fixative for the putty.
Note! Some primers are not suitable for use on wood, so check with your retailer before purchasing.
The final layer, after the primer, is applied with a translucent antiseptic. It will protect the wood from various fungi, mold, and high humidity. It is applied using tools such as a spray gun, but can be done with a regular roller or brush.
If you like the texture of wood and want to preserve it, it is best to use translucent paints. The properties of the paint will not change if you paint the wood with matte paint. It all depends on the preferences of the owners. Lining requires a special painting technology. It is advisable to use a brush and continuously move it strictly from top to bottom. Thus, the layer will be thin and even, without drips or thickening. If using a brush is inconvenient, you can use a small roller.
The brush should be applied only once; when applying paint repeatedly to the same place, it will be very noticeable. It is advisable to apply color with the tip of the brush, rather than with the base - this will be more accurate and will simplify the cleaning process later.
If you paint the wood with two thin coats of paint instead of one, the finish will be much more durable. Be sure to wait until the first one is completely dry before covering the surface with a second layer. In order to avoid streaks, the lining is covered with a final layer of paint.
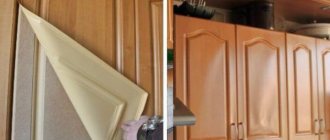
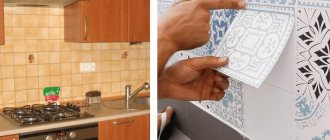
Painting window frames or moldings will require you to use a small brush, no more than 5 centimeters wide. Otherwise, painting will be inconvenient, and in addition, streaks and stains will remain on glass and other surfaces. Often the most difficult areas to paint are window frames and door frames.
Follow the same advice and go slow and careful. To simplify the task, you can seal the doors and glass with masking tape. It does not leave sticky stains and will protect important areas from contamination. The wider the masking tape, the better. If you don’t have it on hand, you can use a piece of plywood or cardboard that is glued to the window with a soap solution.
If you are not a professional in this field and do not know how to paint varnished wooden paneling, you should consider these points.
Most often, all colors are applied at temperatures from +5 to +30C. Low temperatures will cause drips and freezing (water based ones). High temperatures will speed up the drying process, which can lead to uneven drying and, as a result, an uneven paint layer.
An excellent substitute for varnish is wax. It will give the surface a pleasant semi-matte shine, but you should be aware that it has a complex application technique.
Paints must be diluted to the consistency of rich milk. If you make the paint thicker, it will spread in a thicker layer and give the wall drips.
To prevent paint from dripping from your brush, hold it perpendicular to the surface and scoop paint onto the tip of the brush.
Background for painting furniture
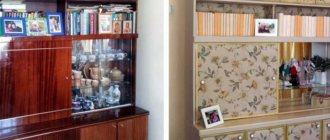
It is not difficult to identify problems with old furniture - they are clearly visible from the outside. By the appearance of the products, you can determine that they need painting: the top layer of polish begins to separate, and the coating itself darkens. During long-term use, the entire glossy surface of the wood becomes covered with mesh and cracks. Also, chips, scratches, abrasions, and other defects may appear on the furniture. If the furniture is antique, minor defects do not change its value. But such problems greatly spoil ordinary interior items.
A change in appearance for the worse is the first sign that the furniture requires restoration. You can repaint varnished furniture yourself, because hiring a specialist will cost much more. Even at home, it is possible to paint objects so that the wood structure remains the same. If desired, the texture of the furniture can be hidden by giving the base a new color - dark, white or even bright.
How to paint polished furniture?
To create cozy and comfortable living conditions in the apartment, furniture is used, which should combine practicality and attractive appearance. During use, it loses its beauty, so the homeowner has a choice: buy new furniture or restore the old one. Of course, the first option is more practical, since unlimited possibilities open up, but they require large financial investments. If you don’t have extra money, but you like the furniture, you can restore its appearance by painting the polished surface. How to do this correctly at home? This is exactly what we will talk about in this article.
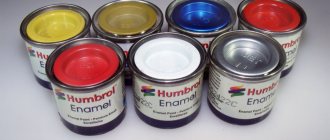
Selection of paint and additional materials
To make the product look beautiful, you need to buy a good paint and varnish material. The product must be suitable for wood, because the durability of the new coating depends on the quality of the paint. It is also worth considering personal preferences - the effects of different paints may not be the same. For handles and other metal parts, you should additionally purchase metal paint, otherwise they will quickly peel off.
Paint and varnish material for wood must have a number of properties:
- moisture resistance;
- resistance to abrasion, rapid wear, dirt, mechanical influence, and staining when exposed to chemicals;
- frost resistance if the product is used outdoors;
- long service life while maintaining original properties.
After removing the old varnish, you can apply almost any paint effect to the base. The new coating will be glossy, matte, semi-matte, you can make it completely transparent with or without color. It all depends on personal preferences and how well the product fits into the overall interior. If you decide to repaint the furniture white, it is better to buy translucent paint - matte will immediately give the products an out-of-date look.
Here are the most common types of paints for wood products:
- acrylic - water-based, perfect for natural wood, veneer, plywood and even laminate, MDF;
- enamel with a metallic tint - intended for painting fittings, as well as for giving the wood an original tone;
- varnish - usually purchased for painting an old coating in order to renew it.
It happens that you have to varnish or paint furniture that comes into contact with hot objects or is used in hot rooms. Then the paint should be chosen with fire-retardant properties. Pre-treatment with a primer is also allowed to increase the level of heat resistance.
After purchasing paint, you should prepare a number of auxiliary materials and tools. To apply paint and varnish, buy a roller or brush; large areas can be painted with a spray gun. For sanding, purchase an emery sheet or use a sanding machine. Removing stubborn varnish will require the use of a scraper or wire brush. If you decide to heat up the old coating, you will have to purchase a hair dryer.
Additional resources you need to prepare:
- primer;
- putty;
- varnish for varnishing after paint (if required);
- detergent or washing powder;
- varnish thinner;
- antiseptic (etchant);
- insect repellent (if required).
Paint selection criteria
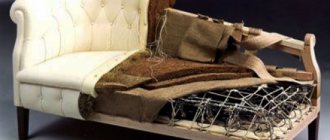
Furniture restoration
Solving the question of how to paint lacquered furniture begins with the selection of a paint and varnish substance.
The paint must meet certain requirements.
Not only the appearance of the structure, but also the durability of the coating will depend on this.
Experts find it somewhat difficult to choose a suitable substance for treating a varnished surface.
But there are still some recommendations to resolve this issue.
When choosing a paint and varnish substance, it is worth considering the type of coating of the structure. If a wooden chest of drawers can be restored, then it is worth using wood paint. For metal products, you will need a metal substance. Compliance with this rule will create a resistant and durable coating.
The paint used to coat varnished wood has serious requirements. She must be:
- waterproof
- abrasion resistant
- resist mechanical stress
- durable
- frost-resistant
The desired end result is also important. Depending on the type of substance used, the coating can be glossy, matte or semi-matte. Transparent paints and varnishes should be included in a separate group. Here the furniture is varnished.
When choosing a paint, it is worth considering the features of its composition. Today the following substances are available on the market:
- Acrylic paint. A universal substance that is used to finish any surface. Of course, it is best suited for painting veneered furniture.
- Varnish or enamel. Recommended for use in cases where there is a need to renew the coating of lacquered furniture.
- Metallic paint. Using this material you can give your furniture an original silver color.
For furniture restoration, it is recommended to use paints that can retain their properties for a long time. This is especially true for the appearance of the coating.
Coloring stages
All work is carried out in several stages. It is not recommended to cover furniture with new paint without removing the varnish - this will greatly deteriorate the quality of the finished surface. It is better to carry out the restoration in accordance with the advice of professionals, which will make the result beautiful and durable.
Surface preparation
Removing the old coating is the main stage of preparing furniture for repair. You can remove varnish in different ways - mechanical, thermal and chemical. Experts prefer to use a hair dryer for thermal removal of varnish. The procedure is as follows:
- put on a protective suit and gloves, not forgetting about glasses;
- run a hairdryer over a small area of the surface, warming it up well (instead of a hairdryer, some use a blowtorch, but this method requires extreme caution so as not to damage the wood);
- take a spatula or knife and scrape off the varnish coating.
The mechanical method is more labor-intensive. You should proceed like this:
- remove drawers from furniture, remove all fittings;
- Wash fasteners, handles and other accessories well with soapy water, use soda if necessary;
- wipe the furniture with soap and powder to degrease it and remove dirt;
- rub off the varnish using a scraper, coarse sandpaper, or a metal brush;
- sand the surface with fine-grain sandpaper or a sander.
We fix minor defects without removing old varnish
There are several ways to restore polished furniture if there are minor defects:
- Dull color and minor stains can be removed using a product made from orange oils and intended for wood care. To ensure that the product is distributed evenly, it is applied using a spray bottle, after which you take a cotton cloth and rub the surface.
- To get rid of stains, use a retouching marker, wax, or denatured alcohol. At the first stage, the surface is degreased using a weak solution of dishwashing detergent. After the moisture has dried, apply alcohol to a cotton swab and wipe the stains. Deep scratches can be removed with a marker. To restore shine, apply wax to the surface and rub it with a rag.
- Irregularities formed by small scratches are cleaned using a manicure file.
- If the wood is swollen as a result of moisture, rub the swelling area with a mixture of olive oil and salt. Leave for 30 minutes. During this time, salt absorbs moisture, and olive oil makes the wood fibers elastic. When the mixture is dry, remove it, apply wax and polish.
- Chips are removed using wood putty. The material is applied to the chip and the surface adjacent to it. After drying, the coating area is sanded using fine-grain sandpaper.
To refresh the polish, you can use the following solutions:
- flax oil, turpentine, vinegar in proportions 2:2:1;
- turpentine, alcohol, 10% soap solution, drying oil, shellac, water in proportions 25:15:1:5:4:45.
Pay attention to: How to paint a chair at home
Main difficulties and mistakes
Below are the mistakes that beginners most often make when repairing lacquered furniture:
- partial removal of varnish - if you leave pieces of the old coating, the appearance of the new one will be spoiled;
- improper dilution of paint - you should carefully read the instructions so that the coating is of good quality, otherwise drops, bumps or streaks may appear on it;
- failure to adhere to the drying time - touching or using furniture that is not completely dried will lead to the formation of unsightly stains;
- ignoring proper preparation - lack of sanding or puttying of furniture will cause defects to appear on the new coating and impair adhesion.
How to prepare the surface?
First, the surface is prepared for applying paint. The instructions involve the following steps:
- We remove all the contents of old furniture, eliminate doors and drawers, as well as all fittings.
- We clean the fastening parts with a soap solution, after which we should degrease the entire surface of the structure and wait until it dries completely.
- We remove the old polish and varnish layer using a wire brush, scraper or solvent (it is recommended to carry out this procedure at least three times to achieve the best effect).
- In industrial conditions, at this stage the surface of the painted piece of furniture is sanded and minor defects are removed. At home, you can use sandpaper and apply an antiseptic.
- Next, we proceed to the primer; when it is completely dry, the surface should be sanded again until rough.
This is the main thing you need to know about the preparatory stage of painting lacquered furniture. Next we will talk about the process of painting this kind of surfaces.
Tips and tricks
Some craftsmen try to paint furniture without removing the old varnish. This can be done if there is not the slightest chip or network of cracks on the coating. It is worth first applying paintwork to an inconspicuous area, and evaluate the result after drying. If the paint lays down evenly, there are no drips or build-ups, you can paint the rest of the surface. Unfortunately, this rarely happens, and in most cases, old furniture does not look its best. If you want to get a really high-quality item, you should remove the varnish and carry out all the work according to the described technology.
How and with what you can paint furniture
Recommendations for painting and varnishing furniture at home with your own hands, tips for choosing varnishes and paints
Sometimes a happy time appears in our lives when we can allow ourselves to be creative. For example, paint old furniture and give it a new life, or use new, standard furniture to make a masterpiece of furniture art.
Take a closer look at the furniture and be grateful for the years you have lived with us, with admiration for the nobility of forms and style and with repentance for neglecting it.
In order for the furniture to be aesthetically attractive and last a long time, its surface requires a finish that will highlight the natural beauty of the wood, and perhaps delight you with the color of forest moss or the purple of ripe pomegranate. And besides, it will definitely protect it from adverse effects during operation.
This material will tell you about what and how to paint furniture at home without spending a lot of time and effort.
How to paint an old cabinet with your own hands
Furniture is one of those interior items that are purchased with the expectation of long service. There is no need to throw away used furnishings if, after repairing the cabinet, drawers and fronts, they no longer fit the interior or simply require updating. If the structure is strong and functionally satisfactory, it is enough to know how to paint an old cabinet with your own hands so that it can serve again and delight you with its appearance.
Cabinet painting process
It is necessary to start painting the cabinet in a well-ventilated area, in which there should be no dust or debris left. The floor around the cabinet must be protected with film or old newspapers, and the same applies to the furniture around it. It is best to open the windows immediately so that the smell of paint does not disturb everyone in the apartment. The process of painting a cabinet with your own hands is as follows:
Options for painting the cabinet with a roller and brush.
- first the surface must be covered with a thin layer of light paint; The paint should not be too thick or have dried pieces. It is recommended to dilute a composition that is too thick with water in the proportion specified by the manufacturer. A thin layer of light-colored paint will allow you to see the structure of the wood. This condition suits the Provence style. To get this effect, the paint needs to be diluted as thinly as possible;
- if you need to create a denser layer, then thinning the paint is not recommended, since the surface will be uniform, dense, and the structure of the wood will not show through; The next layer is applied only after the previous one has completely dried;
- when the preliminary painting with a light tone is completed, you can begin painting in the main color; The areas that need to be protected from paint are first taped with masking tape, and the remaining areas are painted with a roller or brush using the same method as the previous ones. It doesn't take much time to paint an old cabinet;
- The drying time of the paint coating will depend on what kind of paint was used. The time frame for complete drying is indicated by the manufacturer; it usually takes a couple of days;
- Afterwards, 2-3 layers of matte varnish must be applied to the surface, which allows you to perfectly protect the furniture.
The varnish is applied not with a brush, but with a foam sponge, using light blotting movements. The varnish must dry completely, only then can you begin assembling the cabinet, hanging the doors, and replacing all the bedside tables.
Painting an old cabinet doesn't require a lot of work, but you must first properly prepare the surface. This often takes much longer than subsequent restoration, since you will have to completely remove a layer of old paint or varnish, treat the surface, clean it, and sand it. After this, you need to apply several layers of fresh paint of the required shade, cover with a layer of transparent varnish.
Furniture decor is creativity that does not like fuss. You've been thinking for a long time about how to update an old wardrobe, but you were afraid of ruining an out-of-fashion or familiar piece of furniture. Let's look at different options, ideas and techniques and choose something for ourselves. Simple wardrobes and sliding wardrobes may have similar decor, but as for a simple old wardrobe that has lost its former luster: you can make a unique piece out of it.
What you need for painting
The most time-consuming and financially consuming process is preparing an old cabinet for painting. You may need:
- Sandpaper of different grits for sanding the top coat for better adhesion to the paint, a sponge and a brush for removing dust.
- Metal brushes for brushing if the cabinet is made of solid wood and the goal is to make the wood texture more expressive before painting.
- Grinding machine for automating sanding and brushing. By the way, you can use a screwdriver or drill with special attachments for this.
- A heat gun and a scraper/trowel if the old cabinet has been painted in the past.
- Wood putty for filling holes and irregularities, spatula.
- Solvent, primer, paint tray, masking tape, gloves and other protective items (apron, goggles, respirator, etc.).
- Narrow and wide brushes for painting, foam or velor rollers. Ideally, a spray gun.
Before the advent of chalk paints, acrylic-based compositions were most in demand. Acrylic paints have many advantages: they are diluted with water and mix easily, dry quickly, do not have a strong odor and are resistant to abrasion. Optimal for painting cabinets in children's rooms, bedrooms and kitchens.
To comply with safety precautions, painting should be done in the fresh air or in a well-ventilated area, away from flammable objects and potential sources of fire.
Putty surface damage
If various cracks or chips have formed while removing the old varnish coating, you must use wood putty. A fine-grained, quick-drying mixture is just what you need.
After the putty has completely dried, another cleaning is carried out with sandpaper.
The key to successful work and long-term service is priming the furniture at this stage. It is priming that guarantees the safety of the painted surface from cracks and peeling.
After the primer has dried, you need to go over the surface again with sandpaper or a sanding machine with a fine-grained cloth. Eliminating primer smudges is the key to even painting.
The nuances of coloring
- If the goal is to paint the cabinet white or any other light shade, the surface must be carefully primed. It is also better to choose an acrylic-based primer for furniture that matches the paint.
- Priming also needs to be done for chipboard, since this material strongly absorbs moisture (and, accordingly, paint consumption will be high). Laminated chipboard, on the contrary, absorbs very poorly and it is better to use a more viscous alkyd enamel for painting.
- The visual effect of painting also depends on how many layers of paint were applied.
- Translucency is appropriate in order to emphasize the texture of the wood - here it would be appropriate to apply one or two layers, preferably with a roller. More dense brush painting involves applying several layers.
- When combining several colors, apply lighter shades first, then darker ones. The boundaries are marked with masking tape. For a smooth gradient, the principle “from light to dark” is also used, gradually introducing color pigment.
The final coating after painting an old cabinet can be wax or varnish.
Wax gives depth to the selected shade and a pleasant velvety feel. However, over time it wears out, washes out and requires updating. Therefore, it is not suitable as a topcoat for cabinets in kitchens, bathrooms and hallways.
Water-based varnishes provide a more durable finish. You shouldn’t expect such a noble matte finish like wax from them. Even compositions marked “matte” impart a slight gloss to the painted surface.
Polyurethane varnishes are ideal for finishing painted cabinets in the kitchen and bathroom, as they form a protective layer on the surface that is more resistant to abrasion and mechanical stress. But they should only be applied in a well-ventilated area.
Also, for additional patination effects and artificial aging of furniture, you can use additional compositions - varnishes and topcoats of various brands.
Painting is not always a panacea for updating furniture. It is quite possible that it will be appropriate for the cabinet body, but the facades will require replacement. We recommend that you familiarize yourself with the types of furniture facades to choose the best option.
Kitchen 2020: 5 key trends
We tell you what kitchen design to choose today so that it is relevant tomorrow
Sand the surface
Your product should be completely covered with small scratches. To do this, use fine sandpaper, but if one of your friends has a sanding machine, it’s time to remind these friends about yourself.
Prepare for painting
To do this, you need to remove dust and degrease the surface: wipe it with a damp cloth, and then with a cloth with degreaser or alcohol. The remaining glue from the film will also have to be sanded off and degreased. After this, you need to putty the products: remove all holes from old handles, shelves and fasteners, cracks and irregularities. After this, sand and degrease the surface again.
Apply primer
To ensure that the paint adheres to the surface, cover the surface with primer. Choose an unscented primer, such as Otex Akva from Tikkurila, it doesn't smell! Liquid, water-based, dries quickly. Prime in two layers, allowing each layer to dry.
You can paint it!
Latex matte paint of different colors, for example, Luxens, is suitable for painting furniture and doors. It’s convenient to buy paint at Leroy Merlin and tint it right there. There is also a good color palette of ready-made paints there.
To paint you will need brushes, foam rollers and lint rollers. To protect painted furniture, apply wax or oil with foam rubber or rags.
Apply the paint in 2-3 layers, allowing each layer to dry completely.
Source: www.inmyroom.ru