A simple and elegant solution for the design of any room would be a round cornice with curtains on grommets. The smooth and graceful waves of curtains do not need to be adjusted, they do not sag under their own weight, do not weigh down the space and please the eye of even the most demanding aesthetes. Even a beginner can understand how to sew curtains with eyelets. It’s not difficult to install fasteners yourself, the main thing is to choose the right materials, carefully measure the fabric, calculate the distance and carefully do all the work with a good tool. Then stylish curtains will look great in any interior.
What are eyelets
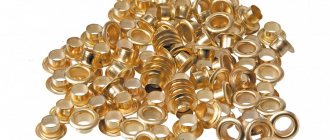
Eyelets are bushings made of various metal, plastic or wood, with a hole of a certain diameter in the middle. They are designed to be attached to the edge of curtains to ensure smooth and unhindered movement of the curtains along the round rod of the curtain rod.
Most often, eyelets are presented in the form of rings. They were originally used for sail sheets to make it easier to thread the ropes that secured the sail. Later they were adopted by fashionistas for their corsets, and only then these designs began to be used in the interior.
Today, eyelets can be seen everywhere - on clothing, shoes, leather goods, paper decoration, printing materials, truck awnings, advertising banners and streamers. Eyelets increase the lifespan of things and look beautiful on any window openings.
Benefits of use
Currently, eyelets on the market are presented in various colors, shades and shapes, which makes it possible to choose them for any curtains and for different interior designs. In addition to the aesthetic appearance, eyelets have many other advantages.
Advantages:
- Reliable - curtains hung with grommets are difficult to tear, even if pulled strongly or sharply. The bushings can withstand almost any weight. More likely, the rod and the curtain rod fastenings will become deformed, the curtain fabric will become unusable, rather than the rings will break.
- Durable - there are no sharp teeth on the eyelet fastenings that could ruin the material of the curtains, leaving unpleasant puffs, so they will last a long time.
- Easy to use - hanging or removing curtains with such fittings is not difficult. The shape will not be lost even if washed frequently. Such curtains can be hung in a nursery. Thanks to reliable fastenings and smooth movements of the eyelets along the cornice, even a child will be able to close and open the curtains.
- They do not spoil the appearance of the curtains by deforming the frame - durable bushings will not break even over time under the influence of curtains of different weights.
- Silent movement along the cornice - due to noiselessness, preference is given to installing eyelets on various curtains in any room, especially children's rooms and bedrooms, where silence must be maintained.
Types of eyelets
Today there is a huge variety of fastenings for curtains. Before making a choice in favor of such accessories, it is worth understanding its classification. Eyelets are divided into types depending on the following properties.
By ring diameter:
- from 5 mm - for shoes, bags, belts, clothes;
- up to 8 cm - most often used for advertising banners, banners or other structures;
- for sewing home curtains, experts recommend choosing a maximum diameter of 7 cm.
The shape of the sleeve is:
- in the shape of a circle;
- oval;
- rectangular;
- square;
- triangular;
- in the form of the sun;
- in the form of various animals;
- in the form of snowflakes for curtains in a children's bedroom;
- For bathroom interiors, rivets can be made in the form of fish, an anchor or a steering wheel.
According to the material of manufacture there are:
- plastic;
- metal;
- wooden.
Plastic bushings are easy to install yourself, since no special tools are required; the structures are fixed by pressing with your hands. Wooden rings are sold in specialized stores and are more finicky to assemble. Their disadvantage is their fragility when disassembled. Metal latches are more durable, but require significant latching force or special equipment.
Metal structures are:
- glossy;
- chrome plated;
- matte.
Latch fasteners come in a variety of colors. Based on the design of future curtains and tiebacks for them, choose plain or patterned fasteners with imitation of marble, metal, glass, stone. Metal fittings can be gold, silver or bronze.
What you need to install grommets
Eyelets are installed in sewing workshops, but this can be done at home with your own hands. To work you need to prepare:
- Ready ironed curtains.
- Eyelet tape made of hot-melt adhesive material.
- Threads.
- Tape measure.
- Pencil or felt-tip pen for fabric.
- Sharp scissors or a special punch.
- Iron.
Related article: Installing curtains with your own hands: what to consider?
Brief installation instructions:
- You need to purchase the required number of rings.
- Mark their location on the canvas.
- Cut with scissors or punch holes according to the markings.
- Place the halves of the plastic eyelet on both sides of the curtain and press until it clicks.
How to choose the right one
The appearance of the finished product depends on harmoniously selected fittings. In order to qualitatively sew curtains with eyelets with your own hands, you need to pay attention to the choice of fastenings.
You need to decide:
- with curtain design;
- material;
- colors.
You can take a piece of fabric with you to the store to try it on. Massive eyelets will not look organic on light fabrics, and vice versa.
Small fasteners may not support heavy curtains.
The style of the curtains will determine the color of the rings. For an original design, you can focus on them by attaching them to simple plain curtains. If there are pins or tiebacks on the curtains, then they should also be given attention. Plastic fasteners are easier to install, can be washed with fabric, and will not oxidize. Their price is lower, but metal bushings look more solid.
The main thing is to remember to measure the diameter of the cornice rod before purchasing. It should be at least one and a half centimeters smaller than the inner hole of the sleeve.
If the hole is small, the curtain will not slide well and will start to get stuck. The packaging should not be damaged, and the products themselves should not have scratches or chips.
Selection of rods
A variety of color shades and materials for making curtain rods will allow you to choose the ideal option for any room.
Barbells come in the following types:
- Plastic cornices are the most economical option. They are made with various decorative elements. Such rods are well compatible with light fabrics: organza, silk. However, thin plastic curtain rods will not support heavy blackout curtains.
- Metal rods are more expensive, but they are designed for any weight of curtains. They have forged elements; gold, silver or bronze plating can be applied to the products. They are practical, but noisier than plastic ones when the rings move along the rods.
- Wooden cornices are ecological and natural products with beautiful carvings on the knobs, curly tips and various brackets. The disadvantage of such a rod is the difficult selection of eyelets for it.
When choosing a bar, you need to take into account the width of the window. The cornice should be 15 cm longer than the window opening. For visual enlargement, you can use voluminous oblong tips.
For originality, you can make a contrast. Metal rings and pipes are suitable for dark curtains, and plastic rings and a wooden rod are suitable for curtains with bright patterns. It is not difficult to select it for the clamps; the main thing is to determine the design, the diameter of the rod and the type of fabric that will be used.
How to make curtains with eyelets yourself
It is not recommended to sew curtains with eyelets without preliminary measurements and calculations. The number of fittings and fabric footage depends on the size of the window opening and the number of panels on it. Their length is chosen independently, but it is necessary to take into account the fabric for adding the necessary allowances. The size of the wave and the number of folds depend on the width of the selected fabric.
Required tools and materials
After determining the style direction and color scheme, you can begin preparation.
Necessary materials:
- curtain fabric and stitching fabric;
- metal or plastic bushings;
- textile or grommet adhesive tape (dublerin);
- matching and contrasting threads for stitches.
Tools:
- sewing machine;
- scissors with pointed blades or hole punch;
- ruler and centimeter;
- chalk, bar of soap or marker;
- fabric clips, needles with rings or pins.
When creating curtains, you can use duplicating material or sew grommet tape onto the curtain. The second option is more convenient to use. The ribbon can be from 5 to 12 cm wide. It is better to buy one that is at least 2 cm wider than the grommet. It is advisable to choose its color according to the main tone, but transparent is also suitable. Dublerin will have to be cut.
If you have little experience, you can try installing a spare eyelet on a separate piece of fabric.
Footage calculation
To make the curtains look beautiful and the fittings not to bulge in different directions, you should use an even number of eyelets. There should be the same distance between them. If the curtain consists of two panels, then an equal number of fittings are installed on them.
Calculating the width of the curtain is simple: just measure the window opening and multiply this number by 2. If the width of the window is 2 meters, accordingly, you need to take 4 m of fabric. Since there are usually two curtains, it means that each will be 2 m wide.
Presumably, the rod has a diameter of 1.6 cm. It was already written above that the diameter of the inner ring should be at least one and a half times larger, that is, no less than 2.5 cm.
For a curtain width of 2 meters, 12 eyelets are used. Now the rings need to be placed on the curtain so that the distance between them is the same. A distance of 3 cm is removed from the edge of the fabric; on both sides this value is 6 cm. It is subtracted from the total width of the fabric, resulting in 194 cm.
Next, 12 eyelets are multiplied by 2.5 cm, which will occupy the rings, and you get 30 cm for the holes. This value is subtracted from 194 cm, leaving 164 cm. There are only 11 gaps between 12 elements. The number 164 is divided by 11 and the result is 14.9 cm - this is the distance between the fasteners. (200 – 3×2 – 12×2.5): 11=14.9 (cm).
After simple calculations, you can begin marking the curtains on the canvas.
Determining the number of eyelets
The number of fasteners must be even so that the edges of the curtains bend inside the window and do not stick out. Ideally, the distance between the fastening fittings should be 18 cm, but you can make it within 14-22 cm. It is advisable to leave 3-7 cm along the edges to the centers of the first and last ring.
The denser and heavier the fabric, the greater the distance taken both from the edges and between the eyelets.
Formula for calculating the quantity: n1=(L–2a):18+1.
Where:
- n1 is the number of bushings;
- L - curtain width;
- a is the distance from the edge of the curtain to the center of the first ring.
If the number of bushings is odd, then it is rounded to an even number. For example, the width of the curtain is 200 cm, and the distance to the first fastening is 6 cm, then n1 = (200-2×6): 18 + 1 = 11.4, after rounding to an even number you get 12 rings. Since there will be two curtains, then 12×2=24 pcs.
Initial fabric processing
Before you begin installing eyelets, experts advise preparing the fabric.
This is done as follows:
- The fabric is ironed while it is wet to avoid unevenness during sewing and possible stretching or shrinkage of the fabric.
- On light fabrics with fraying edges, make a hem seam to close the cut.
- The basting is done by hand. First, the fold is ironed to obtain a smooth edge. Then it can be stitched with threads, pinned with clips, needles or pins.
- The prepared fold is sewn on a machine.
For denser fabrics, there is a special product that forms a film on the surface that prevents the edges from fraying. The composition is also sprayed onto the blades for rivets.
The pattern is adjusted along one edge. Then 10 cm are retreated from the top to place the eyelets and 3-4 cm for the bend. The bottom seam will take up another 5 cm from the edge. The sides of the curtains are stitched with stitching. You can sew on hem tape. The second curtain is made using the template of the first curtain.
Marking curtains and installing eyelets
In order for the curtains to form a single composition, they must be symmetrical. Therefore, all work should be carried out after carefully adjusting the pattern on the canvases.
Work order:
- The top edge is folded over, and a grommet tape is applied from the inside 2 cm lower than the hem edge.
- Using gauze and an iron, the tape is ironed.
- Now the seam allowance is turned up and stitched with a sewing machine.
- Using chalk and a ruler, points for future fastenings are marked.
- Using a special hole punch or scissors, holes are cut in the fabric 1 cm smaller than the inner diameter of the ring. For synthetic fabrics, it is better to use heated scissors to make holes, which will gently melt the material.
- The holes are sealed with dublerin or glue so that the circles do not crumble or stretch.
- The extreme side rivet is inserted in one piece under the fabric, and the second must be placed above it.
- Threads and pieces of fabric are carefully straightened with scissors. The fastener is pressed until it clicks.
- After all operations, the finished curtains are ironed and hung.
There are different ways to hang curtains. Traditionally, rings are placed on a barbell. You can also attach them using all kinds of tapes, ties, ropes or hooks, combining the fasteners and the curtain rod. It is common to use eyelets that are hung on special fasteners near the window opening.
General rules
When making calculations, you should remember one of the basic rules for sewing such curtains: the number of eyelets must be even. Why? Because it is precisely thanks to the even number that the side sections of the fabric will be positioned in such a way that they will not be visible from the room, that is, they will be turned towards the window.
If there is an odd number of them, the side sections will look into the room, and this will have a very negative impact on the appearance of the curtain and the design of the room.
When carrying out the calculation, you should also take into account that the optimal number of holes per 1 meter of width is the number 6. This means that to obtain the result you simply need to multiply the width of the panel in meters by 6. The resulting result will indicate the number of round metal rings that are needed to sew this interior element.
It should also be remembered that on average the distance between the holes in the fabric should be from 10 to 15 cm. It is partly determined by the diameter of the selected fittings. For optimal movement of the curtain on the rod, it is recommended to make an indent of 3 cm from the outer hole to the edge.
This value remains the same regardless of the width of the curtain.
Recommendations for washing curtains
Curtains with eyelets are washed once every 6 months, the rest of the time it is enough to vacuum them. Care of the canvas is carried out depending on the type of fabric and the type of eyelets.
The original packaging must contain all the information on cleaning the product. It should be remembered that cheap metal rings can leave rust on the curtains.
It is recommended to machine wash textiles in a special protective net or by placing them in a pillowcase, otherwise the fittings may become tangled and damage the curtain fabric. Drying and spinning occurs without a centrifuge. This will help prevent the rings from warping and the fabric from distorting, which could weaken the fastening strength.
Hang the washed curtains on the rod in a damp state. Ironing is done in a vertical position.
How to hang curtains on a cornice...
To hang window draperies on the cornice using grommets, you need:
- Remove the pipe (this is easier to do if the brackets are open).
- Carefully string the rings onto it . In this case, the very first round fittings should be directed towards the window.
- Select the outermost left and right rings - if the curtain will not move in the future, but will only perform a decorative function.
- Insert the pipe into the brackets, moving the separated eyelets out of the holders . This is necessary so that the curtain, sewn from thin fabric, does not gather in the center, but is evenly distributed along the cornice.
If not one, but two draperies are hung on the window, for example, light tulle and thick curtains, then in this case you need to use a special two-row cornice. A heavy curtain is hung on the first pipe (farthest from the window), and a light curtain on the second. Each curtain is strung on its own part of the cornice separately from the other.
mizzninaqistina
exclusive.decorbyo
charliehltd
In this case, thin tulle can be attached to the cornice using:
- drawstring pockets;
- eyelets;
- fabric loops;
- hooks
What does a curtain look like with grommets on a two-row cornice:


