When the phrase “wooden box” is mentioned, many people immediately imagine a standard fruit box. Although in fact boxes can be very different and used for all sorts of purposes. This is a very useful product that can be used in everyday life, not only somewhere in the country, but also just in the house. Let's figure out how to make a wooden box with your own hands, because only a homemade thing can be not only unique and as convenient as possible, but also completely safe.
DIY wooden box
general information
A box is a type of container or an interior item, which is a product that has a cubic or parallelepiped shape. It can be made of various materials, including plastic, cardboard, metal, but is mainly made according to tradition from wood or its derivatives. Depending on the design, the box can have solid walls and bottom or slatted surfaces, and it can also have a lid and be either simple or decorative.
On a note! The category of drawers also includes drawers that complement furniture and make it more functional and convenient to use. Such boxes usually do not have a top lid, but their bottom is equipped with special wheels that ride on small rails fixed inside the cabinet or cabinet in the place where the box itself should be located. This makes it easier to use.
Wooden box
The history of the box itself is unknown. From time immemorial, people have used various containers for storing all kinds of household items, transporting and packaging goods, etc. Historians believe that, most likely, the first boxes appeared during the period when trade relations began to develop and were invented precisely with the aim of simplifying the transportation of goods and products , maintaining it in proper quality until it reaches the point of sale.
Wooden vegetable boxes
Nowadays, a wooden box is still used for transporting and storing goods, but at the same time it is also used in everyday life, and even in gardening. It is actively used for harvesting and growing seedlings. By the way, at one time standards even appeared for boxes for potatoes, storage of apples, etc.
At the same time, the boxes settled firmly in the house. They can be used not only as furniture elements, but also as individual products. For example, there are drawers for storing tools, small parts, sewing accessories, etc.
DIY wooden box
Serious competitors to a regular wooden box are products and containers made of veneer, plastic, and cardboard. But none of them can fully replace simple, but reliable and high-quality boxes, and therefore they continue to be actively produced and made with their own hands.
Tool storage box
This type of design is considered the best DIY box idea. This product will allow you to keep all your working tools in one place. Here you can make additional sections for storing screws, nails and nuts.
To do this you need to prepare:
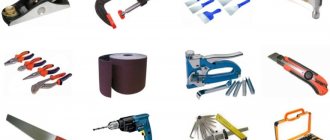
- thin board;
- thick plywood;
- hacksaw;
- electric jigsaw;
- hammer;
- screwdriver;
- tape measure;
- drawing of the finished product;
- metal corners.
On sheets of thick plywood we make markings for the drawer parts. After this, we drill holes for fastening the metal hinges. Next, we connect the side parts to each other.
Let's start making the bottom for the storage system. To do this, we attach a thin board to the sides of the box. To prevent it from collapsing under the weight of tools, it must be strengthened with thin boards. To do this, several wooden elements are stuffed on the bottom surface.
- Do-it-yourself armchair - step-by-step instructions for creating upholstered furniture. Designer tips for designing chairs
Do-it-yourself potholders: diagrams, patterns and a master class on sewing original and comfortable potholders (85 photos)
Do-it-yourself smoking: TOP 10 basic methods for preparing smoked meat
On the side parts of the plywood we draw markings for the handles. They will be cut inside the main body of the product. Here you will need an electric jigsaw. The cutting base is installed at the beginning of the marking.
In the process of cutting out parts, you should not make sudden movements. They can cause cracks to appear on the surface of the product.
Now let's start installing the partitions. To do this, cut out a small square from thin plywood. It is fixed with metal corners in the middle of the structure.
The diagram shows a detailed view of the tool box. The drawing shows the exact number of parts:
- side parts – 4 pcs.;
- bottom – 1 pc.;
- septal wall;
- handles – 2 pcs.
Properties of a wooden box
Why, despite the emergence of cheaper and simpler competitors, does an ordinary wooden box not lose its popularity? It's simple - the answer to this question lies in the unique properties and features of such containers.
Table. Comparison of box characteristics.
| Drawer type | Advantages and disadvantages |
| Veneer | Such a box is made from planks that have virtually no processing. It is quite fragile compared to wood, but costs less. Suitable for storing and transporting fruits and vegetables, as well as other products. Afraid of moisture. |
| Made of plastic | A fairly convenient type of box that is not at all afraid of moisture. Depending on the quality of the plastic, it can be either very durable or quite fragile. But this type of box is still easier to damage than a regular wooden one. It doesn’t cost much, but it’s more expensive than a wooden product. Suitable for storing and transporting not only dry, but also wet products. |
| Made of metal | A species that is quite rare. Metal boxes have not become popular due to their tendency to rust, as well as their heaviness and high price. It is not easy to make a metal box at home without special equipment. |
| Made of wood | The most optimal type of box. It is quite durable, can have different designs, and is suitable for storing all kinds of products. Looks much better than a regular veneer box. When used as a decorative finish, it can be used at home; it is durable if the wood has been treated with protective compounds. |
Wooden box
On a note! Ordinary wooden boxes of simple design are actively used when decorating loft-style rooms. They are an excellent attribute of this design solution.
The production of wooden boxes in production occurs in accordance with GOST 20767-75 . And for them, a wooden board of a certain quality, 1 cm thick, is used. Such boxes are thin-walled, but durable. They are quite light and easy to use.
Tool cabinets, drawers, cabinets
Prices for construction boards
Construction boards
How to make a mailbox with your own hands from wood
Having decided on the size and design, we begin production. A sketch drawing with the dimensions of the parts is applied to a sheet of paper. The action plan is as follows:
- determine the dimensions and draw a drawing;
- measure the required amount of materials;
- elements are cut to size;
- create a hole for correspondence;
- attach the end walls to the front and rear panels;
- attach the door to the hinges;
- install a lock;
- attach the finished product to the fence.
Tools and materials that may be needed to make a mailbox:
- wooden beam 1.5-2cm thick;
- stainless steel hinges;
- sandpaper for grinding and polishing;
- blowtorch for burning wood;
- drill, screwdriver;
- wood screws;
- corners for attaching walls;
- wood glue;
- epoxy adhesive;
- masking tape;
- saw or hacksaw;
- lock, handle.
Simple wooden mailbox
Action algorithm:
- Parts are cut out of the board according to the drawing: The mailbox consists of a back and front wall, 2 ends and a roof
- Connect the elements of the door, front and rear walls using wood glue so that there are no gaps left. Leave until completely dry for 1-3 days.
- The parts are polished and the dimensions are checked so that there are no gaps when connecting them. If the elements do not fit together, grind them.
- Cut a hole for correspondence.
- Connect the end, rear and front walls with self-tapping screws.
- The door is installed on hinges.
- They cut the lock.
- The mailbox is painted with paint or varnish that is resistant to natural precipitation and sunlight.
Advice!
To prevent the correspondence from getting wet, it is better to use wood for manufacturing with a width equal to the width of the product. If this is not possible, then the boards are connected into a groove so that gaps do not form. A homemade wooden mailbox is coated with varnish or paint that is resistant to natural precipitation.
The finished mailbox is attached to the fence
Antique wooden mailbox
Fashion dictates the design of not only clothing, but also the exterior and interior. Designers really like items made from aged wood. There are 2 ways to age timber:
- brushing;
- layer-by-layer coloring.
To brush the surface you will need:
- gas-burner;
- sanding brush;
- sandpaper;
- protective varnish.
Stages of work when brushing wood:
- The timber is fired using a burner at a medium fire level. Firing is carried out at an angle of 450 to the wood
- The block is carefully combed out using a brush and sanding sponges. Comb out burnt areas in the direction of the wood grain
- The elements are coated with moisture-proof varnish. Weather-resistant varnish will reliably protect the wood from rotting
The photo below shows an antique box:
The wood was aged using the brushing method.
Aging of timber using layer-by-layer staining is done by applying warm wax between layers.
The operating algorithm is simple:
- A layer of dark paint is applied to the prepared and primed wood surface.
- In some places where abrasions are expected, warm wax is partially applied. To do this, light a candle for 2 minutes before application.
- Cover with a layer of light paint.
- Using sandpaper or parchment, rub the paint so that abrasions are formed.
Carved wooden mailbox
Before starting to manufacture carved elements, assemble a box from timber with a cross-section of 1.5-2 cm. Stages of work:
- The slats are ground and cut to size.
Finished elements are coated with a layer of primer to ensure better adhesion - Assemble a box without a door. All joints are coated with moisture-resistant sealant for reliability.
- Using a router and a chisel, wood carving is performed. The finished door is attached to the frame. Hand tools for wood carving allow you to create unique masterpieces
Modern carpentry machines help make wood carvings of varying complexity. The program is loaded into the machine, the timber is laid and after some time a finished carved part is obtained.
A carved mailbox is made using various attachments on a router
Decorative wooden mailbox
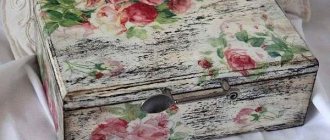
There are many ways to decorate a mailbox. Using acrylic paints, patterns are applied and painted to resemble Gzhel. If the owner does not have artistic skills, various stencils and decoupage come to his aid.
Attention! To prevent the image from fading in the sun, it is applied to a carefully primed and sanded surface. After applying the pattern, the letter box is coated with 3-5 layers of moisture-resistant varnish.
The box was decorated with wooden slats imitating windows and doors of a house and painted in different colors
The letter box is decorated with beads, a flower garden is erected on the roof, and shells are glued to imitate the water element. The scope for creativity is inexhaustible.
Original DIY mailbox made of wood
Decoration is added to a product not only with the help of objects. The originality of the design can also be very attractive. They make correspondence boxes from logs, in the form of a well, or a hut on chicken legs. Decorated with wood bark.
The carved door is based on Russian fairy tales
Below are photos of wooden mailboxes made in various techniques and styles.
Mailbox made from a wooden frame Brushed timber is decorated with wooden latches A small mailbox is decorated with a large gable roof and the inscription “Mail” The giant box is decorated with forged hinges and a barn lock The box is made of an antique cuckoo clock
Boxes in the house
As a rule, boxes for transporting and storing products are not well processed - they are hardly sanded and, of course, are not varnished. But for use at home, it is recommended to treat them and cover them not only with protective compounds, but also with paints and varnishes. Then the box will look beautiful, and the person using it will not risk getting a splinter in his finger.
Simple tool box
Typically, the house rarely uses boxes made directly for transporting cargo or storing the same fruit. More often than not, those who need a simple but nice box have to contact carpentry workshops and order a specific product from them according to their size and wishes. So don’t confuse industrial and carpentry boxes.
Boxes in the house, as already mentioned, can be used for various purposes. This includes storing utensils in the kitchen, storing small items in the living room, storing toys, clothes, shoes, cosmetics, household chemicals, etc. The main thing is that this type of container fits organically into the interior and does not cause confusion.
Wooden box for storing various household items
The easiest way, of course, is to get hold of boxes in a store or warehouse, sand them and varnish them to use at home. But you can make such a container yourself, since this is not a difficult task at all, be it a box for decorating a room, storing things, or growing seedlings.
Prices for different types of wooden boxes
Wooden box
Wall shelves
Slatted boxes are most often used, but plywood “models” are also available. Both options are useful for decorating a room. A wall storage system is needed in every home. Using hanging shelves, you can save space in a cramped bathroom, living room, kitchen, and even in a pantry or loggia. Fruit or vegetable wooden boxes make an excellent organizer that will help keep things and household items in strict order. After pre-processing the container, the modules are fastened together by screwing self-tapping screws into their side walls. If you need “single” shelves with spaces between them, then the scale of work is reduced. They are painted in the desired color, decorated and attached with the bottom cover to the wall vertically or horizontally. The sides will serve as shelves. In another option, the boxes are placed “naturally”, that is, one of the sides leans against the surface. Such shelves will be more spacious, but are used more often in closets, since the contents will not be displayed. An original solution would be to make a wooden frame in which the decorated drawers will be placed as pull-out containers. By the way, you can organize hanging shelves from baskets in the same way. To make the storage system look more beautiful, it is decorated with forged support at the bottom. Metal goes well with wood. An unusual design solution would be to decorate the wall in the hallway using drawers of different sizes. The center of the composition will be a mirror in a wooden frame. Boxes of different sizes are placed around it: some are used as key holders, others are used for hats and gloves, and still others are used for indoor plants and small decor. The design is completed by securing the slats with hooks for bags.
Wooden boxes can be decorated as original shelves for storing wine bottles. Inside, they are divided into sections using crossbars, and then varnished, decorated with twine, pieces of burlap, fixed to the wall and laid with a backing of hay. The themed wine storage shelf is ready. In another version, an open cabinet is made from a box. It is placed vertically, the top cover is reinforced with a decorative table top made of boards. Shelves are installed inside for horizontal placement of bottles, as in wine cellars.
Why exactly a tree?
Wood is the very material that is most often used to create products for the home. The reasons why this happens are simple. First of all, it is important to say that wood is an environmentally friendly material that does not pose a danger to human health . It does not emit an unpleasant odor and does not release any toxic substances into the air, so you do not have to worry about allergies or health problems.
Wood is easy to work with
Wood is also one of those materials that you can easily work with at home. You don’t have to use complex specialized equipment; it’s enough to have a sawing tool, drill and screwdriver or screwdriver on hand. Also, grinding and other processing of the material may require a minimum of cost and effort.
The wood is durable and beautiful and, varnished, can maintain its appearance for many years. Only uncoated material can darken over time and lose its former natural beauty. Fresh wood looks very nice.
Why wood is the best material for making boxes
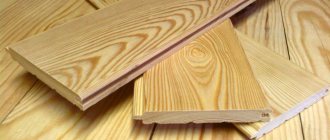
It is not surprising that wood has been and remains one of the most popular types of materials. Although now in almost any specialized store you can buy its derivatives - plywood, panels, furniture board, etc. But none of these options, in any case, will be better than ordinary natural fresh board.
Prices for furniture panels
Furniture board
Material used
To make a box with your own hands, various materials can be used. This should include:
- natural wood;
- plywood, chipboard, fiberboard;
- plastic and metal sheets.
Each of these materials has its own characteristics:
- Wood and plywood are easy to process.
- The use of plastic allows the structure to be used in humid environments.
- Metal makes it possible to make boxes of increased strength in which you can store heavy objects.
Making boxes: what do you need?
So, to make absolutely any wooden box (regardless of the purpose of its use), you will need a number of tools and materials. The list is small, but without these things the matter will not move forward. You will need:
- sawing tool for cutting wooden boards and blocks into strips of the required length. This could be a jigsaw or a wood saw;
- a device for sanding wooden surfaces - a grinding machine, sandpaper with a special block, etc.;
- hammer (in case nails will be used);
- screws, nails, possibly metal corners;
- screwdriver (if self-tapping screws will be used as fasteners);
- varnish and brush or paint - to cover the surface of the wood or give it a certain color;
Preparing the necessary tools
On a note! Before applying paint, it is best to pre-prime the wood. This will reduce the amount of paint used and also provide it with a more saturated color.
- pencil, square, ruler, tape measure - tools that will help make the necessary markings.
Important! Before you start creating a box, you must draw its diagram or download a ready-made one from the Internet. This will allow you to make a smooth and neat product that has the necessary parameters.
Wooden box drawing
Prices for popular models of screwdrivers
Screwdrivers
Furniture from boxes in the interior
Simple wooden boxes are an excellent base for creating amazing interior items and functional furniture. Experiment, get inspired by ideas and create unique designs that will decorate your home.
Making a plant box
Step 1. First of all, you need to decide on the dimensions of the box being constructed. It is important to choose the place where it will stand. Based on this, you should sketch out a drawing of the box indicating the dimensional parameters and calculate how much material is required.
First you need to decide on the sizes
Step 2. Next, you need to go to the store and purchase everything you need. First of all, you need to buy the required amount of boards.
Buy boards in the required quantity
Step 3. Now you need to apply the appropriate markings to the board - mark the sides and ends of the box on it. It is better to take measurements with a tape measure, but to get even marks it is better to use a square.
Marking
Step 4. Next you need to assemble the box frame and drill holes in its sides. It is better to make several holes on each side.
Assembling the drawer box
Step 5. The boards on the sides of the box need to be connected together using self-tapping screws. You can also use nails, but connections with self-tapping screws are much stronger and of better quality.
Self-tapping screws are used for connection
Step 6. Next, you need to determine the size of the bottom of the box and cut the bottom itself from the board. It needs to be secured by drilling wooden holes and screwing screws along the bottom border of the box around the entire perimeter.
Attaching the drawer bottom
Step 7: It is important to be sure to drill a few drainage holes in the bottom of the plant box. They will ensure the drainage of excess water that will enter the soil during irrigation or rain.
Drainage holes are drilled
Step 8. It is important to sand all surfaces of the drawer so that they are smooth, pleasant to the touch and safe.
Sanding the drawer
Step 9. Finally, the box can be painted, but it is better to coat it with varnish. This will make the box beautiful and additionally protect it from moisture.
Finished product painting
Video - Making a simple box
Coffee table made from drawers
If you connect 4 drawers in a certain order, you can make a cute coffee table.
Pay attention to how the boxes are connected.
It is also worth noting that it is advisable to treat the drawers and paint them with varnish or brown paint to make them look even more like a coffee table.
You can attach wheels if desired, although this may require attaching some plywood boards (which will better secure the entire structure) to the bottom of the table before attaching the wheels.
Slat box
Step 1. First of all, you need to cut the blanks to create a box. You will need bars of the selected length, slats 1 cm thick. The bars need to be cut to length so that their profile is triangular.
Blanks are cut
The process of creating blanks
The block has a triangular cross-section
Step 2. Next you need to take the bars, lay them on top of each other (2 bars on each side) and start making walls. You need to apply wood glue to the flat surface of the block and arrange the slats so that they rest on the flat side surface of the bars. The slats are placed at a certain distance from each other to create gaps.
Applying glue
The slats are parallel
Advice! If you plan to make several boxes of the same size, then it is convenient to use a wooden template to create the walls.
Step 3. Then the slats additionally need to be secured to the corner bars using nails or self-tapping screws. In this way, two side walls of the box are made.
Additional rail fastening
Finished side wall
Step 4. Next, the prepared walls need to be placed in a special template (or simply held correctly) and, using the same principle as in steps 2 and 3, attach the next slats to the sides of the free sides of the bars. Thus, it will be possible to create two other side walls.
The next slats are attached
All side walls are ready
Step 5. Then the bottom is made. You need to lay two slats (with a length equal to the length of the box) parallel to each other, and fix other slats on them, but without gaps, so that the bottom is solid.
Making the bottom of the box
The bottom turns out to be solid
Step 6. All that remains is to secure the bottom to the underside of the box, and it is ready. If necessary, all structural parts can be sanded before assembling the box. It is better to varnish or paint the product after assembly.
The bottom of the box is attached
This is what the finished box looks like
Video – Box on spikes
Bedside tables and tables
From the drawers you can make cabinets, coffee tables and boxes for storing small items instead of plastic or wicker baskets. In the latter case, choose containers with high sides. It is simply sanded, varnished or painted and equipped with paired handles on the sides for ease of movement. Bedside tables are assembled from two drawers connected to each other. They store photographs, watches, phones, magazines and books, and the top cover is used as a shelf for lamps or indoor plants. To create a coffee table you will need:
- Four drawers;
- Plywood sheet;
- Self-tapping screws;
- Wheels (optional).
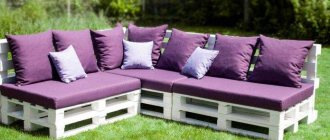
A square-shaped pallet is cut out of plywood. The width of its edges should correspond to the sum of the length of one box and the height of the other. If desired, you can add small indents of a couple of centimeters. Wheels are first attached to the pallet, and then the boxes are attached in a spiral, that is, the side of the next one rests against the back wall of the previous one. The empty middle is decorated with a flower arrangement, a group of candles or a lamp. This coffee table can be used to decorate your living room or backyard in the summer. It is complemented by sun loungers assembled from pallets or poufs from old tires, decorated with rope.
From miniature boxes you can make decorative boxes for jewelry or boxes for flowers on a holiday table.
Decorating a wooden box “Chocolatier”. Glaze. Part 1
Details create the mood and style in the interior. With small accents you can fill your home with a certain atmosphere. Today at the master class, we will create just such a colorful decorative element. This is a wooden box “Chocolatier”.
To create it we will need:
- wooden box with lid;
- medium grit sandpaper;
- acrylic enamel, water-based;
- water-based varnish;
- acrylic paints;
- bristle brushes, synthetic brushes;
- household sponges;
- toothbrushes (minimum 2);
- disposable plates, sticks for mixing paint;
- hair dryer;
- glass of water;
- water-based stain.
Surface preparation. We sand our box thoroughly, using medium-grain sandpaper. We sand the entire surface of the box and lid, don’t forget about the bottom.
Coloring. Let’s put the lid aside for now and work on the box itself. Coloring will be done in several stages.
1. We treat the entire box with water-based stain, inside and outside, remembering the bottom and inside of the lid. Lightly rub the stain with a clean, dry cloth.
2. On the dry surface of the box (stain was previously applied). Using a dry brush, apply any pastel shade, in my case, this is the color of fermented baked milk. This color will delicately show through other colors. Dry with a hairdryer.
3. White enamel + blue + fermented baked milk color, the color turns out to be mint blue, we paint the box with this color very carelessly. We work with a dry, clean brush. It is better to use a new, dry brush for each color. It is important here that there is no water. Dry with a hairdryer. Next, we sand along the grain, sanding out the paint.
4. The next layer of paint is brown, the brush is dry, there is not enough paint on the brush. Dry with a hairdryer. Again we cover it with our blue color. Dry with a hairdryer.
Important moment! Apply our water-based stain to the dried paint and quickly rub it over the surface with a dry cloth. This technique allows you to quickly and “believably” age a wooden surface. Leave the box for a while. Sand along the grain. Let him come to his senses after so many manipulations.
Let's start working on the lid. We work with white enamel. Apply the enamel evenly to the lid, to the central part (where the design will later be). Apply one layer with a brush, dry it with a hairdryer, apply a 2nd layer, dry it with a hairdryer again. An important point: we start the next stage when the previous one has dried thoroughly, speed up the process with a hairdryer! After the enamel has dried, we go over it thoroughly with sandpaper to remove any unevenness, if any.
We work with the colored part of the lid, the principle is the same as with the box, I’ll write briefly.
Brown color, hair dryer, ocher, hair dryer, blue color, hair dryer, sand along the grain. Please note that in this case we add ocher to the work in order to create a rhyme with the printout.
Printing.
For this wonderful activity, let's head to the kitchen. Pour water into a bowl. The size of the bowl is to fit our printout.
First, I cut the printout into 4 parts (according to the size of the drawer slats).
The printout was placed in a bowl of water, picture side up. At this time, apply the varnish with a brush to the box, where our drawing will be. After the varnish is applied, take out the printout and apply it to the varnish. Quickly level with a cloth and remove excess water. We work with each strip separately.
Now is a very important stage! While the entire printout is wet, we quickly do the following: take a very soft sandpaper (soft in the literal sense, this is an old sandpaper that you have sanded with a hundred times and it looks like a newspaper, let you always have such sandpapers on hand, they are worth their weight in gold) .
With this soft sandpaper we sand off the border between the box and the printout, moving strictly perpendicular to the side of the printout. So, if you are working with the vertical side (along the height of the box), hold the sandpaper horizontally. This must be done very quickly. The goal of this stage is to reduce the thickness of the printout. Dry with a hairdryer. Next we protect it with varnish. We apply varnish only where the picture is applied.
Break!
Part 2 here>>
Manufacturing technology for a simple street model
In its most primitive form, the work is performed in the following steps:
- Boards, the width of which varies between 15-20 cm, are cut into blanks. Three long pieces will be needed to make the bottom and sides, the ends will be decorated with two short ones (here you need to leave allowances equal to the thickness on three sides).
- The boards are planed with a plane, they can be sanded with coarse sandpaper, the cuts must be carefully processed.
- Thin holes are made along the edges of the workpieces: in the side parts - 3, in the end parts - 4.
- Using screws, first fix the sides and bottom, then attach the end blanks.
- The assembled structure is sanded with fine sandpaper.
All surfaces must be thoroughly impregnated with an antiseptic; varnish, stain or enamel can be applied to the outside.
Assemble the box parts using screws
Used cargo pallets are often used as the base material; this is a very cheap raw material that is easy to process. Instructions for assembling an outdoor flower box:
- the pallet must be disassembled using a nail puller; pliers will be needed to remove fasteners;
- Rotten and damaged boards are rejected;
- a rough sketch of the box is drawn up indicating the planned dimensions;
- in accordance with the notes, the wood is sawn and cleaned using sandpaper;
- assembly begins by fixing the lower base and upper frame;
- The side edges are attached to the two parts of the container with nails;
- the joints are masked with narrow decorative strips.
Here, too, the final stage is the application of protective and paint compositions.
If necessary, you can nail legs made of beams to the container; with their help, complete ventilation of the bottom edge is ensured. Flowers can be placed inside in pots or planted directly in the container. In the second case, it is necessary to cover the box with film and equip it with drainage holes.
The end blanks are attached last
Advantages and disadvantages of a wooden flower box
The key advantage of the solution is considered to be extremely low cost; we are also pleased with the possibility of creating a unique composition that fully matches the interior or landscape design. The special structure of wood helps maintain an optimal microclimate for plants; with a skillful approach, you can use the natural beauty and fiber of the material.
All the disadvantages of such boxes are due to the susceptibility of wood to rot and biological damage. If you want to plant plants directly in a container, you need to take care to protect the boards from contact with moisture and soil substrate. When used outdoors, wood is relatively short-lived and therefore requires protective impregnation and paint coating.
With the right skills, you can make a box from wood that is as beautiful as designer works
