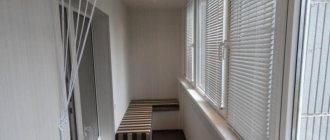
A comfortable and beautifully decorated balcony from the inside not only pleases the eye, but also evokes a feeling of pride in front of others, especially if everything is done with your own hands. The correct approach to balcony arrangement should be present at every stage of work, from glazing to cladding, so special attention should be paid to this. This will allow you to create a full-fledged living space from a nondescript room.
Do-it-yourself finishing of the balcony with clapboard from the inside
How to decorate a balcony from the inside
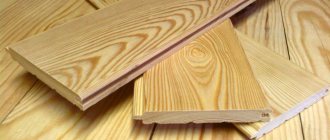
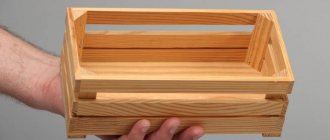
Among the large number of finishing materials for premises, the most commonly used are lining (regular) and eurolining. It consists of specially made oak, ash, linden, alder, cedar, pine boards (other types of wood can also be used). It is worth noting that pine material is not used for cladding the sunny side, because when heated, pine releases resins and spoils the aesthetic appearance of the room.
Wooden lining
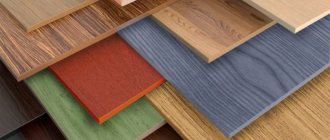
There are also car cladding materials of artificial origin, the most popular of which include PVC, MDF, seamless and suture panels.
What is the clapboard made of?
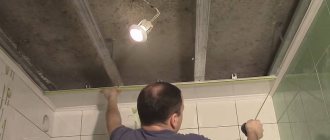
Installation of lining
And finally, we are starting to look at the final and most anticipated stage of the work. Installing the lining itself is not as complicated as installing the sheathing. But, to obtain a high-quality result, you need to know all the nuances of such work.
Internal lining should start from the corners. The panels should be installed strictly vertically, but there is no need to fix the panels immediately. First, everything is checked with a level, only then the facing material is attached. The panels can be fastened to the cladding using special fasteners, as well as nails. But nails can damage the lining if you handle the hammer carelessly.
Since many people use nails to fasten the lining, we want to give you some tips: you don’t need to immediately hit the head of the nail with all your might! Start hitting with light movements of the wrist, and only when the nail is well embedded in the wood can you begin to increase the force of the blow. The remaining panels are attached in the same way.
The final stage of the work will be the installation of the removed window sill and other parts of the room. Then you definitely need to apply a special solution that will protect your cladding.
How does eurolining differ from ordinary wood lining?
Lining or eurolining is a planed board with grooves, a tongue for joining or a profile. These cladding options can last about 20 years, but provided they are properly cared for and are not exposed to direct sunlight, exposure to moisture, pests (mice, rats), insects and other factors.
GOST 8242-88. Profile parts made of wood and wood materials for construction. File for download.
GOST 8242-88
Eurolining
Below are the main differences between lining and eurolining.
- These profiles have different thickness, width, quality.
- Eurolining is more demanding to maintain than conventional wood lining.
- The materials have different manufacturing technologies. Eurolining is an almost completely dried material, and the lining has its own natural moisture (no additional drying treatment was used).
- Eurolining has specially designed grooves to drain condensate, so such panels are less susceptible to rotting. Also, these internal grooves allow you to remove stress from the board and the finished cladding.
- The cost of materials is also different (eurolining will cost more).
How the lining is arranged: 1 - tenon; 2 - shelf; 3 - facial face; 4 - compensation grooves; 5 - lower edge of the groove; a—working width; b - full width.
How to choose a lining
Lining is a popular material in the decoration of loggias; it allows you to create a unique interior. At the same time, the purpose of the room can be varied; with its help, winter gardens, workplaces and recreation areas are created.
There are two main types of lining:
- Plastic. It is distinguished by the presence of a beautiful glossy surface. This quality is important for small balcony spaces, because glossy elements allow you to expand the space. The main advantage is the ease of cleaning and replacing damaged parts. However, it can be difficult to fit plastic into the interior.
- Wooden. Instantly creates coziness and comfort. Quite a popular method of covering balconies. But such material requires constant care, only then will it have a good appearance. It is due to this that a tree can become a background for any idea on a balcony. The design of wooden lining also suggests different wood textures.
With the development of technology, the requirements for cladding began to increase. Therefore, even wooden lining has been improved. So, for example, eurolining appeared.
Its distinctive features are:
- quality (if regular lining is made from wet wood, then euro is made from dry wood);
- surface dimensions (reduced from 15 to 12 cm);
- special drainage systems were made on the inside;
- joints (thanks to a wider joint of 88 mm, the eurolining is resistant to moisture).
It is better to purchase the euro finishing option and save money and effort. This material will delight you for a long time with its appearance and practicality.
Advantages of wooden lining
The main advantages of lining include the fact that it:
- made from environmentally friendly material;
- characterized by resistance to temperature changes and mechanical damage;
- has good thermal insulation;
- has a long service life.
Based on the quality of the material, wooden lining is divided into 4 classes. These boards are produced over one period of time, and are classified when they are ready for molding and sale.
Classes of wooden lining
Table. Classes of wooden lining.
| Class | Peculiarities |
| Premium (Prima or Extra) | This is the most expensive lining option. It has no knots or irregularities. It is absolutely smooth and attractive in appearance. |
| A | There is a small number of knots (no more than 1-2 per 1.5 sq. m of surface). |
| IN | There may be microcracks and resin pockets. |
| WITH | Suitable for external cladding only. Has numerous cracks and knots. |
Characteristics of the lining
Types and characteristics
The lining is classified according to the species and type of wood from which it is made, as well as the profile and dimensions of the slats themselves. In the production of this finishing material, both coniferous (pine, spruce, larch) and deciduous (alder, linden, aspen) wood species can be used. There are several classes or grades of lining:
- “Extra” – complete absence of defects (knots, cracks, chips, etc.).
- “A” – no more than 1 knot or crack per 1.5 m2.
- “B” – no more than 4 knots, 2 resin pockets or blind cracks per 1.5 m2.
- “C” – multiple defects, minor mechanical damage.
Four types of wooden lining
Today, material manufactured in accordance with the European quality standard DIN 68–126 is becoming very popular. It is called eurolining and can have the profile types “EUROSTANDARD”, “SOFT-LINE”, “BLOCK-HOUSE”, “STILE”. Such panels are distinguished by high quality, ergonomics and the presence of grooves for condensate drainage on the back side.
Main types of lining profiles
The dimensions of domestically produced wooden lining, according to GOST 8242–88, should not exceed:
- width - 150 mm;
- length - 6000 mm;
- thickness - 25 mm.
European production standards are more stringent, and products produced there have the following dimensions:
- length: from 500 to 6000 mm;
- width: 80, 100, 110 or 120 mm;
- thickness: 13, 16 or 19 mm.
For a more detailed introduction to this natural finishing material, we suggest watching a short video.
Video: How to choose lining
More information about existing forms of finished cladding boards
There are several forms of boards ready for cladding. Before sale, the boards undergo processing, as a result of which the following types of lining are obtained:
- block house (imitation logs);
- imitation timber;
- soft-line;
- calm;
- eurolining;
- Landhouse.
Some types of natural lining profiles
Prices for lining, imitation timber, block house
Lining, imitation timber, block house
Description of the lining
Decorating a balcony with wood can be either a budget method or an expensive one. It all depends on the types of lining, which will be discussed further. What is a lining? This is a panel designed for cladding. It is made of wood. Therefore, many choose it, and this is not strange, since the material is high-quality and environmentally friendly.
It performs well during operation and can create a homely and pleasant atmosphere on your balcony.
What is required to cover a balcony yourself
Balcony cladding can be carried out either by a professional team or by the apartment owner. To carry out such work, it is not necessary to have special skills or knowledge, but you should carefully prepare and approach the task responsibly.
In order for internal work to be completed successfully, you need to know the basic rules.
- Before finishing, it is worth preparing the wall surfaces well.
- Only high-quality material is used for cladding. It is best to give preference to the “Premium” class, but if your financial situation does not allow, then you can use A or B. (C is, roughly speaking, waste, which is still used in some cases).
- Before purchasing, you need to calculate the number of consumables, but you need to purchase them with a small margin.
How to calculate the amount of lining for lining a balcony from the inside
Calculation of the amount of lining
- You also need to first prepare your working tools.
- If the balcony is cold, then care should be taken in choosing insulation. Consult a specialist about how to install insulation.
- Consider what the finish of the finished skin will be.
Correctly covering a balcony with clapboard is easy
If you decide to cover your balcony, then you should keep in mind that essentially a balcony is just a room, the finishing process of which will be similar to others.
Loggia design - 45 photos of amazing design options- Balcony in Khrushchev - planning a convenient design for a small balcony (75 photos)
- Small loggia - 84 photos of the best ways to arrange it comfortably
- Assemble the frame
- Nail a pre-prepared sheathing board directly onto it, which can be purchased at any hardware store.
It is important to align the entire sheathing vertically and horizontally, so that in the future you can accurately place the first plank on the ceiling and directly on the wall, since all further work will be carried out from them.
Before completing the work, it is necessary to nail to the first board, the second, the third, and so on.
Tools and materials
Balcony cladding can only be done efficiently if you have all the tools and materials listed below.
To work you will need:
- high power hammer drill or drill;
- screwdriver;
- drills (1 mm, suitable in size for the screws);
- high-quality drills, 4 and 6 mm in diameter;
- hacksaw or jigsaw for wood;
- level;
- simple pencil, tape measure, square;
- hammer and axe;
- self-tapping screws 90, 75 and 50 mm;
- 30mm large head nails, dowels; For perfectly smooth surfaces, 6*60 dowels are suitable, but for minor unevenness - 6*100.
Tools for finishing a balcony with clapboard
Prices for popular hammer drill models
Hammers
Disadvantages of the material
Of course, covering a balcony with clapboard also has its own disadvantages. It reduces the already small area of the balcony.
This material must be regularly treated with a special varnish, otherwise the lining will lose its appearance. Nevertheless, this finishing method has many more advantages, which leads to its popularity.
Preparing walls for cladding
Before starting work, surface preparation is required. It is required so that the lining is well attached, the walls do not crumble, and fungus and mold do not appear on them. To do this, it is worth sealing the cracks with plaster, eliminating uneven areas and treating the surfaces with an antifungal solution.
The first step is to clean the surfaces, thoroughly cleaning the balcony from dirt and dust.
How to cover a balcony with your own hands
Any person with a minimal understanding of repairs can decorate a balcony or loggia on their own. Correctly made calculations and step-by-step implementation of all stages of work will help you quickly and efficiently complete the covering of the room. At the planning stage and when choosing the base material, many homeowners in apartment buildings try to find a cheaper option by considering PVC panels. But such a finish will not be durable or as aesthetically pleasing as natural wood. Therefore, there is no point in saving, but it is better to allocate a little time and money and make a beautiful, unique finish.
Necessary tools and auxiliary materials
In addition to the main sheathing material, the work will require wooden blocks. The sheathing will be made from them. In conditions of high humidity, it is better to use auxiliary elements made of plastic or with the addition of plasticizers. You will also need a metal profile. If insulation is necessary, then you should purchase rolled foil, mineral wool or polystyrene foam in advance.
A vapor barrier film, polyurethane foam, or masking tape will help ensure good sealing. At the surface preparation stage, you cannot do without materials for wall finishing. You can use a primer or PVA-based putty. For the finishing coat you will need varnish. Painted lining will have a more aesthetic appearance. To secure foam plastic, sheathing and wooden panels, anchor bolts, self-tapping screws, nails, and clamps are used. Finishing work is carried out using the following tools:
- Drill, hammer drill;
- Screwdriver;
- Drill bits for augers and wood;
- Jigsaw, hacksaw;
- Measuring tools (level, cord, tape measure);
- Hammer, axe.
Calculation of the required amount of material
After choosing the type of wood and lining profile, you need to correctly calculate the required number of panels for the job. Experts recommend giving preference to linden or pine, as they are more resistant to temperature changes. You can calculate the required amount of material using an online calculator on the website of the manufacturer, supplier, or make the calculations yourself.
The standard parameters of lamellas according to GOST are length - 6 m, width - 15 cm. By multiplication we can determine the quadrature. The area of one such board will be 0.9 m2. Since there are many types and sizes of lining, in this way you need to calculate the area for your board. If we divide the area of the balcony by the area of one board, we will find out the required number of panels.
When calculating the number of boards, you should take into account the sizes of windows and doors, and you also need to take into account the features of fastening the lining. As a result of installation, the width of each board will be reduced.
Preparing the premises
Before starting work and even before purchasing materials, you should prepare the balcony surfaces for finishing. All elements of the old cladding are removed from the walls, the whitewash is washed off, and the paint is washed off. You should also remove the ebb, window slopes, and baseboards. Work can only be carried out in a bare box.
Lathing for wooden panels can only be installed on perfectly flat walls. Only in this case will it be durable and visually attractive. Waves and bumps must be leveled with special mixtures, and cracks must be filled with putty.
On a glazed balcony, you need to carefully inspect the frames. Elements that have become unusable must be repaired or replaced. Rotten areas must be treated with antiseptic drugs. If this is not done, the lining will immediately begin to deteriorate after installation. We carefully fill all the cracks with polyurethane foam.
If the balcony fence is made of metal, then it should be covered with foam blocks installed on cement mortar. In regions with cold climates, walls and protective edges are covered with waterproofing film.
Preparation and processing of lining
Despite the many positive characteristics, wooden slats need reliable protection from external factors - exposure to the sun, moisture, and pests. Special compounds - varnishes, impregnations, primers, paints - will help improve the appearance and increase the durability of the material.
Preparing the lining for installation should begin with a thorough inspection. If moldy spots or dark areas are found, they must be bleached with special solutions. The composition is chosen based on the type of wood and its class. For birch, beech, and walnut, hydrogen peroxide is suitable. Ash is treated with a solution of peroxide and ammonia in a ratio of 10:1. Oak, linden, maple are wiped with oxalic acid. Any bleaching agent must be washed off with water after application.
If irregularities are detected and simply for prevention, the new lining is cleaned with fine-grained sandpaper. Then the boards are washed, dried and coated with an antiseptic composition. Then it is left to dry in a horizontal position for 24 hours.
Choice of insulation
Any available material is suitable for insulating a balcony. You should choose taking into account the level of insulation of each, cost, form of sale, and ease of installation. Each of the options on the market has individual characteristics and performance indicators. Before choosing, you should familiarize yourself with the characteristics of each type:
- Styrofoam. The affordable material fully fulfills its insulation functions. Hidden under the lining, it does not come into contact with the external environment, so it will serve for a long time.
- Mineral wool. In addition to its good ability to insulate, it strongly absorbs moisture. Belongs to the middle price category. Release form: rolls and skeins. Can only be used if it is possible to completely avoid getting wet.
- Extruded polystyrene foam. The optimal insulation option. Has good sound insulation. The locking installation system completely eliminates the appearance of cracks. The price is above average.
- Foil polyethylene foam. Suitable for southern regions, where the greatest danger to the lining is not cold, but moisture. Can be used as an additional layer.
- Foam glass. Lightweight, durable material retains heat well indoors at -50°C outside. Quality characteristics vary depending on the manufacturer. It has the highest cost of all presented.
- Foam block. Suitable only for spacious balconies. The minimum width of the parts is 30 cm. Lightweight, durable material can be installed on any surface.
Installation of sheathing
The wooden frame for the lining is mounted on top of the already installed insulation and waterproofing layers. To make it, you will need bars at least 3 cm thick. Thin planks can split when hammering nails. The best option for lathing is a 5x5 cm block. All additional wood materials must be treated with anti-rotting impregnations before installation.
If the lining is laid horizontally, the load-bearing sheathing is filled vertically. The diagonal, transverse arrangement of the lamellas requires a horizontal direction of the frame. The distance between the planks in both cases must be at least 0.5 m. If the bars do not adhere tightly to the wall, wooden wedges must be placed under them. In some cases, it is possible to grind down sections of the planks to level the base.
The first two slats are screwed to the ceiling. Then the distance of subsequent parts is marked, and the bars are nailed. Using the same scheme, according to the instructions, the sheathing is installed on all surfaces. At the stage of installing the sheathing, the location of the cabinet, shelves, and other furniture is determined.
Cladding
Once the preparatory work has been done, the process of covering the balcony with clapboard will seem very simple. The planks are assembled using special locks using the tongue-and-groove method and nailed to the sheathing. Installation work should be carried out very carefully, since natural wood can easily split if the nail is directed in the wrong direction. It is better to connect the parts through a block.
Installation of the lining begins from the corner, gradually moving along the walls. The first panel is applied to the guide bar and leveled. Drive the nails into the groove and ridge, trying to choose the optimal distance from the edge. Take the next element and connect the locks. To ensure a tight fit, you can gently hit the panel with a mallet and secure with nails at the top and bottom. Such manipulations must be done with all the details. It is necessary to leave small gaps in the corners for free air circulation and prevent the formation of mold.
Using nails, you can attach the lining to the wall in several ways - in a groove, in a tenon, through. They also use the clamping method. One board is applied to the surface and loosely nailed at the bottom and top. The clamp is attached to the lamella and to the sheathing, and the initial fixation is removed. After finishing is completed, they begin to slope and lay out the floor. The final touch is the trim and baseboards.
Protective and decorative coating of lining
Wood has low resistance to atmospheric conditions, is a breeding ground for insects and bacteria, and burns well. To avoid negative aspects during operation and extend the service life of the cladding, the lining must be treated and a protective coating applied.
Processing wooden panels significantly improves their characteristics, protective and decorative properties. To do this, various mixtures are applied to the element in layers, each of which performs its own function. Coating solutions are divided into several groups:
- Lucky. The characteristics of the compositions for the lining are determined by the main component. Water base is safe and non-toxic, no unpleasant odor. Panels can only be painted on a glazed balcony. Alkyd, acrylic base is suitable for any climatic conditions, protects well from ultraviolet radiation.
- Paints. They are used less often than varnishes, if necessary to mask defects. Any mixture will completely hide the unique wood pattern. Thick alkyd, facade, and oil paints are suitable for balconies.
- Impregnations. They create reliable protection for the cladding on the balcony due to deep penetration into the wood structure. Wood stains and wax impregnations are most often used.
Insulation works
An important point after preparation is insulating the balcony. Balcony insulation is sold in stores in the form of rolls and slabs.
Materials “Penofol” or “Izolon” have a foil base, so they are attached to the surface of the walls after preparatory work and drying. Next, a frame for sheathing is installed on top of the insulation.
Balcony insulation with Penofol (a sheathing frame is mounted on top of the heat insulator)
If mineral wool or foam plastic boards are used, you should immediately prepare the sheathing frame and lay the insulation between its slats.
Sheathing frame
Do-it-yourself insulation of a balcony with polystyrene foam
Prices for mineral wool
Minvata
Correct installation of the frame
Lathing for lining
Step 1. First, check the evenness of the surface using a level. If the upper section needs to be taken away more than the lower one, then work should start from the bottom.
Step 2. First of all, vertical slats are installed, and then horizontal slats are placed between them.
Do-it-yourself clapboard lining of the balcony from the inside
Step 3. The guide rail is cut to the required length.
Step 4. Places for future lining fastenings are marked. Marks are placed every 60-80 cm.
Step 5. Use a 6 mm drill to prepare holes 5-6 cm deep.
Step 6. Installation of the sheathing begins with the corner posts.
Step 7. The slats are laid as follows: one - at the level of the knee, the second - the hips, the third - the shoulder. It is necessary to maintain an interval between the bars of about 50 cm.
Frame installation (without insulation)
Step 8. There is no need to immediately tighten the screws too much. First, the guides are baited with plastic choppers.
Step 9. Before installing the rail, you need to make sure that it is level.
Step 10. The rail is hammered with a dowel, which can then be tightened with a screwdriver.
For the dowel, you need to use a plastic nozzle that fits tightly into the hole by at least 30 mm.
Step 11
It is necessary to create vertical lines along the working perimeter in order to see the evenness of the car laying during installation. To do this, cords are stretched.
Step 12. Based on these indicators, the remaining bars are attached.
Step 13. After installing the vertical slats, you need to move on to laying the horizontal ones.
Fastening horizontal slats
Step 14. If mineral wool is used for insulation, you will need to place it in the resulting cells and glue it with specially designed adhesive foam.
Insulation of walls and ceilings with mineral wool
Step 15. After this, the vapor barrier film is attached.
Vapor barrier
Fastening the frame to a deformed surface
If there are visible irregularities on the working surfaces that require a lot of effort and financial costs to eliminate, you can mount the frame differently.
- Install the rail on the most level part of the wall and attach a plumb line to it.
- Attach subsequent lower beams based on the plumb line indicators.
- Where it is necessary to reduce the distance between the surface and the lath, make a backing, and if there is a visible bulge, remove the top layer of plaster.
This way you can hide the imperfections of the walls in the most economical way accessible to everyone. After installation work, traces of deformation will be invisible.
Furniture selection
It is important to choose the right decorative elements. And furniture is the most complex and central detail. You should get rid of unnecessary things. There should be a minimum of items here. In the case of cold rooms, it is worth taking into account temperature changes and high humidity. Based on these factors, the appropriate furniture is selected.
Each piece of furniture must meet the following requirements:
- Compactness. For the balcony, select chairs, tables, cabinets that take up little space. The modern product market offers the use of transformable furniture. It is easy to fold and change its purpose.
- Light. It is necessary to leave it the opportunity to illuminate the space and not block the windows with furniture. So, cabinets are replaced with transparent shelves.
- Ease. All decorative elements should weigh little and be easy to move.
- Appearance. It depends on the overall style of the room. You need to try to maintain a single design.
Related article: Interior decoration of a balcony: doing the work entirely with your own hands
If it is permissible to use any materials in enclosed spaces, then for open balconies it is worth resorting to metal and wooden parts.
- We recommend reading: How to easily make a cabinet for a balcony yourself
Installation of lining
Step 1. You need to prepare all the necessary tools and materials: drill, self-tapping screws, small nails, clamps or dowels, level and wood materials for cladding.
Lining installation diagram
Step 2. Attach 1 board to the corner of the already installed frame. Check the evenness of the corner using a level.
Step 3. After making sure that the board is positioned correctly (vertically), you can use a clamp. To do this, the latter is inserted into a groove in the wood and secured with a small nail.
Clamps for lining
The wood structure is very delicate, so when driving a nail it is important not to damage it. To do this, it is recommended to place pliers on top of the nail and lightly hit it with a hammer.
Attaching to sheathing with a nail
To securely attach the lining to the sheathing with a self-tapping screw, you will need to screw it into the groove (tilting inward).
Using this method may cause the wood to crack. To avoid this, you need to make a hole in the mounting location with a drill, and then screw in the self-tapping screw.
To avoid damage to the material, you should first make a hole in the board with a thin drill
Step 4. To attach the second board, you need to carefully insert it into the groove of the previous one (from bottom to top) and also carefully fix it using a clamp or self-tapping screw.
Attaching the second board
Step 5. When installing the third board, you need to repeat all the manipulations. When the wood is in place, you need to take a hammer and tap it well against the previous boards along the entire length. To avoid leaving marks on the edges of the board, you need to apply a block and knock on it.
Craftsmen use a small (30 cm) piece of lining, which is inserted into the groove of the board and hit with a hammer so as not to damage the working part.
Step 6. The entire working perimeter is installed in the same way.
Carrying out work on covering the balcony with wooden clapboard
Ceiling frame and its cladding
Step 7. The last stage of the sheathing is the installation of skirting boards, which allows you to hide the seams in the corner places where the boards join.
Skirting boards at lining joints
To do this, you need to place the finished plinth in the corner, drill holes with the thinnest drill bit and drive small, inconspicuous nails into it. Such actions are performed along the entire perimeter of the balcony.
Video - Do-it-yourself lining of a balcony with clapboard from the inside
Recommendation! To properly sheathe a balcony, you should use eurolining. It has low humidity and is more protected from fungi and mold.
Also, euro-lining has longer tenons (8-9 mm) compared to conventional lining (4-5 mm), so it is attached easier and more reliably.
Stages of work execution
Having decided on the choice of material to cover the balcony with clapboard, you should perform the following preparatory measures on the balcony before starting work. To understand the installation process, consider the option of covering the balcony with euro clapboard or finishing the balconies with wood.
We present the stages of work on how to cover a balcony with clapboard.
The first stage involves glazing the balcony, choosing thermal insulation and fastening material for insulating the balcony, the amount of material for work, the availability of the necessary tools and preparing the place for work.
When choosing insulation, you should take into account the thermal insulation properties of the materials and the ability of easy installation. The cheapest is considered to be polystyrene foam, produced in the form of slabs. It retains heat well, but does not withstand loads and can release harmful substances to the body, especially when ignited or burned.
If it is used, it is better in external thermal insulation. Mineral wool is a more common thermal insulation material. It contains glass fibers from rocks and slag, and contains fordamelhyde resins.
Basalt materials have no binding properties, they are environmentally friendly and fireproof. Mineral insulation requires protection from moisture during operation. Extruded polystyrene foam in slabs, does not allow cold to pass through, is in great demand, and is expensive.
Foil polyethylene foam is effective as a vapor barrier and can be used in conjunction with mineral wool for cold regions. Foam glass know-how in construction, environmentally friendly insulation in slabs, cut with a hacksaw and installed on foam, similar insulation to foam blocks.
At the second stage, the balcony is prepared for finishing. All structures are checked for reliability and high-quality fastening. Walls, floors, and ceilings must be free of cracks, chips, and loose parts of plaster, concrete, and paint.
Also read: Finishing a balcony with plastic panels: advantages and disadvantages, installation technology
All places of cracks and chips must be sealed hermetically with cement mortar, sealants, and polyurethane foam. Level the surfaces of obvious protrusions and depressions. Treat finished surfaces with a primer or anti-mold and mildew compound.
At the third stage, the frame is installed under the sheathing. The frame can be made of a metal profile with special metal strips fastening it to each other and to the wall.
You can make the sheathing from wooden beams, this method is much cheaper, but you must first prepare the timber by covering it with an antiseptic to prevent rotting. The thickness of the timber is selected 2-3mm greater than the thickness of the insulation.
The frame slats are mounted in a vertical or horizontal plane, depending on the location of the lining panels, which are positioned strictly perpendicular to the timber frame slats.
Before installing the timber slats, work must be done on the floor to install the frame or pour the floor with concrete, with the installation of the finished covering. After this work, you can install the timber slats on the ceiling and walls.
The sheathing is installed with a pitch between the slats of approximately 600 mm and with a distance of 60 mm from the corner or wall. The sheathing slats are secured with dowels to the wall and ceiling securely and level. At the end of the work, you should get a strong, reliable frame in each plane and there should be no discrepancies in geometry and parallelism.
At the fourth stage , insulation is installed between the timber slats; if it is in slabs, then the insulation slabs are adjusted to the size of the cells. You should get a dense carpet of insulation; if necessary, you can attach the insulation to plastic dowels or glue - liquid nails; the cracks between the plates should be foamed with foam.
At the fifth stage, the lining is installed. The cladding of the balcony begins from the most difficult angle. The first strip of the lining is installed with a tenon in the corner according to the level and secured with a nail with a clamp to the bars, or without it, a nail is driven at an angle of 45 * into the lower part of the tenon to the batten.
The fastening point should be covered by the next panel. You should work with the lining carefully, gradually moving from the corner along the wall. The last plank is cut to size so that it can easily fit into the groove and fill the remaining space, then it is fixed with a nail to the block.
When installing long lining strips, you should take into account the size of the lining; if there is insufficient length, first install a long piece, then extend the length further.
Also read: Finishing a balcony with plastic panels: advantages and disadvantages, installation technology
The next lining should be run, that is, first a short section, then a long strip of lining. Finishing is carried out on all areas of the walls, ceiling and ledges.
The completion of the installation stage will be the installation of decorative corners, baseboards, and window sills.
At the last stage, sixth, we will consider how to treat the lining on the balcony, how to cover the lining on the balcony. Under the influence of temperature differences, moisture, and insect penetration, the wooden structure of the lining should be treated with protective coatings.
How to treat to prevent mold and mildew? For this purpose, special antiseptic liquids such as PINOTEKS, SENEZH and other compositions are used.
How to cover the lining on the balcony in order to give decorative shades and highlight the structure of the wood lines? Special water-based dyes such as STAIN or alkyd-based can transform wood and make it the desired shade.
Currently, the question of how to paint the paneling on the balcony is not urgent, because the construction market offers different types of quick-drying, water-based, alkyd, and polyurethane-based varnishes from domestic and foreign manufacturers.
By following the technology of applying the composition, you can achieve results and ensure a long service life of the tree. It is more convenient to use special antiseptic painting compounds, then the material will be protected, the wood will acquire color, the treated eurolining will not only decorate the balcony, but also protect it from various influences.
In color design, it is of course better to give preference to light tones, since the light surface of the lining warms up less and, accordingly, fades less.
Protective coating for finished cladding
A protective coating is a special solution that allows you to protect wood material (lining) from exposure to sunlight, mold or mildew, and also give it a smooth and more attractive appearance.
The following tools are used for this:
- antiseptic preparations: covering or glazing;
- varnishes: alkyd and acrylic;
- paints: oil or acrylate.
For lining on the loggia, yacht (boat) varnish, which is based on polyurethane, is suitable. This product is used to treat wooden boats, so it provides excellent protection against moisture.
Also, to give the boards color and strength, you can use acrylic paint, which must be applied to the lining in several layers.
Features of the material
Wooden cladding boards are used for interior decoration. Any type has excellent performance characteristics and an attractive appearance. Natural material is easy to install thanks to special locks on each element. Profiled boards can be made from any type and type of wood. More often they use pine, oak, linden lining.
Wooden panels are very flexible, which makes them easy to process. When installing or repairing individual elements, you can use hand tools. The special configuration provides the lining with a number of advantages. Convenient width and thickness, the piece nature of the panels have a positive effect on the weight of the material. One person can handle the installation of compact lamellas; there is no need to assemble a powerful frame and overload the base to install wooden parts.
The panels are installed using a tongue-and-groove method, the wooden boards cover each other with an overlap of 5-8 mm. This allows you to avoid the appearance of cracks when temperature and humidity levels change. Thanks to special fastenings, metal clamps, the appearance of rises, cracks and other types of deformations on the lined surfaces is excluded. Moreover, all fasteners are hidden behind a smooth, decorative surface.
Use of PVC lining
This option for internal balcony cladding is the most economical and accessible to everyone.
Color solutions for plastic lining
Table. Pros and cons of plastic lining.
| Advantages of PVC lining | Flaws | How to improve quality |
| Panel boards are easy to use and can be easily installed at any angle. | Manufactured artificially and therefore not environmentally friendly. | Make flexo printing. |
| They are cheap and accessible to everyone. | Capable of turning yellow due to solar influence on the PVC structure. | Apply lamination agent. |
| They have a huge color spectrum. | Does not prevent condensation accumulation. | Use thermal transfer. |
Flexo printing. After coating a plastic material with flexo printing, it becomes more resistant to light mechanical damage and ultraviolet rays. This is due to the surface varnish fixation of the pattern.
Plastic panel with flexo printing “Beige Marble”
Lamination. When using it, a special film is glued to the material. After carrying out these manipulations, you will notice that the artificial material has become stronger and more elastic, so it will last much longer. The second function of lamination is decorative decoration. After this procedure, the surface of the lining takes on the appearance of wood or stone, which designers will definitely appreciate.
Samples of laminated PVC panels
Thermal transfer. The most difficult process of drawing a picture, because it is carried out by exposing the image and surface to high temperature. Consequently, the image is reprinted and soldered into the base of the artificial lining. Using this technology, you can get bright pictures, and golden or silver shades can only be obtained using this method.
PVC panel (thermal transfer)
PVC panels are the simplest and most convenient material for interior cladding. This lining fits well in any position - horizontal, angular and vertical.
There are many colors and textures of plastic lining (there are even mirror panels). However, the “mirror” option is used exclusively on darkened balconies where direct sunlight does not penetrate. This is due to the negative impact of the sun on the shine of the PVC mirror coating.
Application of mirror plastic panels
Prices for PVC panels
PVC panels
Installation of PVC panels (lining)
To correctly install PVC carriage slabs, you will need to evaluate the evenness of the wall surface. If they are perfect, then the panels are attached with glue.
Scheme of finishing a balcony with PVC panels
If there are curvatures or unevenness on the surface, you will need to make a frame (the same as for facing boards). The process then proceeds as follows.
Fastening panels with a clamp
- The slabs are attached to the beams with a stapler or self-tapping screws.
- Work begins from the corner.
- To secure the panels together, you will need to insert the plate into the groove of the previous panel (until it clicks).
Balcony cladding with PVC panels inside
Before installing the frame and panels, pre-antiseptic treatment of the wall surfaces should be done. This helps reduce the likelihood of fungus appearing.
We finish fastening the plastic lining
Fastening PVC panels to the balcony ceiling
Features of seamless PVC lining
This type of finishing material is artificial. In its structure, it is not very different from tile PVC, but it is large in size, which is the only difference and causes inconvenience when transporting it to your home.
The walls are lined with colored seamless plastic lining
Main types of lining
Before you begin installing the facing material, you should know the types of lining. Different types of wood are used for finishing inside the building. Mainly it is pine. This material is considered more budget-friendly. Oak or cedar lining is a little more expensive. Why is pine lining cheaper than oak or cedar? You pay more for good quality; pine is not as high quality as oak. Also, pine lining does not tolerate high temperatures; when exposed to them, the material releases resin, and this is a big problem, since such resin is harmful to human health. If you are still going to install pine lining, make sure that the material is not exposed to direct rays of the sun.
The lining itself is divided into four classes:
- Premium
- Class A.
- Class B.
- Class C.
Premium class, or Extra class lining is the highest quality facing material of its kind, but you have to pay dearly for such quality. This material differs from others in that you will not find knots or cracks on its surface. A smooth, clean and uniform surface attracts many people.
Class A - it has an insignificant difference from the premium class. These differences include: small knots on the surface, several knots per one and a half meters of lining.
Class B - it has a visual difference from other types, they are visible to the naked eye. On this type of lining, you can see knots, cracks, and pockets of resin.
Class C - this class is not used for interior finishing work, because it can be shabby, with knots and strong cracks. Most often, class A and premium class are used for finishing. But, if your plans include painting the facing material, you can choose class B.
Finishing the balcony with eurolining is gaining unprecedented speed in use. You have a large selection of materials. Think about how much money you are willing to spend on this repair, then base it on the type of material.
COVERING BALCONIES AND LOGGIAS WITH PLASTIC LINKING
Plastic lining got its name due to its resemblance to wooden lining. Some craftsmen simply call it wall panels.
ADVANTAGES OF POLYVINYL CHLORIDE LINING:
– resistance to moisture;
- low price;
– a huge range of colors;
– durability;
– resistance to mechanical stress.
Customers are impressed by the fact that plastic lining is easy to clean from dust and dirt. Also, this lining has a lot of colors and does not need to be additionally treated with paint or other compounds.
Below you can see examples of finishing balconies and loggias with plastic lining.
Where to start processing lining on the balcony
When you do not have the opportunity to buy already antiseptic lumber, you will have to process the lining intended for the balcony yourself.
Impregnations used to treat wooden boards are solutions of chemicals with various additives. They should be handled with care.
For work you will need rubber gloves, goggles, a respirator or mask, and a long oilskin apron. To process the lining, prepare a roller, a set of brushes, brushes, sponges, rags, a spray gun, and containers for liquids. Follow the recommendations of the technological map and instructions for using chemical compositions.
There are both mono-primers and wide-range impregnations on sale. It is assumed that by treating the lining with them, you immediately protect it from all risks. It is better to prefer special preparations to universal means of protection as they are more effective.
Whitening
Wood bleaching surgery is needed when the board is already affected by fungus. An indicator is the presence of blue, gray-black spots on its plane.
Treating lining with chlorine-containing liquids does not kill microbial spores, but will inhibit the development of the fungus. Bleach will lighten the board, but penetrating the wood will destroy the cellulose. The effect of chlorine is neutralized by washing off with a stream of warm water.
The bleached board must be dried in air under a canopy, cleaned of efflorescence and antiseptic.
Detarring
On lining made of coniferous materials, resin often appears, which prevents the penetration of the necessary impregnating compounds into the wood. Therefore, the board will need to be cleaned of resin “tears”.
For this purpose, ready-made resin solvent preparations are sold. But you can remove the tar from the board with alcohol, white spirit, acetone, or gasoline. The liquid is applied to the surface to be treated several times, rubbed with a brush, washed, wiped with acetic acid, and dried.
Fire treatment
Fire retardants or fire retardants are aqueous solutions of ammonium sulfate, boric and phosphoric acid salts.
Treating the lining with a fire retardant slows down or stops the burning of wood, which allows the fire to be extinguished more quickly.
Wooden lining is impregnated with fire retardants on all sides, especially at the ends. Impregnation can be superficial or deep. It does not change the color of the processed lining. Deep vacuum impregnation is carried out at a woodworking enterprise during the production of lumber.
At home, in soft soil, dig a hole the size of the lining, line it with thick polyethylene, pour in impregnation and soak the wood. Surface treatment is done by applying fire retardant with a brush, sponge, or spray gun.
Such actions need to be resumed after 2-3 years if nothing else is going to be applied to the lining.
When buying a fire retardant, pay attention to the type and class/fire protection group. Class I flame retardants have the highest level of fire protection. The lining on the balcony can be treated with class II fire protection.
It is strictly forbidden to mix different fire retardant liquids. The first and subsequent layers of impregnation must also be applied to the board using a product of the same brand and manufacturer.
Treatment for mold and shashel
Preparations for mold, fungal microorganisms and wood-damaging wood-boring beetles are called aniseptics, bioprotection, impregnates. Impregnations are available in dry, liquid, concentrated form, calculated per m2.
Antiseptics are divided into water-soluble, oil-based, and combined. The first include impregnations based on copper sulfate, sodium fluoride and fluorosilicone, and zinc chloride.
Sodium tetraborate, borax, has antiseptic properties. Oily primers are not used inside buildings. In case of slight infection of wood with shashel, use a medical syringe to clog its passages with special wax, and carry out deep treatment with the biological preparation “Antishashel” or similar. It’s better not to delay treating the lining from mold and insects.
Repairing cracks and other mechanical damage
If it is preferable to carry out fire and bioprotection of the lining before its installation on the balcony, then the processing and leveling is done according to the finished lining.
You will need to fill up splits, cracks, and seal holes from knots. It is better to buy industrial wood putty in a small container - it dries quickly. Putty on a dry board, following the text on the package.
Preparing the balcony for lining for finishing
The main work to prepare for finishing a balcony with eurolining is:
- installation of double-glazed windows (metal-plastic glazing) with sealing of cracks and joints;
- sealing all cracks, holes and other defects in the walls and external fencing;
- removal of significant protrusions and protruding pieces of reinforcement;
- waterproofing of all surfaces;
- preliminary insulation of walls, floors and ceilings (if necessary). For this, thin material is selected, for example, foil-foamed polyethylene foam;
- creating sheathing;
- electrical wiring arrangement with fastening to the sheathing and output to the installation sites of sockets, switches and lighting fixtures (as needed);
- placement of the main insulating material between the frame slats;
- additional vapor barrier with membrane;
- treatment of the frame and other wooden elements with protective compounds - antiseptics, fire retardants, etc. Depending on what kind of lining you plan to install on the balcony, you can increase or decrease the number of degrees of protection.
The last point of the preparatory work for finishing the balcony with MDF and lining can be neglected only if the room is guaranteed dry and there is no risk of fire.
Waterproofing and floor insulation
Let's move on to waterproofing. It is made with foil polyethylene foam. The walls, ceiling and floor are completely covered with a substrate. It is secured to the walls and ceiling with “liquid nails.” The strips and sheets are connected to each other with sealing tape. Please note that polyethylene foam is laid with the metallized side facing the inside of the room. It will reflect infrared radiation, providing additional heat retention.
It's the floor's turn. Before you cover your balcony with clapboard yourself, you need to insulate the floor. Beams measuring 50 by 50 millimeters are laid on the waterproofing at a distance of 40 cm from each other. If the floor is uneven, use pads. The position of the bars is controlled with a level, so that they all lie in the same horizontal plane.
The gaps between the resulting logs are filled with thermal insulation material. For these purposes, it is convenient to use mineral wool. Expanded clay, expanded polystyrene or polystyrene are less commonly used. If the thickness of the insulation is more than 5 centimeters, then the height of the beam will need to be different. The floorboard is laid on top and secured with nails or self-tapping screws.