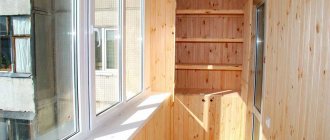
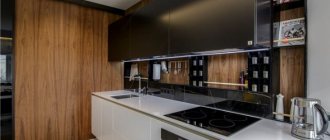
Cladding materials have always been in great demand. One of their varieties is lining. It has established itself as a high-quality product with many positive properties. There is a wide variety of profiles on the market, which allows you to create different textures and attach panels anywhere. Almost any type of wood can be used as a primary raw material. Lining has become a common material for finishing steam rooms, but it can also be found in expensive private homes. The styling pattern is selected individually. It can be horizontal, vertical, diagonal, combined. Complex configurations are popular these days. Eurolining has a good reputation. It has a neater appearance and improved properties. If you have basic knowledge, clapboard cladding can be done on your own.
Advantages and disadvantages of finishing
Initially, lining was used to decorate train interiors. Even then, people paid attention to its ability to soften changes in humidity and temperature. It was quickly attached with profiled joints - this is another plus. Then the lining was improved: the shape and grooves changed, and the design characteristics improved. Finishing with modern lining has many advantages. First of all, this is the convenience and speed of installation thanks to the tongue-and-groove system. Another advantage is environmental friendliness. And one of the main advantages can be considered a low price with a fairly presentable appearance. Clapboard finishing has several negative aspects. The material can be spoiled by parasites. Rotting also causes deterioration in the appearance of the cladding. Wood also absorbs a lot of moisture and heat and deteriorates because of this. However, in doing so it improves the indoor air.
Advantages and disadvantages
The material has a natural structure and fits perfectly into the surrounding environment. Changing its color is easy with the help of paint, the choice of which is huge. Using different colors and their combinations, it is possible to achieve interesting results.
Main advantages:
- durability of operation;
- environmental friendliness:
- additional thermal insulation;
- simple installation without the need to involve specialists;
- affordable price.
Wooden lining goes well with any materials. It will help create an exceptional atmosphere in your home.
Room design with clapboard trim
Decorating a room with wooden clapboard
There are also some disadvantages of finishing boards:
- It is perfect for private households, but wood is easily flammable. Before use, it is carefully treated with fire retardants.
- When exposed to moisture, wood begins to deteriorate. It is impregnated with special substances to ensure resistance to decay processes. This increases the durability of the skin.
Even housing in a metropolis will look like a luxurious manor if you use clapboard cladding. A unique atmosphere will be created with the right choice of lighting, mirrors and furniture.
Lining with a pattern
Wooden lining in the interior of the room
Types of lining
Conventional lining is characterized by the following dimensions: thickness - 1.2-2.5 cm, width - up to 15 cm and length - up to 6 m (this is basically what it was in the old GOSTs). Standard lining has a smaller tenon - 4-6 mm, compared to 8-9 for Euro lining. The humidity of ordinary material is 8-12%, 25-35%, the European version is up to 12%. The old type of lining is made from material with natural moisture. Eurolining is a high-quality cladding board for external and internal wall decoration. It masks imperfections well and is capable of leveling surfaces. In addition, it performs sound and heat insulating functions. Eurolining has certain fixed parameters. The thickness is 1.3, 1.6 and 1.9 cm. The width is 8, 10, 11 or 12 cm. The maximum length of the board is 6 meters, but this figure depends on the manufacturer and varies greatly in different cases.
Types of wood from which eurolining is made:
- oak;
- Linden;
- pine;
- spruce;
- aspen.
Selection of lining: varieties, classes and grades
Wooden lining is a classic material for interior decoration; Thanks to its environmental friendliness and natural surface structure, it fits into most interiors. The most common material is in the form of wooden slats with a standard width of 8.8 cm and a length of 1 to 6 meters.
Bedroom in a modern style Source yandex.ua
The panels can be installed horizontally (which helps to visually expand the room), or vertically (this arrangement makes the room taller). In addition to wooden boards, finishing the cottage with clapboard is also done using other finishing materials:
- PVC profile (plastic panels). Plastic products are used to cover ceilings and rooms with high humidity (kitchen and bathroom). The material is moisture resistant and fragile. A small color variety can also be considered a disadvantage - panels are produced in white and several additional simple colors (blue, brown, yellow), which narrows the prospects for the original design.
- MDF panels . A finishing material made from wood fibers that closely resembles wood in appearance. Such panels are mounted both on walls and on the ceiling; Manufacturers offer panels of various colors and textures. Like wood, the main disadvantage of MDF panels is their sensitivity to moisture, which somewhat limits their use.
MDF panels Source stroitnado.ru
See also: Catalog of companies that specialize in finishing materials.
Wooden lining, offered in construction stores, can have various profile options:
- American . Material with this profile has increased resistance to moisture and is therefore used in external decoration. Due to the design features, installation is carried out “overlapping”, which provides additional protection for the seams and an original appearance.
- Eurolining . Ideal for both external and internal cladding. It differs from other varieties in the large size of the grooves and tenons; This design feature ensures good ventilation of the coating.
- Calm . There is no decorative recess at the place where elements with this profile are attached. The surface is absolutely flat, acquiring the effect of complete seamlessness. Lining profiled in this way is convenient to use in finishing both walls and ceilings; it is characterized by a low percentage of defects (chips and cracks) in work.
Eurolining made of pine Source lesprom.com
- Blockhouse . This material is suitable for both external and internal decoration. Unlike other types of finishing panels, the front side of the blockhouse is not flat, but convex, which allows you to successfully imitate a log wall.
When choosing lining, it is important to pay attention not only to the scope of use and profile shape; For interior decoration, the class of material is of great importance. Wooden lining for finishing the inside of a house is divided into the following quality classes:
- Extra class . For the manufacture of panels, high-quality wood is used, often from valuable tree species. Lining of this level is characterized by increased strength, ideal appearance, absence of defects and corresponding cost.
- Class A. The material has a well polished surface. A small percentage of defects is allowed - no more than two on one panel. This may be a small light knot up to 1 cm in diameter, but not a crack or a resin pocket. In terms of price/quality ratio, class A lining is the leader among other varieties.
About quality clearly Source legkovmeste.ru
Types of lining profiles
Variety is important in finishing, so manufacturers produce different variations and modifications of the lining. Traditional eurolining forms distinct seams after installation. If this type of lining has a rounded chamfer, then it is “Softline”. Its outer part is devoid of corners, which allows you to protect the wood from burrs and chips for a long time. "Softline" is well suited for saunas. The Shtil lining does not have a chamfer near the tenon, and, as a result, there will be no pronounced seams after assembly. The thickness reaches 2.5 cm, so it can be used for decorating facades. “Landhouse” is a lining with a complex rounded shape at the edges. Finishing with this coating will make the interior more “expensive”. Another interesting option is “Blockhouse”, which features a rounded front side. This material can be used to finish the surfaces inside log houses and facades.
Several more types of lining:
- "American". Has a sloping surface. The elements are overlapped.
- Double-sided. Both sides are obverse. It is used not only for finishing walls, but also for constructing partitions.
Type of lining depending on the type of wood
The lining is made from coniferous and deciduous trees, as well as from exotic species (for example, mahogany). Among the coniferous species, it is worth highlighting spruce, pine, larch and cedar. Spruce is endowed with softness, which is important for making boards with rounded shapes. This material looks great in a modern interior. Pine lining is a budget option that has many important qualities, including high strength. Larch is one of the most expensive coniferous species. Cedar boards have a pleasant natural smell that has a beneficial effect on the body. Among hardwoods, the most popular are oak, alder and linden. Oak wood is a durable and sought-after material. Lining made from this wood is considered a classic option. Alder is suitable for use in damp rooms as it does not absorb moisture. Linden is very resistant to deformation and mechanical damage. Lining from it is relatively inexpensive.
Type of lining
There are 4 varieties:
- Extra;
- Class A;
- Class B;
- Class C.
The boards are sorted depending on the presence of resin pockets, pronounced blueness, knots, cracks, and roughness (poorly treated areas). The extra grade is characterized by the complete absence of prostrog or minor defects on the front side. There may be one light knot per linear meter. For class A, the presence of microcracks and small untreated areas is allowed. At the longitudinal ends, cracks no longer than the width of the board are allowed. There should be no more than a fifth of all boards made of core profiles. It is acceptable to have 3 knots on one linear meter. As for class B, the presence of 2 falling knots is allowed on one such board. Cracks up to 3 cm are allowed on the front side, and cracks of any size on the front and back sides. All panels can be made from core, with resin pockets. Class C includes all boards that are not included in the categories from extra to class B, but are suitable for use. Rottenness is not allowed.
Material characteristics
Lining is a cladding board made from solid or laminated wood. It is produced according to two standards: GOST - ordinary, and European - eurolining.
- Regular - can have a thickness from 12 to 25 mm, a width from 12 to 15 cm and different lengths. Its fundamental difference from the board is the formation of the lock element - the groove and ridge at the ends of the lamella. During installation, the planks are not only fixed to the surface, but also connected to each other.
- Eurolining is more limited in size range: its thickness is 13, 16 and 19 mm, width - from 8 to 12 cm. The docking lock is more durable, thanks to the greater depth of the groove and the size of the ridge - 8-9 mm, versus 4-5 mm for ordinary. The slats on the inside have drainage grooves, which allows you to effectively remove condensation. In addition, the trim goes on sale already treated with antiseptic agents, while ordinary lining needs to be disinfected with your own hands.
The physical and decorative qualities of the material largely depend on the type of wood. For certain types of work, they try to select the appropriate finish. For example, spruce is an affordable, almost universal material, but its resistance to decay is low, so it is better not to use it for external work. But larch can be used to cover a façade without any pre-treatment, as it is so insensitive to rain and snow.
The appearance of the finished surface is determined by the profile of the board - calm, American, block house.
The grade of the feedstock also matters. The “Extra” grade, for example, does not contain any defects, therefore it is used for finishing residential premises. And grade “B” allows both knots and resinous pockets, and is more often used for cladding terraces or bathhouses. There is one more nuance here: depending on the grade, the lamellas are produced in polished or untreated form. In the latter case, you will have to do the grinding yourself.
Where to apply
Clapboard finishing is often used in steam rooms and other bathhouses. In this case, choose panels made of linden and alder (for steam rooms) and coniferous wood (for other places). These types of wood are endowed with healing properties, thanks to substances that are released when heated. Boards with knots cannot be used in steam rooms, as the corresponding areas become hotter. For a good aroma, it is recommended to install several pine boards in the area of the stove. The lining treated with protective compounds is suitable for cladding facades; the type of wood in this regard is not particularly important. Interior decoration is a complex task; panels in a uniform color scheme are required. Mahogany lining is used for cladding walls in expensive mansions. The panels are also used to make partitions to divide space: both in apartments and in open areas.
Lining in the kitchen interior
These panels completely decorate the room, but you need to make a bright accent. They highlight the dining area and are also used to decorate work areas. After coating with a moisture-resistant composition, maintenance will be easy.
For French classics and country style, placing the material only at the bottom of the walls is suitable. The rest of the surface is covered with wallpaper and painted. There are other options. Installation of the lining is carried out only where the kitchen unit is installed. Its vertical location will visually increase the height of the room. If you need to expand the space, then stop at the horizontal version of the cladding.
Bedroom with white paneling
White lining in the interior of the room
Attention is paid to facades; it is better to choose smooth products. The upper sections are often replaced with shelves to make the room more laconic. If you decide to decorate a room in an eclectic style, it is better to use lining for one or two walls. In this case, choose the horizontal direction of the material texture.
Finishing with multi-colored lining
Wooden paneling in the room
Sheathing schemes
There are two ways - using external fastening and hidden. With the external method, the boards must be fixed with fasteners. In the second case, the panels are attached to the sheathing from the groove side, where there is a joint with a tenon. The appearance with this option will be more aesthetic. The lining can be mounted vertically, horizontally and, if necessary, in a non-standard way. When laying panels horizontally, the teeth must be directed from the lower element to the upper one, and not vice versa. When sheathing a log wall, staples and nails for them and lathing are used. To clap a room with smooth walls, you need to use bars. They are placed at a distance of no more than 50 cm between adjacent elements and perpendicular to the panels. The cladding is framed with decorative skirting boards and fillets
Basic fastening methods:
- nails;
- screws;
- staples;
- kleimers.
Types of installation
Naturally, before you start covering the walls with wooden lining with your own hands - an example in the video, you need to decide on its type and direction. Be it horizontal, vertical, diagonal, herringbone, diamond or brick laying, mixed.
Horizontal installation is considered a classic (in Russia, for sure). Has a positive effect on expanding room space. A small disadvantage that can be avoided (during installation, the grooves are directed downwards) is dust and moisture that collect at the joints of the boards. Following this recommendation, start laying from the top.
Vertical placement is the most popular among Finns. It makes the ceilings visually higher. This effect is especially important for low rooms. Installation of wall trim with clapboards begins from the most difficult angle.
Diagonal installation (and mixed) have differences in direction and aesthetic appearance. Installation is much more complicated than previous options. The interior, decorated with wood of different types and shades, looks especially bright and unusual.
It is easier to install wooden panels on walls horizontally with belts or vertically.
The vertical version of wall covering with clapboard is simply necessary for rooms with high humidity, places where frequent condensation is possible (bathhouse, kitchen, etc.). Because the horizontal method will not protect against excess moisture. The type of installation, when installing boards vertically, affects whether the tongue and groove will be cut, in what place, and by how much.
When mounted horizontally, the final result looks very attractive. Here the lining is installed, directing the ridges upward to protect the grooves from the accumulation of water. This will prevent the occurrence of rotting, microbes, and fungi in the future. When installing the first bottom board, the edge of its groove is cut off. This removes the pocket that will collect moisture.
The diagonal option for placing lining is used less often. This happens more difficultly, with a large amount of material waste. From the point of view of beauty, it is practically no different from previous installation methods. This DIY clapboard wall decoration will add zest to the room.
There are shaped styling: herringbone - a little difficult, but possible. A vertical sheathing is required, on which template-cut fragments of material will be mounted.
Wall cladding with diamond-shaped clapboard is more complex. The sheathing is made in the form of a framed cross. The bars are fastened diagonally in its quadrants. The labor spent on installing diamond-shaped lining is worth it. The result looks incredibly stylish and expensive.
How to sheathe it yourself
You will need to complete the following stages of work:
- Prepare the lining.
- Prepare the wall.
- Assemble the sheathing.
- Attach the clapboard to the lattice frame.
- Finish the covering with skirting boards and, if necessary, other elements.
The panels are processed first. Depending on the place of application, any class of lining can be processed. It is always necessary to prepare the surface of class C products. The same applies to lining made by yourself. Preparing the walls consists of leveling them and applying markings for the sheathing. It is not necessary to level it; instead, you can do other manipulations. The crucial point is the installation of the sheathing. The timber itself and the distance between the elements are selected. The configuration completely depends on the planned method of laying the lining. Different approaches are used to fix the panels. The main thing in the work is caution, because inaccurate driving of the fastener can lead to the appearance of serious defects in the material. When the sheathing is ready, installation of baseboards and finishing begins.
How to prepare the lining
If necessary, the panels are treated with fine-grained sandpaper to eliminate roughness. Further processing begins with cleaning the surface of the material. If you plan to apply wax or varnish to the lining, stain is first used. It will preserve the color of the wood for a long time. There are 3 types of stain: oil-based, alcohol-based and water-based. Antiseptics will protect the wood from moisture penetration and mold. If the installation location is a bathhouse, waxing will be required. It is applied in small quantities, in the direction of the fibers. This procedure must be repeated several times. Then the products are polished. Among other things, the color of the boards will become deeper. There is a large selection of wax impregnations on sale, which are also suitable for preparing lining. The last stage is applying varnish. You will need at least 2 layers. The material must be perfectly dry before installation.
Grease stains can be removed using a 25% acetone solution.
Preparing the walls
You will need to make markings on the wall for the sheathing. This action is performed using a pencil and level. The configuration of the cladding and the direction in which the lining will be placed are determined in advance. The bars are always placed perpendicularly. If everything has already been decided about this nuance, you can start treating the walls with antifungal agents and marking the surfaces. If something happens, the pencil is replaced with chalk. The width of the sheathing step is selected depending on the purposes. For strength, it is advisable to make it as small as possible. Usually this figure is in the range of 35-60 cm. If in the future it is planned to insulate a room, the step is determined based on the size of the insulating material and should be slightly less than it. To ensure that the frame structure is level, you will need to use a plumb line and fishing line. A visualization is created, along the edges of which bars are then placed.
We create a sheathing for fasteners
This is one of the most important stages, which has a significant impact on the final result. Only sometimes the lining is attached directly to wooden walls; in other situations, lathing is necessary. At the very beginning, we select the timber. For this sheathing, a block with a cross section of 40×20 mm is the best option. We install the frame one level at a time. If necessary, we level each individual wall. You can use another method - determine the most protruding place on the wall. Then a small piece of timber is placed there and the sheathing is mounted from it. From this point the thread is pulled parallel to the planned direction of laying the panels. At the extreme points of the wall, 2 load-bearing beams are placed. If necessary, install spacers between the wall and the beam. If a row of lining will be mounted from 2 boards, another beam is needed at the junction.
Other important nuances:
- when securing the structure, you need to check the level;
- if there are door or window openings, the beams must be fastened around them;
- Installation of lathing on the ceiling is done in the same way as on the walls.
Fixation methods
The lining is secured using staplers, clamps or fasteners (screws, nails). During installation, care must be taken to avoid splitting the wood and causing cracks. Full insertion of the nail head into the material and accuracy of work are ensured with the help of a hammer. When installed in a hidden way, the panels are nailed to the frame at the junction of the tongue and groove. The simplest and easiest assembly method is to fasten with small nails in any places, but it is better to prefer a neat method that involves hammering nails into the grooves to hide the connection. The highest quality fastening is ensured by metal clamps. They come in different sizes, shapes and are designed for a certain board thickness. The fasteners are connected to the sheathing on one side, and cut into the grooves on the other.
Fastening the lining to the ceiling requires careful steps, so it is better to do this together with a specialist!
The process of fastening the lining
If the sheathing is installed correctly, the process of installing the lining will go without complications. A level may be needed when attaching the first panel. The first question before installation is which side to start laying the boards on. You can determine the answer by finding out how smooth the surface is. If it corresponds to the level, then you can start laying from any side: top, bottom, right, left, corner. The first board is then placed level. If the surface is slightly “overwhelmed” or some corner is uneven, the boards cannot be installed this way. Otherwise, they will visually emphasize the curvature. The lining will need to be assembled in a different way. The first board is attached flush to the corner, the rest - with a slight inclination in the desired direction. Sooner or later some panel will become level. All boards “fill up” to the same extent. The first one needs to be placed with the spike towards the corner.
Rules for installing skirting boards on a wall with lining
For an aesthetic appearance, the sheathed walls are decorated with floor and ceiling skirting boards. Sometimes they need to be mounted on the wall (corner). When finishing corners, they are guided by the following rules: if there is an adjacent unsheathed wall, then the plinth is installed on it, and when placed between two sheathed ones, it should be attached to the shorter one. These measures should not prevent thermal deformation and drying out of surfaces that are most susceptible to them. If the wall is decorated with clapboard, then the baseboards are fixed using finishing nails. They hammer it through the body, the narrow cap goes into the mass. These areas are then treated with a wax pencil. If the surface is not flat (for example, log), nailing a regular baseboard will not always be possible. Gaps may remain. It is likely that in the corners the baseboards will not meet at all. Instead, you can use flat platbands. They fit tightly on the wall, and you can make them yourself, including from clapboard.
Decorative finishing methods
If installation is carried out in a hidden way, it is recommended to use decorative fasteners. A hammer will ensure accurate fixation and decoration of the nail in the wood. You can decorate the corner between the boards using treated timber - this way there will be no gaps in the opening. If the natural color of the wood does not fit into the interior or does not add any color, then the lining is coated with paint. It’s better to match the decor or white. The nail heads that secure the starter board are covered with decorative corners. If there are no decorative slats, then the tops of the fasteners are removed with side cutters. All joints, internal and external corners must be closed. Bottom and ceiling plinths are also used for decoration. The interior can be radically changed by installing false beams on top of the lining.
Wall decoration with clapboard
How to use lining in the interior of an apartment or house? The most popular answer is to decorate the walls with it. Wooden panels will make the design of any room homely and warm, will organically combine with wooden furniture, and will also highlight a bright sofa or decorative ornaments against its background.
Photo: degeorgeroomimprovement.com
It is not necessary to cover the entire wall with clapboard - you can lay it along the bottom of the wall, as in the photo below. For example, plastic gray lining in an interior with white walls will help create a classic light design with a slight visual contrast.
Calculate the exact cost of repairs using an online calculator
and receive a free detailed estimate for repairs
Calculate
Photo: planete-deco.fr
You can also use lining for zoning space. For example, using it to decorate a wall in the dining room, thereby visually separating it from the main kitchen. For more effective zoning, as well as to improve the aesthetic qualities of the room, you can use brushed lining with a beautiful textured surface in the interior.
Photo: toolboxprodhouse.com
Another task that lining can help solve is adding bright colors to the interior. One-color or two-color MDF lining, painted in bright colors, is suitable. The furniture will stand out better against the background of a colorful wall, and the interior of the room will become more expressive and energetic.
Photo: hotro.me
You can also use clapboard to create an accent wall, for example behind a bed in a bedroom. To do this, it is better to choose a textured lining - the interior will look even more impressive in artificial lighting due to the play of light and shadow on the accent wall.
Photo: terkultura.com
