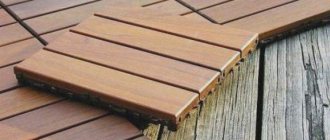
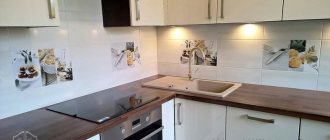
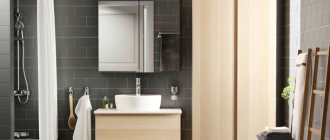
A kitchen backsplash is a wall surface located between the upper and lower kitchen cabinets, behind the sink and above the work area. This interior detail puts the finishing touches on creating a kitchen interior. Any material can be used as an apron .
Advice! Before choosing a material, it is worth considering not only the appearance, but also resistance to damage and installation method.
Why paint tiles - pros and cons
Decorating your kitchen by painting tiles is one way to update the interior of a room. As a result, you will be able to achieve:
- Quick change of interior . This option is used to quickly change the design of the kitchen. The work will take no more than two days, given that the second day is necessary for the paint to completely dry and ventilate the room.
- Saving money. If you want to change the color of the floor or walls, there is no need to completely replace the tiles. It is enough to apply paint to the surface. This is cheaper than purchasing a new coating and spending additional money on consumables.
- Opportunities to hide defects . If the tile is damaged during use, small chips and scratches can be masked with paint.
Despite a number of positive aspects, painting tiles also has disadvantages:
- The work is quite painstaking, requiring extreme precision and accuracy.
- You will have to stop cooking for a day after completing the main work, otherwise the coating may deteriorate due to temperature changes.
- You need to take the choice of materials seriously. It's not just about paint, but also about varnish. If you purchase the wrong composition to protect the drawing, all the work done can be ruined. Some polishes leave unsightly yellow marks.
How to install a kitchen apron
On guide profiles
Installing an apron on profiles is justified when its regular replacement is planned in the future. With this installation, the material is removed without destroying the base. The position of the plastic is directed by special iron slats, fixed horizontally to the wall with self-tapping screws. The plastic apron is fixed on guides, which serve as a kind of “rail” for it. In the future, old panels can be pulled out and new ones pushed in to replace them.
How to fasten with self-tapping screws
Option for ideal bases and for attaching a transparent painted apron. You can put it on glue, but it will show through and distort the design.
- Using a drill, holes are made in the wall into which installation dowels will be inserted, and then self-tapping screws or rails.
- Pieces of panels of the required size are cut out, holes are made in them with a sharp stabbing or cutting tool. You cannot drill them on the PVC and the wall at the same time, as the panel may crack.
- Beacons are placed according to the level, serving as support for the wall panels.
- The apron elements are attached with staples or screws.
- Plugs, caps or other fittings are put on the heads of the screws.
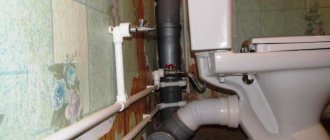
- Wiring may be hidden in the gap between the base and the apron.
On the sheathing
You can attach an apron to a small area or to a heavily deformed base. The lattice structure will hide all surface irregularities.
The sheathing is made of metal or wooden slats. They are installed on the wall according to the size of the apron. Inside the slats, strips reinforcing the structure are attached in horizontal and vertical positions. The distance between the slats should not exceed 0.5 m. Wiring, controllers, and sockets are laid under the sheathing.
On glue
Reliable gluing of the panel is possible only if the difference in the height of the base is no more than 10 mm.
Old tiles or other finishing are removed from the wall, and all irregularities, crevices, and cracks are carefully sealed. The base must be primed, then the wall is leveled with plaster and covered with primer again.
If the apron is made of plastic, then after treatment with glue it will become more durable and less susceptible to deformation.
Plastic placed on glue will quickly fall off from an uneven, unprepared base.
- A level is used to mark the base; the upper and lower limits of the plastic element being installed are precisely marked.
- PVC is cut in accordance with the markings, small gaps are made so that the panels are hidden behind the furniture.
- Dry construction adhesive or liquid nails are applied to the apron in thin strips with small distances between them. It is better to choose white products.
- Next, the panels are glued and pressed tightly to the base.
- The plastic is additionally glued along the edges; it is best to secure it with brackets or screws.
- If necessary, cuts are masked with skirting boards or planks.
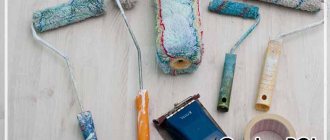
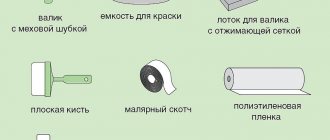
Required tools and materials
Before you start painting tiles in the kitchen, you need to purchase the necessary tools and materials. For painting you will need the following:
- dye;
- primer;
- several brushes;
- paint thinner;
- wide roller to speed up work;
- masking tape;
- cellophane to cover the floor and furniture;
- varnish for application to the wall.
This will be enough to paint tiles or create an interesting design without damaging furniture and other surfaces.
Important ! If you plan to make patterns, you need to prepare appropriate templates. You can choose a stencil in a store or make it yourself. To fix it on the wall, you can use regular tape, or you can make a template on self-adhesive paper.
Choosing a composition for painting tiles in the kitchen
When all the necessary tools are at hand, you can move on to choosing paint. Since the repair work will be carried out inside the residential premises, it is best to use the following coating options:
- acrylic paint - you can find bright colors on sale if you want to add expression to the interior;
- epoxy paint - the main advantage is fast drying, as well as almost complete absence of odor.
Important parameters for choosing other types of paint:
- If there is a need to maintain the shine of the surface, it is advisable to give preference to glossy options.
- To prevent streaks and dirt on the enamel from attracting attention, you should use semi-matte satin enamel. An additional feature is that after drying, the tile will acquire a velvety effect.
Important ! When buying paint, it is better to choose trusted manufacturers.
It is not advisable to purchase inexpensive paint, since low-quality components are often used for its production. The composition may also contain harmful substances that, when heated, will release toxic fumes.
Here are a few manufacturing companies that have earned a good reputation in the market:
- Turkish company Marshall. Known all over the world. The enamel forms a durable coating that is resistant to impacts and scratches.
- Finncolor – enamels from Finland. One of the advantages of using them is reliable protection of walls from mold and mildew.
- Empils . This is a Russian manufacturer known for its high quality products. Enamel is used for painting any surfaces.
- Alpine is a German brand widely known in Europe and around the world. Among the advantages - when applied and dried there is practically no odor, the enamel does not turn yellow and is easy to clean.
- Dufa is a German company producing enamels. Their peculiarity is their specialized focus. There are enamels intended for painting window frames, radiators, enamels for swimming pools, etc.
Artificial acrylic stone
Artificial acrylic stone was invented by DuPont scientists in 1967 and patented under the Corian brand in 1968. It is an imitation of natural stone, and a kitchen apron made of this material can be matte or glossy, uniform in structure or interspersed. An apron made of artificial acrylic stone looks very impressive.
Often designers advise customers to make the countertop and backsplash from acrylic in the same or similar shade. It turns out that the surfaces of the tabletop and apron are visually connected. If we talk about its properties, then in its characteristics artificial stone is close to natural, but at the same time it is much lighter, cheaper, it is easier to cover a wall with it and it is easier to make technological holes for sockets or switches. And artificial stone allows you to make the apron monolithic, without seams or joints.
Pros:
acrylic is durable and has a wide range of colors, and it is also resistant to mechanical and temperature influences and is not afraid of moisture.
You can restore the surface if minor scratches appear. In addition, it is lighter than natural stone and is easy to install and maintain. Cons:
high price.
Design Variations
The next step is choosing a design. The decision should be made not only based on the overall color scheme of the interior, but also on practical grounds. Kitchen design options can be completely different:
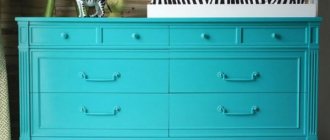
- Full painting of walls . The tile will be completely covered with the selected color. When working, use a wide roller to speed up the process. This option is suitable if you want to update the design from time to time without much effort.
- Color update. It is not necessary to radically change the appearance of the kitchen. Sometimes it is enough to maintain the overall color scheme of the room by refreshing the colors a little. Some areas of the tile can be highlighted with bright spots.
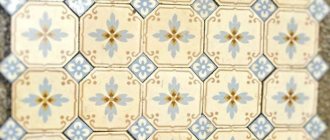
- Creating patterns . The tiles do not need to be completely covered with paint and varnish material. If the tile is initially plain, you can apply a pattern to it using a template. This technique can make the kitchen wall a bright element of the interior.
- Drawings . This option is used to create a design on a specific theme. There are many design options: paint just one corner inside the kitchen or highlight certain elements. You will also need templates for this work.
- Painting . An original design option is to use tiles to create a picture. You can create absolutely any composition: still life, portrait, landscape. For such work it is better to hire a professional artist.
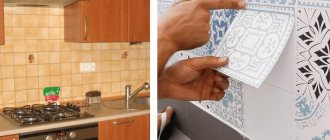
Surface preparation
Before painting, the tiles must be prepared so that the paint applies evenly and lasts a long time:
- First you need to thoroughly clean the tiles from dust, old paint and dirt. This is best done with a wire brush. Particular attention should be paid to the seams.
- If the paint will be applied completely to the entire wall, it is advisable to use sanding material to ensure that the enamel adheres securely to the wall. We recommend using sandpaper.
- After cleaning, the surface should be degreased.
- If there are any chips or scratches on the tile, they are hidden with a primer. This composition also provides high-quality grip. It should be applied to a dry surface, after which it must be left for a day until completely dry, and then smoothed with sandpaper.
Important ! Particular attention should be paid to areas with rust. It can be removed with a special liquid. After drying, corrosion residues can be easily cleaned with sandpaper.
Metal
A stainless steel apron is perfect for a high-tech kitchen. In addition, such an apron will go well with the steel handles of the headset and built-in appliances, which usually have a steel frame. If you think that an all-steel backsplash will give your kitchen a too cold, industrial feel, you can combine steel with ceramic tiles, mosaics or glass. And depending on the color of the kitchen, you can choose a metal apron with a shade of copper or brass. If we talk about processing, the surface of stainless steel can be glossy, matte or embossed.
Applying paint to tiles
After preparing the surface, you can begin painting. Don't forget to stick masking tape in the right places so as not to spoil the details of the kitchen interior.
Important ! Before applying enamel, you need to make a sketch of the future wall design on paper. Having a visual plan in front of your eyes makes it easier to paint.
It is advisable to apply the paint with a foam roller - this will significantly speed up the work process, especially if you have to cover a large area. If you decide to apply a design to the wall or paint only individual tiles, you can limit yourself to a regular brush.
It is undesirable to use hard pile - it leaves marks. To draw or paint tiles without creating a relief, use only soft types of brushes.
Painting work is carried out in several stages:
- Apply the base layer and let it dry for 30-60 minutes. The time depends on the chosen paint. Information should be clarified in the instructions.
- After the first layer has hardened, the surface is re-coated with perpendicular strokes. If painting is used, you can leave one layer, but you need to apply more paint to the brush to make the consistency thick.
Reference . Paint will dry faster in a warm room. For additional heating, additional heat sources can be used.