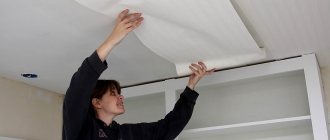
DIY Painting Tools
Painting equipment will be required for painting.
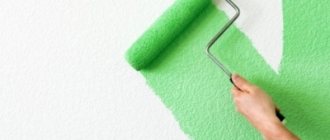
- The first and most important tool is a paint roller. The final result depends on it. Tips for choosing can be found in the corresponding section.
- For the roller you will need a tray with a squeezing mesh.
- You can dilute the paint in a tray or any other container.
- You will need a small brush to paint corners, areas along the ceiling and baseboards.
- To cover the floor, windows, window sill you need a film.
- Skirting boards and small elements are sealed with masking tape.
- A rag or sponge will be useful to remove splashes.
- To work, you will need a telescopic handle for a roller, a stepladder or a stool.
DIY painting technology
Painting wall coverings is no different from other painting jobs. The main thing is to choose the right paint, prepare the room and other equipment
Preparation before painting
Before work, you need to prepare the room and walls for painting. Things to consider:
- You need to paint the wallpaper after the glue has completely dried.
- Fiberglass wallpaper is pre-treated with a primer.
- Remove traces of glue from non-woven wallpaper, otherwise defects will appear after painting.
- Paints tend to dry quickly. It is recommended to pour a little into the tray and keep the jar closed.
- The consistency should resemble liquid sour cream. Before use, mix it thoroughly until a homogeneous mass is obtained.
- If you are not satisfied with the tone, you can add color. The composition is prepared for the entire room at once, otherwise you will get different shades.
- Fiberglass wallpaper must be painted in at least 2 layers. An interval of 10-12 hours is required between work.
- The optimal temperature for painting is 17-25°.
- You cannot paint wallpaper with the windows open - the sheets may fall off due to a draft.
Painting process
When the equipment and walls are ready, you can start painting.
Step by step guide
- Remove or cover furniture with film.
- Cover doors, window sills, baseboards with masking tape.
- Immerse the rollers in warm soapy water, wring out and rinse with clean water or roll over masking tape - there will be no lint on the surface to be painted.
- It is recommended to start painting from the top - use a small roller or brush to apply 5-10 cm from the ceiling around the perimeter of the room.
- Carefully paint the wallpaper near the floor with a small roller or brush.
- Paint the relief elements with a brush.
- Use a large roller to paint the wall from top to bottom, avoiding bubbles and drips. Do not hold the roller in one place.
- If necessary, apply a second coat (after the first has dried).
- After the paint has dried, the walls can be coated with acrylic clear varnish, which will protect them from contamination.
- Use a rag to remove any splashes, rinse and dry brushes and rollers.
Video instructions
Many people are overcome by doubts before work, especially if the person is not a painter. An explanatory video will help you understand the technology of painting wall coverings.
Finishing
The most important stage of painting, but there are simple methods for beautifully decorating walls with your own hands.
Selecting a texture
To emphasize individual elements on the wallpaper or give volume to the pattern, the technique of textured highlighting is practiced. Without waiting for the wallpaper to dry completely, gently blot the area of the pattern with a damp cloth or sponge, removing the dye. After the surface has completely dried, the desired shade is given to the pattern.
There is non-woven wallpaper that can be painted on the reverse side. To highlight the textured element, the selected pattern is painted in the desired color or remains in a natural (usually white) tone.
Combination of 2 or more colors
To highlight individual zones, a combination of colors is practiced. There are several options: a combination of related shades, a gradient (using one color with a smooth transition from a light shade to a dark one, or vice versa) and a combination of two contrasting colors.
Knowing the rules of color doesn't hurt here. Otherwise, it is not recommended to use more than two colors to avoid bad taste.
The combination is possible in any direction:
- horizontally,
- verticals,
- diagonals.
Do-it-yourself drawing on wallpaper
A popular way to decorate wallpaper after painting is to apply a pattern. Modern tools will help even inexperienced craftsmen cope with the task. There are many design options, let's look at some of them.
- Using a textured roller. The tool is a regular paint roller with a convex pattern. Before work, you can practice on extra pieces. To be sure and match the pattern, you can mark the wall.
- Using a stencil. You can make it yourself from plastic or cardboard. The stencil is attached to the wall with masking tape. After preliminary marking (to ensure perfect alignment of the pattern), paint is applied to it with a sponge. After 5-10 minutes, the stencil is removed, and the next area is painted in the same way.
- Handwritten or artistic. If you have artistic skills, you can create a drawing on the wall yourself. For those who cannot draw, a special device - a projector - will help. A sheet with a drawing is brought to it, and the contours displayed on the wall are outlined with a pencil. The finished image is painted in the desired color.
- Using stamps. Another popular way to paint on wallpaper is to use a stamp. He is smeared with paint and pressed against the wallpaper for a few seconds. You can be creative and create an abstract composition using available materials. The disadvantage of stamping is a blurry or smeared pattern, drips.
Tips for streak-free painting
Painting wallpaper has its tricks. To achieve an ideal result without drips, it is worth considering the recommendations of experienced painters:
- You need to paint a dry and clean wall.
- Use rollers with natural bristles.
- If you are using old paint, test it on scrap sheets first - you don't know how it will behave.
- Apply the paint in a thin layer and distribute it well on the surface.
- Paint hard-to-reach places with a brush.
- It is good to saturate the roller with dye.
- If possible, use a spray bottle or spray gun.
Do I need to prime?
Some people ask the question “should I prime non-woven wallpaper to create a better base for painting?” This question is difficult to answer, since there are different opinions on this matter. It is necessary to prime the surface before gluing wallpaper, but opinions differ further.
If you prime the surface of the wallpaper, you will get a better base on which the paint will lay evenly and without streaks. At the same time, it will not form stains when drying due to the fact that the paint has penetrated to different depths of the wallpaper base. As you can see, it is possible and even necessary to prime this type of finish if you want to get an ideal wall or ceiling surface along its entire length. But there are people who argue that there is no need to prime non-woven wallpaper, since it is already quite dense and will not absorb enough mixture to create stains.
It is worth noting that this type of wallpaper can be painted up to six times. And between paintings, in order to get an excellent new coat, it is still recommended to prime. But it all depends on your desire, since a primer cannot always help to avoid uneven painting, as this can be caused by poor-quality paint or finishing, as well as non-compliance with painting technology.
If you follow the recommendations given in the article, you will paint non-woven wallpaper without any problems.
What paint is better to paint?
When purchasing a dye, you need to take into account the coating material and the purpose of the room (apartment, office, etc.).
| Wallpaper type | Coloring base |
| Paper | Water emulsion |
| Non-woven | Water-dispersion and water-emulsion |
| Glass wallpaper | Acrylic and latex |
| Linkrust | Liquid oil and acrylic, wax paste |
Basic rules for choosing paint
What to consider when choosing paint:
- For rooms on the sunny side, latex paint is recommended - it does not fade with regular exposure to sunlight.
- For the kitchen and bathroom, the right solution is latex or acrylic paint. They are resistant to moisture and steam.
- Matte paint masks surface defects and dims bright lighting.
- Satin paint is durable and recommended for bathrooms and kitchens.
- Glossy paint compensates for the lack of lighting in darkened rooms.
- Water-based paint washes off quickly. Not suitable if you plan to wash walls frequently in the future.
- A water-dispersion composition is suitable for painting bathrooms and kitchens - it is not afraid of water and cleaning.
Wallpaper for painting - photos in the interior - 20 more options!
In the house
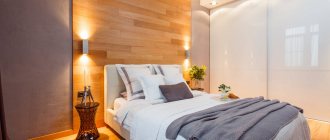
Paintable lilac wallpaper: photo in the bedroom
Office
Green wallpaper for painting in the living room
Bedroom design
Structural wallpaper
Combining different wallpapers for painting
Corridor
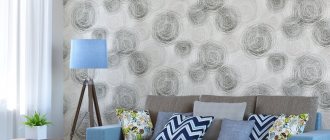
Paper wallpaper for painting - interior design in a modern style
Gradient in your bedroom
Minimalism
White painted wallpaper
In the interior of the kitchen
In the bath
Without invoice
Photo in the nursery interior
Acrylic paints
In a modern living room
Combining colors
Nice interior design
Which roller is best for painting?
For anyone planning to paint wallpaper by hand, it is best to use a paint roller. There are several types of tools, the difference is in the length of the pile and the width of the device.
- A short-pile velor roller is good for painting smooth wallpaper. It will also help to lightly roll the design, for example, when highlighting an element with texture.
- It is better to paint deep relief with a long-haired fur roller. The fibers are able to penetrate the entire depth of the texture, painting the most inaccessible places.
- Smooth canvases can be painted with a foam roller. But it leaves bubbles on the wallpaper, reducing the quality of work.
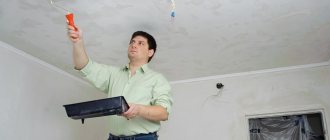
Features of painting the ceiling
Wallpapering the ceiling is popular when decorating rooms. The algorithm for painting the ceiling is the same, but there are nuances that are important to consider:
- Cover the floor, window sills, and remove furniture with film if possible.
- Paint the ceiling plinth the same color as the ceiling. To protect the wallpaper, apply masking tape along the edge of the baseboard.
- It is better to work during daylight hours to evaluate the results in daylight and electric light.
- If primer treatment is required, it must have the same base as the paint. You can start painting the ceiling after the primer has completely dried.
- After applying the first layer, turn on the light and inspect the ceiling. If there are gaps, paint over them.
- The ceiling is painted in 2 layers. The first is distributed parallel to the window, the second - perpendicular.
- New wallpaper on the ceiling cannot be painted for 1-3 days until the glue dries.
Preparation of materials and surface
Some experts at the preparation stage advise applying a primer to the canvas to ensure better distribution of paint over the finishing surface and prevent the formation of stains. Typically, paint stains appear due to uneven saturation of the finishing surface. But in this situation, when using special wallpaper and water-based paint, the use of a primer is not a prerequisite. In addition, the finish itself already has high adhesion, which does not need to be increased further.
Related article: DIY lamps, chandeliers and bottle lamps - ideas and description
You also need to carry out the following manipulations:
- de-energize the room to prevent short circuits and accidents;
- the temperature regime of the room must meet the requirements of the dye application technology;
- close all windows and doors to prevent the risk of drafts (this will ensure even drying of painted surfaces);
- cover the floor, doors and windows with covering material.
In addition, you will need the following materials:
- different types of rollers for applying the primary layer and patterns;
- tassels;
- tray;
- masking tape;
- ladder.
It would be a good idea to use protective clothing (gloves, hats, goggles) while working.
