During use, small scratches on the wallpaper can occur even for the most thrifty owners. Most often these are marks from cat claws or a dent on the wall due to careless rearrangement of furniture. Many people believe that if the wallpaper is torn, there is no point in decorating the defects; it is better to re-glue the wallpaper.
If the problem is large-scale, then the only correct solution is a complete update. But sometimes it’s enough to just glue the torn fragment back or disguise the flaw with a painting, a photo in a frame, a flowerpot with a flower or any other decorative element.
How to disguise peeled wallpaper
Sometimes the problem occurs gradually. Small cracks appear on the wallpaper, the edges begin to move away from the wall, and joints become visible. It is obvious that the repairs were carried out incorrectly, in a hurry, with the hope that the wallpaper would hang normally, but it did not work out.
We advise you to pay attention to the little things when working with wallpaper. Control the process. It is better to correct all the defects at once than to re-do repairs and figure out how to disguise the defects.
But the beloved Barsik is difficult to control. The wall is torn, the cat likes it, but you don’t really like it. What to do? To remove scratches on wallpaper, you will need:
- PVA glue or special glue depending on the type of wallpaper;
- small brush;
- any rags that do not leave fibers;
- rubber pressure roller (optional);
- hair dryer.
Pets can tear even the most durable wallpaper with their claws
Repairing damaged wallpaper occurs as follows:
- We inspect the scratched wall and decide whether it will be possible to carefully disguise the defect.
- Using a brush, apply a moderate amount of glue to the peeled wall.
- We press the peeled wallpaper against the wall using a clean rag.
- Remove any remaining glue.
- If necessary, warm up the area to be repaired with a hairdryer, apply pressure and wait for it to cool.
If the scratch is large, the damaged area must be carefully separated from the wall, coated with glue, and the glue must be applied to the wall as deeply as possible. Cotton swabs are ideal for this. The technology is also suitable for situations where you need to glue the edges of wallpaper. If the detached edge fits clearly on the old place on the wall, then everything is simple.
If the loose edges are torn, a patch may be needed, so always save any remaining finishing materials after repairs.
The patch requires strict alignment of the pattern. Make it with slightly larger sizes to accurately align the old panels and the new piece. The required fragment is cut out very carefully using sharp scissors.
How can I restore fragments?
Restoration is more of a creative work than a construction one. Restoring wallpaper requires skill and patience. The scope of work depends on the damage. To work you need:
- PVA glue;
- brush;
- rollers;
- as well as rags and napkins.
- If a piece of wallpaper is damaged by small scratches or holes, this can be easily fixed with a brush and glue. It is enough to saturate the scratch with glue, not forgetting the edges.
- If the damage is very small, a toothpick will do. Next, the damaged area is wiped with a rag and dried with a hairdryer. After this, the damaged area must be pressed down with a napkin.
But if there are no spare or torn pieces, and the damage is too great, then you can combine it with other canvases.
You can disguise damaged wallpaper. And it is best to do this immediately after discovery; you cannot delay this matter. If the damage is very severe or the coatings are old, then it is better to re-glue all the walls completely.
How to replace some wallpaper on a wall
If the wallpaper is damaged over a large area, you will have to completely remove it in that area and apply a patch. Replacing some of the wallpaper will require a lot more effort. The main emphasis is on accuracy.
Attention! To remove is not just to rip it off. In our case, we need to carefully cut out an even figure on the wall, this will make it easier for us to fit the patch, and replacing part of the wallpaper will be perfect.
If the damaged area does not peel off well from the wall, you can wet it with water or apply a special wallpaper remover.
Do-it-yourself wallpaper restoration occurs in the following sequence:
- We cut out a patch from the panels remaining after the repair. If there are none left or you didn’t do the repairs, you can go to hardware stores with a sample. Maybe they still produce exactly this type and luck will smile on you.
- The patch pattern is made several cm larger than the old fragment.
- We apply wallpaper glue, suitable specifically for your type of rolls, to the wallpaper and to the wall.
- Apply and smooth the patch, getting rid of unnecessary air. We try to combine the drawing.
For all the details on how to apply a patch to wallpaper correctly, watch the video:
The glued patch is several centimeters larger, so it overlaps. We remove it with a sharp knife, cutting along the joint between the patch and the old panels. This creates a perfect connection that will be almost invisible after drying.
How to save already damaged items
Most often, the owner cannot predict the behavior of his pet. The result is furniture with snags and holes, tattered wallpaper on the corners and damaged carpets.
You can try to fix everything:
If a cat has torn off the furniture, this is not a reason to send it outside. We are responsible for those we have tamed, so we must re-educate the animal, and not get rid of it. To prevent wallpaper from becoming the only way for a cat to sharpen its claws, you need to prepare a special scratching post for your pet. And it’s better to do this right away, when the kitten first gets into the house, so that he gradually gets used to the scratching post, because cats don’t like new objects and treat them with distrust.
How to glue fallen wallpaper
A more global problem is that the wallpaper begins to fall off in entire sheets or peels off from the wall near the ceiling, floor or in the corners. These are the most difficult areas during repairs and this is where defects form. To glue fallen wallpaper, you need to move its edges away from the wall and study why the peeling occurs.
If you need to glue the edge of the wallpaper, you need to apply the glue as deeply as possible
The main reasons for wallpaper peeling off the wall:
- The wallpaper was pasted onto old plaster, which became wet and fell off when it came into contact with the glue.
- The walls were not pre-primed and the wallpaper glue was absorbed into them.
- The glue was too thin because it was not diluted correctly. Or the glue did not fit the chosen type of rolls.
- During the renovation, there was high humidity or a draft in the room.
To prevent the problem from recurring, you need to study why it happens. The wall will have to be well prepared for wallpapering.
Falling off wallpaper is only applied to a clean surface.
How to glue wallpaper that doesn't stick to the wall:
- We remove dust, debris, and old plaster from under the panels hanging on the walls.
- If necessary, we plaster the wall and give the new plaster time to harden.
- We prime the fresh plaster with a special compound or wallpaper glue.
- We apply glue to the walls and canvases, join the detached piece with the wall and other canvases glued nearby.
- We press it, smooth it, remove the air and remaining glue from under it. We are waiting for it to dry completely.
To speed up the drying process, you can use a household hair dryer. In addition, by heating the joints, you can strengthen their contact with the wall and perfectly align them. To achieve the desired effect, press the joints against the wall and wait until they cool completely.
Updating your wallpaper in radical ways
There are situations in which it is simply impossible to clean or update wallpaper using standard methods. But this does not mean that you should despair. There are several methods by which you can update your wallpaper.
Painting with water-based paint
This is a fairly radical, but at the same time simple way to refresh the room and interior. Absolutely any wallpaper is suitable for painting, regardless of pattern, relief, material or texture. Despite the fact that the water-based paint mixture is the most universal, some rules should still be followed.
- If you have doubts about the advisability of painting, then test it on a small area that is not noticeable.
- The layer must be thin, otherwise the wallpaper will get wet and completely deteriorate.
- Before painting, the surface must be prepared by removing dirt and loose pieces.
Important! When painting embossed textures, you need to use a roller with long pile.
Partial replacement
To do this, you need to apply masking tape around the entire perimeter of the area that needs to be replaced. Using a painting or stationery knife, you need to cut out a piece of old wallpaper canvas. Remove it. Paste on the new canvas.
Important! To make the new area look harmonious, use decorative overlays or strips from old wallpaper.
Damage to wallpaper can occur for various reasons: during rearrangement, furniture was carelessly moved and caught on the wall, a pet sharpened its claws, non-compliance was committed during repairs, and much more. The nature of the damage can also be different, ranging from minor scratches to the appearance of a bubble in the middle of the wallpaper.
There are many reasons, but you need to somehow correct the detected defects, which can be done with your own hands. Correcting each such damage requires its own approach.
How to fix loose joints on wallpaper
The next problem is loose or poorly joined seams. The defect is formed after gluing paper wallpaper, which can stretch slightly under the influence of moisture. After drying, such stretched canvases shrink, leaving a gap between the joints.
Even small gaps are clearly visible on bright or dark wallpaper if the base plaster is gray or white. Experienced craftsmen prefer to paint the joints with paint that matches the color of the rolls being prepared for gluing.
Joints can be corrected using putty and color when complete masking of unsuccessful joints is achieved:
- select a color that is close in tone to the glued canvases;
- tinting the putty;
- apply it to the joints;
- Even before drying, remove the residue using cleaning materials.
After drying, the joints can be visually noticeable only from a very close distance, but are absolutely indistinguishable from afar.
What to do with mold?
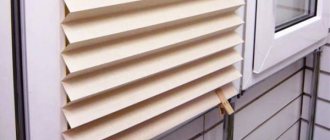
1. Ventilate the room more often.
It is advisable to install fresh air ventilation valves on plastic windows. This way you can overcome mold that appears at the initial stage. Fresh air will change the microclimate in the apartment, mold will disappear and there will be no need to repair the wallpaper.
2. Treat the affected area with vinegar or peroxide.
These substances will help cope with pinpoint lesions.
3. Scrape off the damaged area with a spatula.
This method is used if mold begins to grow under the wallpaper. The canvas will have to be peeled off carefully. It is necessary to scrape off mold, making sure to go beyond the boundaries of the mold formation, because spores can also be found near the affected area. Afterwards, treat the area with an antiseptic and dry thoroughly, for example, with a heater. And only then glue the wallpaper back. The primer and glue must be “breathable” and have antibacterial properties.
Extraneous drawings and inscriptions
1. Rub with a brush.
This can only be done with the most durable compact vinyl wallpaper. They are not afraid of either a rough brush or household chemicals.
2. Wipe with a soft sponge and soda solution.
The method is suitable for foamed vinyl, since this wallpaper needs to be washed with gentle solutions. Recipe: two tablespoons of soda per liter of water.
3. Repaint the area with a similar color.
This type of repair is recommended for wallpaper that needs to be painted. It is enough to go over the drawing with paint, and the problem is solved.
4. Apply a patch.
This method can be used if the wallpaper is made of paper or has a complex print. Measure the area that needs replacement. Cut out the same piece from the remaining wallpaper. Carefully cut off the damaged area from the wall and glue a patch in its place.
Many stains, for example, a ballpoint pen, can be wiped off the wallpaper with lemon juice, bleach with chlorine, or ammonia. You can try painting on a worn-out drawing.
In the photo: wallpaper Paint by numbers P180301-W from Mr Perswall.
Procedure and conditions for applying dyes
Painting is the easiest stage of repair and less expensive.
You can do without construction workers; no special skills are required. After the preparatory work, apply the mixture with a paint brush or a regular paint roller. For quality, paint a couple of times in a treated, cleaned and dry area. Before use, the dye is thoroughly stirred to a homogeneous consistency; if it is too thick, dilute it with a solvent. Events can be held in dry, windless weather, with temperatures above 40 degrees above zero. When the polymer protective layer is damaged, it is repaired by the following steps:
- select enamel by color;
- shake the paint in the can;
- damaged areas are cleaned, primed, dried;
- spray the coloring agent along the scratch line;
- Allow to dry and repeat the procedure.
You can use aerosol varnish for restoration; this product can create a protective film against corrosion. It is packaged and sold in cans.
How to protect the interior
Parents have different attitudes to the problem: some tolerate children's drawings until the child grows up and then simply make repairs, others cover the room with special coloring wallpaper or paper on which they can draw. There are even cases when parents simply hide pens, pencils, felt-tip pens, and the child manages to ruin the wallpaper with his mother’s lipstick or eyeliner...
It’s rare that parents understand children’s creativity; even the thought of a damaged interior scares them, especially if it was created with their own hands. But we cannot prohibit children from developing their creative abilities. To protect the walls from childish impulses, you need to think about creating a full-fledged workplace for self-expression. And you need to think about it already when the baby learns to walk.
Advice: if no one is going to redo the renovation, but you really need to protect the surface of the walls, then you can cover the wallpaper with water-based acrylic varnish. From such a surface it will be possible to remove almost all materials that fall into the hands of a little artist.
Your own workplace
An adult desk is not suitable for children, if only because it is impossible to find a suitable chair for it. And an uncomfortable posture during creativity = a damaged interior.
Therefore, take care of a full-fledged small children's table and chair at which the baby will sit comfortably.
In addition to the table + chair pair, you will also need a set of paper and drawing tools. As a first step, you should not buy your child a regular album: usually the baby draws it completely in the first ten minutes. Use the simplest printer paper or roll (such as those sold at IKEA).
In addition to the desktop, you can purchase a special children's easel. But this option is permissible if there is enough space in the nursery. Otherwise, you have to choose between a table and an easel. But the table is also preferable because it will allow you to not only draw, but also sculpt, play logic games, and even do some early exercises.
As for drawing materials, immediately choose those that are washable and easy to remove. After all, if you leave the baby alone in the room, peacefully drawing at the table, and go to the kitchen for 5 minutes, when you come back, you can find those same scribbles already on the wallpaper that we were trying to protect ourselves from. Therefore, disappearing/washable markers and pens will help you. By the way, markers are preferable for kids rather than pencils. Felt pens are brighter and require almost no effort when drawing.
Drawing wall
Sometimes it can be very difficult, even impossible, for a child to draw a clear line between “possible” and “impossible.” Having fixed a sheet of whatman paper on the wall, the child needs to be given a clear understanding of where he can draw and where he cannot. And you won’t be able to do this without a clear boundary. Therefore, frame the sheet in a bright and contrasting (or best of all, embossed) frame, beyond which you cannot go. It’s better to hang two or even three sheets side by side, from one wall to the other. It’s okay that the room doesn’t look very good now, but the wallpaper will be intact.
You won’t have to think about Whatman paper if, at the renovation stage, you immediately decided to make a full-fledged wall for drawing and/or sketching. We are talking about marker or slate paint. The first creates a clean white surface on which you can draw and write with colored markers. The second, on the contrary, has a dark color, imitates a school board and allows you to create with the help of crayons. Which option is preferable depends on the style of the interior itself.
Another option that allows you to draw directly on the wallpaper is to use special coloring wallpapers. A room or one of the walls is covered with such wallpaper with various thematic linear images, which can later be painted. But in this case, it can be difficult to convey to the child a simple truth: you can draw in this room, but not in another (in the living room, for example).