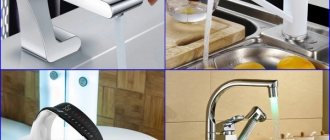
A kitchen faucet is an actively used appliance. It keeps the water closed, and when open it mixes the cold stream with the hot one and sets the pressure. These factors, together with incorrect handling, contribute to rapid wear. Therefore, when choosing, you need to take into account not only the appearance, but also the reliability of the product, agree.
In order to purchase a reliably working product, you need to know the structure of a kitchen faucet. In addition, this information will help you understand how difficult or simple the repair will be. Will the owner be able to deal with the problems on his own or will he need to call a plumber?
You will learn everything about the design features of kitchen faucets from our article. We have described in detail the varieties presented to the consumer by the market. For visual perception of the information, we have attached diagrams, a selection of photos and video repair instructions.
Classification of mixers by type of design
There are two main types of kitchen faucets:
- two-valve;
- single lever.
They are radically different in structure and principle of operation. The difference can be understood by reading the name. A two-valve faucet has two flywheels (valves) to adjust the pressure and proportions of water, and in a single-lever device both functions are performed by one switch - a lever.
In addition to the above-mentioned traditional options for kitchen faucets, touch-sensitive faucets are gaining popularity, which supply water automatically if you bring your palms to them. When choosing between these options, you need to initially know how they work.
Two-valve model device
A two-valve mixer, by and large, is two separate taps combined in one body and equipped with one spout. Hot and cold water are regulated independently of each other.
Image gallery
Photo from
Traditional two-handle mixer
Vintage style faucet models
Valve model with disk heads
Mixer with rotary-sliding type of action
The main disadvantage of this design is that each time you have to re-adjust the position of the flywheels to obtain water at the desired temperature.
One of the most common models of two-valve faucets is a herringbone faucet for the kitchen with a high spout (a low spout is preferable for the bathroom)
The design of a two-valve mixer is as follows:
- valve heads (faucet axle boxes);
- valves;
- frame;
- spout;
- aerator.
The housing is installed in a hole made in the kitchen sink, and a rubber or plastic gasket is placed at the junction to seal it. The design of a two-valve kitchen faucet depends on what type of shut-off elements (faucet axle boxes) are used.
If the valve head mechanism, which locks and regulates the flow of water, includes ceramic discs, then it should not be installed in water pipes without strainers. If grains of sand get into the gap between the disks, the device will jam and will have to be disassembled and cleaned frequently.
At the moment, two options for the design of the “controls” of such a mixer are used in everyday life:
- with ground ceramic discs that rotate relative to each other within a limited segment;
- with valve heads performing rotational or reciprocating movements.
The type and structure of the crane box determines the simplicity and ease of use of the crane, as well as its service life.
Water leaks through the valve head of the first option occur due to a leaky o-ring (6); in the second option, the valve gasket (12) most often wears out.
You can eliminate leaks in valve options yourself without much difficulty. The predominant number of such breakdowns occurs due to leaky rubber seals, which simply need to be replaced.
The design of a valve tabletop mixer can be divided into two parts: the first is located above the sink, the second is located under it. Most top failures occur due to broken or improperly installed seals.
At the bottom of the valve mixing device, the pin basically falls out of the rod, which causes water to flow from the hot pipe to the cold pipe and vice versa.
Structure of a crane axle box based on metal ceramics
A valve head with ceramic discs as a shut-off mechanism allows/blocks the flow of water depending on the position of the holes in these plates. When they are combined, water flows. The larger the contact area, the greater the water flow. To turn off the water, the valve must be turned so that the holes do not coincide with each other.
To imagine how a metal-ceramic type axle box works, look at its design.
The structure of the crane box looks like this:
- frame;
- stock;
- rod clamp;
- turn signal;
- top plate;
- bottom plate;
- elastic gasket.
The rod is inserted into the brass body using a clamp. If everything is done correctly, at the moment of fixation you will hear a characteristic click. The valve is placed on the stem. The turn signal is responsible for transmitting torque from the valve to the plates.
The turn signal can also be metal, but often the manufacturer saves on this part and it is made of plastic. Of course, metal models are more reliable and durable.
Externally, crane axle boxes of this type differ in color. The one with the blue ring is placed on the valve with cold water, and the one with the red ring is placed on the valve with hot water.
A rubber or plastic gasket is located at the junction of the faucet axle and the mixer body. If it is damaged or does not fit well, water begins to flow from under the valve. The function of the gasket is to securely fit the faucet housing and the mixer body.
Design of a threaded crane axle box
A threaded valve axle works on a different principle. Its design is as follows:
- stock;
- union;
- valve;
- rubber gasket;
- frame.
The principle of operation of this model of valve head is that while the valve is rotating, the gasket is pressed or pushed out, respectively, closing or opening the valve. A fitting with a thread at the end is responsible for the translational movement of the rod on which the gasket is located.
This is the easiest design to understand, so in most cases you can handle its repairs yourself.
The main advantage of this model is the simple replacement of the rubber gasket if it wears out. But the main drawback is the need to perform this operation much more often than we would like. In addition, to use a mixer with such faucet axle boxes, you will have to turn the valve several turns, which complicates the process of adjusting the water temperature.
Due to the specific operation of valve mixers, the element of the system most susceptible to wear is the gasket, which ensures a tight fit of the flow-blocking device to the water supply channel.
Let's consider the standard option for replacing the crane-axlebox seal:
Image gallery
Photo from
Step 1: Removing the Valve Head Handwheel
Step 2: Removing the locking mechanism from its slot
Step 3: Removing the Cracked Rubber Seal
Step 4: Replacing the damaged seal
You will find an overview of the best options for kitchen faucets and a rating of products on the market in another popular article on our website.
Single lever mixer device
A single lever mixer is a more modern and practical option for the kitchen.
The main advantages of this model:
- ease of operation - can be adjusted with one hand;
- speed of temperature and pressure adjustment - significantly affects the readings of water meters;
The mixer “remembers” the position of the handle for a comfortable temperature.
To understand the principle of operation of a single-handle mixer, you need to understand its structure.
Image gallery
Photo from
Articulating or single lever faucet
Brass water mixing device
Mixer with two separate mechanisms
Model with swivel spout
Single lever mixer elements
Design of a single lever kitchen faucet:
- frame;
- switch lever;
- spout;
- cartridge;
- aerator.
Standard faucets of this type mix water by turning the switch handle in a horizontal plane, and the water pressure is mixed by moving it in a vertical plane. The aerator ensures a uniform supply of water at the outlet by mixing the water jet with air.
An exploded view of the faucet, showing all the smallest parts, including the ball, gaskets and springs
The main functional element is a cartridge, which is analogous to a crane axle box. A ball or disk type locking mechanism is placed in a plastic case.
Ball valve design
The ball-type cartridge is based on a metal hollow sphere with three holes. Two of them are used for water inlet (cold and hot), and the third is for water outlet at the desired temperature. The ball connects directly to the handle and changes its position along with it.
This is what the main character looks like - a smooth stainless steel ball with special holes for water and fasteners
When rotated, the holes on the ball may, to one degree or another, coincide with the holes in the cartridge. In this way, both the pressure and temperature of the water in the kitchen are regulated. Mixers of this type are now less common. This is due to the complexity of producing such models, their high cost and frequent failure.
Operating principle of a disk cartridge
The principle of a ceramic disc cartridge for a lever mixer is the same as that of a ceramic faucet in a two-valve version. The base is two ceramic plates, one of which is movable and rotates when the position of the lever changes.
A cartridge with ceramic discs looks like a single system; all its internal elements are hidden under a cylindrical plastic body
If the holes on the upper and lower disks coincide, water flows into the spout; if not, it closes off.
The cartridge is based on white ceramic discs, characterized by ideal surface grinding to ensure maximum adherence.
Such cartridges using metal ceramics are most often used in single-lever faucets in kitchens.
Regardless of the design features and methods of water supply, installation of kitchen faucets and connection to water supply branches are carried out in a similar manner.
Automatic faucet - touchless use
If the operation of a single-lever or two-valve mixer is based on pure mechanics, then an automatic faucet works thanks to electronics.
Its structure is much more complicated:
- frame;
- sensor;
- thermostat;
- membrane on a spring;
- solenoid with detent;
- shielding coil;
- spring core;
- sealing material.
The solenoid is an inductor. A membrane that blocks the flow of water is located at the end of the core.
When the sensor is triggered, voltage is applied to the solenoid, the coil lifts the core, it is drawn into the cavity of the solenoid, thus lifting the membrane and opening the way for water. When the power supply is stopped, the opposite occurs: the core lowers and the membrane returns to its original position.
In the diagram you can easily see how the main components are connected to each other: coils, tip, core, solenoid, membrane, housing
An automatic faucet requires a battery. You can use a connection to an eclectic network by converting the current through a transformer, but this is an unnecessary installation complication. Batteries or accumulators are most often used. Automation in the kitchen is a good idea.
When cooking, you often get your hands dirty, for example, when working with dough. Turning on the water without touching the valve will help keep the kitchen clean.
An automatic kitchen faucet with touch control is not equipped with the usual levers and valves. The choice of jet pressure and temperature is made by lightly touching the right/left side of the housing. In addition to touch sensors, there are models with a mechanical miniature controller
Can a lever faucet be repaired?
In joystick models, the bolt cartridges cannot be repaired. You just need to change them. The design of such a mixer looks unusual. You can try to handle it yourself, but not everyone decides to do this, preferring to entrust it to a plumber.
On most models the screw is located under the lever. If you unscrew it, you will have access to the cap. A joystick moves around it, which controls the water pressure.
Shutter cartridges in such models cannot be repaired; they need to be replaced
The cap should be screwed off. The top of the cartridge will become visible. You will also see a hexagon. Unscrew it. Afterwards you get access to the bolt assembly, which should be pulled out. Before installing a new one, it is recommended to thoroughly clean the cartridge slot using a brush. Treat the threaded grooves in the same way. Otherwise, when solid particles get under the seal, a leak will appear. If you do not clean the threads of the locking nut, the same problem may occur. Therefore, before replacing with a new element, it is important to clean everything to avoid leakage in the future.
Before installing a new cartridge, you should thoroughly clean the slot
Additional functionality and features
In addition to design differences, kitchen faucets can be of completely different models.
They must have a number of design features that make this faucet ideal for the kitchen, namely:
- high spout;
- possibility of rotation;
- directing the jet to the center of the sink;
- retractable hose.
A high spout will be very useful in the kitchen, as there is often a need to collect water in a high container, such as a bucket or jug. Another condition is that water enters the center of the sink. This is convenient for washing dishes. Tasks in the kitchen can be very different, so it would be nice if the faucet spout could be rotated.
A good faucet can be equipped with a dispenser for liquid soap or detergent, an aerator, a flexible hose or other device that expands the functionality
The presence of a retractable hose in the design of a kitchen faucet will make the faucet more practical and mobile. With this innovation, you can easily fill a bucket of water that is on the floor or wash large dishes from all sides.
No professional kitchen faucet is complete without a pull-out spout. In the photo - a dynamic watering can with an extended working area
Some faucets are equipped with additional functionality, for example, the ability to switch a direct stream to a drip mode or the presence of an additional outlet for supplying filtered water.
Weak stream when tap is open
One possible reason for this problem is clogged water pipes. This picture is more often observed in old houses.
You can check the condition of the pipeline in the following way. First, the cold and hot water supply valves are closed. Next, the mixer is dismantled. After which both valves are gradually opened in turn. If the water supply is poor, then the problem lies in the pipes. Otherwise, we are talking about a malfunction of the water supply device.
Read here: Renovation of a two-room apartment: assessment of the cost and timing of modern designer and cosmetic renovations
The next step is to disassemble the mixer for repair. The first step is to remove the aerator, which is a metal or plastic mesh located at the very exit from the gander.
Poor condition of pipes and hard water lead to the fact that this element quickly becomes clogged and begins to pass water poorly. After removal, it can be cleaned or completely removed from the water supply system.
Secondly, pay attention to the condition of the rubber gasket on the axle box. Use a sharp thin object to pry up the decorative cap on the tap, after which the fastening screw is unscrewed with a screwdriver. The axle box is unscrewed from the body using a wrench of the appropriate diameter.
The condition of the gasket will allow you to understand whether it is the cause of the channel blockage. The damaged part is replaced with a new one, and the mixer is assembled. The procedure is repeated for the second axle box.
Another reason could be dirt getting into the device. To correct the situation, it should be disassembled and washed.
Features of repairing faucets in the kitchen
In fact, you are unlikely to need the internal structure of the faucet until your faucet fails. Then there is an urgent need to disassemble it and look for damage.
And if you prepare in advance and study the algorithm for disassembling the mixer before a malfunction occurs, you can save time and nerves by being prepared for unforeseen situations.
Disassembling a single lever mixer
In order to disassemble a single-lever mixer and get to its device, you must follow these simple instructions. First, turn off the water supply - turn off the water. To unscrew the mixer body, you need to remove the decorative plug (often looks like a round red-blue insert).
A decorative plastic insert hides an unaesthetic screw. Some parts of the mixer are specially made removable to provide access to the main operating parts during repairs.
Behind the plug you will see a screw connecting the lever and the rod. You need to unscrew it with a screwdriver. After this, you can remove the control knob. The next step is to unscrew the locking ring. To do this, you need to use an adjustable or gas wrench.
If the nut does not unscrew, you can gently tap the key with a hammer in the direction of movement, this should help
Now you have access to the cartridge, you can take it out and replace it if necessary.
After diagnosing or repairing or replacing, you need to perform all steps in reverse order. In plumbing, it is important not to “tighten” threaded connections, but they should not “walk” either.
Image gallery
Photo from
Step 1: Purchasing replacement disk cartridges
Step 2: Removing the faucet handle
Step 3: Removing the cartridge from the housing
Step 4: Reassemble the Single Lever Faucet
Repair of a mixer with two valves
A two-valve mixer is disassembled according to the following diagram:
- As in the first case, turn off the water.
- Remove the valve plug that covers the screw. Unscrew it and remove the flywheel in need of repair, or both.
- Under the valve you will see a nut that secures the valve axle. You need to unscrew it using a wrench.
- Having gained access to the crane box, it can be removed and inspected visually. Particular attention is paid to the seal; if the gasket is damaged or deformed, it must be replaced.
When the inspection is completed, all the parts are put together in the same order.
We disassemble and repair a single-lever ball mixer
The single-lever ball mixer was invented a little over 40 years ago. Its design is simple and reliable - there is nothing to break. If problems arise, it is only due to poor quality water - dirt particles settle on the rubber saddles on which the ball rests. The contact deteriorates, water leaks out and the faucet begins to leak.
How to disassemble a single lever ball mixer
Some ball valves are also available with a cartridge. Only inside the cartridge there are not plates, but a ball. Disassembly of this type is no different from that described above. All the difference is hidden inside the flask. There are also other types of taps. In them, the locking ball is installed directly into the rubber seat. There are some minor differences here.
The faucet lever is removed in the same way - first remove the plug, then unscrew the screw with a hexagon. Pull the lever up and remove it. Afterwards the steps are very simple and similar to those described above:
- We unscrew the cap, preferably by hand, since it is usually made of thin metal and is easy to bend.
- We unscrew the clamping nut, there is a washer under it, remove it too.
- Access to the ball has opened. Pull the rod and take out the ball.
- Under the ball there are two saddles, with springs so that the elastic bands are pressed more tightly to the ball.
That's it, sorted it out. Next comes the repair of the single-lever mixer. In theory, the problem is that deposits have accumulated at the contact point between the ball and the seat. They need to be removed - carefully clean and wipe. There may be problems with the springs. Dirt sometimes accumulates on them too, but more often they simply lose their elasticity.
The third source of problems is the ball itself. In general, it should be made of stainless steel; accordingly, it only needs to be cleaned of deposits. In reality, this is not always the case - cheap faucets have appeared even with plastic balls or made of cheap metal. In this case, peeling of the surface or other similar troubles may occur. Such a locking element will no longer work normally. It needs to be replaced. You also go to the store with the ball and select a replacement of the appropriate size. Assembling the mixer in the reverse order: springs from the seat, the seat is out of place, there is a ball on it, etc. When assembling the entire structure, carefully center everything - misalignment will lead to rapid wear and the tap will leak again.
How to properly disassemble a disk mixer
If the plates in the faucet sleeve break, it is necessary to disassemble the mixer. To do this you will need the following tools : a screwdriver and a hex key.
Instructions:
- Using a screwdriver, you need to pull out the plugs. They are painted in two colors to indicate the direction of movement of the lever to regulate the water temperature.
- Using a hex wrench, unscrew the screw that connects the joystick and the adjustment rod.
- The handle is removed from the tap. The ceramic and then the clamping nut located on the top plate are unscrewed. If the clamping nut has small indentations, it must be carefully unscrewed so as not to damage the part. In other cases, the nut is unscrewed as usual. The ceramic one can be easily unscrewed by hand.
- The mixer disk is removed . The cartridge in the mixer needs to be replaced if it begins to leak or fails for other reasons.
- The new cartridge is installed in its original place. The nut holding the disk is tightened, then the lever is put on, the screw is mounted and finally the plugs are put on.
Tip: before buying a new cartridge for the mixer, you need to take with you the old disk that has already failed. The thing is that cartridges can have different hole diameters (3 or 4 cm) and clamps on the bottom plate of the cartridge. Therefore, there is a risk of purchasing a larger or smaller disk. Also, when choosing a new cartridge, you need to pay attention to the disk with a silicone gasket, since it is less susceptible to water.
How does an automatic mixer work?
The operating principle of single-lever and double-valve faucets is based solely on physics. More modern models work electronically.
The design of contactless models is much more complex than conventional ones. It includes:
- frame;
- thermostat;
- solenoid equipped with a lock;
- sealing material;
- core;
- screening device in the form of a coil;
- membrane installed at the end of the core;
- infrared sensor.
Shower repair
Shutting off the water in a shower faucet is usually done using a lever switch or button. In the latter option, the spring most often breaks, which requires its replacement.
Another reason for the breakdown is a rupture of the shower hose, which is hidden under a metal sheath. There are several ways to fix it: shorten the hose, replace it, or completely change the shower set.
All the above steps can be considered as instructions for repairing faucets. To do the work yourself, you will need the following tools and materials:
- screwdriver;
- a key of the appropriate size;
- pliers;
- FUM tape (linen, sealant).
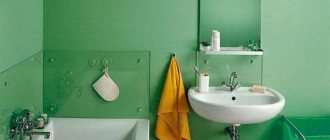
What does the mixer consist of?
How to fix a leak in a bathroom faucet, what parts does it consist of? The basic design of all mixers is the same. The difference between them may be in design. An old faucet in the bathroom is leaking, how can I fix it?
The mixer for washing old structures, in which the water flow and temperature is controlled by two valves, consists of:
- housings;
- two crane boxes;
- two valves;
- gander;
- two decorative washers;
- two eccentrics;
- gaskets
Depending on the design, the taps can be positioned vertically or horizontally. A modern single-lever four-way mixer has a replaceable cartridge instead of a faucet. The faucet in the bathroom, in addition to the “gander”, has a shower head connection.