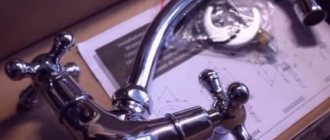
Modern kitchen faucets come in several types; they differ in design, ease of use and cost. Over time, any model needs preventive maintenance related to updating parts; to carry out the work yourself, you need to know the structure of a kitchen faucet.
In order to save a considerable amount of money on calling a plumber by repairing the faucet yourself, you need to study the internal structure and operating principle of a specific type of faucet. The task is greatly facilitated by the fact that all mixing plumbing fixtures are unified, their parts are interchangeable, and the design can be divided into several groups.
Modern kitchen faucets
Design of two-valve mixers
Two-valve mixing devices are classic models that are morally outdated and at the same time find a certain demand among consumers. This is partly due to the low cost or the opposite desire to use them as a retro interior element.
The principle of operation of water valve mixers is to control the flow and temperature of water by closing the input channels separately on the hot and cold pipelines with axle-box taps. There are two main designs of shut-off valves, one of them is outdated due to its manufacturing technology, the second is modern and is more convenient and efficient.
The main material for the manufacture of most valve mixers is brass, which is coated with chrome on top. Retro-style models use uncoated brass or bronze; faucets can be painted on top in different colors.
Structural design of a two-valve mixer
Worm-type crane axle box
In a worm-type faucet, the flow of water is blocked by a rod with an external thread located inside a threaded piston. When the rod rotates, the piston moves along the thread and the rubber disk seal at its end gradually closes the passage channel. It takes approximately three to four 360-degree rotations of the flywheel to move the internal piston from closed to fully open.
The main disadvantage of worm valves is the longest time among analogues in obtaining the required pressure and temperature of the water flow, which leads to excessive water consumption. The advantages include good maintainability and low cost of rubber gaskets with low wear resistance.
The device of a ceramic crane axle box
Crane axle box made of ceramics
Unlike worm-type valves, modern ceramic crane axle boxes operate on a different principle. The main locking elements in them are two ceramic disc plates with slots. In the closed position, they mutually overlap each other, preventing the passage of water due to the tight fit of finely processed surfaces. When the upper plate connected to the rod and flywheel is rotated, a passage hole appears between the ceramic discs and water enters the mixer body.
The feed volume in ceramic valve axle boxes is regulated by the angle of rotation of the flywheel; in contrast to worm-type types, half a turn of the flywheel is sufficient to fully open the valve. Obtaining the required flow and temperature of water in mixers with ceramic axle-boxes is faster compared to worm-type ones, and due to the high wear resistance of ceramics, their repair and maintenance are required much less frequently.
The disadvantages of ceramic models include the low unification of various products. If any rubber gasket for worm-gear models can be found in every specialized retail outlet or cut out yourself, then ceramic liners of a suitable design and size, if they are not included in the package, are difficult to find in the retail network and in many cases you will have to change the axlebox completely due to the lack of the necessary parts.
Internal structure of a single lever faucet with cartridge
Models with valves or valve
These products differ in that they have two valve handles. One of them opens the supply of cold water, and the other opens the supply of hot water. These models are easy to recognize. They are used in most bathrooms. They are often called two-valve. This is easy to understand, because they have two valves in their design.
Valve mixers belong to the classic style, retro and country styles. They have such advantages as simplicity of device, classic appearance and low price. In addition, such products are highly reliable. They tolerate contact well with hard chlorinated water. As for the disadvantages, these include the fragility of the sealing gaskets. Over time, they become unusable and the faucet leaks. Although this drawback can be easily eliminated by replacing the old gaskets with new ones. Also considered a disadvantage is the high water consumption, difficulty in adjusting the jet pressure and its temperature. This also leads to a certain inconvenience, which lies in the fact that the regulation must be carried out with both hands.
But now you can find more advanced models of valve-type mixers on sale. They are valves that are made of ceramics and have a rotation mechanism. Such products are two round-shaped plates. Their surface is perfectly smooth with through holes. The valve can rotate ninety and one hundred and eighty degrees. This makes it much more convenient to set the water flow parameters.
Design of single lever mixers
Today, single-lever (cartridge) faucets are the leaders in prevalence among similar types; they are distinguished by their simplicity of design and ease of use. The water temperature in a single-lever faucet is controlled by one handle, the pressure is regulated by raising it, and the temperature by turning it in different directions.
There are two main types of single-lever mixers, which have significant design differences and operating principles.
Cartridge mixing devices
In cartridge-type mixers, the main control element is a sealed barrel-shaped cartridge with a rectangular cross-section rod placed at the top. The main executive parts of the cartridge are two tightly fitted ceramic plates, one of which is fixedly fixed in the body and has three through holes - through two of them cold and hot water is supplied, and the third is used to drain the mixed water flow. The second ceramic plate contains a shaped oval channel, and it is connected through a system of mechanical parts to the handle.
The cartridge works in such a way that when the handle is lifted, the shaped depression of the control plate slides over the slots for cold and hot water, after which the mixed flow enters the mixer through the resulting channel. When you turn the knob to the right or left, the area of the open holes of cold or hot water changes - thus regulating the temperature of the water flow.
Cartridge types are convenient and easy to use; compared to previous types, they save more water resources. If the system has clean water and a high-quality cartridge, its service life can reach up to 10 years. The disadvantages include the need to completely replace the cartridge in case of any breakdowns, as well as high requirements for the purity of the water - if there are hard grains of sand in it, they can damage the surface of the ceramic plates and cause leaks, so a filter must be present in the water supply.
Operating principle of the cartridge
Ball mixers
The operating principle of a single-lever kitchen faucet resembles a joystick; in it, a one-armed lever is welded to a hollow ball that has three holes - one each for supplying hot and cold water and a third for discharging the mixed flow. The ball, held on top by a dome seal and a conical cap, rotates in a spherical seat that has three round holes with spring-loaded sealed gaskets - cold and hot water is supplied through two, and the water flow mixed in the ball enters the third.
When the ball with a lever welded to it rotates, different areas of the openings of cold and hot water and their ratio are obtained - this allows you to simultaneously regulate the volume of the drained water flow and its temperature.
In addition to ease of use, the advantage of ball models compared to cartridges is a longer service life and inexpensive replacement of consumables - when rubber seals wear out, the price of new rings is much lower than replacing an entire cartridge.
Note: However, ball valves require too frequent replacement of the gaskets worn out by the ball and are therefore a rare guest on the domestic market of mixing equipment.
Ball mixer - design
Design of a standard tap
Ordinary taps are designed to supply hot or cold water without the ability to adjust the temperature of the liquid. Standard faucets are equipped with a mechanism for adjusting the water temperature. There is equipment with a progressive return and rotational principle of operation. The crane structure is as follows:
- spindle;
- lid;
- oil seal bushings;
- fastening screws.
The kit includes a valve handle, a nut holding the body and stuffing box packings with a seat, spout and gaskets. Structurally, the mixer provides a connection between a valve and a spindle placed in a vertical plane in accordance with the diagram. The gaskets are fixed with nuts and when the handle is turned, the spindle is screwed in, which helps to press them against the steel protrusions that form the seat, thereby creating an obstacle to water flows. Protection against leakage of the mixer along the spindle is provided by a stuffing box, and insulation is created using packing made from waterproof materials.
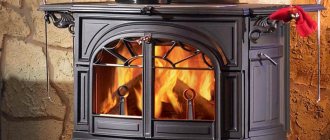
Electronic faucets
It’s hard to imagine a high-tech modern kitchen without electronic faucets; they not only have a stylish appearance, but also make washing dishes and cooking easier and allow maximum water savings (up to 33%). The main changes that electronics brings to the functioning of traditional mixing devices are non-contact or touch switching on and off and maintaining the water temperature at a constant level.
Touchless mixing devices
In traditional types of faucets, which do not require contact with the handle to turn on, an infrared sensor is installed that reacts to the thermal radiation of hands brought to it. The sensor is connected to an electronic circuit that controls a solenoid valve that opens and closes the water. To operate the device, a DC power supply is required, which is supplied to its circuit through an electrical converter of 9 - 12 V or four AA batteries with a total voltage of 6 V.
The continuous operating time of the design described above is limited to an average of 1 minute and then the mixer automatically turns off, which is completely inconvenient when using it as a dishwashing or food processing device. Therefore, more practical touch-sensitive faucets are installed in the kitchen sink, which can be turned on and off by touching a hand (more precisely, any part of the body) to a part of the body or watering can.
Wealthy consumers are well aware of the brands of the leading German manufacturers of touch-sensitive kitchen faucets Grohe and Hansgrohe; the Chinese brands Gappo, Russian-Chinese Frap, Russian-Czech Lemark and Czech Vidima have lower prices for similar plumbing fixtures.
Controlling the activation of infrared and touch faucets
Faucets with thermostat
The kitchen faucet with automatic support of the set temperature includes two handles - one is designed to pre-set the flow, and the second is used to set the desired temperature on a side scale.
The main element of a thermostatic mixer is a special cartridge, it contains paraffin placed in a sealed glass, on one side of which a rod with a special control part is installed. As the water temperature increases, the paraffin expands and linearly shifts the rod by no more than 0.6 mm - this displacement is enough to increase the flow of cold water and bring the overall temperature to the set value.
Faucets with a thermostat have a complex design, are too expensive and impractical for use in the kitchen, where the temperature parameters of water are constantly required (from drinking temperature to hot for washing dishes), so their use in kitchen areas is not practiced due to the lack of rational sense. The situation is different with high-tech, ultra-expensive appliances that have a control panel and functions for programming temperature parameters, turning them on and off - they can be used in the kitchen, but more so as a piece of high-tech style furniture.
Thermostatic mixer design
Faucets with thermostat
Mixers equipped with a thermostat have the following device:
- body - Blanco models with a thermostat are made of brass;
- adjusting devices special handles;
- cartridges – thermostat, ceramics;
- switch with mechanism - installed on Grohe models with a bathroom shower;
- mixer adjustment knob - allows you to change the water pressure and media temperature.
Faucets installed on washbasins are equipped with ceramic cartridges used as locking mechanisms. According to the scheme, the mixer thermostat regulates the thermal regime of water using built-in elements. The mixer is equipped with a blocker that can limit temperature limits. By looking at photos and diagrams of faucets, you can study in detail the operating principle of faucets and carry out repair work yourself.
Single lever mixer repair
If a single-lever kitchen faucet fails, you don’t need a special plumbing tool to repair it yourself; a regular adjustable wrench is enough. Sometimes you may need an auxiliary tool in the form of various types of screwdrivers, a hex wrench to unscrew the handle screw.
Among the malfunctions of cartridge and other types of mixing plumbing fixtures, the following situations most often arise:
- Mechanical damage to the body, spout, in this case the mixer is replaced, but if desired, it can be repaired at home. The fact is that the main material for making faucets is brass, which lends itself well to soldering.
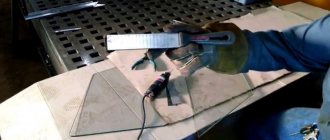
A common malfunction of many faucets is the aerator mesh becoming clogged with dirt, which increases the pressure inside the body, and the most vulnerable element is the thin-walled gib. A crack may appear in its lower part and water leakage may occur.
In this case, the chrome coating is removed with sandpaper and the crack is sealed with a powerful soldering iron using ordinary solder and flux (rosin) - the soldering under the gooseneck will not be noticeable from the outside. In the same way, you can solder a spout that has been broken off from the body, after first removing the mixer from the sink.
- Weak water pressure. The main reason for this malfunction is the clogging of the aerator mesh with solid particles when using dirty water. As noted above, the lack of a passage for water often leads to cracks in the spout, so it is recommended to regularly unscrew the divider and clean its mesh from sand particles.
Aerator and its pollution
- Cartridge damage.
- The standard cartridge is produced in a thin-walled casing; during installation, it is clamped with a threaded nut using an adjustable wrench. It is difficult for an inexperienced user to calculate the clamping force, so with the slightest tightening of the nut, a crack appears in the body and the tap begins to flow water through the upper hole. Thus, a significant number of cartridges fail and the only way to repair the mixer is to replace them.
- The second common problem with cartridges is a broken rectangular pulley on which the handle is attached. It is problematic to reliably connect broken polymer elements of parts by gluing or other methods, so the cartridge also has to be replaced.
- Often, the internal parts of the cartridge, made of thin-walled polymer materials, also break; this becomes immediately noticeable by the easy movement of the handle and the inability to block or regulate the flow. The malfunction cannot be repaired and requires a complete replacement of the cartridge.
- Leak in the mixer body. The housings of single-lever cartridge mixers are produced in two types - some are pressed in and cannot be disassembled, in others disassembly is possible by unscrewing the lower threaded washer, after which you can get inside.
If over time the internal rubber rings in the mixer body have worn out, then in a collapsible design it is possible to replace them after removing the device from the sink and unscrewing the flexible hoses.
Replacing seals in the mixer body
To do this, perform the following operations:
- The water supply is first shut off and the mixer is dismantled. Usually a kitchen faucet is installed with a flexible water supply hose - in this case, the flexible hoses and the clamping nut attaching to the sink are unscrewed from its body.
- Unscrew the ring-shaped lock nut from the bottom of the housing and remove the fluoroplastic sealing ring.
- Pull down the rotary assembly with the spout and separate it from the second part of the body, thereby freeing the ring gaskets (cuffs).
- They buy similar body seals in a retail chain, but usually the chance of such a purchase is small, since all mixers have different designs and sizes, if they do not belong to the same brand.
Therefore, many craftsmen use winding under rings. To do this, they are removed from the recess and a suitable material with high adhesive ability is wound into the groove; it can be narrow (along the width of the groove) strips of fabric electrical tape; a medical adhesive plaster has excellent adhesive ability; some plumbers use FUM tape.
After winding one or two layers of lining material into the groove, the O-rings are returned to their place and the faucet is reassembled in the reverse order - thus extending its service life for a significant time.
Cartridges and their ceramic parts
Replacing the cartridge and eliminating the main problems
The main repair of faucets of this type consists of replacing the cartridge. To do this, you will need an adjustable wrench, a sharp knife or flat-head screwdriver, and a hexagon. The work is carried out in the following order:
- Shut off the water, close the drain with a stopper to prevent loss of small parts, then use a knife or screwdriver to pry up and remove the plastic plug in the front of the handle.
Since the clamping screw is located in a recess and determining the shape of its head is problematic, shine a cell phone inside the hole and then proceed to unscrew the locking screw with a suitable tool. Usually the screw head has a hexagon-shaped recess and a similar key is used to unscrew it.
- After unscrewing the fixing screw, the handle is removed from the rectangular pulley, pulling it up.
- Under the head there is a decorative cap attached to a threaded clamping nut; it is designed to be easily unscrewed by hand, but after using the mixer for a long time, the threaded connection becomes covered with limescale and the process of manual removal often ends in failure.
If time permits, you can pour vinegar, a solution of citric acid, or an effective household chemical to remove limescale from sanitary appliances into the space between the cap, and postpone the process of replacing the cartridge for a while. The second option is to pour boiling water between the cartridge and the cap and try to unscrew it.
But if the options outlined are for some reason impossible or the use of the product does not bring a noticeable effect, you will have to put significant effort into the decorative cap.
It is unlikely to be possible to unscrew it from the outside with an adjustable or gas wrench due to the smooth, round and cone-shaped surface, so you will often have to use pliers, holding the upper edge of the cap in the jaws and turning it counterclockwise. The surface of the cap and its edge will be damaged, but since it is closed with a handle, this will not affect the appearance of the mixer.
Sequence of operations for replacing a cartridge
- Next, unscrew the released clamping nut, which has a convenient hexagonal projection for using an adjustable wrench. When carrying out work, the probability of success is much higher than in the case of a cap, but sometimes situations arise when this nut cannot be unscrewed after a long period of use of the mixer.
If the use of lime scale solvents or hot water does not produce results, the nut will have to be removed from the housing mechanically. The task is simplified due to the fact that in many mixers the pressure ring has thin walls. To remove it, cut longitudinal radial grooves in the nut with a grinder, if necessary, cut off part of the hexagonal protrusion, and break out fragments of the ring from the body using pliers. To replace a broken nut, purchase a similar one from a retail chain or unscrew the part from an old mixer.
- Remove the cartridge from the mixer by pulling it out with your fingers by the rectangular rod. Typically, cartridge sizes are standardized for different types of faucets, so replacing it with a similar product will not cause difficulties - if you take it with you to a specialized store or market, you will always find the right product with similar dimensional parameters from any manufacturer.
- Clean the vacated housing cavity from dirt and limescale, and install a new cartridge, aligning its protrusions with the recesses in the lower part of the inner glass.
- Press the cartridge with the nut by hand with maximum force without using an adjustable wrench - this must be done in order to avoid major damage to the cartridge when its body is compressed by the clamping ring.
- Turn on the water and check the mixer for leaks; if water comes through the top, slowly rotate the ring with an adjustable wrench until the leak is eliminated, after which the operation is stopped.
- The assembly is completed by screwing back the decorative cap, securing the handle with a screw (the hex head screw can be replaced with a regular slotted screwdriver) and putting the decorative plug in place.
Stages of repair work in a ball mixer
Ball mixer repair
Before repairing a ball valve, it is advisable to purchase a standard set of spare parts with a set of seals - this will simplify the task of finding the necessary parts. To remove small parts you will need a thin screwdriver or tweezers; unscrew the outer cap with an adjustable wrench.
To repair a ball mixer, remove its handle and decorative cap by analogy with the method described above. In most models, removal of the cap is simplified due to the presence of straight sections on its surface for gripping with an adjustable wrench. After this, all parts can be easily removed.
The main malfunctions that have to be eliminated in a ball mixer are as follows:
- The top dome washer wears out and water leaks out the top of the faucet. The leak is eliminated by replacing the damaged product.
- Defects of the ball, the appearance of cracks and grooves on its surface. The part cannot be repaired and must be replaced with a new one.
- Abrasion of seat seals. Cylinder gaskets are replaced with new ones.
- Weakening of the spring, while the seat valves do not fit tightly to the surface of the ball and the mixer allows water to pass through. To eliminate the malfunction, the springs are stretched or replaced with new ones.
Construction of worm-mounted crane axle boxes
What materials are modern faucets made from?
When choosing a new faucet, you need to find out what material it is made of.
Please note that the heavier the installation, the longer it will last you
At the moment, manufacturers most often use the following materials:
- Plastic. Such mixers are not expensive, easy to install, and not heavy. But their huge disadvantage is that they will not serve you for many years and can break at the most unexpected moment.
- Alloy steel. Such faucets are resistant to corrosion, however, this model can be found less and less on the market, because... Their production has been reduced due to the complexity of processing the material. In addition, they have a short service life.
- Silumin is a special alloy of aluminum and silicon. It does not corrode, but is a fairly brittle material.
- The most durable and popular material is brass. An alloy of copper and zinc is added to it in such proportions as not to harm human health. The top layer of brass faucets is nickel or chrome plated. Chrome plating increases the service life of the product.
Additional elements (watering cans, handles) of the mixers are made of ABS plastic - it is quite durable and will last a long time.
Repair of a two-valve mixer
The main malfunctions of two-valve mixers are incomplete shutoff of water when it flows from the tap, and leaks in the body area or through the stem. In all of the above situations, the causes of malfunctions are abrasion of the sealing gaskets on the body, stem and shut-off valve (in ceramic valve axle boxes - when the surface of ceramic elements is damaged).
Repairing leaks in a worm valve
Repair of valve-type kitchen mixer taps is carried out in the following order:
- Use a sharp knife or flat screwdriver to pry off the plastic cap-plug from the hot or cold water flywheel and set it aside.
- Unscrew the flywheel mounting screw with a screwdriver and remove it by moving it upward from the splines of the rod.
- Using an adjustable wrench, unscrew the axle box using the hexagon in the upper part of the housing.
Next, depending on the type of valve, proceed as follows:
In worm-type axleboxes, the main causes of leaks are abrasion of the gaskets; they are located on the rod, body and in the shut-off valve seat; the last gasket is subject to the greatest abrasion and most often needs to be replaced.
To replace the valve seal, unscrew the clamping screw at the end of the piston, remove the gasket from the socket and put a new one in its place. If urgent repairs are required, but there is no suitable part at hand, place a piece of any material (rubber, leather, plastic) cut in a circle with a central hole into the socket and put the gasket in place.
When the seals on the rod or body wear out, purchase similar parts from a retail chain and install them in place of the worn ones. If the store fails to find rubber rings for the rod, you can remove them from the grooves and wind one or two turns of thin strips of FUM tape, adhesive plaster or fabric tape into the grooves and return the worn ring seals to their place.
Stages of replacing the gasket in a worm-wheel drive valve
Eliminating leaks in ceramic valves
To repair ceramic axle boxes, it is rational to purchase a repair kit in advance, which includes all the main gaskets and two ceramic plates. The main malfunctions and methods for eliminating them are given below:
- Water enters the spout when the lower silicone gasket wears out. To eliminate the malfunction, it must be replaced.
- The faucet is leaking under the flywheel; for repairs, two o-rings on the rod are replaced (if there are no replacement parts, use the winding discussed above).
- Water flows from the spout when the tap is closed; if you press the handwheel from above, the flow stops. The cause of the malfunction, which is most often found in ceramic axle boxes, is wear of the fluoroplastic ring, which is responsible for pressing the ceramic plates to each other, while water seeps into the gap between them. The defect is eliminated by installing a new fluoroplastic (copper) ring.
- Water flows between the axlebox and the mixer body; the malfunction is caused by wear of the rubber ring on the surface of the axlebox. This is one of the very rare malfunctions, since the gasket is in a stationary state and cannot wear out, unless it crumbles due to time and prolonged heating. The repair consists of replacing the outer rubber ring on the axlebox body.
- Water drips from the spout; the problem is that the surface of the most durable ceramic plates is damaged by sand particles and other hard abrasive particles during long-term use of taps to shut off dirty water. Eliminate the malfunction by replacing worn plates with new ones from the repair kit.
Replacing a worn fluoroplastic ring (white) with a copper one in a ceramic faucet.
In modern kitchens, single-lever faucets are more often used than others; they have high functionality, ease of use and reasonable cost. Due to the simplicity of their design, single-lever faucets are reliable in operation, and in case of malfunctions, any user can replace worn or broken parts (cartridge) with an adjustable wrench and basic technical skills.
Failures
What fails most often in the products we are interested in?
Flexible hoses
Their service life rarely exceeds 5 - 7 years.
Over time, the rubber core loses its elasticity due to liming and begins to crack.
The problem is eliminated by replacing both hoses:
- The water is shut off.
- The union nuts of the hoses are unscrewed.
- The sink is removed.
- Old hoses are unscrewed from the housing and replaced with new ones.
Attention: do not screw in the hoses while holding them by the braid. This can only be done with a small adjustable wrench or narrow-nose pliers by touching the edges on the end. In addition, it is better to additionally wrap the pipe threads of the hose with FUM tape or a polymer sealing thread.
- The design plans in reverse order.
Cranbooks
Instructions for repairing faucets that have stopped turning off water depend on the type of faucet and the malfunction.
- On a screw valve that drips when closed, in most cases it is enough to replace the gasket. For replacement, plumbing stores sell special repair kits.
But: before you go to the store, open the tap several times until it stops and close it again. The cause of the malfunction may also be a piece of scale stuck in the body.
- A screw faucet that has turned and a ceramic one that has been crushed when trying to turn it when scale gets into the cutout of the plates can be repaired with your own hands only if you have a donor faucet with another breakdown. In most cases, it changes to an analogue.
Cartridge
Continuing to discuss the design and repair of sink faucets, a single-lever faucet much more often stops turning off the water due to a broken cartridge. Along with ceramic plates, when the lever is sharply jerked, their plastic clamps quite often break.
How to replace the cartridge?
- We turn off the water.
- Remove the decorative plug from the bottom or side of the lever.
- Unscrew the screw under it. It comes with a simple screwdriver or a hexagon.
- We remove the lever.
- Unscrew the decorative nut.
- Unscrew and replace the cartridge.
- We repeat the operations in reverse order.
Filter
A filter aerator on a gander is often caused by a drop in water pressure. It is enough to disassemble it and clean out all the dirt.