Our compatriots of the older generation are accustomed to the fact that after purchasing household equipment, they need to repair it at home and bring it to normal condition themselves. Today we sell products of excellent quality, because responsible world-famous companies value their prestige and produce very good products. Its service life is calculated for many years and does not cause any complaints from users.
Unfortunately, you can often see a different situation - a recently purchased and installed mixer has failed. These may be leaks of varying intensity, jamming, or complete loss of functionality. Specialized stores have spare parts; you can buy them and install them on the mixer to replace the broken ones. Do-it-yourself repairs will cost several times less than buying new equipment or calling a professional technician to your home.
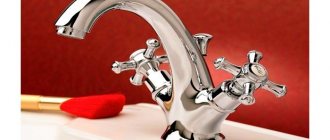
How to disassemble a single lever mixer
Types of faucets
It is strictly not recommended to start disassembling any mechanism without first studying its structure. You must understand not only the sequence of dismantling certain parts, but also their purpose, strengths and weaknesses, operating principles, etc. In implementation, there are two fundamentally different types of single-lever mixers.
Table. Types of single lever mixers
| Construction type | Brief description of the device and performance characteristics |
With ball mechanism | Inside the body there is a movable ball with holes. During rotation, the holes with cold and hot water close/open, due to which the proportions and volume of supplied water and, accordingly, the outlet temperature change. Such designs are currently used very rarely due to technological shortcomings. The faucet has many sliding elements; the functionality and service life of the device depend on their tightness. There is an axiom in mechanics that the more parts a mechanism has, the lower its reliability. The explanation is simple - each of these parts can break, and as a result, the mechanism requires repair due to any of them. It is important to know that many types of ball mixers do not have the ability to replace the ball; there is no point in disassembling them; you need to buy a new faucet. |
With cartridge | The most common types of single-lever faucets today. The cartridges are all replaceable and can be easily replaced if they fail. But they also have one problem. Manufacturers are interested in increasing the number of sales of assembled products, rather than spare parts for them, as this greatly increases their profitability. In order to complicate repair work in various ways, very original measures are taken - each faucet model has its own individual cartridge, and they are not interchangeable. There are a huge number of models, they may differ only in the length of the spout or handle, but the cartridges installed are different. Finding exactly the same one is a great success. After a long search, consumers become impatient and purchase a completely new faucet. |
Prices for popular models of single-lever mixers
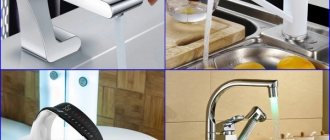
Single lever mixers
This is pure theory, now we need to get acquainted with practice.
Other faucet breakdowns and fault prevention
The quality of water in many cities leaves much to be desired, so over time the aerator in the tap can become dirty. On the inside, hard deposits “grow” on it. When there are too many of them, the pressure and quality of the water deteriorate significantly. The solution to the problem is to replace the aerator. Ideally, it can be easily unscrewed with an adjustable wrench, but for stuck parts you will need WD40 or tapping with a hammer.
The faucet is leaking, and during the inspection you found a crack in it? Then it's time to go for a new product. For a short time, silicone sealant can be an assistant.
You can extend the life of the faucet if you install a water filter and use the device carefully, without tightening the valves too tightly or moving the lever suddenly and all the way.
Strengths and weaknesses of lever mixers
One more problem needs to be solved before you start disassembling the mixer. You already have a rough idea of what problems you will face. Are these mixers worth the lost time for disassembly and repair, or does it make sense to purchase devices with a different operating principle? Today there are many fundamentally new devices made using the latest achievements of science and technology.
Variety of modern faucets
Let's consider the advantages and disadvantages of single-lever mixers in comparison with other more modern ones.
- Relatively cheap. If we compare devices with all indicators being equal, then single-lever mixers are only slightly more expensive than ordinary valve mixers. True, the price range depending on manufacturers and design features is hundreds of percent.
- Speed of action. You can adjust the required temperature and water pressure much faster than using a traditional mixer. Due to this advantage, water consumption is reduced, which significantly affects the amount of utility bills. By the way, the water is immediately drained into the sewer; such use is considered extremely undesirable.
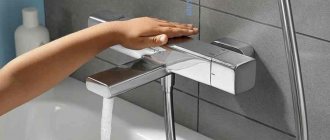
Single lever faucets are relatively inexpensive and easy to use
- There is no need to adjust the temperature each time during treatment. A single-lever mixer in the desired position completely shuts off the supply, and when turned on, it resumes it in the same proportions between cold and hot water.
- Modern ceramic cartridges last much longer than rubber valve gaskets. Under such light loads, ceramics hardly wears out and has a minimal coefficient of friction, which increases the service life of all parts. Another important advantage of ceramics is that hard calcium deposits appear on it very slowly. This is despite the fact that domestic water in most regions has an increased amount of calcium, and it has a very negative effect on all plumbing.
This is what a ceramic faucet cartridge looks like
Single-lever mixers also have their drawbacks, which no device can do without. One of the problems is that it is never possible to adjust the optimal outlet water temperature the first time. And this leads to a slight increase in the consumption of hot and cold water.
So, do you need to disassemble a single lever faucet? Prepare for simple steps and follow professional advice.
Single lever mixer device
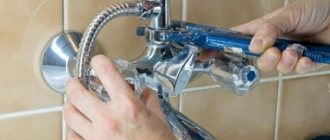
How to disassemble and repair a faucet with a cartridge
Repairing a single-lever cartridge faucet often involves reassembling and cleaning the O-rings. Salts are deposited on them, debris and dirt accumulate, which is why the faucet begins to leak. To eliminate this nuisance, the mixer is disassembled, all parts are wiped of dirt (with soapy warm water), rinsed, dried, and put back in place.
Sequence of installation of parts in a cartridge single-lever mixer
Let's figure out how to disassemble a faucet with a cartridge. First, turn off the water, and then the procedure is as follows:
- Remove the decorative plug located on the handle. Just pry it out with a screwdriver.
- The mounting screw is hidden behind it. We unscrew it with a hex key and take it out.
First, unscrew the fixing screw
- Now pull up the shift lever.
- Next, a decorative washer is screwed onto the body or simply installed. We're filming it.
- Unscrew the clamping nut. It has a large diameter, so you may need an adjustable wrench or a set of open-end wrenches.
- We take out the cartridge. Let's examine it.
- Below are gaskets, fasteners and studs. You need to remember exactly the order in which they are laid out. Sometimes it even matters which side they are laid on. Therefore, be careful when disassembling.
That's all. The single lever mixer with cartridge was disassembled. As you can see, there are not many details. The main working part is the cartridge. It is in it, inside, that mixing occurs.
Replacing the cartridge
The cartridge itself has a sealing gasket - a rubber seat at the bottom, which ensures a tight fit to the body. Over time, the rubber loses its elasticity and water begins to leak out. If this is the problem, you can first try to clean this ring from the salts and deposits that have formed on it. Place the cleaned part in place and check the work. If the leak does not stop, you will have to replace the cartridge.
Cartridges for “one-arm” faucets
Cartridges for mixers have different diameters, and the inlets and outlets in the lower part are located differently. Therefore, if you need to replace it, first you disassemble the mixer, get the treasured part and go to the store or market with it. You must choose exactly the same model without any deviations. At home, install the cartridge into the housing, turn it slightly until you feel that it “sits” in place. Next is assembly, it goes in reverse order.
First install the clamp nut. Actually, at this stage you can check how the new cartridge works. Turn on the water, adjust the temperature and pressure with the stem. To make it more convenient, you can put a handle on the rod. If everything is fine, continue assembly.
Step-by-step instructions for disassembling the crane
As always, before starting work you need to check the availability of tools and accessories, otherwise you will have to interrupt disassembly due to the lack of something. Prepare:
- a set of open-end wrenches or an adjustable wrench;
- an asterisk and a regular screwdriver;
- hex wrench;
- assembly knife.
You need to stock up on tools in advance
Prices for adjustable wrenches
Adjustable wrench
Important. To repair a faucet, you may need spare parts, some of which you can make yourself, while others will have to be purchased. A specific decision is made after disassembling the mechanism and inspecting the technical condition of its elements.
Step 1. To make work easier, remove the faucet from the sink. It can be fixed with two studs and a special metal washer or a large nut. The mounting method depends on the type of device and manufacturer.
First you need to remove the mixer
Step 2. Unscrew the studs; for this, they have a slot for an ordinary screwdriver.
Unscrew both studs
Practical advice. Before beginning any disassembly, prepare a clean area for storing parts. Lay them out as you remove them, assembly will be done in the opposite order.
Step 3: Remove the round rubber gasket. It prevents water from flowing down from the top surface of the sink. Such leaks occur only as a result of gross errors during installation of the mixer; during operation, the gasket does not wear out and does not lose its original properties.
Remove the rubber gasket
Step 4: Carefully twist two flexible hoses, one for hot water and one for cold water. There is not enough space under the sink; therefore, the hoses have a reduced diameter compared to ordinary ones. In addition, they have a small nut; while the standard ones require an 11 mm open-end wrench, here the nut size is only 8 mm. Keep this in mind when preparing your tool for disassembling your single lever faucet.
Unscrew the water supply hoses
Step 5: Use a small screwdriver or other sharp object to pry the swing arm retaining screw cap. There are red and blue marks on it, remember their position. When assembling and connecting the faucet, you must not mix up the cold and hot water hoses, otherwise the faucet will work the other way around. This is not critical, but it causes certain inconvenience during the initial periods of use; you will have to get used to the opposite algorithm for regulating water parameters.
The screw plug must be pryed off with a screwdriver
Step 6. Using a hex wrench, unscrew the lever fixing screw.
Important. Do not unscrew it all the way, otherwise problems may arise. The screw is small and easy to lose, and screwing it into place is quite a labor-intensive task - it is difficult to get into the hole at a distance, the first turns take a long time to get into place.
Release the hardware half a turn and constantly try to remove the lever. It is fixed to the rod in a small recess; complete disengagement does not require more than 1.5–2.0 turns of the screw.
Unscrew the screw and carefully remove the lever
Step 7. Unscrew the top cap on the faucet body; it is held on the external thread of the clamping nut. Remove the clamping nut that secures the cartridge in the housing. To do this, you need to use an open-end wrench.
To remove the clamping nut you will need an open-end wrench
Step 8. Remove the cartridge from the tap.
Remove the cartridge from the faucet body
The mechanism has been disassembled, now we need to inspect it to find out the cause of the problem. Unless, of course, you disassembled the device just to find out its internal structure.
Disassembling a ball mixer
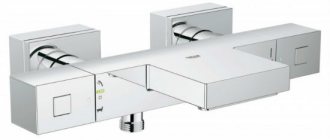
Repair of a single lever faucet with swivel spout
Faucets with a swivel spout are installed on sinks in the kitchen or bathroom. Periodically it starts leaking from under it. In this case, the locking mechanism is not to blame; it’s just that the gaskets have lost their elasticity or the lubricant has dried out.
Repair of a single-lever mixer with a movable spout
In this case, disassemble the mixer as described above, then remove it by pulling the spout up. Remove all old gaskets. If they are stuck, you can use a flathead screwdriver or even a knife blade. You have to remove them, but they are still replaceable. Use the removed gaskets to select new ones. It is advisable that they be made of silicone, not rubber. Silicone is more elastic, retains its properties longer, and tolerates contact with water better.
Lubricate the new gaskets with plumbing silicone grease and install them in place. Reinstall the spout. It must be pressed down well so that it rests against the union nut on the mixer body. Next is the assembly of the rest of the mechanism.
Mixer diagnostics and repair
A crane may fail for several reasons.
- Critical wear or complete failure of the cartridge. This situation happens with cheap elements made of plastic. Cartridges cannot be repaired; they must be replaced with new ones.
Most often, the mixer fails due to a broken cartridge.
- Failure of clamping nuts. And this problem only applies to cheap, low-quality faucets. They are made from poor, unstable alloys that quickly deteriorate due to ordinary physical aging.
Wear of the clamping nut also leads to faucet leakage
Ball mixer malfunctions
If you handle the mixer carefully, without applying excessive force where it is not needed, products of this design can serve without fail for a long time. However, the following breakdowns can be considered typical for them:
- When the lever is in the blocking position, the flow of water from the tap does not stop.
- A faulty ball faucet provides too little water pressure, despite the fact that the pressure in your home's water supply has not dropped, which can be checked by opening other taps.
- The regulation of the water temperature in the mixers has been disrupted: it is impossible to achieve the required parameters, since the mixing of hot and cold flows occurs in a chaotic manner.
A fairly common malfunction of a ball mixer is manifested by water leakage when the device itself is in the blocking position
Before you begin repairs, you should understand the cause of the malfunction, which manifested itself in one of the ways listed above.
How to restore the nut yourself?
Step 1. Remove the gooseneck, upper and lower nylon rings.
Remove the gooseneck and both o-rings
Step 2. Using a thin object, pry up the rubber seals and carefully remove them from the special technological grooves. Work carefully, do not leave depressions in the grooves, as they may cause new leaks.
Next, remove the rubber seals
Now you should start replacing the worn clamping nut. It can be made from unwanted CDs.
Step 3. Using a compass or awl, carefully trace the nut onto the disk, making sure that the outer and inner diameters do not move. Using sharp small scissors, cut out the piece along the outer contour.
Cutting a blank from the disk
Step 4. Heat a piece of wire on the gas burner of the kitchen stove and make a hole in the center of the workpiece; without it it is impossible to remove the inner part of the disk.
A hole is burned in the workpiece with a hot wire.
Step 5: Using scissors, carefully remove the inner diameter. The disc consists of two parts, separate them.
Cut out the inside of the workpiece
Step 6. All components of the future nut should fit tightly onto the thread; adjust them using a small round file. You need to make 6 such blanks.
Blanks are adjusted to size
Step 7. Screw the elements onto the threads one at a time and glue them together with a special glue for polymers. This is a very effective composition; gluing is performed using the molecular welding method.
The blanks are screwed onto the thread, having previously been coated with glue.
Step 8. Press the tap in a vertical position and leave until the glue dries completely.
The crane body is turned over and pressed with a load on top
While the nut is drying, check the condition of the aerator. The device is designed to saturate water with air, thereby reducing jet splashing. Unscrew the aerator body, remove the internal parts and clean the narrow slots from dirt and oxides. Check the condition of the rubber gasket and replace it if necessary.
Check the condition of the aerator
The glue has hardened - continue assembling the mixer.
DIY repair of a ball mixer in the kitchen
It should be understood that the repair of ball mixers for bathtubs, as well as for kitchens, will be practically no different, since the same device is assumed. The main thing is to purchase consumables and components correctly, otherwise it’s easy to get into trouble. So, if you are going to repair a faucet, first disassemble it, remove the broken or damaged part and be sure to take it with you to the store. There you can present it to the seller, who will then immediately figure out what exactly you need and you won’t have to run back and forth ten times.
Remember
Before disassembling the ball mixer in the kitchen or bathroom, you must first completely shut off the water supply in the apartment or house. To do this, it will be enough to tighten the general taps and then release the remainder from the system. If there are none inside the apartment, then you will have to connect the housing office to turn off the entire riser, otherwise the hour is uneven, you can flood your neighbors, which is fraught with serious consequences.
Tools and equipment
- The screwdriver is flat and also figured. Such goodness is in the household of any home craftsman. It is worth choosing powerful screwdrivers with a strong handle, since screws, washers and nuts can “stick” from hot water.
- Wrenches and adjustable wrenches of suitable size and shape.
- Plumbing fork puller, if available. You can get by with a punch and a hammer.
- Hexagons, as well as other socket heads, if required.
- A knife with a sharp tip.
- Pliers or pliers.
Sequencing
Having collected everything you need, and most importantly, purchased the necessary spare parts and components, you can begin repairing the ball mixer, regardless of whether it is installed in your kitchen or in the bathroom. It won’t be difficult to cope, the main thing is to be careful, clearly monitor your actions and not make more effort than necessary. Professionals recommend filming every step of your repair so that you can easily restore the sequence of events and assemble the crane without problems.
- Pry out the plug with the blue and red dots on it using a knife or flat-head screwdriver and set it aside so as not to lose it.
- Unscrew the screw under the plug with a curved or flat screwdriver, depending on the design.
- Lifting with a screwdriver, remove the lever handle from its place.
- Under the handle, the dome of the tap will immediately become visible, along which the lever for switching pressure and temperature conveniently slides. Remove the dome by easily prying it off with a screwdriver or knife.
- Unscrew the lock nut that holds the ball with the rod, adjustable or gas wrench attached to it.
- Remove the ball from the valve body and inspect it carefully. If it is not damaged anywhere, is not worn out or has not burst, then it can be washed, cleaned, wiped and put back in place. But if there is visible damage on the ball, then it must be replaced.
- Remove the rubber seat-gaskets from the mixer body on which the ball mechanism with grooves and slots rested. If they have their original appearance, are not deformed or damaged, then they do not need to be replaced, but in other cases replacement will not hurt.
- Unscrew the spout tube where leaks may occur. There are two sealing rings that will have to be replaced with new ones, fortunately, today such gaskets can be purchased either individually or as a complete set.
- Unscrew the mesh aerator attached to the end of the spout and clean it with a stiff brush, rinsing it with a strong stream of water.
- Thoroughly rinse all internal cavities of the body to remove lime, sand and other deposits, then reassemble the mixer with new parts in the reverse order. After such repairs, the mechanism should work like a watch.
Please note that repairing a ball faucet in a kitchen or bathroom is not so difficult, but you should carefully ensure that it is not twisted too tightly, but also not loose. Either option will lead to rapid failure of the crane, so you should always keep this in mind. If there are manufacturing defects, defects, cracks and chips on its body, from which water is leaking, then there will be no choice but to buy new equipment.
Mixer assembly
Do not forget that a hand-made nut does not have the same strength; individual elements must be assembled with extreme caution.
Step 1. Unscrew the nut and check its movement. Put on new rubber seals.
Remove the nut and install new o-rings
Important. Pay attention to the position of the rings; the conical surfaces should be directed towards each other. Due to this position, the internal water pressure further expands the seals and increases the tightness of the fit.
Step 2. Carefully place the spout on the faucet; before doing this, do not forget to replace the lower nylon gasket. It acts as a bearing when turning the spout. To facilitate the process, it is recommended to use technical Vaseline or ordinary soapy water. Wet the surfaces; the composition will greatly reduce the friction forces and facilitate the assembly process.
Screw the top of the faucet
Step 3. Place the top gasket and tighten the DIY disc nut. Tighten it with a little force. Remember that the purpose of the nut is not to compress the nylon gaskets or rubber seals, but only to hold all the parts of the faucet together and prevent them from wobbling.
Screwing a homemade nut
And one moment. The pressing force of the nut will increase after the final installation of the mixer on the sink and fixing the device with studs and a washer.
The faucet is assembled, it is advisable to check the tightness. To do this, temporarily connect the hoses to the water sources and turn on the mixer. Leaks will appear in a few seconds. If everything is normal, then you can install the device in its place. Disassembly, repair and assembly takes no more than two hours; it is much faster and cheaper than going to stores looking for a new lever mixer.
Connect the hoses to the mixer and check for leaks
What is good about a ball valve?
Until recently, there was no alternative to a valve mixer. And so, with the advent of a single-lever mixer with a ball switch, users were faced with a choice: which faucet to prefer? It turned out that the ball design is in high demand. This is explained by the remarkable performance characteristics of this type of mixers.
Another undoubted advantage of the ball mixer is its modern and attractive appearance: it can easily fit into any interior
The new faucet is very convenient to use. You don't have to twist anything to set the required temperature and water pressure. Simply put the lever in the desired position. This elementary procedure is performed automatically over time.
Those who have long preferred this design know roughly what position the rotary handle should be in so that both the pressure and temperature of the water are as comfortable as possible for a variety of purposes. It is useful for beginners to know that the water pressure is adjusted by moving the handle up and down, and the temperature – left and right.
The ball mixer is very functional: it can be easily adjusted to the pressure you need and the required temperature with one movement of the hand
In addition, it is believed that a more reliable ball mixer cannot be found.
How to disassemble a single lever kitchen or bathroom faucet
With cartridge
| Illustration | How to disassemble a single-lever faucet in the bathroom (kitchen) with a cartridge: step-by-step instructions |
| The seals began to leak water after a year of operation of the equipment. The faucet was installed by a professional. The malfunction was discovered after a two-week break in operation, after the user went on vacation. | |
| To eliminate emergency situations, first close the valves in the main pipelines. Next, remove the plastic plug. Frees access to the fastening unit. | |
| Using a hex wrench, unscrew the fixing screw. After this, remove the handle of the single-lever mixer. | |
| Remove the decorative cover manually. The large nut is unscrewed with a wrench in a counterclockwise direction. In this example, no difficulties arose, since the new crane was disassembled. If you have to make an effort, you should dose it carefully. Otherwise, damage to relatively thin parts of the assembly is possible. | |
| Remove the cartridge lever mixer. After careful examination, it became clear that the plastic case had burst. Replacing the product and troubleshooting other faults are discussed in more detail in the following sections of the article. |
For your information! To remove the faucet assembly from the sink, loosen its fastening. Unscrew the inlet hoses using a small adjustable wrench.
How to disassemble a ball mixer
Scheme of dismantling operations with explanations.
Disassembly of this device is carried out in a similar way, taking into account the design features. To access the inside, remove the decorative plug and unscrew the hex screw. Handle rubber O-rings with particular care.
How to disassemble a ball valve in the kitchen, video:
Troubleshooting a single-lever ball mixer
Ball mixers are durable, but if a breakdown occurs, they cannot be repaired and require replacement. You can eliminate with your own hands only a weak flow of water being released and leaks associated with wear of the sealing rubber bands. It’s difficult to call a “trouble” with a weak stream a breakdown - the mixer still functions. The reason is a clogged aerator.
Procedure for clearing the blockage
- Remove the aerator from the faucet spout.
- Rinse it thoroughly under running water in the opposite direction to the water flow.
- Install the aerator, securing it with the clamping nut.
Procedure for replacing rubber seals
Diagram: single-lever ball mixer device
- Remove the handle.
- Remove the plastic shield two-piece. The black part is a seal that needs to be cleaned or replaced.
- If the leak is not eliminated, remove the ball mechanism.
- Replace the bottom seal.
- Place the ball in place and secure the seals with a plastic nut.
- Install the handle and check the functionality of the mixer.
Advice. When replacing rubber seals, additionally use silicone grease, this will improve the tightness.
Design of two-valve mixers
The part of the mixer that regulates the flow of water (it is topped with a “wing”) is called the valve head. In everyday life, a more laconic name has been assigned to it - axle box crane.
Two-valve mixer device
Externally, all two-valve mixers are absolutely similar, but their internal structure can be very different. The fact is that there are two types of valve heads.
With rubber gasket
The valve-axlebox is a pair of “nut-screw”; a rubber gasket in the form of a thick disk is fixed at the end of the screw. When the flywheel rotates, the screw moves along its axis, which changes the position of the gasket relative to the seat.
The closer the gasket is to the seat, the smaller the flow area of the valve—the pressure drops. When the flywheel rotates in the opposite direction, the distance between the gasket and the seat, and accordingly the pressure, increases.
The design of the valve head with a rubber gasket is the oldest; it has a number of disadvantages:
- adjustment requires several revolutions of the flywheel: the main inconvenience due to which many today refuse such mixers;
- when worn, the gasket may produce a buzzing sound (deformations appear on it);
- the “screw-nut” pair is difficult to manufacture, is subject to wear and requires the use of a stuffing box assembly (seals the hole for the rod);
- relatively high cost (due to difficulty in manufacturing).
There are also advantages:
- unpretentiousness to water quality: solid impurities do not have any effect on the gasket;
- simplicity and low cost of repair: the gasket is easy to change, you can cut a new one yourself from a sheet of rubber or leather. True, if the oil seal leaks, the repair will be more difficult, and if the screw pair wears out, it will be completely impossible (replacement of the valve axlebox is required). But such breakdowns happen less frequently.
Ceramic (half-turn)
The regulating mechanism consists of two ceramic plates tightly adjacent to each other with holes (instead of holes there may be recesses on the edge). One plate is fixed motionless, the second is mounted on a rod rotating around its axis, topped with a flywheel. Water flows into the spout when the holes in the plates match.
Ceramic crane axle boxes
Ceramic construction is more progressive because it has a number of advantages:
- To supply water with maximum pressure, the flywheel rotates at an angle of only 90 degrees. Hence the name “half-turnover”. Because of this, such faucets are much more convenient to use than analogues with rubber gaskets;
- in any condition the crane box does not make a buzz;
- a simple device: instead of a screw, a rod without a thread is used (easy to manufacture). Since it only rotates (the screw also moves translationally), instead of the stuffing box, it is enough to install two rubber rings. Due to the absence of a movable threaded connection, there is nothing to wear out;
- low cost (due to the simplicity of the device).
Flaws:
- grains of sand and other solid impurities, falling between the plates, lead to leaks and simultaneously destroy the ceramics. Therefore, it is recommended to install mechanical cleaning filters (“oblique” or “mud filter”) in front of such mixers. It is known from practice that such damage is extremely rare;
- gaskets, and especially ceramic plates, cannot be made independently. True, the entire repair kit costs less than 10 rubles.
Compared to the advantages, the disadvantages of ceramic valve heads seem insignificant, which is why these devices are more preferable.
Repair
Having taken out the faucet box, the first thing to do is clean it and the mounting hole in the mixer from dirt and mineral deposits.
To remove limescale formations, special compounds are used. Alternative processing methods:
- citric acid: diluted in a small amount of water;
- vinegar;
- mechanical: with a file or other sharp instrument.
Often, replacing the entire crane axlebox is not required - repairs can be done. This applies to both types; the ceramic version, contrary to popular belief, is completely repairable.
Crane axle box with rubber gasket
Most often, repairing such a head consists of replacing the gasket; this is done in the following cases:
- due to natural wear, the part has partially collapsed and allows water to pass through (usually the edges are the first to wear);
- Due to the grooves formed on it, the gasket is humming.
You can cut the gasket yourself. The starting material is soft rubber, which is not prone to hardening quickly.
A hard, stiff gasket has to be pressed hard against the seat, and this leads to rapid wear of the screw pair. Rubber from the wheel tubes of tractors and trucks, having a thickness of 3–4 mm, is very suitable. It stays soft for quite a long time.
With the correct selection of material, a homemade gasket may well turn out to be better than factory-made analogues. Some unscrupulous manufacturers make gaskets from low-quality rubber or petroleum polymer, which quickly lose their plasticity.
It is advisable to purchase gaskets made of silicone: this material does not harden and lasts longer . Some manufacturers enclose the product in a brass shell, which also extends its service life.
Silicone sanitary gaskets
The gasket is not always secured with a screw. In many models, it is simply put on the ledge, since it is still pressed by the flow of water.
If the oil seal assembly leaks (water oozes from under the flywheel), unscrew the clamping nut, remove the axle box and replenish the worn oil seal packing with oiled cotton fiber.
Leaks may occur due to the formation of grooves or cavities on the seat. The reasons are defective casting or a grain of sand or scale getting under the gasket at the moment of closing. Such defects are eliminated with laps or abrasive stones. The lapping is used in conjunction with lapping powder.
The tool can be used in one of the following ways:
- manually;
- with drill;
- with a special lapping machine.
Before installing the repaired faucet box in place, its threads are wrapped with tow or FUM tape (does not work well on a “hot” faucet).
Outdated faucet axle boxes with gaskets and ceramic ones are interchangeable.
To install a more modern half-turn valve head, you need to clarify:
- thread diameter in the mixer (old faucet axle box), the most common: ¾, 3/8, ½;
- the shape of the rod head for the flywheel (for domestic products - tetrahedrons, for imported ones - round with slots in the amount of 20 or 18 pieces).
The length of different valve heads is almost the same, so this parameter is not particularly important. The required flywheel can be purchased separately.
Ceramic crane axle box
The key to the absence of leaks in a half-turn valve is the tight fit of the plates to each other, this is ensured by two gaskets:
- one is located under the fixed plate;
- the other is on a movable rod: it supports a ring with antennae holding the plate.
Most often, the gasket on the rod wears out. It is extremely difficult to find a new replacement on sale, so craftsmen compensate for wear using a bushing made of copper wire (wound around the rod).
If there is no wire, you can make a plastic sleeve by cutting. Sometimes the gasket sags under the lower, stationary plate. It is replaced - repair kits are available for sale.
Also, in case of wear, you can replace the rubber rings that seal the hole for the rod (they act as a stuffing box). Ceramic plates are very rarely damaged. If this happens, the parts are replaced - they are also sold as part of repair kits.
When reassembling, there is no need to seal the threads of the ceramic valve axle box - the design has a rubber sealing ring.
Dismantling
Dismantling the mixer is required when repairing it is useless. This may be due to damage to the case, fasteners, or the desire to replace the old model with a more modern one.
Dismantling procedure:
- Shut off the water supply.
- Drain the remaining water.
- Using a wrench, unscrew the fastening nuts. If this is a wall-mounted faucet, you will need an adjustable wrench. If the faucet is for a sink, then it is installed on studs, which are secured with nuts. They are unscrewed with a regular open-end or tubular wrench. The size is selected according to the nut, as they can be different.
- At this stage, all that remains to do is remove the wall-mounted bathtub faucet from the fittings. It is still necessary to disconnect the hoses supplying hot and cold water from the washbasin faucet or kitchen faucet.
The dismantling process is complete.
How to choose the right spare parts
You should go to a plumbing store, taking the old part with you, as you can make a mistake with the size. For example, there are 1/2 and 3/8 inch crane axle boxes, with square and spline type rods and different thread pitches.
Mixer tap seat repair
If chips and roughness appear on the mixer seat, it is possible to repair it by grinding with a roller cutter using a drill.
Another option is to repair the seat by lapping. The lap consists of a base with two screw threads of different pitches, so it can be used for any axlebox. After grinding the mixer seat, you need to remove metal shavings. To do this, you will need to remove the jet regulator, plug the hole tightly with your hand, and then slowly open the water for a few seconds.
Repair of valve seat using lapping
Sequence of work:
- Disassemble the crane and remove the axle box.
- Carefully check the condition of the saddle with your hands. Perhaps the cause of the breakdown was the presence of scale or lime deposits.
- Screw the lap into the faucet.
- Turn the handle of the device several times.
- The work is completed, you can reattach the mixer.
Attention! Don't forget to turn on the water supply in the riser.
As you can see, any cause of failure can be eliminated yourself. Those who are looking for an answer to the question of how to disassemble a two-valve faucet in a bathroom should read the step-by-step instructions and watch the video to become more familiar with the sequence of actions.
After disassembling the faucet, clean all its parts to prevent damage.
The two-valve type of mixer is a favorite classic, which has been used since Soviet times. Despite the fact that over the years it has lost its position of popularity, many owners have not changed their preferences for decades. Everything is quite simple: in terms of technical characteristics, the model is comparable to a single-lever faucet, its price is much lower and repairs are much more convenient and simpler.
A two-valve faucet consists of several parts that are attached in series. Installing and dismantling it will take a few minutes for professionals and a little more time for beginners. You can always find inexpensive replacement components for the mixer to fix breakdowns. You will no longer need a plumber from a housing company; you can fix everything yourself. And this is a great saving of money and time, because you don’t have to wait all day for a specialist who needs to be paid.