Necessary materials and tools for repairing a stool
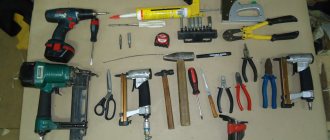
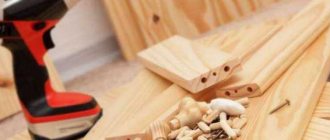
For different stages of work you may need:
- a grinder or special drill attachments for grinding and polishing;
- sandpaper;
- power saw or file;
- iron;
- shoe knife;
- vice;
- brushes, varnish, paint;
- self-adhesive furniture edge;
- epoxy resin;
- screwdriver;
- pliers;
- nuts;
- open-end wrench;
- bolts;
How to repair a stool seat
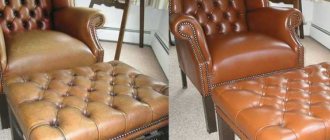
If the seat has lost its presentable appearance, it can be restored or, in extreme cases, replaced.
For restoration, many materials are available in the house - a piece of thick fabric, foam rubber, etc.
How can you return the “marketable” look to the seat of an old stool:
- sand the top layer and cover it with fresh paint or varnish;
- make soft upholstery;
- cover with vinyl film.
Restoring a stool that can serve for many years is not at all difficult.
The first step will be removing the old finish. You can use solvents or a grinder (a drill with a grinding wheel will do). When the top layer is removed, the surface must be cleaned with a polishing wheel or fine-grained sandpaper.
The updated chair, covered with a beautiful varnish, looks no less neat than when purchased.
Now all that remains is to choose the finishing method. The simplest thing is to cover it with film. Its service life is 3-4 years. You need to glue it evenly, avoiding the appearance of air bubbles. One edge of the film is pressed to the surface, the other is stretched, straightening it with a rubber spatula.
For painting you will need special brushes.
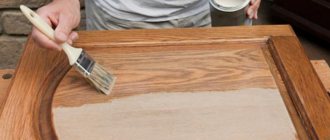
If you plan to paint or varnish the seat of a wooden stool, the surface can be treated with putty. After it dries, prime it (or treat it with varnish stain) and decorate it in the way you like.
Replacing holey or worn upholstery is a matter of one hour.
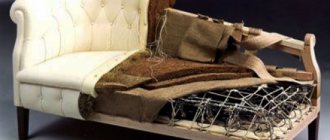
To replace a soft seat, you will need to remove the upholstery and filling (replace it if necessary), and clean the surface. Then a new filler is placed on the glue, and the sheathing is secured with a furniture stapler.
Advice. To replace the seat, you need to cut out a new part with a saw or a fine-toothed bit.
Taping furniture edges to the ends of the seat
This procedure requires self-adhesive furniture edges. Its reverse side is covered with hot-melt adhesive, which after drying holds perfectly and is not afraid of water. You will need a minimum of tools: an iron and scissors.
Make sure you have all the necessary tools available.
How to repair a stool with your own hands:
- cut off the edge - the size of the tape should slightly exceed the length of the perimeter of the stool;
- fix the seat;
- heat the iron;
- apply the tape to the end part so that the edge of the furniture is in the center (the edges of the tape protrude beyond the edge at the same distance);
- apply a hot iron to the edge, move it slowly with slight pressure;
- check the tightness of the edge pressure;
- iron the lagging areas again, adjust the position of the edge;
- trim the tape at the joint and iron it.
Sand the furniture with a special tool.
If the edge moves during operation, it’s not a big deal. When reheated with an iron, the glue will melt, and all the nuances can be corrected.
Getting rid of excess furniture edges
To remove protruding edges, you need to use a shoe knife. The tool is led from the corners to the center, the return movements are performed without cutting.
If the chair is antique, then it must be restored very carefully.
Now you need to round off the sharp corner of the edge with fine-grained sandpaper.
Features of work
Scheme for repairing an old wooden chair using hot water.
If the axle is very dry, then you need to insert a wedge into it. First, the part is removed from the groove, then its upper edge is split with a saw, and a wedge is inserted into the resulting gap. It should be thin and not very long so that it protrudes just a little from the surface of the trunnion. It is best to use wood chips as a wedge. As a result, the trunnion will be expanded and the connection will become more reliable.
If the pin has dried out, but is held firmly by the glue, then getting it out of the groove can be quite difficult. In this case, you need to try to move the parts of the chair as far apart as possible and inject glue into the resulting space. However, it is recommended to remove the leg from the groove.
You may need to soften the glue to release glued parts. If you are repairing a chair with slats between the legs, even strong seams will need to be separated. It is recommended to use steam on a strong adhesive joint. Steam is effective even for properly closed adhesive joints. To create a directed flow of steam, you will need a thin rubber hose (6-7 mm in diameter), 2 pieces of metal tube of suitable diameter, a stopper and a kettle. You need to put tubes on both ends of the hose, insert one of them into the hole drilled in the cork, and the cork into the spout of the kettle. Such a simple device will allow you to direct steam to the seam.
Related article: Table and benches for the gazebo: how to choose their design
Before steam treatment, it is recommended to place a chair as close to the stove as possible; access to the treatment area must be provided. After cooling, the steam will turn into water, which it is advisable to remove. Do not allow it to come into contact with other wooden parts or upholstery. It is necessary to carry out steam treatment with gloves. You need to put at least one on the hand that will hold the hose. This will protect you from exposure to high temperatures. Typically, 1-2 minutes of steaming is enough to separate the wood elements. They can be re-glued only after complete drying.
Repair instructions for fixing legs
The main problem is loss of stability. This can happen due to loose legs or cracks in them. Both problems can be easily fixed at home.
You can make a stool from a log of wood.
How to secure legs with a nut or bolt
The first reason for loose legs is a damaged thread on a stud or fastening strip. This is easy to determine by sight. If the thread of the bar is damaged, you need to unscrew the pin 1 cm, insert it into the bar and secure it with a new nut.
Advice. For work, pliers are used. To avoid damaging the thread, place a piece of leather between the pin and the tool. If it is impossible to unscrew it with pliers, then you need to step back a few mm from the end part of the stud, apply edges under the open-end wrench, then unscrew the stud.
Another way:
- unscrew the pin;
- insert the damaged end into the leg;
- twist.
The chair is made with carved legs or a back, and the seat is reinforced so that it can be used for its intended purpose for a long time.
You can replace the old stud with an 80 mm bolt. To do this you will need an open-end wrench. If you plan to replace the seat, then it is worth replacing the fastenings with new 12 mm screws. Before installation, it is advisable to drill holes at the mounting points. Their length must match the length of the screw. Use a drill with a diameter half the diameter of the fasteners.
Features of repairing a cracked leg
The best material for repairing cracks is epoxy resin. It remains viscous for a long time, so you don’t have to rush.
A cracked leg can be replaced.
Resin is poured into the threaded hole or cracked area. Since the material is viscous, you may need to spread it with a screwdriver or a wooden stick.
You can replace the stool's upholstery.
If a threaded hole is being repaired, the stud is also coated with resin. The product dries within 24 hours.
Repair of chairs with fixed corners
Methods for repairing frequently occurring chair destruction: 1 - destruction of the leg; 2 - destruction of the king; 3 - replacement of the destroyed section of the leg; 4 — replacement of the tsar pin; 5 - elastic crack tie with tenon reinforcement with an insert; 6 - sealing a wide crack with a bet.
Repairing chairs in which the drawers at the bottom of the seat are connected to the legs with a tenon joint is quite labor-intensive. Such designs provide additional corner fastening elements - solid wood lumps. They can be in the shape of a trapezoid or triangle.
With such a connection, separating 1 adhesive seam is usually not enough. It is necessary to disassemble at least 1 corner, and in some cases, the entire frame. Do not use force to disconnect such a connection. In this case, the tsar pin can be damaged or completely broken off. You can glue the parts by steam softening the glue. When gluing back, it is very important to maintain the angle. Small wedges can be inserted into the tenons on the sides to seal the joint.
In some cases, it is necessary to strengthen the chair frame.
This may be necessary if the seat panel is not firmly and securely fastened to the frame. To strengthen such a structure, it is necessary to screw a triangular or trapezoidal chock on the inside of each corner joint. Over time, under high loads on the chair, even such strengthened joints can become loose. In this case, you will need to tighten the screws or replace them with new ones.
Related article: Installing a sink above a washing machine
Sometimes you need to replace the lumps. This is necessary if they are cracked, splintered, separated or split. The new parts must completely match the old ones in shape. In addition, it is very important to adjust the side surface of the chocks to the frame. If the new chocks do not match the old ones, then the entire frame may be warped. The chocks must first be glued inside the frame, and then additionally secured with screws.
After gluing the frame, it must be secured with clamps. It is not recommended to create very high pressure, so as not to squeeze out too much glue from the seams. Tensioning will take about 12 hours. It is very important to maintain the correct angle for the chair and prevent it from distorting. The tension pressure should be uniform.
Thus, repairing chairs with your own hands can be done even by an inexperienced craftsman, who will adhere to accuracy and precision in his work. Do not apply too much force to the frame of the chair, as this may damage its parts. Some adhesive joints may require steaming to release.
Useful tips and tricks
The finished stool can be painted with waterproof paint. Acrylic compounds are suitable. It is best to paint with a roller. The legs are covered without unscrewing.
An interesting solution would be to decorate the seat using decoupage technique. You will need water, PVA glue, napkins or newspaper clippings. The glue is diluted in a 1:1 ratio with water, and the cut-out images are immersed in this mixture.
Decorate the chair with pillows.
Using a brush, apply to the cleaned surface and smooth to expel air. After drying, the stool seat needs to be covered with 3-4 layers of varnish.
Get creative with chair painting.
How to glue a chair leg
1.
Carefully remove the leg from the nest, being careful not to split the wood.
2.
Remove old glue and apply fresh glue.
3.
Place a weight on the seat.
Remove any excess glue that appears.
Old chairs, made of solid wood at the end of the last - beginning of this century, usually have simple connections between the front legs and the seat. They are simply tenoned into the frame under the seat. A chair of this design always becomes loose easily. Even if such a defect has already been eliminated once, a new repair will be required in a few years. After all, the chair is subject to load not only from above: it is moved, tilted, rearranged, which is why simple adhesive seams are destroyed. Here the leg literally becomes a lever, which sooner or later will definitely separate the adhesive seam. To make the whole structure stable again, remove the wobbly leg from the frame and then re-glue it.
At the upper end of the leg, completely remove the old glue with a knife or chisel, being careful not to scratch the wood.
Damaged trunnion
If the trunion (the upper, sometimes tapered end of the leg that is inserted into the seat socket) is slightly damaged, make a “bandage” from a strip of paper that should not be wider than the length of the trunion. For greater stability, coat individual turns of paper with glue. Finally, glue the leg into the cleaned socket on the underside of the seat.
