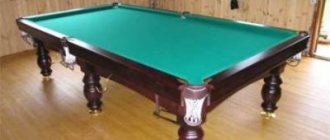
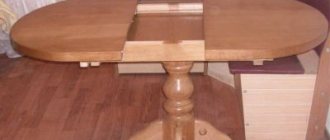
With a wooden tabletop at minimal financial costs.
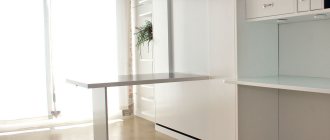
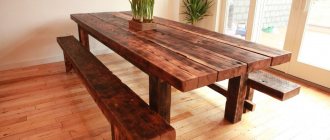
The house has been rebuilt and renovations are nearing completion. The kitchen was also ready at that time. The question became about the kitchen table. The shops were looking for wooden tables. Normal tables with a wooden tabletop (not chipboard) cost from 3,000 rubles. After looking at the whole thing, I decided to make a table with my own hands.
To make the table I bought:
- type-setting wooden furniture panel 60 cm wide and 3 m long (there was no less),
- wooden beam 4 x 4 cm,
- 4 table legs. (they are sold in furniture stores),
- screw nuts for fastening the legs.
It took 1,500 rubles for everything.
The dimensions of our future table are 60 cm by 160 cm (half a furniture panel), based on the size of the kitchen), so the cost of the table was set at just over 1000 rubles.
Having cut the tabletop to the size of the table, I began sawing the ends of the beam at 45 degrees.
The timber is necessary to give rigidity to the tabletop. We run it around the perimeter of the table from the bottom side. Without a block, the tabletop will sag.
We apply the blanks of the bars to the tabletop and check that everything fits together without gaps.
We attach the beam to the tabletop with screws.
On the back side of the tabletop we mark the mounting locations for the legs and holes.
We drill holes in the tabletop for screws. Drill diameter - 10 mm. The diameter of the screw nut is 12 mm. To make screwing the nut easier, you can set the tap stroke to 12mm. The tap pitch is equal to the thread pitch on the socket nut.
We do all this with four legs.
The table is ready and standing on legs. Let's start sanding and varnishing it.
I cleaned the table with sandpaper, first 80-grit, then finer - 150-grit. I made the edges of the table and bars slightly rounded. In some places I worked on some irregularities.
After careful sanding, I began to varnish the table.
Our varnish was matte (we used it earlier to cover the floor). After applying the first layer, let the varnish dry. After drying, the pile rises. We go over it again with fine sandpaper and cover it with a second layer of varnish.
If necessary, after the second layer we also sand it with sandpaper and varnish the table, as I did.
The table is ready!
Instead of metal legs, you can also use square beams or ready-made balusters, which are sold ready-made.
Probably when I make another table, I will use balusters. They come in different sizes. It is advisable to use balusters with a diameter of more than 70 mm. They are also secured with screws.
Perhaps the main attribute of a room for eating - a dining room or kitchen - is the kitchen dining table. When choosing any furniture for a small-sized kitchen in a typical city apartment, you have to make a compromise between the free space in the room and the spaciousness and comfort of the furniture, this fully applies to the choice of table. It is not easy to find a small kitchen table with the desired shape of the tabletop in stores; custom-made ones promise considerable additional costs. There is a decent way out of the situation - making a table with your own hands.
For a room with an area of 6-8 sq.m., probably the most suitable tabletop size will be in the range from 800x500 mm to 1200x600 mm, with a standard height of 750 mm from the floor. The elongated shape of the tabletop - oval or rectangular - allows you to place the table along the wall, saving free space.
Selection and purchase of materials and accessories.
When making a kitchen table, it would be the right decision to use a factory-made material intended for the same purpose, namely a post-forming countertop made of chipboard. These countertops are covered with wear-resistant decorated plastic, used in the furniture industry in the manufacture of kitchen sets, supplied in the form of sheets about 3 m long, 600 mm wide, 26 mm or 36 mm thick (standard). Postforming countertops have a low price. Their front overhang (end) has an aesthetic semicircular shape and is also covered with plastic. Standard fittings are available for them: end and connecting strips, edges for processing ends, couplers, etc. There is no need to purchase a whole piece of kitchen countertop just for one third of its length. The required piece can always be found (purchased for a proportional fee) in furniture workshops, where they accumulate in large quantities as remnants from the production of kitchen sets. There, in the furniture workshop, you can immediately ask to cut the part on a format cutting machine to obtain a rectangular workpiece with the required dimensions.
Postforming type tabletop.
However, chipboard countertops have one feature - they have only one or two plastic-covered overhangs along the length of the canvas. For the table, we need to have all the ends processed (on all sides). For this reason, it will not be possible to directly (without processing the ends) use ready-made kitchen countertops. Moreover, you will have to cut off the front factory overhang. The open ends of the chipboard must be treated taking into account protection from water ingress, not forgetting the aesthetic appeal of the treatment. There are two main ways: apply (glue) a special edge tape or use PVC-based furniture edging. We will take the second path, as it is the most practical from an operational point of view and forgiving some minor mistakes of the master. We will use furniture edging with sides (girths), this will not only give the tabletop a more solid appearance, but will also provide additional protection. A piece of edging of the required length can be purchased at a furniture fittings store. A T-shaped (with a central tenon) PVC edging with girths is required for chipboard with a thickness of 25 mm or 32 mm. When purchasing a 25-mm edge, you must first make sure that it can be put on a 26-mm end without any problems. The use of a 32nd edge is also quite acceptable and gives the tabletop a visually thicker edge.
T-edge with girths (sides) in section.
Another important point is the legs (supports). Today there is a wide selection of both piece supports and ready-made bases for tables. The most common solution is a round leg with a height of 710 mm and a diameter of 60 mm. Legs of this type are collapsible, adjustable in height, have a low price, are easy to install, and come in several external coating options (shiny, matte, painted in various colors). If you need to transport or compactly store the table, it can be easily disassembled. Legs are also sold in specialized furniture stores. As a rule, the manufacturer packs them in packs of 4 pieces, unassembled. When purchasing a whole pack, the kit must include a hex key.
Set for making a table: a piece of kitchen worktop, four legs, edging.
The process of making a table.
What tools are needed for this have already been described in detail; we will not repeat ourselves; we will briefly list the main stages and dwell on some of the nuances.
Step 1. Apply markings.
On the front (working) surface of the tabletop we apply markings with a pencil according to the design of the future table. All roundings must be made with a radius of at least 60 mm, in order to avoid changes in the color of the edging in places of sharp bends (depending on the edging manufacturer).
Applying markings for rounding corners on the front surface of a rectangular workpiece.
Step 2. Give shape.
According to the markings, leaving a small reserve of 2-3 mm, we cut off the excess. The jigsaw file must have the opposite (reversible) direction of the teeth (see article about), in order to avoid chipping the plastic coating, even though the edge with its girths can partially hide small chips in the cut. Use a belt sander to ensure that the contours of the table top exactly match the markings.
Cutting corners with a jigsaw and final finishing with a belt sander.
Step 3. Mill the groove.
Depending on whether the edging is used exactly along the width of the tabletop (25 mm) or larger (32 mm), the groove is milled exactly in the center of the end, or with an offset. The exact milling parameters are calculated after measuring the geometry of the edge used with a caliper. In the absence of a “native” cutter with which you can make the required groove width in one pass, you can perform multi-pass milling using a cutter with a smaller tooth height.
Measuring the edge with a caliper: the internal width and thickness of the tenon.
Milling a groove for a 32 mm edge in a tabletop 26 mm thick (the groove is offset downward relative to the center of the end).
Step 4. Stuff the edging.
Before filling the edging, the end of the tabletop must be coated with silicone sealant. It will not be superfluous to put the sealant in the groove, and also apply it to the upper edge (girth) of the edge, directly adjacent to the working surface of the tabletop. This will ensure maximum protection against water penetration. The edging is stuffed with a rubber mallet, starting from the place where the joining seam will be least noticeable. After completing the stuffing, accurately join the ends of the edging using a sharp knife. The last operation will be to remove from the surfaces of the tabletop any excess sealant that was squeezed out during packing. The tabletop is ready.
Applying sealant to the chipboard end. It is enough to apply only to the upper half, which is above the groove.
Edge padding. When securing the tabletop using struts (as in the photo), you need to take care of the spacers under the tabletop to prevent damage to the lower, protruding edge of the edge.
Step 5. Attach the legs.
To attach the legs (more precisely, their cast holders), on the underside of the tabletop we apply pencil markings in the form of two perpendicular lines at the location where each holder is attached. As a general rule, a good option is to install the legs about 100mm from the edge of the tabletop (see photo). The holders can be secured with self-tapping screws 20-25 mm long with a countersunk head. All that remains is to put the legs on the holders, securing them with a hex key, and the dining table for the kitchen is completely ready to use.
Markings for attaching leg holders.
The table is ready.
Table option with an oval tabletop.
The design of a kitchen table made from a postforming table top is simple, unpretentious, accessible for self-production, and reliable. However, it must be remembered that if handled carelessly - a strong blow to the leg in the side direction - there is a possibility of breaking the holder, made of a relatively brittle alloy. With careful handling and proper care, the table will last for many years.
A steel bathtub is much lighter than a cast iron one, for this reason it will be much easier to transport and install. The weight of such equipment is small, so it cannot be installed in the center of the bathroom without support from the walls. First you need to install a steel bathtub on legs. Reliable and stable legs for a steel bathtub are those that follow the contour of the bottom of the product itself; in addition, it is desirable that they be self-adhesive.
Some manufacturers include bolted supports for a steel bathtub in the installation kit. But this set of fasteners is not harmless to the surface of the product, because it can damage the enamel layer. In case of excessive load, the enamel may crack in the fastening area. In addition, the “standard” legs of bathtubs from some manufacturers, alas, do not differ in quality. Therefore, it is preferable to purchase universal legs for a steel bathtub with a self-adhesive base.
Generally speaking, installing metal plumbing fixtures is practically no different from installing cast iron fixtures (except, of course, that they are easier to move). But there are still some differences.
Legs for kitchen base cabinets
When purchasing a ready-made kitchen set or a custom-made one, the first thing you should pay attention to is its base. The most common options for its design are kitchen plinths or legs. Less commonly, lower cabinets are attached to the side wall, creating the effect of furniture floating in the air.
Adjustable legs for kitchen
The main requirements for a kitchen base are:
- Strength endurance
. The foundation is the support for everything. He has to withstand the weight of not only the furniture itself, but also all the utensils that are stored inside it. And sometimes the weight of a person during force loads that arise during the process of cooking at the cutting table. - The second function that the base must perform concerns the appearance of the product.
It should not stand out from the overall design of the entire kitchen, but harmoniously correspond to it.
The video shows adjustable legs for the kitchen:
Now, taking into account the main requirements, let's consider the options for the basis for a kitchen set.
It is simply impossible to imagine a kitchen without a table that performs two functions at once, one of them is eating, the second is preparing it. You can buy this piece of furniture at any store of relevant goods, but it is not always possible to choose the model that will be suitable for the dimensions and design of a certain room, so it is better to make the table yourself.
Figure 1. You can make your own wooden dining table, so you can make it the size and shape you need.
In Fig. 1 you can see the design of the table, which will be discussed in the example. For the work process, you can rent all the necessary equipment for wood processing, avoiding its purchase. As a result, you can get not only an original, but also a strong table that will fit into an interior decorated in any style.
Design and materials of adjustable legs
Supports with an adjustable mechanism are made in the form of a standard screw on which a knob is mounted (its function is to protect the floor covering while moving furniture). On the back of the support, which looks like a nut, there are lugs, thanks to which the leg is attached to the base of the floor cabinet. To adjust the height, there is a screw in the design, screwing it in will raise or lower the cabinet. The maximum height to which furniture can be raised or lowered is 4cm.
| Tip: For more convenient adjustment, you will need two people. The cabinet is initially freed from the things present in it. Then, while one raises the desired angle, the second sets the desired height of the leg. |
Adjustable legs are often sold in chrome or plastic.
- The use of plastic can significantly reduce the cost of supports, and the material is also considered resistant to various types of contamination. In case of breakdown, the structure is easily replaced. The base is produced in a round or square shape in white or brown (these colors are most often found in the decoration of kitchen sets), although if necessary, you can find any suitable color.
- Chrome products have also proven themselves well. The positive aspects are that they are easy to clean and go well with items in the kitchen made of metal. Available in 3 versions: pipe, cast and stamped supports. For low cabinets, stamped small supports are used. The pipe option is the most budget-friendly and most versatile. Cast products are distinguished by their high cost and reliability. Most often used in custom-made kitchen sets.
| Tip: To create a stylish kitchen, it is better to opt for chrome or contrasting designs. This will highlight the entire interior and can create a special effect. |
You can also find kitchen adjustable legs made of wood, but their use is more often used for decoration and occurs in isolated cases. The designer draws in advance the shape of the leg and the carved elements on it. The cost of the design is quite high, but the product itself can easily dry out and deform. They are produced in combination with other materials.
The video shows the design and materials of the adjustable legs:
Preparation before starting work
Tools for making a table: jigsaw, drill, screws, tape measure, ruler, pencil.
In order to make a table with your own hands, you need to prepare a furniture slab, the thickness of which can be equal to the limit of 40-45 mm, while its width can vary from 600 to 800 mm, the length of the slab can be any, but traditionally it is 1200-1400 mm . It is permissible to use the corresponding element for a kitchen set as a tabletop, adjusting it to the required dimensions. If it is not possible to purchase a solid tabletop, then it can be replaced with a set of boards that need to be glued together.
The legs can be made using timber that has a square cross-section equal to 60x60 mm or 70x70 mm. The legs can be shaped wooden or steel products. The structure will become rigid thanks to the timber, the cross-section of which is 40x40 mm, and the length should be such that it is possible to circle the tabletop around the perimeter. We make a table using fastening fittings, they can be represented by different models; you will also need fastening elements, namely bolts, screws and nuts.
Materials
Chromed metal
Metal legs are one of the most common types of support for kitchen tables. The exceptional strength of the material ensures their reliability. Such legs are considered stable not only because of their solid design, but also due to the plugs that are installed to prevent them from slipping on the floor. Metal legs attract the attention of manufacturers and craftsmen who decide to make a table with their own hands due to their low value and durability. The coating of such supports can be different; they can be painted or chrome.
Forged metal
Tables with forged legs have a number of advantages. Firstly, they are very durable and never need repairs. Secondly, the model with iron legs has maximum stability; it is almost impossible to tilt or turn over. Thirdly, tables with forged legs are quite versatile, easily fit into any interior and do not conflict with interior items that do not have forged elements. Fourthly, forged legs are quite easy to care for and there are no special recommendations for their maintenance.
Wooden
Tables made of natural wood are a classic and the oldest tradition of our country. Such furniture always looks very beautiful and expensive. Wooden legs for a kitchen table can be of various shapes: round, square or carved. Models with carved or turned legs are the most beautiful and elegant, and the overall impression of the furniture often depends on the skill of the carving craftsmen. The wood is varnished and sanded, making as many layers as necessary to obtain a beautiful smooth surface.
Plastic
Plastic legs are in great demand due to their low cost. In addition, furniture legs made of polyurethane are high-quality and reliable, captivating with beautiful carvings. Legs made of this material go well with all tabletops, regardless of the material from which they are made. Polymer materials are absolutely not susceptible to moisture and fumes. Another advantage of polyurethane legs is their flame resistance, which helps prevent the rapid spread of fire in the room in the event of a fire.
Table manufacturing technology
Boards and beams must be marked to the required length and cut into blanks.
Before making a table, you have to think about what design it will have, what technical solutions will be used in the process of its manufacture, how it can then be decorated; these components will allow you to get a full-fledged aesthetic piece of furniture. This stage involves drawing up a sketch according to certain dimensions of the structure.
For the table, you need to choose the type of tabletop that will be easiest for the craftsman to make, and the one that will look most harmonious in the interior of the room. There are two types of countertops, one of which is distinguished by its simplicity, the second by a high degree of aesthetics and originality.
If you prefer a table top made on the basis of laminated veneer lumber, then it will act as the simplest design option, excluding a table top based on a ready-made furniture board.
In order to make a tabletop from timber, you will need to use a saw, which can be replaced by electrical equipment: a jigsaw, a sawmill, etc.
Corners are used to attach the legs.
The timber must be cut into blanks, giving it the required length. And then you can carefully process the mating surfaces. This procedure may also involve grinding.
The ends of the workpieces must be coated with glue for working on wood, secured with clamps on a flat base until completely dry. As soon as the tabletop is ready, its surface must be thoroughly sanded by hand or using a grinding machine, then chamfered around the perimeter and rounded corners.
The second type of countertop can be decorated with tiles, which can give the product high aesthetic and consumer qualities. During the manufacturing process, it is permissible to use solid wood, which can be replaced with a solid furniture board. The inside of the countertop must be removed to a depth that is equivalent to the thickness of the tiles, and it should be taken into account that the adhesive layer also has its own thickness, which will become apparent when laying the products. In order to achieve even greater aesthetics, it is permissible to form a border located along the perimeter of the tabletop, equal to 70 mm. You can more accurately calculate the size of the border by taking into account the dimensions of the tiles. Work to remove a layer of wood can be done, for example, with a chisel or by hand milling.
You can lay tiles on the formed base using traditional Bustilat glue, and its height should coincide with the height of the curb. Once the glue has dried, you can continue the construction process.
Self-tapping screws or special fittings are used to connect the table legs and the tabletop.
At the stage of attaching the table legs, you will need to use mounting hardware. In advance, you need to drill holes on the legs, the diameter of which should be 1 mm less than the corresponding size of the screws. Now you can attach the fittings to the legs.
The next step will be to increase the rigidity characteristics of the future structure; to do this, a prepared block should be secured to the inside of the tabletop along the perimeter using self-tapping screws, which will act as a table drawer. The installation of the timber must be carried out after marking, ensuring sufficient space for the legs. Then you can match the legs and mounting hardware to the tabletop and frame.
Mounting methods
The legs of the table are attached to the sides of the supporting frame, and the tabletop is, in turn, attached to them
Many craftsmen know that improperly secured legs are the root cause of the table swaying and tilting. There are adjustable mounts that can correct a large percentage of tilt, but quality assembly is paramount.
There are several options for attaching legs to tabletops:
Attaching the leg with surface plates
Attaching the Legs with T-Nuts
An option for attaching the table top to the table frames without using additional fittings using screws
Using small metal Z-brackets is another popular way to secure a countertop.
Using homemade wooden clamps is a simple and reliable way to attach a tabletop to a tabletop without purchasing hardware
Steel figure-eight fasteners - an option using inexpensive fittings
In this case, two or three additional spacers with rectangular grooves 10-15 mm long are attached to the side frames of the headset.
Table surface design
Applying tiles to the countertop.
When making a table with your own hands, at the last stage you will have to finally decorate the structure. Before this process, all elements must be carefully sanded to get rid of the slightest roughness. The final finishing also allows you to reveal the unique natural structure of the wood.
Before you make a table with your own hands, you need to choose the right wood, which should be of high quality and well dried using the right technology. Otherwise, the structure will begin to change its linear dimensions over time. This can happen if wood with a high moisture content has been used. Over time, it will begin to evaporate and deform the table. But even well-dried wood must be protected from external negative factors, because the kitchen is characterized by conditions with high humidity. In addition, the table is often used for cooking, which may be accompanied by exposure of the tabletop to substances harmful to wood.
After completing the manufacturing process, the table with your own hands must be covered with varnish, which can be replaced with wax. Wood is not always free from flaws or knots, which must be treated with putty, and then sanded and decorated with acrylic composition.
The surface of all table elements must be varnished in several layers. The more there are, the more attractive the appearance of the finished product will be.
After all wood cutting work has been completed, the work area should be thoroughly cleaned, especially during the painting or varnishing stage. After all, dust can cause poor quality of painting. The next step is drying, which should be done in a warm room. You can choose a varnish that will be able to give the wood the desired shade and appearance of valuable species. In addition, it will provide good protection of elements from damage and rapid wear.
What tools are needed
To independently assemble the kitchen sections and install them on site, you will need the following tools:
- Screwdriver with attachment and bits for screwdrivers. If you don’t have a power tool, a regular set of screwdrivers can replace it.
- Electric drill with drills or brace (hand drill).
- Hammer drill (if there is a concrete or brick wall).
- A jigsaw or grinder with wood cutting discs. If you don't have power tools, a set of hand saws will do.
- Hex key for installing fasteners.
- Auxiliary tools (hammer, mallet, measuring tape, level).
To assemble the headset you will need tools.
The selection of tools is made based on the method of fastening all elements and the availability of fittings.
Making a children's table
Before you make a table for the nursery with your own hands, you should prepare a solid mass that will form the basis of the tabletop. You will need blanks for legs made of timber with a cross section of 40x40 mm. The power frame will be based on 4 bars. The children's table model can be 500 mm or higher.
The connection of structural elements should be made according to the “groove-tenon” principle; for this reason, using end mills it is necessary to form grooves in the places where the legs are attached. To do this, you have to mark the places for the grooves, combining paired elements, and then you should arrange a blind hole in the right place. Its diameter should be equivalent to the thickness of the groove, while its depth is usually equal to 1/3 of the body of the workpiece. Now you can fix the leg blank in the clamp, and then, using an end mill installed at low speeds of an electric drill, begin sampling the wood until a groove of the required size is formed.
The ruler will allow you to measure the resulting grooves and mark the tenons on the bars for the load-bearing frame, which can then be formed. Now you can perform a test assembly. Measuring tools will allow you to check the angles between elements. Then you need to mark the workpieces and disassemble the table. Wood glue will help secure the mating elements. After waiting for the frame to dry, it is necessary to attach the tabletop to it. Why do you need to drill a blind hole in the center of the legs for a furniture pin? Next, you need to mark the positions of the tenons on the back of the tabletop by drilling matching holes.
In this case, it is also necessary to carry out preliminary fitting, only then the parts can be treated with glue and attached.
Any of these tables can be adjusted to the size of a nursery or dining room; the main thing is to take accurate measurements and make a strong connection, then the structure will serve its owners for a long time.
A dacha is, of course, the place where you want to take a break from the bustle of the city, breathe in fresh air and simply drink fragrant herbal tea on the veranda. And decorating the dacha with furniture made by yourself will add a special charm to such a simple ceremony.
When choosing materials for a table, first of all you should pay attention to the quality of the wood - not all wood is suitable for use. Conifers, such as spruce and pine, are pliable and easy to work with, but such material without proper treatment is more flammable, and the resins released can ruin the tablecloth.
Hardwoods (aspen, oak, ash) are more advantageous; products made from them are strong, durable and have an attractive appearance.
| Wood type | Brinell hardness) | Density (kg/m3) | Stability | Color trends |
| Birch | 3,0 | 600 | average | the color becomes deeper |
| Larch | 2,6 | 500 | good | takes on shades of gray |
| European oak | 3,7 | 700 | good | the color becomes deeper |
| Ash | 4,0 | 700 | average | light to straw, yellowish brown |
| Pear | 3,3 | 680 | average | blushes |
| Cherry | 3,0 | 580 | good | from light pink to deep reddish hue |
Materials and tools
For the interior design of dachas and country houses, long, narrow ones are more acceptable, allowing you to move freely around the room. This should be taken into account when preparing everything necessary for work and designing the table itself.
For the table, it is preferable to use a board with a thickness of at least 30 mm. This thickness will ensure the strength of the table and the ability to withstand heavy loads. The optimal length ranges from 150-200 cm. You can purchase two ready-made wooden panels measuring 30-2000 mm.
Balusters or wooden beams for legs.
Curly balusters will give your homemade table an industrial chic and luxurious look. And to make legs from timber, you need to choose boards with a minimum cross-section of 50x50 mm. A comfortable table height is ensured with a leg height of approximately 73-75 cm.
Other materials and tools
- Boards 20 mm thick and 8-10 cm wide for the tabletop frame.
- Wood putty.
- Screwdriver and screws for 30 and 50 mm.
- Sandpaper of various grits, as well as a holder.
- Clamps for fixing legs and table top.
- Electric drill.
- Sander.
- Building level.
- Square.
- Tape measure or centimeter.
- Marker.
- Glue.
Manufacturing stages
When preparing materials, all boards and beams are processed with a plane, sander or coarse sandpaper to remove unevenness, remnants of cut knots, and clean out cracks. The boards must be even and smooth, so they are sanded on all sides, including the ends, edges and corners.
If it is intended to be manufactured as a solid panel without gaps, then it is better to purchase tongue-and-groove materials - this will create a stronger adhesion of the single sheet and save time on adjusting the elements. Chamfers are cut from the edges of the beams for the legs.
Assembling the frame for the tabletop
The frame helps to enhance the strength and stability of the table; its dimensions completely depend on the parameters of the tabletop, but there are several general rules: both in length and width, the frame should be 30-25 cm smaller than the tabletop.
Video - Making a dining table for a summer house
The frame itself is assembled from 4 boards that form the outer frame, and 6 internal transverse strips. The boards are installed on the edge at a right angle using a square and tightened with 50 mm self-tapping screws. The joints are pre-coated with glue (PVA or wood glue). To prevent the boards from splitting, you can drill guide holes in them and only then screw in the screws.
Along the length of the frame, markings are made for the transverse strips, and guides are drilled. It is very important that the cross members are strictly perpendicular to both sides of the frame frame. The ends of the transverse strips are coated with glue, and the entire structure is fixed with self-tapping screws. Make sure that the screw heads do not protrude, but are completely “recessed” into the wood.
Table frame (production option)
The tabletop boards are connected, aligned with a tape measure and laid face down on the floor; a frame is placed on top so that the transverse planks lie tightly on the tabletop. Guides for self-tapping screws are drilled into the planks, and all elements are tightened with 30 mm screws. There are 5-6 screws for each cross board.
Assembling the table legs
The tabletop is placed on a workbench or several stools for subsequent installation of legs. The table leg is fixed in the corner of the frame with clamps, and guides for self-tapping screws are drilled into the frame.
Before attaching the leg, glue is applied to the end of the block - this will protect the table from loosening and will contribute to greater strength. It is recommended to fix the leg on each side with four screws, but if desired, you can additionally use metal corners. Round balusters are fixed with long self-tapping screws on the front side of the table, and square balusters are fixed with corner fasteners.
Finishing
After installing the legs, the table is turned over and placed on the floor. Depending on the design of the table, the corners are sawed off along the radius with a jigsaw or the end is completely rounded. You can cut chamfers from the edges of the tabletop and sand everything thoroughly.
If necessary, scratches and cracks resulting from work are repaired using wood. It is better not to touch the screw heads so that the structure can be tightened.
After the final sanding, all dust and shavings are removed from the table, and the product itself is covered with stain or several layers of varnish.
Tables with elements of decoupage decor or single painting look beautiful and unusual. But there is no need to hide the beauty of natural wood under a layer of paint; modern varnishes and impregnations will do all the necessary work to protect the product from moisture.
Video - Table with legs for a summer house
How to attach legs to a tabletop with your own hands
Perhaps the main attribute of a room for eating - a dining room or kitchen - is the kitchen dining table. When choosing any furniture for a small-sized kitchen in a typical city apartment, you have to make a compromise between the free space in the room and the spaciousness and comfort of the furniture, this fully applies to the choice of table. It is not easy to find a small kitchen table with the desired shape of the tabletop in stores; custom-made ones promise considerable additional costs. There is a decent way out of the situation - making a table with your own hands.
For a room with an area of 6-8 sq.m., probably the most suitable tabletop size will be in the range from 800x500 mm to 1200x600 mm, with a standard height of 750 mm from the floor. The elongated shape of the tabletop - oval or rectangular - allows you to place the table along the wall, saving free space.
Selection and purchase of materials and accessories.
When making a kitchen table, it would be the right decision to use a factory-made material intended for the same purpose, namely a post-forming countertop made of chipboard. These countertops are covered with wear-resistant decorated plastic, used in the furniture industry in the manufacture of kitchen sets, supplied in the form of sheets about 3 m long, 600 mm wide, 26 mm or 36 mm thick (standard). Postforming countertops have a low price. Their front overhang (end) has an aesthetic semicircular shape and is also covered with plastic. Standard fittings are available for them: end and connecting strips, edges for processing ends, couplers, etc. There is no need to purchase a whole piece of kitchen countertop just for one third of its length. The required piece can always be found (purchased for a proportional fee) in furniture workshops, where they accumulate in large quantities as remnants from the production of kitchen sets. There, in the furniture workshop, you can immediately ask to cut the part on a format cutting machine to obtain a rectangular workpiece with the required dimensions.
Postforming type tabletop.
However, chipboard countertops have one feature - they have only one or two plastic-covered overhangs along the length of the canvas. For the table, we need to have all the ends processed (on all sides). For this reason, it will not be possible to directly (without processing the ends) use ready-made kitchen countertops. Moreover, you will have to cut off the front factory overhang. The open ends of the chipboard must be treated taking into account protection from water ingress, not forgetting the aesthetic appeal of the treatment. There are two main ways: apply (glue) a special edge tape or use PVC-based furniture edging. We will take the second path, as it is the most practical from an operational point of view and forgiving some minor mistakes of the master. We will use furniture edging with sides (girths), this will not only give the tabletop a more solid appearance, but will also provide additional protection. A piece of edging of the required length can be purchased at a furniture fittings store. A T-shaped (with a central tenon) PVC edging with girths is required for chipboard with a thickness of 25 mm or 32 mm. When purchasing a 25-mm edge, you must first make sure that it can be put on a 26-mm end without any problems. The use of a 32nd edge is also quite acceptable and gives the tabletop a visually thicker edge.
Option 2. Table made from a stump
An unusual and non-standard way to arrange a personal space is to create interior items from natural materials. When landscaping an area, trees that are old or that threaten buildings are often cut down. If your dacha has or had just such a tree, then you definitely won’t have any problems finding a suitable stump. If the idea came spontaneously, then you can look for the desired stump in clearings, in the nearest forest, or ask the owners of neighboring plots.
Materials and tools
To make such a fantasy table from a stump you will need very little:
- wood for the tabletop, the recommended thickness of the tabletop is from 20 mm, when choosing boards you need to adhere to the rule “the larger the tabletop, the larger the cut of the board”;
- stump. For the work you will need a dried stump of any type of tree, the main thing is that the wood is intact, not damp or rotten. If the tree was cut down recently, the stump needs to be dried thoroughly. And it is better to do this by placing the stump in a warm, dry room or outdoors in sunny weather. It must be remembered that several weeks is not enough time for proper drying. As a rule, the entire process takes at least two months. You can determine the condition of the wood by the ease of removing the bark - if the bark comes off without effort, then you can start working;
- water-based wood varnish in a natural shade or transparent. It is this composition that will best emphasize the texture and advantages of natural wood;
- sandpaper of various grains and holder;
- plane or sander;
- chisel;
- building level;
- roulette;
- hammer and nails;
- screwdriver and screws;
- abrasive fiber.
Manufacturing stages
Stage 1
The dried blank of the future table must be cleared of bark. A chisel or chisel will be useful for this step. The bark must be removed with extreme caution and precision so as not to damage the wood and prevent cracks and splits from appearing. Any soft or rotten areas should also be removed.
Stage 2
After the bark has been removed, the stump must be leveled relative to the horizontal plane. To do this, use a level to prepare a flat surface, and place the base of the future table on it.
If curvature is observed, the imperfections are eliminated using a plane. At the same stage of work, excessively large rhizomes of the stump and all unnecessary parts are sawed off with a hacksaw, the sections from which are then sanded.
Stage 3
The leveled stump is ground with a disk sander, especially its horizontal parts. The sides of the stump are also sanded, and hard-to-reach places are treated with coarse sandpaper. This is a rather labor-intensive process that requires a significant amount of time.
Stage 4
Cracks and depressions in the barrel must be cleaned of dirt and debris using a chisel, then sandpaper folded in half (with the working layer facing outward) should be carefully processed from the inside. Remains of wood dust are cleaned with a brush or a construction vacuum cleaner.
Stage 5
To prevent the stump from rotting and ensure air circulation between the table and the floor, furniture legs can be attached to the base from below. The presence of legs will make moving the table more convenient.
You can choose any legs: metal, furniture wheels or special rubberized stands. It is best to attach them using self-tapping screws to the base of the stump; the number is chosen arbitrarily, based on the size of the table.
Stage 6
After installing the legs, we proceed to sheathing the top of the stump. To do this, we put two parallel strips perpendicularly on the sidewalls, and two more rows of holders on top - a total of 6 strips, fastened together with nails. This will be the frame for the table top.
Stage 7
We fasten the prepared tabletop boards from below with transverse strips. The shape of the tabletop can be very diverse: round, rectangular, with rounded corners. A table option with a round or oval tabletop looks more advantageous.
To give this shape, you can use a homemade device made from thread, pencil and nail: the end of the thread is tied around a pencil, and the tip of the nail is placed in the middle of the tabletop, outlining a circle with a selected radius, after which all excess is sawed off, and the edges and surface of the tabletop are processed with a sanding machine.
Stage 8
Holes and defects in the boards can be decorated with finely chopped shiny stones, filling them with varnish and treating them with a sander after drying to smooth the surface.
The finished tabletop is fixed from below to the sheathing with holders on nails or self-tapping screws selected to size.
The finished table is varnished in several layers. After applying the first layer, the product is thoroughly dried and processed with fine-grained sandpaper. This will prevent the varnish from peeling off, and subsequent layers will lay down more evenly.
After removing the dust, apply the second and subsequent layers of varnish without grouting. If desired, after drying, the last layer can be treated with abrasive fiber - this will remove excess shine and give the surface a matte finish.
Such a creative table will decorate any veranda, especially if surrounded by green bushes or flower beds.
Video - DIY garden table made from a stump
Even at the kitchen design stage, you have to decide how to finish the bottom of the kitchen, called the plinth. There are two options: either use decorative legs or install a plinth. Most often the last option is chosen. Using this option, you can easily decorate the base, additionally decorate the kitchen with lighting, or organize places to store food or kitchen utensils. How and from what you can make a kitchen plinth will be discussed in this article.
Assembling the headset box
Any kitchen set must have cabinets, cabinets, drawers and sections, the basis of which is a box of four boards. Such boxes can be floor-mounted, wall-mounted, or supported only by the surfaces of other furniture elements. When assembling boxes, it is recommended to adhere to the following instructions:
- The sides of the box are attached to the bottom and top with confirmations.
For these special “screws”, holes of appropriate size are pre-drilled in the surfaces to be fastened. Ordinary nails and screws are not suitable for high-quality and durable screeding of wooden surfaces. The use of furniture screws is allowed as fastening only in small boxes that are not designed to bear a large load from the kitchen utensils placed in them. - If, during factory assembly, there are no holes and marks for installing shelf holders and receiving guides, then the installation locations for the fittings can be determined using a level. All structurally connected pairs of holders or guides must lie in a strict horizontal plane.
- When calculating the method of installing the box, it is necessary to take into account that the confirmats must fasten the boards in a horizontal position. If, after the final installation of the box, the confirmats find themselves in a vertical position, then the force of gravity can make such fastening very unreliable.
- A thin sheet of chipboard or plywood is usually chosen as the back wall of a small box. Such a sheet is fastened to the back of the box using numerous small nails or sheathed with a construction stapler. It is irrational to use thick back walls in small boxes, with the exception of some types of decorative sections of the set.
It is also important to know that the diagonals of the assembled box must be equal. This will indicate their original proportionality and correct positioning in relation to each other. If the diagonals are not equal, it means that the geometry of the box was violated during installation, or during the initial fitting of the walls, discrepancies in the size of the boards were missed.
The diagonals of the box must be equal.
How to choose a plinth for the kitchen
By and large, the choice is small; the two most popular materials for kitchen plinths are chipboard and plastic. Both types will cope with their task perfectly, but they differ fundamentally in possible use cases. Therefore, the choice of base material should be based on the tasks assigned to it.
Fig.1.
Fig.2.
Fig.3.
The plinth for the kitchen, chipboard, will be made of the same material as the kitchen set itself. The advantage of chipboard is that such a base can be made of any size, which is important for a non-standard kitchen. Another advantage is that there are a huge number of color options when using chipboard, which will allow you to make the base and kitchen unit the same color or choose a contrasting color at your discretion. When choosing a plinth for a kitchen made of chipboard, you should be sure to provide an edge on the chipboard panel; this will protect it from moisture, which is always abundant in the kitchen.
Fig.4.
Fig.5.
Fig.6.
PVC plinth for the kitchen is no less popular. The main advantage of a PVC base is its resistance to mechanical stress and moisture, which is very important for a kitchen. The PVC base is equipped with various connecting elements, which, when installed in the kitchen, allows you to hide the joints of the panels. If you are the owner of a kitchen with smooth curves, then plastic is practically the only option to make a base with a bend.
Fig.7.
Fig.8.
Fig.9.
A plastic kitchen plinth cannot be made to order; its dimensions are standardized, as are the colors. This circumstance is certainly a disadvantage of the plastic plinth, but it must be taken into account at the kitchen design stage. The main characteristic of a plastic base is its width. It can be 100, 120, 150 mm. The width of the plastic base should be less than or equal to the length of the legs of the kitchen set.
Fig. 10.
Fig. 11.
Fig. 12.
Legs for kitchen set
If a kitchen unit is planned to have a plinth, then regardless of whether it is decorative or functional, it is necessary to use special furniture legs for the kitchen that are adjustable in height. Kitchen legs come in three sizes: 100, 120, 150 mm. Height adjustment is provided by the design of the leg and is a screw mechanism. Rotating the leg support allows you to adjust the height of the furniture.
Fig. 13.
If we are talking about a plastic base, then it is important to focus on how to choose the right legs and base. The legs can be adjusted within a fairly wide range, both towards decreasing the height and towards increasing it. In addition, kitchen floors may have slight unevenness, and this must also be taken into account. Therefore, the legs and base must be the same size, or the legs must be larger. Usually the legs are adjusted so that there is a small gap between the plinth and the kitchen unit, which will ensure ventilation of the kitchen plinth.
Fig. 15.
Kinds
Absolutely all types of furniture legs that exist today allow you to establish interaction between the structure and other objects in the room. Such small-sized elements make the design complete, giving the space laconicism and comfort. Without the most ordinary leg, it is difficult to imagine a comfortable residential building today. Such fastening devices can give furniture stability, a luxurious, stylish look.
But what type of such products should you prefer? Let us characterize the main ones below:
- regular stands without the function of adjusting their height are available at an affordable price. Often, such legs have a laconic design without any special decorative elements;
- legs with the ability to adjust the height of the furniture. Combine aesthetic appeal and high functionality;
- decorative legs are used to decorate a piece of furniture, as designers give them an original look with their own hands. Curly supports can have a non-standard shape, an attractive coating, and various types of decorations. For example, carved furniture legs act as an independent element of room design.
Attaching the plinth to the kitchen legs
When designing a set, an important consideration is the height of the kitchen plinth. Due to the height of the plinth, the position of the tabletop relative to the floor is adjusted, which allows you to adjust the kitchen to your height. On the other hand, if the kitchen plinth will be used to store utensils, then it should be made at least 120 mm high; standard retractable storage systems cannot be installed in a plinth of lesser height. Therefore, kitchen plinths with a height of 120 and 150 mm are most widespread.
Fig. 16.
Fig. 17.
When assembling a kitchen set, special adjustable furniture legs are used, the design of which includes a clip for the kitchen plinth. The plinth strip is attached to the kitchen legs using this clip. The clips are attached first to the base plate, and with the help of a special clamp to the kitchen leg. For a base made of chipboard, the clip is attached using self-tapping screws; for a plastic base, a special groove is provided where the clip is inserted.
Fig. 18.
Fig. 19.
A kitchen plinth fastener is included with each leg, but this does not mean that you need to use all the fasteners. The plinth fastenings should be placed at a distance of 1 m from each other and along the edges of the strip. This way the plinth will stand level and possible mutual displacement of the legs will not affect the appearance of the plinth, at the same time it will be securely fastened.
Fig.20.
Installing a plinth in the kitchen involves another important issue: the depth of the plinth. The plinth should be recessed relative to the kitchen facade by 7-10 cm. This is necessary so that when you stand close to the countertop, your feet do not rest against the plinth. The required displacement of the base can be ensured by correctly installing the legs. When assembling the kitchen, the legs of the front row should be shifted 7-10 cm relative to the facade. This is enough to ensure correct installation of the base in the future.
Fig.21.
Fig.22.
Fig.23.
Installation of the leg and its adjustment
Companies that produce furniture produce adjustable legs of 10 cm, 12 cm and 15 cm. The most common adjustment is 3 cm. Rules that will help you install the legs correctly:
- The leg is screwed to the furniture using self-tapping screws, which are included in the product package.
- When adjusting the height of the cabinet, it is better to use a building level. This will help prevent the surface from tilting to the side.
- If the dimensions of the cabinet exceed 80 cm, then for greater reliability it is better to increase the number of legs and add an additional pair in the middle of the product.
| Tip: If you attach the legs 8 - 10 cm away from the edge, this will make the kitchen set more light. |
Comfortable height for different surfaces, depending on the type of process performed on them.
- It is better to install the sink at a height of 1 meter. This rule will help to avoid unnecessary stress on the spine when constantly bending over while washing. And if you choose a corner cabinet for your kitchen sink, you can still save space.
- The cooking zone will be comfortable and most importantly safe (when removing hot pans and pots) at a height of 80 cm.
- The most acceptable height for a work surface is 90 cm. Although if heavy tasks are often performed (kneading dough or cutting vegetables), it is recommended to increase the height by another couple of cm.
Additional plinth elements
By installing a plinth, you severely restrict ventilation under the kitchen cabinets and if you have a built-in oven, this may violate safety requirements. A ventilation grille in the kitchen basement will completely solve this problem. There is a special ventilation grille for the kitchen plinth. The advantage of which is that it is produced in the color of the base strips and has the size specified by the manufacturers of the built-in equipment. This allows for optimal ventilation. In addition, the design of these grilles allows them to be installed in a plinth without unnecessary problems; you just need to cut a groove of the required size.
Fig.24.
Fig.25.
Despite the apparent versatility of a laminated chipboard plinth, it is very vulnerable to moisture. Therefore, it is necessary to purchase a plinth seal for the kitchen. A silicone seal for the kitchen plinth will protect the chipboard and hide the uneven fit of the plinth to the floor. This way, contaminants will not get under the kitchen unit.
Assembling a cabinet with a drawer
Unlike a simple furniture section, drawers must have guide elements. Most often, guides for kitchen furniture are made of metal or metal-plastic. Drawers, as well as many elements of the set, have a prefabricated box as a body.
But unlike cabinets, the plywood sheet attached to the body of the box does not form the back wall, but its bottom. Therefore, instead of small nails, the basis for fastening the bottom of the drawer is the incoming guides, created in the form of long corners. And the receiving guides for the drawer are installed on the sides of the cabinet.
Drawers are installed on metal guides.
The assembly process is carried out according to the following step-by-step scheme:
- The cabinet box is being assembled. If the components of the cabinet are factory-made, then the receiving guides will already be initially built into the sides.
- If the cabinet is homemade, then it is recommended that you first temporarily place the receiving guides on the glue according to the design marks, then put the cabinet box on the floor and install the drawers. It is not advisable to place the structure on a standing box, since the glue may not withstand the fitting load.
- The boxes are assembled separately. The small dimensions of the box make it possible to connect the body boards using ordinary furniture screws. The bottom is placed on the box and attached to the sides using two corner guides. For additional fastening, the upper and lower parts of the bottom sheet are sheathed with nails.
- The box is placed on the floor, and the assembled drawers are sequentially placed on the receiving guides. They should slide out easily, without distortions or gaps in the retracted position.
If during such fitting it is discovered that the length of the drawer sides is greater than the width of the cabinet, then the pull-out element (drawer) will not be able to go all the way. In this case, you will have to disassemble the drawers and saw down their sides or increase the depth of the cabinet by attaching a rear frame-box.You can also add dimension by adding matching strips along the back perimeter of the cabinet. However, you will have to consider a masking design made from corners, which will restore the aesthetics of the reclaimed cabinet.
- The rear wall is installed. This element is not a load-bearing part of the cabinet and can be attached to the assembled body with self-tapping screws.

