Every pastry chef should have a cake turntable in their arsenal.
With its help, you can greatly facilitate the process of decorating cakes and make it enjoyable, comfortable and safe.
If you are not planning to purchase it in the near future, then an experienced craftsman can assemble it yourself.
Features of the rotating table
If you want the cake to be accessible to you from all sides at the same time, and at the same time you do not have to run around it, be sure to consider having a rotating stand.
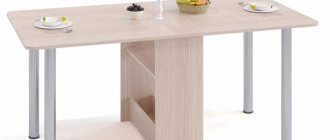
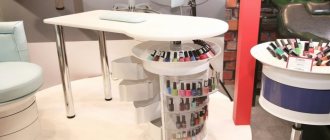
What is a rotary design for cakes? This is a product consisting of:
- round work surface;
- legs-bases;
- rollers, rubber bands.
Thanks to its design, the table easily rotates around its axis and provides convenient access to the confectionery product . With such a supply, you can create elegant and original decors in the most convenient way and create decorations of any complexity. At the same time, you don’t have to worry at all that your masterpiece will move, get damaged, or fall to the floor.
You can either purchase a turntable for cakes ready-made or make it yourself. A homemade design has many advantages. Firstly, you will be able to make a product that will fully meet your requirements and preferences .
Secondly, you yourself will be able to create a thoughtful drawing of the product, select materials for its manufacture and think over the most optimal dimensions. In addition, a homemade design will be much cheaper than a purchased one.
The nuances of making a rotating cake table
To make the assembly process go smoothly, you need to know some nuances. For example, it is better to take a double pressed bearing. Otherwise, two bearings will be required, and one of them must fit into the other. One element can be driven into another using nails. It is also necessary to ensure that the plastic tube fits into the bearing as accurately as possible. It is important that there is a strong fixation and that it does not dangle. Otherwise, it will be very difficult to use such a device.
IMPORTANT!
The resulting product can be given an attractive appearance. It must be covered with a film or plastic base. This will also extend the life of the device and make it easier to maintain.
The rotating rotating table provides convenient access to the confectionery product from all sides at the same time. You can make such a stand yourself, especially since the materials for its manufacture are available in every home.
It is very convenient for confectioners who make cakes to use various types of devices that facilitate the process of decorating the finished product. Fortunately, today stores offer a wide range of such equipment. One such device is a turntable. True, the cost of such a table is quite considerable, and it is often easier and more profitable to try to make a turntable for a cake with your own hands.
Materials
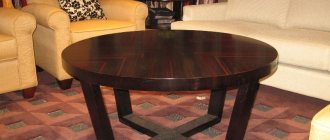
A rotating table can be made from any available materials :
- Fiberboard;
- MDF;
- plywood;
- tree.
Each individual option has its own advantages. Wood is environmentally friendly, safe, and has a texture that is pleasant to the touch . MDF and plywood are easy to process. In addition, this material has a low cost.
But chipboard is inexpensive, looks attractive, and is a pleasure to work with.
Tip : in order to save consumables, you can use a door from an old kitchen set to make a countertop.
Work process
Making a turntable with your own hands is quite simple. First of all, you will need to draw a high-quality drawing. After this, we begin to work according to the following scheme. If you have two bearings, and not one pressed one, then we hammer the element of the smaller diameter into the larger one using nails. It is necessary to cut two circles with a diameter of 20 cm in a wooden slab. A hole is cut in the middle of one of the circles into which the bearing is driven. In this case, the two parts are twisted and secured with self-tapping screws. A bearing is placed in the center.
The DIY table is equipped with plastic tubes. The tube should connect the upper and lower parts. Keep this point in mind when making a drawing for the turntable. In this case, the tube must fit exactly into the bearing. The ideal length is 15 cm. Such a tube will not be too short or long, so you will not have to bend over while decorating the product.
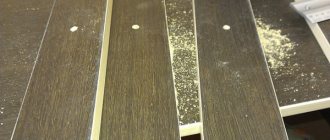
The top is made of metal. In order for it to spin, pay special attention to its diameter. On average, the diameter of a metal circle should range from 30 to 40 cm. If you have the opportunity to weld the elements, that will be great. For those who are deprived of this opportunity, cold welding was invented, which looks like plasticine. The cake turntable also requires circles cut from plywood. The rotating part is installed on the pipe, and the elements are fastened with self-tapping screws.
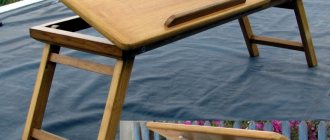
The table can be made of wood:
OK it's all over Now. The cake turntable is ready. In order to give it an aesthetic appearance, you can cover the product with thin plastic. Another option is to purchase self-adhesive film. It is sold in wallpaper or supplies stores. This film is easy to apply and washes well.
Every pastry chef should have a cake turntable in their arsenal.
With its help, you can greatly facilitate the process of decorating cakes and make it enjoyable, comfortable and safe.
If you are not planning to purchase it in the near future, then an experienced craftsman can assemble it yourself.
Tools
Having decided to make a rotating cake table with your own hands, prepare the following tools and materials :
two bearings (they can be purchased at any auto store);- lumber for the countertop (in our case, plywood);
- hard nails;
- self-tapping screws;
- plastic tubes;
- metal circle;
- thin plastic.
Important: bearings are double and pressed.
The second option is preferable when assembling a rotating cake stand, as they are more convenient to install.
How can I replace a cake turntable?
What is the solution for those who do not have a turntable? A very simple and affordable solution can also be found in almost any home. You can use a rotating plate from the microwave. Almost all models are designed in such a way that they have a glass plate and a round stand at the bottom. You need to remove the plate and the circle underneath it from the microwave. If it is too smooth, you can put paper (a paper towel) underneath to reduce slipping. This way you can decorate the cake by smoothly rotating it around its axis. Also, a glass plate will not spoil the view when serving the finished decorated product.
How to make a rotating table?
Making a turntable is quite easy and simple. First you need to make a well-thought-out sketch. In this drawing, indicate the design of the product, its exact dimensions and materials of manufacture. Having such a diagram at hand, you can easily assemble the table the first time and without errors.
The manufacturing process of the rotary table is carried out in the following sequence:
According to the drawing, we cut out a round tabletop from plywood.- Take the bearing (if you chose a double bearing rather than a pressed one, then use nails to hammer the smaller element into the larger one).
- two circles with a diameter of 20 cm in a wooden slab .
- We insert a bearing into one of the pre-made circles .
- Next, we twist the two parts together using self-tapping screws and place the bearing in the center.
- The turntable is equipped with plastic pipes . They will connect the top and bottom of the product. The tube must fit into the bearing with millimeter accuracy. It is best to make it 15 cm long. This will simplify the process of decorating cakes. Since you won't have to constantly bend over your masterpiece.
- The top of the table is made of metal . Particular attention is paid to its diameter. It is best if the diameter of the metal surface varies within 30-40 cm.
- Next, we weld the elements together . If you do not know how to use a welding machine, you can use cold welding.
- We install the rotating part on the pipe and fasten the elements with self-tapping screws.
That's the whole simple process of manufacturing a rotating structure.
Tip : to give the product a decorative appearance, it can be covered with thin plastic.
The product can also be decorated with self-adhesive film. It simply sticks on and is easy to clean.
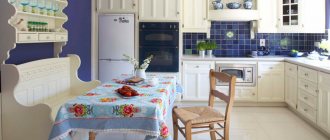
Tip : An extendable table, coffee table or a good quality kitchen table can also come in handy in the kitchen.
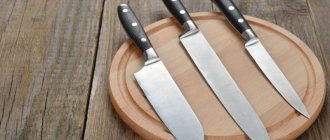
Rotating knife stand | DIY master class
We will not talk about rotating knives and jugglers in this instruction, but one way or another you will find it interesting. Here I will describe the process of creating a rotating knife stand with a homemade bearing. The stand has the shape of a cylinder, the diameter of its base is about 18 cm, and its height is approximately 25 cm.
Tools and materials
You will need the following tools:
- A circular saw with a cutting depth of at least 6 cm (a hand-held circular saw will most likely not cope with the task).
- Tightening straps.
- Wood lathe (with a spindle height of at least 10 cm).
- Belt sanding machine.
- Rasp (or well-sharpened turning chisels).
And the following materials:
- Bars from any hard hardwood - at least 8 pieces measuring 6 cm x 6 cm x 20 cm (I had 2 beech bars 1.9 m long).
- A board of the same type of wood (measuring approximately 20 cm x 20 cm x 1.9 cm).
- Wood glue.
- Adhesive tape.
- About 50 steel balls with a diameter of 1 cm.
- Varnish for wood.
Design and calculations
To create the knife holder, you will need to cut grooves into the blocks and then make diagonal cuts so that the 8 pieces glued together create a circle. The figure above shows diagrams for bars. The width of the bars and the depth of the cuts are presented for different options: for the ideal octagonal version and the minimal version (their differences can be seen in my drawing). It is easier to glue a full octagon, since its parts can be adjusted along common edges, but this option requires more material and a deeper cut. The distance between the oblique cuts is very important for the final diameter of the stand. To create the bearing, it will be necessary to make 2 identical V-shaped grooves in the base and in the stand block using a lathe. Then steel balls will be inserted into the space between the base and the block.
Sawing material
At this stage, you will need to adjust the bars to exactly the same size and sand them so that they can be glued together tightly. First of all, create a groove for the groove of the required depth (d) exactly in the middle of the block. Then turn the block over and make miter cuts at a 22.5 degree angle. The center of the gutter should be equally in the middle of the space between the oblique cuts. Now you need to cut the bars to the same length (mine were 22 cm long). The base is a regular board that you need to drill a hole in the center of to place it in the lathe and turn it into a rough circle (1cm wider than the desired radius of the finished knife stand).
Gluing
Apply a generous amount of glue to all prepared bars and place them next to each other, securing them with adhesive tape. Since miter cuts are unlikely to come out perfect, you'll have to glue the two halves together separately, then sand them down to get a smooth surface before starting gluing. This way you can avoid gaps between parts. After applying the glue, take the two resulting halves, place several sticks between them and tie them together with straps. Once the glue is dry, sand both halves using a sander and glue them together, again using the straps.
Processing the block and base of the stand
Placing the resulting block on the lathe can be difficult. To make things easier, I took a small piece of wood and placed it in the hole on one side of the block. After this, you can begin processing, using a large semi-circular chisel at the beginning of the work and a finishing chisel at the end. Sand the top and bottom of the block as well so that these surfaces are completely smooth and you don't have to fuss with sanding later. At the bottom of the supply block, cut a small V-shaped groove (about 5 mm deep) to contain the steel balls. After processing the base of the stand, cut a groove in it with exactly the same diameter as on the block (also about 5 mm deep).
Final touches and further plans
It is likely that while aligning the top and bottom of the block, small rough spots will remain in the grooves. To remove them I used a small file. After sanding the top, I spray coated the block and base of the stand with several coats of varnish.
Then all you have to do is place the steel balls into the groove in the base, place a block on top, insert the knives - and voila: you have a rotating stand for knives of your own making. Future plans.
Watch the video
If I ever decide to make another stand, I'll try to make it convex so the knives in the slots will be visible.
This time I just didn't want to experiment since I was making a gift for a friend. Original article in English sdelaysam-svoimirukami.ru