However, the cost of such a table in furniture stores sometimes makes you doubt: is this pleasure worth the money? It turns out that it is much cheaper to make a billiard table with your own hands than to purchase a ready-made one.
The main thing is to know what materials you need to choose and what you will need for proper assembly.
What are they made of?
At the stage of choosing materials for making a billiard table, it is important to remember that wood and cloth should be as wear-resistant as possible. This will extend the life of the furniture.
Sides, frame, legs, tabletop
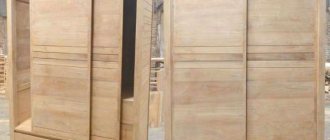
The best option for making a table base is wood . This material is quite strong, durable and environmentally friendly, which is important for many lovers of natural furniture.
Natural wood bars must be solid. Thanks to this, there will be no chance of dust, moisture and dirt getting into the base, which in turn can cause rapid damage to the furniture.
Solid bars can be ordered from pine, beech or oak .
The last two breeds are more difficult to obtain, and they will cost an order of magnitude more. Reference .
Pine is a cheaper material and much easier to process. For those who want to save on buying wood, you can use an alternative option, which is to replace the wood with chipboard. This material is not as durable, but it looks no less beautiful in the interior. From laminated chipboard you can make:
- supporting structure;
- legs;
- table top.
In this case, the thickness of the material should be at least 18-20 mm . If you wish, you can take a thicker one, but it is worth considering that the weight of the table will increase significantly.
Reference . A cheaper option for a countertop could be plywood. It can also replace wood and chipboard in other elements, but you need to remember that the price of the material corresponds to the quality.
Pockets
An integral element of each pocket should be the metal brackets and nets that are attached to them. The important thing to remember here is the force of the ball hitting the staple and the potential for damage to thin staples. Therefore there are two options:
- Purchase ready-made metal pockets in a specialized store.
- Cast from aluminum in a plaster mold to the required dimensions.
The mesh for the pockets must be strong . You can also purchase it ready-made in a store, or weave it yourself.
Advice . The sheathing will help reduce the impact force on the bracket. It can be made of leather - this way, it will not only further strengthen the staples, but also give the pocket an elegant look.
Rubber for sides
For those who do not want to save on the quality of manufacturing a billiard table, it is worth purchasing original side rubber - it is very expensive, but during the game it softens blows well and has a long service life.
Not only the impact force, but also the rebound force of the ball, which is important in professional billiards, depends on the quality of the chosen rubber. Therefore, the carpenter can choose a cheaper option, but subsequently he will have to get used to the rebound force.
Advice . Many of those who made the table themselves recommended replacing such expensive rubber with gas hoses.
Cloth
The tabletop coating must be wear-resistant , since impacts from balls can gradually wear out ordinary fabric, or simply tear it with a strong impact.
When choosing cloth, you don’t need to skimp, as low-quality material often needs to be replaced. It is better to take care of its quality in advance and take into account several important criteria:
- nylon in the fabric composition should not exceed 55%, the rest of the material should be wool;
- fabric density should not be less than 300 g/m
- For Russian billiards, natural wool is usually used as cloth.
If the manufacturer does not want to bother, you can go to a specialty store and purchase a special cloth for the billiard table. It will cost more than the above fabrics, but the owner of the table will be confident in its strength and durability.
Drawing with dimensions
Nowadays it’s enough to simply find the required drawing of a billiard table on the Internet. The main thing is that the project fits in size into the room intended for installing this furniture.
Important ! Keep in mind that the room should have enough free space for comfortable movement of several people playing billiards.
If the designer does not have the desire to download and print a ready-made drawing, or he has not found a suitable option, he can draw the diagram himself, on paper or in a graphics editor. In addition, you can order a drawing from an experienced carpenter - this will save time on creating the project and eliminate hassle in the future.
The optimal size of a billiard table is considered to be:
- length – 2 m;
- width – 1 m;
- height – 80 cm.
It is advisable to maintain an aspect ratio of 2 to 1, no matter what size the designer chooses. And the height of 80 cm is comfortable for all players.
How to assemble a table yourself
By learning how to make billiard tables with your own hands, you can not only get a high-quality and correct table at home, but if you succeed, it can turn into a good business. There is not much work there, and it is not particularly difficult, but there is always demand. The main thing is to know some manufacturing nuances. It is the subtleties that we will deal with today, and we will leave carpentry issues outside of our investigation for now.
Now, a billiard table may be made by a first-class carpenter, but it will be disgusting and useless from the point of view of a billiard player. We will leave the appearance of the table for furniture aesthetes, although this is of great importance. For a billiard table, several things not related to carpentry are much more important:
- how the ball behaves on the table, rolls, goes to the side, does not roll at all;
- how the board works, how it gives the ball, how it receives it and how predictable its work is;
- It’s generally useless to talk about pockets; they should be perfect even on an amateur table;
- what quality is the cloth, how comfortable it is to be at the table.
Tools
To ensure that in the process of creating such complex furniture there is no downtime searching for one or another tool, the following items should be prepared in advance:
- screwdrivers;
- hammer;
- pliers;
- spanners;
- drill;
- screwdriver;
- wood saw;
- plane;
- jigsaw;
- construction stapler;
- Bulgarian.
To save your energy and time spent on creating a table, it is best to take an electric tool (jigsaw, saw, plane).
Manufacturing and assembly
How to make your own frame?
First of all, you will need to start making the frame .
To do this, you will need to cut the prepared pieces of wood in accordance with the dimensions indicated on the prepared drawing. Accuracy down to the millimeter is important here: errors can subsequently cause inconsistencies. The tools you need to use for this are a saw or a jigsaw.
Or you can order cutting to the specified sizes at the place where the materials were purchased - this will save time and effort.
First, the outline of the table is assembled. 4 beams are attached to each other with self-tapping screws using a screwdriver. Then the internal bars are installed in the same way. In this way, a so-called grid is created, on which the tabletop will subsequently be installed. It is best to strengthen the structure, and it is recommended to use metal corners or small beams for this. They are fixed with self-tapping screws or special wood glue.
Attention ! To achieve fixation of all elements in one plane, without bending, it is best to assemble on the floor.
We move on to the stage of marking and installing the tabletop . If, at the time of purchasing a sheet of laminated chipboard or other material, cutting to the established dimensions was not ordered, it is necessary to cut the sheet to the required dimensions. To do this, you need to apply markings using a ready-made drawing, and do not forget to take into account several important factors.
- The diameter of the billiard ball is 60 mm, based on this, the size of the pocket should be slightly larger. Typically, the side pocket has a diameter of 70-72 mm, and the corner pocket - 64-66.
- The distance from the target line of the side pocket to its edge is 0-1 mm; for a corner pocket this value should reach 5-7 mm.
- The pockets can be cut already at the stage when the sides are attached to the tabletop.
How to assemble?
The tabletop slab is attached to the frame . To do this, you can use silicone adhesive sealant. It is best to apply this glue evenly or even pointwise, and place the tabletop on it with 4 hands so that the glue does not smear.
To secure it, when the sealant has dried, you can secure the slab from below with short self-tapping screws.
After this you can make the sides . We cut the wooden blanks, but we must not forget that leather pads will be glued to the ends. Therefore, if they were not taken into account in the drawing, you need to reduce the width of each side by the thickness of the existing overlay.
Rubber is glued to wood using universal construction adhesive; the main thing is to apply the substance to both surfaces to be glued and press as hard as possible. After the glue has dried, you need to cut the rubber in accordance with the drawing - for this you can use a simple sharp knife dipped in soapy water. We are not fixing the edges on the tabletop yet; it is worth moving on to this point after stretching the cloth.
Then you can start making the legs for the table . We cut the wood into bars of the required size. There are many design options, for example:
- make the bars a little thicker than indicated in the drawing and apply threads;
- processed on a lathe;
- frame it on both sides with trapezoidal pieces of laminated chipboard (if there are scraps left from the board), etc.
At the very bottom, rubber pads can be installed on the legs to prevent the wood from scratching the floor. If you want to move the table, you can use rubber wheels with brakes instead. To securely fasten the legs to the frame, use M6 bolts .
We move on to the stage of covering with cloth, which should cover both the table top and the sides. The fabric is attached to the bottom of the tabletop with staples. Each side should be tightly fitted, with maximum tension along the entire length . For this:
- Place the border on the wrong side of the fabric.
- In the middle of the block we stretch the cloth and fix it on top with a stapler.
- In the same way we perform fixation on the right, then on the left.
- We move from the middle to the edge of the bead, gradually stretching the felt completely.
The remaining fabric is trimmed or carefully fixed. The sides are secured using self-tapping screws or through bolts.
Then we install metal brackets on the pockets, having previously covered them with leather. The final stage is to install the nets on the pocket brackets.
Desk for schoolchildren
We will not deal with the typical desks that were found in all Russian homes in the 90s of the last century. Such tables are boring to execute.
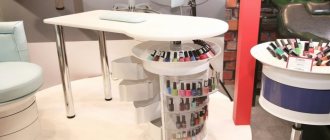
Let's look at an unusual table with A-shaped legs (goats) and a durable long work surface. You can use an old door leaf with a flat surface as a tabletop.
You can install a computer on such a table: Place the monitor on the tabletop and place the system unit in one of the legs.
You can use oak or pine board for the A-post. The width of the plates used to make the legs can be any (it is advisable to use from 75 to 125 mm).
The height of the table is 75 cm. In our case, the width of the tabletop is 70 cm, length - 180 cm, thickness - 4 cm. The length of the boards to which the legs are attached corresponds to the width of the tabletop - 70 cm.
Materials and tools
To produce a school bench we need the following materials:
The board is cut - 14 pieces…………………………………………………………………………………………………………………… ………………….; Bolt - 5-6 pcs; The scale consists of 6 parts………………………………………………………………………………………………………….; self-tapping screws; Furniture screws for attaching legs (6 x 75); Desktop equipment; medium-grit sanding paper; PVA glue ; Waterproof impregnation for woodworking, varnishing or painting.
The right tools:
ruler, meter; pencil, marker; puzzle, saw; milling machine; exercise; screwdriver or screwdriver; Brushes.
If you are interested in how to make a folding table yourself, read our article: //6./dom/mebel/stoly/123455321/-rukami.html.
Stages of work
Step one. Draw and cut the tabletop. Sand it down with sandpaper or a sander. Side by side edges can be made with a special finishing edge that can be purchased from any construction company.
Please note: when using a cantilever arm, the finished tabletop width is 72 cm!
Step 2: Cut 8 boards at least 75cm long (you may need to cut the edges with a power saw) and sand them.
Step 3: The angle of the goat boards should be chosen so that the total height of the legs for a tabletop thickness of 75 cm. To do this, cut out small sticks located between the upper parts of the supports. The width between the lower parts should be 22 cm.
Step 4: Drill two 9mm holes in each of the two 70cm long boards (for attaching the goats). The holes must be equally spaced! We retreat about 3.5-4 cm from the top, it all depends on the width of the board. Drill 9mm holes in the top of the legs in the middle. Furniture screws are used to secure the legs and structure with screws.
Please note: The screw size is 6mm and the hole diameter is 9mm! This is necessary since the table legs are mounted at an angle.
Step 5: Attach two 19cm long rods to the underside of the goat. The height of the rods should be at least 3 cm from the ground. Place the two shelves on the posts and secure them with screws.
Step 6: After measuring the distance between the goats, tighten the wood strips to prevent the tabletop from moving down.
To increase the stability of the tabletop, it is recommended to use a scale. Drill holes in the base plates 8mm deep and 22mm deep in the work surface. The belt pulleys should be dipped in PVA glue and place it in the board, then carefully place the table top on it. For such a massive table, it is necessary to make 2-3 cabinets on each side.
Step 7: Saturate all wooden parts of the table. Apply at least 3 coats to the children's table (to ensure it is waterproof). Each layer must dry completely. After the last layer has dried, the table should be painted or varnished. You can add a little paint to the varnish to give it the desired shade.
Please note: the table can be decorated upon request. Decoupage is the best technique for decorating children's tables. Just choose a cheerful drawing or decorate the tabletop with pictures of your child’s favorite figures.
Finishing
To make the table look more noble, you can install decorative panels under its sides, treat all visible wooden surfaces and paint them, or varnish them.
Reference . Decorative overlays under the edges will make the table visually richer, so if the carpenter has pieces of laminated chipboard left over, such decoration can be done.
If the table will be used in a room with an uneven floor, it needs to be stabilized. The easiest way to do this is to install wheels on the legs on a bracket.
Advice . For relaxation, a massage table, a table for a laptop or sand painting can also be useful.
Material for making a gaming table for a billiard room
For a billiard table you will only need high-quality, reliable materials. The ideal option would be a table entirely (legs, tabletop) made of high-grade wood: oak, pine. At this time, more affordable and accessible raw materials are used for work: chipboard.
So, you should prepare a number of necessary materials:
- Solid wood is useful for planks and sides.
- To make pocket linings you need to purchase metal staples.
- Chipboard - for the surface and supporting mechanisms, that is, table legs.
- Fabric material for lining and decorating the product.
- Self-tapping screws, rubber for impact edge.
- Net for making pockets.
- Legs that regulate the precise positioning of the table.