0
22700
A sedentary lifestyle already causes many health problems. If, during constant sedentary work, a person is in the wrong position, the development of serious diseases of the spine will be added to everything else. You can prevent the problem by choosing comfortable furniture and customizing it “to suit you.” For this purpose, the office chair is adjusted: the appropriate height, backrest angle and other parameters are set. The whole process will only take a couple of minutes, but will definitely make the life of an office worker or freelancer easier.
Top 3 ways to make a chair taller
High chairs are varied, produced in a wide range of styles, materials and additional features.
Some of them have interesting “bells and whistles”: rocking chairs, inflatable seats, etc. Therefore, before you make the chairs taller, you should familiarize yourself with all the models that are popular. A high chair is placed in the swimming pool, billiard rooms, living rooms and dining rooms. The wide range of fabrics and finishes, as well as other parameters such as height and custom footrests, make it a piece of furniture that requires a personal touch, in most cases, models are made by hand.
Design Features
For a beginner in carpentry, it is better not to take on chair models with fine carvings, curly elements or curved backs. Often, novice craftsmen practice making stools to gain experience. If the farm does not require them, there is no need to transfer materials and time to them. By carefully studying the manufacturing instructions, you can immediately make a wooden chair with a simple design. This is a universal piece of furniture that, due to its design, will last a long time. It will fit perfectly into the interior of a country house, and can also be used as a kitchen chair. A regular model with right angles will require the following parts:
- 2 rear legs;
- 2 front legs;
- 4 drawers, as well as horizontal strips that strengthen the seat and the entire structure as a whole;
- 3-4 legs – connect the legs at the bottom, which gives the chair additional stability;
- seat;
- back.
It is possible to install legs and drawers in larger quantities - it depends on the imagination of the master. The backs are also made in different ways. For example, you can make several narrow planks and place them vertically, fastening them at the top and bottom with transverse parts. Or make one wide plank and connect it to the back legs. The advantage of this model is its ease of implementation. Among the shortcomings, the only drawback is that the design is too primitive, which will not stand out against the background of the rest of the furniture.
The sketch and drawing of the future exclusive must exactly correspond to its purpose. For this reason, you should initially decide whether it will be just a chair for sitting or with additional functions.
With soft seat
Visually, this model looks like an ordinary chair, but its upper part is upholstered with foam rubber and fabric. To make an option with a soft seat, you will need to know how to work with a stapler. You will also need to stock up on additional parts and tools:
- A piece of plywood. The seat is cut out of it with a jigsaw exactly to the required size.
- Foam rubber with a density of 40 kg/m, thickness 40-60 mm. You can replace it with batting or padding polyester.
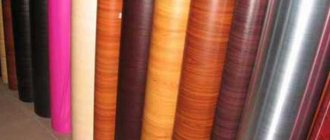
- Upholstery fabric. For soft seats, tapestry, velor, flock, courtesan, leather or leatherette are suitable.
- A sharp knife with a long blade. They are convenient for cutting foam rubber.
- Manual or electric stapler. Use it to cover the seat with fabric.
In addition to the seat, you can also make a soft back. In this case, you need to correctly calculate the amount of material so that there is enough for both parts.
The advantage of making such chairs yourself is the ability to choose the optimal size, taking into account your body type. However, you need to take the choice of texture seriously. Natural leather cannot be used to upholster kitchen chairs, as it stretches due to moisture and begins to bulge over time. It is better to choose jacquard - this material has excellent water-repellent properties.
Armchair chair
The main advantage of this model is the presence of armrests. In addition, it looks more presentable, and if you decorate it with fabric, you will get a rather stylish piece of furniture. An amateur carpenter can easily make a chair of this shape with his own hands. The easiest way would be to make a model with a straight back. For stability, it is better to make the legs wide, using a 15 mm board.
The front legs should be longer than in a regular chair, so that their upper part can then be connected to the armrests. They are made 8-10 cm wide from 10-15 mm boards; the edge is usually rounded to make it more comfortable for the hands. For fastenings you will need furniture bolts - with their help the frame of the chair-chair will be assembled.
For an untrained craftsman who does not have woodworking skills, this design may be too complicated.
Folding
An excellent solution for small spaces. Thanks to its folding legs, it can be quickly assembled and disassembled. There are also disadvantages - lack of a backrest, fragility. Experienced craftsmen recommend making a folding chair from hardwood boards - oak, maple, birch, elm, then the model will be strong and stable. Pine planks are less durable. As a basis, you need to take 2 long slats, which will serve as both the front legs and the back, when they are connected from above by a transverse board. The rear legs are attached to the seat. They, unlike a regular chair, are shorter than the front ones.
In the folding version, it is important to position the central axis correctly so that the seating area does not end up being too high. To assemble a chair of this model, additional fasteners will be required: furniture bolts and nuts with matching washers. Such furniture is usually made according to a sketch, so it is very important that the craftsman knows how to work with drawings.
Transformer
Outwardly, it looks like a massive chair with a back, and if you unfold it, you get a staircase of 2-3 steps. The main advantage is the height. With its help you can reach the very top shelves of cabinets, remove curtains, and in general this chair is very useful, especially during renovations. The disadvantages are that it is heavy and takes up a lot of space. If you are making this model for the first time, it is better to choose a drawing of a chair without intricate shapes of legs and additional elements (for example, there is a design in which the steps protrude in a spiral). In addition to other materials and tools for such a chair, you will need a piano hinge and 2 sets of guides - with their help the steps will extend.
It is not easy to make such a wooden chair with your own hands. This will require skills in working with a jigsaw, drill, and plane.
Sources used:
- https://stroyday.ru/stroitelstvo-doma/interernoe-oformlenie-doma/kak-sdelat-stul-svoimi-rukami.html
- https://mblx.ru/sedlo/1246-stul-svoimi-rukami.html
- https://mebelindesign.ru/stulya-dlya-kuxni/
- https://berkem.ru/drugoe/delaem-podushki-na-stulya-svoimi-rukami/
- https://vseme.ru/svoimi-rukami/taburet-iz-dsp
Children's models
Standard
This is an everyday high chair with tray that can be used as soon as your baby can sit (around six months of age) or even earlier if the model reclines. A special tray serves as a table for the child.
European style
This is a high chair that is pulled right up to the dining table so that the child can eat with the rest of the family. As a rule, it is suitable for a one-year-old baby and a child over a year old; such designs are best made with an adjustable seat.
Hook chair
This model, which can hardly be called a chair, is great for travel and for families with limited living space who live in a small area. This type of compact clip-on seat that attaches to a table or regular dining chair. When making such a model, you need to make sure in advance that the furniture on which it will be attached is strong enough.
Bar models
Many of us associate bar stools only with public places, but isn't it worth creating a spontaneous and relaxing atmosphere right at home? The proportions of bar stools make them suitable for more than just pubs.
A type of high chair, often with an additional leg support, allows you to sit higher when eating, drinking, or socializing. In the 2000s, it became popular in apartments; models are placed on the kitchen island and form a home bar. And if you are a party fan, spend long evenings with friends, or are simply looking for an interesting idea to liven up your space, then a bar at home is the idea for you.
The solution was invented for those who like to have a snack on the run, who prefer to communicate in a relaxed atmosphere. When creating models, they use interesting approaches, the space acquires a completely new atmosphere.
- The bar counter quickly becomes the familiar heart of the apartment; over time, it will be difficult to convince guests to take a seat at the table. The kitchen is made open. This layout will provide flowing space, the ability to move around the dining island.
- Even in a small kitchen of a one-room apartment, you can allocate space for a bar counter, at which two people can sit comfortably; this is a smart way to use a small area.
- They are planning a bar in the basement of a private house. Here it is easier to maintain the required temperature for exceptional wines.
What types of designs are there?
When thinking about how to make a bar stool, take into account that models are made with or without armrests, with or without a backrest, with upholstery on the seat surface and with hard seats. Stools save space. Furniture ranges from basic wooden structures to more complex, height-adjustable designs.
Swivel and floor models can be moved, but they are unstable. Mounting to the floor makes the furniture immovable. This floor-standing option is usually mounted on a column, and if the chair has legs, it is secured to the floor using metal brackets.
Bar stools are produced in various styles. Remember! You and only you limit your imagination.
- Most often, wood is used to make it yourself.
- Some bar models use polyurethane foam as a comfortable upholstery.
- Wooden and metal tall models (including stainless steel), height-adjustable, are especially popular.
- Furniture is made from rattan or bamboo, using it to create the effects of the popular retro style of the 1950s and 1960s.
- Some craftsmen use chrome in combination with matching seats.
Materials used
When repairing chairs or assembling them from scratch, you should immediately think about using soft pads.
There are several options for how to make the heels and what to glue to the bottom of the leg.
Let's start with what to make such protective elements from. They can be:
See also:
How to change facades on a kitchen unit with your own hands quickly and inexpensively
- silicone;
- felt;
- rubber;
- plastic;
- felt;
- cork;
- Teflon;
- polyurethane;
- fabric;
- leather, etc.
You need to choose based on what goal you are pursuing.
Cork overlays are only suitable for stationary furniture. Therefore, they are not suitable for chairs.
Some overlays improve sliding properties, thereby making it easier to move furniture from place to place, and also protect the floor covering from damage.
But if you have a kitchen chair with a soft back, and the kitchen is tiled, you definitely don’t need strongly sliding heels. In this case, you should abandon felt and Teflon products.
But they will help when you need to move heavy furniture without extra effort. Felt, felt and Teflon heels have an optimal sliding effect.
It's a different matter when you need to achieve maximum stability. That is, do not allow the chair to slide and move at the slightest impact. Again, let me remind you about the kitchen and tiles. The surface is slippery if regular wooden chairs without pads are used. And metal stools can even scratch the coating. Therefore, here preference should be given to silicone, rubber or soft plastic. Plastic that is too hard will not cope with this task. It is better to refuse it.
So always be guided by the situation. The foot attachments are designed to perform several functions. And sometimes they turn out to be opposite to each other. I'm talking about improving gliding and providing an anti-slip effect.
How to increase the height of an existing model
Depending on the design of your existing chair, you can significantly increase its height. In one case, this will help to combine with other furniture. In another, a taller chair will make life easier for older people and people with physical limitations who have difficulty sitting down and standing up.
Attention! For some types of chairs, neither method is suitable and none is safe.
"New Legs"
Upholstered, lightweight chairs and stools often have legs that are screwed on. You can make or even buy replacement legs in a variety of styles and a wide range of lengths to increase the height of your chair. The main thing is that the thickness of the new element is similar to the original. Replacing a wide support with a narrow one will cause instability and will make the furniture unsafe.
Wheels
Adding wheels or replacing existing wheels with larger ones will increase the height of certain dining chairs, office chairs or armchairs.
- Wheels equipped with brakes increase the stability of the high chair.
- You should choose heavy-duty wheels, for example, ball-type ones.
If the legs of the existing chair on which you plan to put the wheels are made of wood or rattan, drill a hole in the center of the bottom of each leg. Sometimes it is necessary to use wood glue to ensure solidity.
Attention! Adding casters to a chair is not recommended if the person using the furniture has any mobility impairment.
Pillows
Replacing or adding seat cushions is the easiest and safest way to increase the height of your chair. A pillowcase, cover or fabric covering will not only help change the design, but will also make caring for the upholstered part of the furniture easier. Non-slip support will help prevent slipping.
- High-density cushions wrapped in batting are great for increasing comfort while at the same time “pulling” the seat height to the desired size.
- The existing model with a removable cushion can easily be decorated with a harder cushion, which in some cases is attached, and in others simply placed on a chair or stool.
Attention! If your chair's arms are low, increasing the seat height may make the furniture too uncomfortable.
Master class on making a pillow
Cushion pillows, soft, large, small, multi-colored, plain... They can change any interior and give it character, and at the same time they are practical and comfortable.
You will need:
- textile,
- threads,
- scissors,
- needles,
- sewing machine,
- filling (silicone).
From the selected fabric, cut out two squares measuring 50 x 50 cm and four strips 52 cm x 10 cm (1 cm for seams). The parts are sewn together, leaving a 10 cm hole. If you want the edges of the pillow to be more visible, the seams are made at a greater distance from the edge.
Initially, after filling with silicone, the pillow will not be too beautiful, so it makes sense to give it the shape of a saddle. It is enough to pull the opposite sides of the product towards each other in several places with a large needle.
These cushions, which can vary in size depending on the size of the chair, are ideal for playing directly on the floor.
Enlarge the table legs?
Carpenter Pikabu, hello!
Let's find the most optimal, simple and non-collective farm way to lengthen the table legs by about 10 cm. For example, this:
I'm not asking out of idle curiosity. The last three digits of my nickname indicate height and it is not possible to find a table convenient for me on sale)
I don’t really want to do it myself from scratch, and I don’t have a workshop or a tool with the skill)
I also considered the option of a folding table, but their range is extremely small.
Duplicates found
It's good that it's not the legs.
Maybe it would be easier to lower the floor level?
Without minimal tools and skills, it will not be possible to extend the non-collective farm.
But making new ones 10 cm longer is quite possible.
On the other hand, ordering a table to suit your size from the beginning is even easier.
In my Soviet childhood, the bed was placed on 4 inverted half-liter jars. Maybe this method will come in handy for you too.
It depends on the availability of lumber and the degree of processing. If you take boards from a broken pallet, consider it free
Screwdriver + 16 screws +
TS asked not the collective farm method
He doesn’t want to make the vehicle from scratch + he doesn’t have the space, tools or skills. I bought factory legs and screwed them on - cheap and cheerful. And the “non-collective farm” option - money for the carpenter in the morning, table for home in the evening.
I vote for the carpenter, the table in the picture is quite ordinary, no difficulties with the pattern, color, etc.
Do you need a special room to grow table legs?
In order to make a table from scratch, a room (workshop) is still better than a balcony or a room in an apartment.
and where here, it’s interesting to know, was it said about “making a table from scratch”?
Balconies/loggias, just so you know, are different. some have much smaller rooms
“I don’t really want to do it myself from scratch, and I don’t have a workshop or a tool with the skill)”
Dear sir, have you read the post? Second line from the bottom.
The first thing that comes to mind is to drill a metal pin inward at the place where the length is increased, but wouldn’t it be easier to order new legs from a carpentry shop?
The pin is made of wood with cutting and placed on glue + sawdust. Having previously made holes here and there.
You will definitely need a router. will need to be equalized. in short, there’s a lot of hassle, it’s easier to wrap pieces of the pallet with electrical tape
You take Photoshop and lengthen it as much as necessary.
Everything about everything - 30 seconds...
glue, drill from the bottom of the tabletop a board with an area smaller than the tabletop itself or just a 10*10 beam, and add legs and everything else to it
800-900 mm + tabletop from an old table
1) replace the entire legs.
2) increase (mill out a hole 1/3 of the thickness of the leg and glue the leg with a counter insert).
Option #1: throw out the legs and make new ones. Any additional adhesive will be different in color and will need to be tinted. The tint will look farm-style, so it’s easier to do a new one.
2) Glue the block. Drill through and fasten with a plumbing screw. There is a photo above. Problems with touch-up paint, but more or less durable.
How to cheaply or freely upgrade your computer desk
A computer desk is one of the main things to ensure convenient and comfortable work at the computer. Some may have it purchased in a store, while others may have it homemade. Today we will talk about those computer desks at which people work while standing.
Because it will be healthier. Many may disagree with this, but I think everyone can try it.
Changing a computer desk is possible in two ways
- Raise only the keyboard, mouse and monitor to the required level.
- Raise the height of the tabletop.
Raising the tabletop
There are plenty of creative ways
Composite tabletop with built-in waste drawers.
Here, under the countertop, a drawer with junk and a small library are conveniently placed.
Quite a working option, you can work below with the laptop above and follow its continuation.
Brutal climb option
Coca-Cola in service in the office)
And again a two-part composition.
Minimalism in the spirit of Apple)
Some of the photos may make you laugh, but this is one of the simplest solutions. Use everything at hand and don’t look for something else. It's quite suitable for temporary use.
I would like to list a list of items that were used for these computer desks:
- Books
- Chairs
- Stools
- Boxes
- Shelves
- And even cans of chips!
Disadvantages of this method
- Instability
- Insufficient work surface
Advantages of this method
- Easy to install
- Easy transition from standing to sitting mode
- Most people will be able to do this
- This is not the only option to make a “standing” desktop.
Raise the entire table
The Internet can also offer quite a lot of options, here are some of them
It looks like the desktop of an NKVD officer.
This is apparently from the same building as the brutal version above, apparently they are slowly taking it apart brick by brick. Judging by the fact that the guys in shorts are warm and they don’t really need walls)
Conceptually. Desk of Bazarsky Mac editorial office.
A desk with a computer riser, because it sits on nothing other than old computers.
Quite stylish leg extensions.
People's imagination is limitless; the following objects were found under these tables in the photographs:
- Cinder blocks
- Reams of paper
- Chairs
- Nightstands
- Wooden countertops or something like that
Disadvantages of this method
- Difficult transition from standing to sitting mode
- You need strong material, and one that can withstand the weight of the table with a monitor and other things
Advantages of this method
- No loss of working surface
- The table will be as strong as if placed on the floor
- It’s more common to work at such a table. With these simple methods you can upgrade your computer desk and turn it into a desk for standing work.
Try, experiment and know that everything depends on your desire and imagination.
Well, if searching for non-trivial and not entirely convenient solutions is not for you, then you can buy a table with height adjustment, this is the most optimal solution at the moment.
How to increase the functionality of a computer desk?
Not enough space at your computer? I offer an option for upgrading a standard computer desk. The costs are minimal - the effect is colossal. For craftsmen and those who like to do things with their own hands. DIY computer desk, video.
This is true for those who need to work at a desk. Schoolchildren, students and people of mental work want to arrange objects used in their work in a compact and accessible way.
You can plan the layout of a desk on paper, go to a furniture workshop and, together with the master, carry out your plans. It will cost more, but your wishes will be taken into account.
If the table suits you, but something is missing
This is usually what happens. While using a suitable option, thoughts arise about modifying the workplace to suit your needs.
When working with paper media, it happens that you knock the computer mouse onto the floor. She and the rug take up space, documents and textbooks try to push aside or cover them in the process of work. Especially when the tabletop is narrow.
There is an exit. You need to move the mouse to the keyboard shelf. Most computer desks have this shelf very small. It will have to be replaced.
You should start with measurements
The new shelf will have a length equal to the distance between the supporting legs of the table, minus 2 cm. These centimeters are necessary to accommodate the mechanism that rolls out the shelf. It is called skids, roll-out skids.
It is worth clarifying that the sleds needed are not hanging ones, which are attached to the lower surface of the tabletop. Installation will be carried out between the shelf and the table legs. Reinforced runners without hanging brackets are needed.
The depth of the shelf can be equal to the depth of the tabletop or slightly less. The slides are selected according to these dimensions.
Having such a set, all that remains is to decide at what height to hang the new shelf. It depends on the size of the keyboard.
The runners are usually disassembled for ease of installation. Those parts that are screwed to the table must be set to the building level. The counter part of the mechanism is mounted to the shelf, after which the runners are joined into one whole.
Each table has its own configuration, so everything needs to be carefully measured; it’s better to make a model out of cardboard. This will allow you to evaluate the final result before damage occurs.
Next stage of improvement
Plastic cells for CDs are no longer relevant. Everyone uses memory cards. But manufacturers stubbornly continue to supply computer desks with these useless devices.
They can be positioned vertically, horizontally and occupy the most comfortable position at arm's length.
Take a look at your set of disks sticking out of such storage. How long has it been since you removed them? Are they useful? Are they so in demand? Or can it be moved to another place and safely forgotten until the next spring cleaning?
How to add functional shelves for necessary little things?
To work you will need:
- Metal ruler.
- Stationery knife.
- Sheet of plastic, 3-5 mm thick.
- Glue for plastic.
- Paint or colored film.
After removing the CD slots, you need to measure the resulting cavity. You can make mockups of future functional content. To select a suitable design, it is better to make several paper options.
The essence of the work is to assemble a box with a set of cells that meet certain standards and insert the finished structure into the vacated cavity. The dimensions must match, and the number and type of shelves meet the needs.
For example, through a hole in the back wall it is easy to connect an external hard drive to a computer. The wires will not get in the way, and the device, while in the cell, will not fall to the floor.
Using plastic will make the job easier. It can be purchased at a store that sells materials for the production of promotional products.
But you can go to the nearest advertising workshop, where they throw away scraps of plastic, self-adhesive paper and film. You can ask for help, explain the situation, and you will be offered a cluttered corner to investigate.
Believe me, the material there is such that your imagination about the possibilities of its use will not let you sleep. And you can make enough supplies for a year.
And if you treat advertisers with a jar of coffee, they drink buckets of it, you can join the league of sponsored people and use the offered angle regularly.
What is the best way to glue?
For the first time you will have to buy glue yourself. Cosmofen is best suited for plastic. It dries instantly - it sticks to death. Take the smallest jar first. If you work, you will understand why.
Cosmofen is a very smelly thing. You need to work with it in a room with good ventilation or just near an open window.
You need to lay something on the work surface. The essence of the glue is that it melts the surfaces being glued, dries within a minute, and it is very difficult to correct mistakes.
Experiments show that with any physical impact, plastic bursts in any place except the seams glued together with this substance.
In general, the liquid is extremely caustic and cannot be washed off clothes; take care of your hands, furniture and everything around it.
The paradox is that after using this composition once, people begin to pour it everywhere. The range of its capabilities is very wide and hence the dependence.
How to make cells from plastic?
It is better to first make the surfaces on which the shelves will be attached, mark the installation locations, and make foundations for them. Next, assemble the box and insert transverse modules into it in the prepared places. After checking that all dimensions are met, you can install the partitions with glue.
Finishing touch
Since the structure will be placed inside the vacated niche of the computer desk, external finishing is optional. But the interior space can be covered or painted. Quick-drying paint looks good, repeating the structure and color of wood of different species. But this is not for everyone.
Additional accessories
When working at a desk, a person needs an additional source of lighting. A table lamp also requires a specific place.
When finalizing the computer desk, you can choose a place for the lamp. The configuration of the table and the preferences of the hosts play a role here. But the idea is sound and it can be implemented.
In general, any work becomes more effective if it is diluted with other activities.
If you have to sit at a desk for 10 hours, then in addition to small warm-ups, you can modernize your workspace.
You will see what you have created, you will be able to touch it with your hands, and feel the comfort. And this raises self-esteem, increases work efficiency and proves that if you want, anything is possible.
DIY computer desk video
How to raise a table by 20-25 cm
There is a stupid table in the office (it seems to stand not on legs, but on the ends of chipboards). How to raise this garbage by 20-25 centimeters? Maybe there are some microlegs with clamps that can be put on the end of the chipboard? Drilling or twisting self-tapping screws is not a good option since the business center table. Please tell me if you know the options. If you don’t know, please tell me a budget high table. It seems like there are some where the height is adjustable with screws and it’s budget-friendly. GNU/Linux is here despite the fact that there is a computer with it on the table.
You insert four packs of paper, three each, and that’s it! (measure yourself by centimeters as needed). For advice you can donate bitcoins - your wallet is in your profile.
I’ve already done this, I want a more sane option
measure it yourself in centimeters as needed
I just derived the height from the width of A4 plus the thickness of the box
As an option: 1. trim 2. attach chipboard strips of the required width to the bottom 3. cover the bolts from the inside. If the table is not visible from the sides, then you can make overlays on both sides. Plywood, metal, etc.
Judging by the problems described, this is not an office in a business center, but the basement of a warehouse in Makhachkala
There are wheels for gurneys, sold in construction stores. 20cm is not there, but 10++ is possible. But the price is 2000 rubles per quartet.
I also constantly lollify from this self-explanatory title
Knowing you, it most likely comes from the word “loli”
Drill the ends from the bottom and insert studs into them, then fasten these studs to bars of the required thickness and width. No one will notice the holes in the ends at the bottom.
*furniture dowels, in our village they are called dowels
file your legs (not at the table)
It’s a good idea, but the chipboard is about a centimeter and a half wide, I’m afraid it will start to crumble. this is a last resort
I Googled for an hour before creating a topic. They have different fasteners
then dig a hole as a colleague suggested
the hole should be ready by now
Digging a hole for the lower floor is a bad idea
How to extend chair legs?
Extending chair legs is not as simple a task as it might seem at first glance. The chair leg is a complex detail. Different styles of furniture correspond to a variety of leg shapes. In the Baroque style there are twisted columns or volutes, Rococo offers legs in the form of whimsically curved cabrioles, and in classicism there are strict straight legs, rectangular or round in cross-section of the column. When making a chair or armchair, it is important to cut out the legs correctly. Wood is not a homogeneous material and it is necessary to cut the stem in such a way that the annual layers run strictly vertically, otherwise a “cross-cut” defect will form and the stem will definitely break at this point. It is useless to repair such a chair leg; it will break again and again. Such a part can only be replaced with a new one, correctly made.
Antique chairs, like any other furniture made of wood, are subject to deformation. As a result of natural warping, the geometry of the object changes. The legs change shape, one of them bends and becomes shorter. The chair begins to wobble and, to eliminate this defect, one of the legs of the unfortunate chair is filed down. A non-specialist rarely succeeds in doing it exactly on the first try. The second and all subsequent attempts to level the chair by filing the legs lead to a decrease in the overall height of the chair.
The next reason for reducing the height of chair legs is the breakdown of the wheels. Seating furniture from the first and second Rococo periods was made using bronze cups. The glass was placed on the leg along with a bronze, ebonite or wooden wheel attached to it. It was considered especially chic to move furniture on front legs with wheels, lifting it by the back. Sometimes on a chair or armchair, wheels were made only on the front legs. So the upholstered furniture was more stable. The wheels broke, they were removed, and to level them, the legs of the chair were driven according to the markings under the front legs without wheels. The chair or armchair became low.
To extend a chair leg you need: a block of wood of the appropriate size for the type of wood from which the chair itself is made, glue, preferably carpentry glue, a set of tools for wood carving, a drill with a wood drill bit, dowels made of hard wood, clamps, stain and varnish
A block of wood of a suitable shape is glued to the extension leg. The wood fibers must run strictly vertically relative to the floor. The joint is reinforced with a hardwood dowel. Typically beech. After the glue has dried, the wood is given the required shape using hand cutters. The adhesive connection must be strengthened, that is, made more durable.
To strengthen the connection with a drill, from the side of the new wood, that is, from the floor up, a hole with a diameter of 10-20 mm and a length of 30-40 mm longer than the glued block is drilled. The hole should go through all the glued wood and into the old leg. Next, a dowel is inserted into this hole with glue along the entire length of the hole. After the glue has dried, the dowel is cut, the added part is tinted and finished with varnish.
Legs of complex shapes are extended with specially shaped inserts, which allow increasing the area of the bonded surface. Sometimes chair legs are damaged by wood beetles or destroyed as a result of improper storage in a damp room. The wood itself becomes unusable, becomes loose, brittle, and breaks easily. In this case, you can extend the legs of the chair, but you will no longer have to sit on such a chair. I have to make a new leg.
A course in the restoration of wood products in the workshop of Elena Zhilina. Sign up by our phones.
Workshop gallery
Estimated cost of restoration (price as of January 9, 2019)
| Price, rubles | |
| Chair | 5000 — 20000 |
| Armchair | 10000 — 30000 |
| Sofa | 30000 — 60000 |
| Cost, rubles | |
| Table | 10000 — 40000 |
| Buffet | 30000 — 80000 |
| Closet | 30000 — 80000 |
Restoration of paintwork
| Finishing | RUB/sq. meter |
| Waxing | 500 |
| Polishing | 1500 |
| Shellac | 2000 |
| Gilding | 3000 |
| Decoration | RUB/sq. dm |
| Patination | 50 |
| painting | 200 |
| Marquetry | 500 |
| Mosaic | 1000 |
By sending us a completed form with photographs, as well as asking a question, you will receive complete information about the item (what it is, material, age) and the cost of restoration work. Next, the restorer will come to the site, inspect it, and determine the final price of the restoration.
The final price will not change. Departure is free.