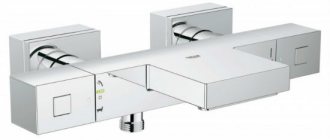
When choosing a kitchen faucet, you need to follow not only aesthetic considerations, but also its practicality. At the same time, not only in terms of ease of use, but also ease of installation, as well as opportunities for routine repairs. Therefore, before going to the store, it makes sense to study the features of models of various designs and the nuances of their connection.
How to choose a kitchen faucet
When choosing the optimal model, the following points are taken into account:
- dimensions and depth of the sink;
- the presence of free space in the sink between the bowl and the wall;
- dimensions and location of the mounting hole for the tap.
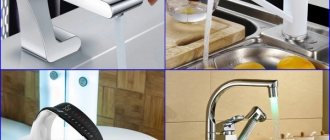
The most widely used types of kitchen faucets are:
- axle crane;
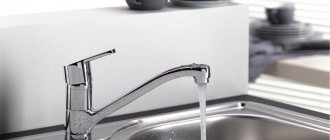
- single lever;
- electronic.
Kinds
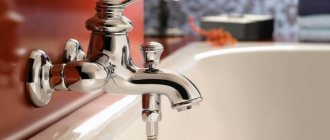
- Traditional axle-box cranes are simple in design and reliable. The main working element in them is the crane axle box, which can be easily replaced or repaired if necessary. Accordingly, the problem of how to change the entire faucet in the kitchen does not arise. Crane axle boxes come in two types: ceramic and worm. Firstly, locking and adjusting the flow of water is done by rotating ceramic plates with a hole relative to each other. Secondly, by raising and lowering the rod rotating along the thread.
- A single lever kitchen faucet is more convenient to use because it has one single control. The main element in it is a cartridge, very similar in design to an axle-box faucet, but it controls two water flows at once. The housings of single-lever models can be either stationary or rotating relative to the installation axis. There are also ball ones, in which the water is blocked by a rotating ball with holes.
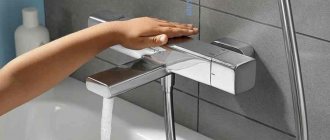
- Electronic options make it possible to ensure a constant water supply at a constant temperature . Some models can turn on water using a contactless sensor. However, structurally they are very complex devices, which inevitably increases their cost. Power supply can be supplied from the mains or from batteries. The height of the spout is selected taking into account the characteristics of the sink bowl. For shallow models, models with a low spout, which reduces splashing, are better suited. In a kitchen, installation is most often done either directly on the sink bowl or on the countertop.
Theoretical knowledge
In most cases, bathrooms already have female end fittings for . If you do the wiring of highways with your own hands, consider the following important points:
- The axes of the hot and cold water supply inlet fittings should be installed at a distance of 15 cm from each other.
- Hot water is supplied from the left, and cold water is supplied from the right.
- It is most convenient to use a mixer installed at a height of 15-20 cm from the bathtub and 60-80 from the floor level. Therefore, it is best in this position.
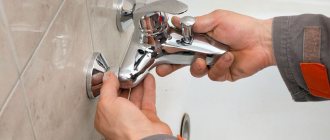
- Recess the inlet fittings into the wall. This must be done in such a way that when laying the tiles on the wall, the ends of the fittings are located flush with the front side of the ceramic tiles. Thanks to this, you can hide the connection points of the plumbing fixture behind decorative cups.
It is best to use plastic pipes for plumbing. They are cheaper and more practical than steel and cast iron products, and even a person without experience can cope with welding such pipes.
Preparation of materials and tools
Before changing the faucet, you need to prepare a complete set of tools and consumables.
The following tools will be needed:
- adjustable or open-end wrench 10-12 mm;
- tubular wrench for tightening hard-to-reach nuts;
- pliers ; screwdriver;
- rag;
- basin or suitable sized bucket,
- flashlight.
Materials you will need:
- installation kit supplied with the device (stud, O-rings, nut and mounting half-washers);
- sealing fum tape or flax with special impregnation (English Tangit sealant is especially suitable);
- silicone sealant;
- flexible liner.
The length of the hoses is selected in such a way that the hose does not break at an acute angle, but is not stretched.
Before replacing the faucet in the kitchen, it is advisable to purchase new supply hoses (often included with the new faucet).
Bellows or reinforced hoses can be used as connections.
- Bellows connections are made of stainless metal and are highly reliable and high in cost.
- Reinforced hoses are more common due to their low price and sufficient reliability.
You can indirectly determine which kitchen faucet is better by the quality of the connections.
Reliable products have the following characteristics:
- braid made of stainless steel or aluminum;
- ethylene propylene rubber (EPDM) hose.
- tips and fittings made of stainless steel or brass.
Design selection
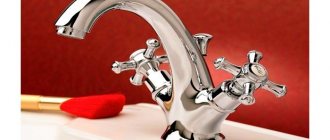
Each mixer model is characterized by the presence of certain design features. Single-lever products are distinguished by their practicality. This design allows you to regulate the flow intensity and temperature using one lever. Mixers with two valves are less practical, but fit perfectly into the classic kitchen interior.
Some models are equipped with a special motion sensor; they are classified as non-contact products. When you bring your hands to the faucet, a sensor is triggered and water starts flowing. For the kitchen, this option cannot be called suitable for solving the question of how to install a faucet in the kitchen, since very often it is necessary to draw water into various containers.
The main factor influencing the cost of mixers is the alloy used and the brand of the manufacturer. The most affordable products are made of silumin and other cheap alloys. Such faucets have an attractive appearance, but quickly become unusable. This is explained by the fact that the manufacturing material itself is prone to cracking and quickly turns into crumbs.
High quality faucets are made of brass with a layer of nickel, aluminum or chrome. This increases the attractiveness of the products and makes them more resistant to wear.
Removing the old tap and hoses
To replace the crane with a new one, you must first dismantle the old equipment.
This requires a number of operations.
- The water supply to the sink is shut off.
- The taps are opened so that the remaining water in the pipes can flow freely into the sink.
- If the sink is a surface-mounted type, then it is detached from the cabinet.
- The liner is disconnected from the water pipe . At this stage, it is advisable to use a basin to drain the remaining water.
- The siphon is unscrewed.
- The sink is raised and installed on the cabinet in such a way as to provide free access to the place where the device is attached.
- Flexible connections are disconnected.
- If there is a watering can, then it is also disconnected.
- The fastener is unscrewed.
Then you should hold the spout with one hand, and with the other unscrew the threaded mounting pin and remove the old tap.
Kitchen faucet installation
Assembly
First of all, you should assemble the device itself. those. screw on the spout, aerator, install handles, etc. The sequence of operations may vary for different models and different manufacturers. You can find out more details and features in the instructions supplied with each device. When choosing a faucet for the kitchen, it is advisable to make sure that this document is clear. When assembling the faucet, you should not put in significant effort. As a rule, all components can be screwed on freely by hand. If you need to use keys, they must be used with the utmost caution. Otherwise, there is a risk of damage to the chrome plating of the device.
Installing a gas meter in an apartment: everything about installation, prices, models, reviews.
Installing a washing machine and connecting to the water supply is a detailed article.
How to install metal-plastic pipes with your own hands: instructions, rules and examples.
In this case, fabric linings will be an excellent solution for installing a faucet in the kitchen without damaging it.
Next, flexible connections are connected. They should be tightened carefully so as not to damage the attachment of the flexible part to the threaded fitting.
The length of the fittings can be either the same for both connections or different. Many manufacturers use the second option to facilitate installation work. The order of further actions will depend on where the faucet is attached: directly to the sink or to the countertop.
Installation on the sink
There are two ways to attach a two-valve faucet to a sink:
- on a stiletto heel
- on the nut.
With stud fastening
In the first case, a threaded rod should be screwed into the valve body before installation. It has threads along its entire length, but before screwing in, you need to make sure that the spline notch will remain on the outer part and will not go into the valve body. This is necessary to simplify repair or dismantling in the future.
In some models for overhead sinks there may be two such pins. Next, an annular gasket is placed on the base of the tap.
It is necessary to ensure that it lies in the place intended for it.
In some cases, the gasket may have a complex shape and must be oriented accordingly during installation.
The next step is to insert flexible hoses into the hole in the sink and install the kitchen faucet in place. When performing this operation, it will be convenient if you rotate the sink so that you can work with both hands both on top of the bowl and on the bottom. Then a rubber seal is put on, sealing the installation site on the underside of the bowl. The shape of this seal coincides with the shape of the pressure plate. Now you can put the pressure plate on and screw the nut onto the threaded rod. When the faucet is secured, begin fixing the sink to the cabinet.
With nut fastening
Installation on the nut is done in a slightly different way. Cranes of this design have a wide cylindrical part at the base with a thread onto which a fastening nut is screwed. Connecting the liner to such a base is much easier than in the case of a stud-mounted fastener. Therefore, the supply hoses will be connected after installing the faucet on the sink. It will not be superfluous to take this point into account when deciding which mixer to choose.
Installation consists of several operations:
- Installing the gasket into the groove under the base of the device;
- The threaded part is inserted into the mounting hole of the sink. When performing this action, it is necessary to control the position of the elastic pad;
- From the bottom of the sink, another rubber gasket from the supply kit is put on. It differs in shape from the top gasket. If the top one looks like a thin rubber ring of circular cross-section, then the bottom one is flat and wide. At the same time, the design of a kitchen faucet may be different, and the shapes of the gaskets may also differ;
- The fastening nut is screwed on . In this case, you need to control the position of the mixer base. The front part of it should be facing the front edge of the sink. If the design of the tap is such that it is difficult to visually determine its position, then the alignment is checked by turning the spout. It should deviate at the same angle in both directions. If the tap is located in the corner of the sink, then it should be oriented diagonally to the sink;
Design of a toilet with a small sink, choose models in a modern style.
Installing a water meter with your own hands: detailed instructions and advice from plumbers.
- The supply hoses are screwed on . First, install a hose with a short fitting, then with a long one (disassembling a kitchen faucet - in the reverse order). Additional sealing of the connections is not required, since their fittings already have rubber O-rings. You should not forget about their existence when connecting the eyeliner. The tightening forces should not be excessive so as not to damage the rubber seals.
The final stage is installing the sink on the cabinet.
Tabletop installation
This installation option is in many ways similar to the nut mount. The difference is that in this case the sink usually does not have wide sides with space for installing a tap. Therefore, the mortise mixer will have to be placed on the countertop, in close proximity to the sink. The mounting location must be chosen in such a way that it is convenient to reach the crane controls. In this case, it is necessary to check that in the working position the spout is above the sink. Having decided on the fastening point, proceed to drilling a hole in the tabletop. To do this, use a drill and a wood pen. The pen diameter is 38 mm. The remaining steps will be as follows:
- supply hoses are threaded into the threaded cylindrical fastener;
- the liner is attached to the base of the mixer;
- the cylindrical fastener is screwed in there;
- put on the upper rubber gasket;
- the entire structure is inserted into a hole in the tabletop. It is not possible to thread the liner nuts into the hole at the same time, so they are threaded sequentially one at a time;
- From below, a rubber gasket, washer and nut are put on the fastener.
Then the position of the mixer is checked and the entire structure is tightened with a wrench. The built-in mixer is installed in almost the same way.
Installation of coarse filters
Tap water often brings with it a lot of debris:
- sand,
- pieces of rust, etc.
To rid the aerator and mixer cartridge from contamination, it is necessary to use coarse filters.
It is best to install the filter at a branch from the riser, where it will be easy to maintain. In this case, it is necessary to control the position of the oblique pipe with the filter mesh. It should always be angled downwards, making the mesh easier to clean.
In addition, the arrow on the filter housing must coincide with the direction of water movement.
Connecting hoses
The choice of a kitchen faucet also depends on the availability of high-quality hoses in the kit. At one end they have a fitting for connecting to the mixer, at the other - a union nut for connecting to the water supply. The fitting is fitted with one or two O-rings and rubber. They are quite enough to ensure tightness when connecting to a new mixer.
- Therefore, when connecting, you just need to tighten the fitting tightly with a wrench.
- You should not use excessive force to avoid stripping the threads and damaging the seals.
- Before screwing the union nut onto the water pipe, you should make sure that the threads on it are free of dirt and rust. If necessary, it should be cleaned thoroughly.
- There is an elastic sealing ring inside the union nut . As a rule, such a seal is enough to ensure tightness. The nut should be tightened with an open-end or adjustable wrench, being careful not to overtighten so as not to strip the thread.
After completing the installation of the mixer, you need to make sure that it is working and that all connections are tight. To do this, open the tap on the riser and the mixer in the kitchen. After the air escapes, the mixer is closed and the appearance of leaks is monitored for half an hour.
Most often, leaks occur due to improper assembly of the faucet and poor sealing at the connection points.
- In the first case, it is necessary to disassemble the faucet and reassemble it, ensuring that the gaskets and cartridge are positioned correctly. In the instructions you can find information on how to disassemble the mixer.
- In the second case , use fum tape or flax to connect the fitting or union nut more tightly.
A pull-out kitchen faucet can cause a little more problems, in which the hose to the watering can may be damaged. It is better to replace such a part entirely.
Is it necessary to install ball valves in front of the mixer?
The ball valve has only two operating positions:
- open,
- closed.
Installing such a tap allows you to cut off the tap from the water supply for repair or replacement. However, in practice this does not always make sense.
As plumbing experts recommend, first you need to study the water distribution diagram throughout the apartment. If there is already a ball valve immediately after the outlet from the riser, then there is no need to duplicate it. If desired, you can install a valve or reducer that will help limit the water pressure in the tap.
Preparatory work
Before installing the faucet, it is not necessary, but it is advisable to flush the entire plumbing system. The point of this procedure is to clean the pipes from scale and small metal particles adhering to their walls.
It is especially important to flush pipes in new buildings
Preparation for installing the mixer is as follows:
- It is necessary to block the access of water through the central riser
- Secure the workplace in one of two ways: either connect the hoses to the place where the mixer will be installed and lead them into the toilet, or unscrew the siphon elbow and drain the water into the sewer pipe.
- You should use the valves to release water from the central riser a couple of times.
- With the valves open, drain water from all plumbing fixtures.
- Install filters for mechanical water purification. Their installation location is immediately behind the central hot and cold water valves.


