To begin with: what types of exhaust systems are there?
Hoods differ in the method of fastening:
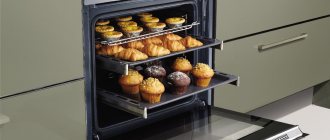
- Built-in. They are mounted inside a hanging cabinet.
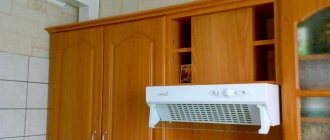
- Wall-mounted. Fixed on the wall above a gas stove or electric stove.
- Hanging. Installed under a cabinet or shelf above the stove.
- Angular. Mounted in one of the corners of the kitchen.
- Island. Installed in kitchens with an island in the center. Attached to the ceiling. The heaviest exhaust systems to install.
By the way, if you need to calculate the power of the hood, I suggest doing it using our calculator.
Considering the principle of operation, there are 2 types of hoods:
- flow-through. The device draws in polluted air and discharges it directly into the ventilation shaft. This system is the most effective option for air purification.
- Circulating. The device passes air through purification filters, and then the same, but already purified air flows back into the kitchen.
Expert opinion
Nikonorov Vladimir Alekseevich
Our expert. Specialist in the field of air conditioning and ventilation with 10 years of experience.
Ask a Question
A ventilation pipe in the circulation system is not needed and the device itself is very easy to install. But, believe me, it is of little use. Filters constantly become clogged and need to be replaced regularly. In addition, they cannot cope with volumes and do not clean the incoming air efficiently.
Checking and installing the ventilation shaft
It is with these works that any installation of a kitchen hood should begin. If there is a problem with the shaft, then none of the most modern and powerful systems will improve indoor air quality. If you install a hood in a new home, the functionality of the vertical channel may be impaired. The reasons are various, but most often these are gross deviations from building codes and regulations. There is no natural ventilation - call representatives of the construction company to fix the problem. In our case, the ventilation passage was clogged with mortar during masonry work.
The ventilation passage was clogged with solution
It is necessary not only to clean it, but also to install a hood with a check valve to ensure continuous natural ventilation. This is a strict safety requirement; if it is violated, gas workers will not give permission to connect the kitchen stove.
Ventilation duct after cleaning
Step 1
. Remove the decorative grille and inspect the shaft. Widen the hole slightly and align the edges of the hole.
Step 2
. Install an MDF board of the appropriate size into it, secure it with two spacers. A plate is required to prevent clogging of the channel with solution.
MDF board installed
Spacers
Step 3
. Make a box according to the dimensions of the connected air duct; a check valve will be installed in it. The device operates only when the hood is turned on; it is constantly open. Due to this, the mandatory requirement of gas workers is fulfilled.
Box
Step 4
. Attach two rods of metal fittings to the wall. To do this, fix the dowels and use them to install the rods.
Two rods of metal reinforcement
Step 5
. Prepare a cement-sand mortar, be sure to add a special liquid to it that inhibits the proliferation of fungi and pathogenic microorganisms. The fact is that the hood captures fat and delivers it into the canal; special additives are used to prevent negative consequences.
Mortar mixture and liquid that inhibits fungal growth
Prices for popular antifungal agent Ceresit ct 99
Antifungal agent Ceresit ct 99
Step 6
. Level the box and fill it with solution. The next day, the solution will gain sufficient strength; use a sharp metal object to disconnect the box from the mass and remove it.
The box is leveled
The box is fixed with mortar
Practical advice. It is much easier to free the box from the mass with a hacksaw blade for metal.
The box is removed by sawing
Do not rush, the solution has not yet reached maximum strength and may be damaged. Experienced builders advise wrapping the box in several layers of plastic film before installing it in place. After the mass hardens, the element can be easily removed from the ventilation shaft.
Mine after removing the box
Step 7. Insert a plastic pipe into the hole and also fill it with mass. You need to form a round hole. Work carefully, do not clog the channel, do not allow solution to get into it.
Plastic pipe
Pipe fastening
Forming a round hole
The wall is sealed with gypsum plaster
Never use gypsum plaster when making holes. This is very bad material in all respects. What is important for the mine is that it is hygroscopic and absorbs a lot of moisture. Mushrooms and mold will certainly appear on such a surface; over time, the affected area increases, and brown spots will appear on the front surface of the wall.
Plastic, metal and cement mortar are excellent at transmitting noise generated by the vibration of fan blades. During operation of the hood, unpleasant sounds are heard in the room. To reduce them, practice recommends covering all pipelines in places of contact with the vertical ventilation duct with noise-absorbing tapes. It can be ordinary thick tape, the specific material does not matter. The main thing is that it is plastic and absorbs multidirectional dynamic forces.
The pipe is covered with noise-absorbing material
The pipe is inserted into the previously prepared hole
Silicone sealant is applied around the pipe
Air duct assembly
Check valve installed with silicone sealant
Now all that remains is to thoroughly level the surface of the wall near the prepared entrances and then proceed with the installation of the hood.
Which is the best hood to choose?
When you have decided on the location of the hood, pay attention to the power of the device. The quality of ventilation and air purification depends on this parameter.
Interesting: in the Russian Federation there is a standard for air exchange in the kitchen. According to it, the air must be renewed every 12 hours.
To calculate the power of the hood for your kitchen, you need to multiply its area with the height of the ceiling, and then multiply the resulting number again by 12. To the final result you should add 30% (losses during the passage of the length of the ventilation duct and bends of the air duct). The final figure is the required power for your kitchen.
Expert opinion
Nikonorov Vladimir Alekseevich
Our expert. Specialist in the field of air conditioning and ventilation with 10 years of experience.
Ask a Question
Required: when purchasing, pay attention to the noise level from the device (indicated on the packaging). If it reaches over 50 dB, do not purchase it to avoid suffering from .
Why do you need a hood?
The hood is an indispensable appliance in the kitchen
Such a device is required for those who are tired of often opening the window, washing the kitchen unit and walls from burning and greasy stains that settle when preparing food.
If you are one of these people, a kitchen hood is your salvation. There are many different stores that offer a wide range of household equipment. There you can find equipment that will meet all your needs, namely, with the required power, absorption radius and pricing policy.
Of course, when choosing a kitchen hood, these requirements are not enough, because the type and shape of the device, dimensions, operating features, comfort and general style play an important role. You will learn how to install a built-in hood in your home kitchen in this article.
Hood installation options
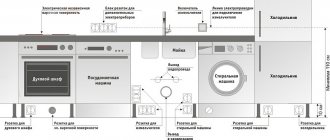
At what height from the stove should the hood be installed?
The height of the hood above the electric stove is no less than 70 cm. The device can be installed above the gas hob at a distance of no less than 80 cm.
Before installing the exhaust system, I had to ask the experts for their opinion on this matter. Some said that the distance between the gas stove and the hood could be 70 cm. Allegedly, this is enough for all the fumes to escape.
However, remember that hotter air comes from a gas stove than from an electric stove, so the power of the device may not be enough to draw in combustion products. In addition, filters and other parts of the exhaust system can deteriorate from such a temperature, and this affects the performance of the device. Is it worth the risk, trying to maintain the minimum possible distance? It’s up to you to decide?!
The distance between the hood and the stove also depends on the height of the person who will stand at the hob. The system must be fixed at such a height that a person does not hit his head on the body of the device.
Hood installation
In our case, the unit is installed in a kitchen that is in use, which creates additional difficulties: you need to remove the work table, all kitchen utensils, etc. Nothing should interfere with your work, do not create additional problems for yourself.
Step 1
. Remove the wall cabinet; the hood will be installed in it later. The hanging furniture is secured using a horizontal metal strip; removal requires slightly loosening the clamps.
Removing the locker
Step 2
. Take out the purchased hood and try it on.
Trying on a hood. Doesn't fit true to size
In most cases, the furniture will have to be slightly altered. The hood fits in size, but the location of the internal shelves and mounting loops may not match. This is a non-critical problem and can be easily resolved. To begin, unscrew the hanging loops and remove the partition.
Dismantling the locker
In our case, we need to take out the bottom shelf of the cabinet and screw the hood body in its place.
Step 3
. Insert the device into the cabinet body and take all measurements.
The hood is inserted into the cabinet
Don’t forget to leave a gap of about three millimeters between it and the doors, otherwise they will touch the lid when opening/closing. Take measurements as accurately as possible.
You need to accurately take measurements and make markings
We must remember that most kitchen furniture is made from laminated chipboards; this is the most budget option. And in such slabs it is impossible to drill holes nearby, the minimum distance is at least 5 mm, otherwise the slab loses strength. This means that it will not be possible to correct errors made during marking by ordinary re-drilling. You will have to take a whole range of complex measures or make new side walls of furniture.
Step 4
. Drill new holes for the Euroscrews.
Drilling blind holes
To control the depth, wrap a piece of insulating tape or tape around the drill; the drilling depth should not exceed 2/3 of the thickness of the slab.
Practical advice. Additionally, install dowels. This takes a little time, but greatly increases the strength of the locker.
Always insert dowels onto the woodworking lei; without it, the efficiency of the elements is noticeably reduced.
Euroscrews are tightened, dowels are inserted
Step 5
. Secure the hood in place and check the functionality of all its elements on the table. Quite often problems arise with check valves; they close/open poorly and vibrate. Such situations indicate low quality of the product; they must be eliminated independently.
Valve does not open properly
Step 6
. To facilitate the process of further installation of the hood, make a template for the location of all holes. For these purposes, you can use any sheet of paper of a suitable size.
Making a paper template
Place it on the back of the cabinet with the hood attached, and mark the exact locations of all openings: pipeline outlets, furniture fixation points, etc.
Transferring drilling and cutting points from the template
Transfer the measurements to the shelf and prepare the holes. Some can be drilled out and cut for the pipeline using an electric jigsaw. Make holes for the air duct in all shelves and the cabinet lid at once. It is recommended to use the first shelf as a template.
Hole preparation
Cutting a hole for the air duct
The shelf is used as a template
Step 7
. Assemble the cabinet, connect all the elements. Do not forget to leave a gap between the hood and the doors, control it with gaskets of the appropriate thickness.
Cabinet assembly
Mounting the hood
The gap between the hood and the doors. Gaskets inserted
Step 8
. Measure the length of the pipe and cut the required piece. Plastic pipes are easier and faster to cut with a grinder and a metal stone. Just always follow the safety rules, this is a very dangerous tool.
Measurements
Transferring dimensions to a pipe
Cutting a pipe with a grinder
Step 9
. Install a channel in the cabinet and silicone the gaps between the pipe and the plates. Silicone performs three functions: reduces vibrations, increases fastening strength and improves the appearance of the cabinet - when opening the doors, uneven holes will not be noticeable.
Applying sealant
Pipe inserted. The joint is sealed
If the door hinges cannot be put back in their original place, then new holes must be drilled for them. This is done with a special furniture maker’s drill.
Attaching the hinges
A special drill is used to drill recesses for hinges on doors.
Drilling process
Attaching the hinges
Step 10
. Attach the assembled cabinet to the wall and straighten its location.
Hanging a cabinet
The door is secured. Checking the operation of the hood
Step 11. Start assembling the air ducts. In our case, we use round ones, but you can also use rectangular ones. The former have less resistance to air flow, which increases the efficiency of the hood and reduces the load on the electric motor. Rectangular ones allow you to mount the system as close as possible to the ceiling, this is very important for low rooms.
Accessories for connecting a plastic air duct
If you connect both an exhaust hood and natural ventilation to one vertical ventilation duct at the same time, then you must use a valve. It is constantly open and provides adequate ventilation of the room. This is an important requirement of gas workers; without compliance with it, they will never give permission to use the stove. When the hood is turned on, the valve closes, which prevents air from flowing back into the room.
Important. You need to understand why the check valve closes. This happens due to an increase in air pressure in the ventilation vertical duct, part of it goes into the kitchen and closes the valve.
At first glance, it seems that everything is fine and fully meets the requirements of building codes and regulations. This would be true if only your kitchen is connected to the channel. And with neighbors in apartment buildings there can be two situations:
- air pressure completely stops natural ventilation from lower apartments;
- a reverse movement occurs, exhaust air flows from your apartment enter the neighboring ones.
For insurance purposes, management companies categorically prohibit connecting hoods to public ventilation ducts; you need to know about this before making a decision.
If the valve is difficult to close/open, then you should find the cause of the jamming and eliminate it. As a rule, it is enough to slightly reduce the diameter of the element; it is recommended to grind it down around the perimeter with sandpaper. If it doesn’t help, install a basic counterweight, you can use a self-tapping screw. The weight and placement of the counterweight is selected experimentally.
Video - Combining hood and ventilation
Step 12
. Make a hole in the channel for the pipe and assemble the air duct. Seal the cracks with silicone of the appropriate color.
Hole preparation
The air duct is installed, the gap is filled with silicone sealant
Extractor fan in the kitchen
Check the operation of the hood. If everything is normal, then give about a day for the silicone and cement-sand mortar to harden and only after that you can use the device.
You can use the hood within 24 hours
Video - Installation of a hood box in the kitchen
Hoods without venting
The functionality and effectiveness of kitchen hoods depends on two factors: correct installation and choice of equipment. In this article we described how to install systems and prepare channels for them. And practical recommendations on the specific choice of various types and models of hoods are on the pages of our website.
What is needed for installation?
To secure and install the exhaust system you need:
- corrugation - for venting air into the ventilation duct.
Advice: it is better to choose plastic corrugation rather than aluminum. It looks more beautiful and works silently
- clamps (2 pcs.) - to install the corrugation on the hood;
- grill for ventilation shaft;
- screwdriver (for a wooden wall);
- hammer drill or impact drill (for a concrete wall);
- hacksaw and sandpaper (for cutting and processing pipes);
- jigsaw - for making a hole in a cabinet or shelf (if the system is built-in);
- level, tape measure, marker - for marking;
- knife;
- screwdriver;
- sealant (silicone) – for sealing cracks and joints between structural elements.
Be sure to: carry out all work wearing gloves and goggles!
About fastening the exhaust system
If the system operates according to a flow-through design, then an air duct with a diameter of at least 120 mm must be brought into the ventilation shaft. It cannot be narrowed, bent or attempted to be lengthened, otherwise power loss is guaranteed. You can use either a round or square duct.
Expert opinion
Nikonorov Vladimir Alekseevich
Our expert. Specialist in the field of air conditioning and ventilation with 10 years of experience.
Ask a Question
Please note: it is better to purchase an air duct not with a corrugated surface, but with a smooth one. This will significantly reduce the noise level of the device in operating condition.
If the hood is circulation, then there is no need to connect it to the ventilation shaft. The main element, the filter, will have to be purchased separately.
Different types of hoods
To correctly install an exhaust device, you should familiarize yourself with the typical features of the selected unit:
- Hanging flat models installed above the stove. You can attach them to the wall using massive dowel nails. The recirculation device on many models allows you to use the device without connecting to the ventilation outlet.
- Built-in models will fit perfectly into a small kitchen thanks to their mounting on a cabinet and sit comfortably above the stove. The grease filter allows it to work normally without an air duct.
- Dome devices are considered the most stylish and comfortable; high suction power significantly increases their price.
Attention! When buying a kitchen hood, you need to make sure there is recirculation. The absence of a ventilation duct above the stove will not allow the hood to work in full mode.
In addition, grease filters require constant replacement. Periodic cleaning of the product will help you avoid such costs. It takes 1 or 2 days for them to dry completely.
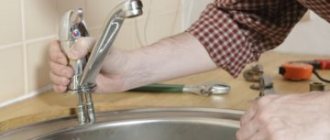
Correct installation of a kitchen hood with your own hands
An important part of the installation is calculating the distance from the hob to the hood, so that it complies with the standards and does not interfere with cooking.
Built-in models are not attached to the wall; they are mounted in the kitchen cabinet itself. After installation is complete, attach a protective cover to the housing to hide the air ducts.
The exhaust system screen should be slightly wider than the stove so that combustion products are completely absorbed by the hood.
Installation stages
Detailed installation steps are given in the table.
| Step | Stage | Description |
| 1 | Preparatory work | Find the right tool and prepare the surface for work. |
| 2 | Checking the contents | Remove the hood from the packaging and check its integrity and the presence of all parts (screws, brackets, clamps, wires). If there is no damage, and there are enough structural elements for installation, then proceed to the next step. |
| 3 | Marking | Using a level, tape measure and pencil, draw two lines on the wall. One of them is vertical, it goes from the center of the slab to the attachment point. The second line is horizontal; it draws the boundary of the working surface of the system. In the instructions, look at the fixation diagram and indicate the location of the brackets. |
| 4 | System fastening | If the hood is hung on the wall, then drill holes in it according to the intended template with a depth of at least 50 mm. Then insert 10 mm dowels there and screw in the screws, but not all the way, but so that there is a small distance left for hanging the device and fix the hood on them. If the device is circulating, then all you have to do is insert filters inside. If the hood is built-in, then remove the bottom shelf of the cabinet and, according to the markings, drill 4 holes in the corners and a hole in the center for the air duct (according to its diameter). Drill the same holes in the center in the other shelves so that the pipe passes through the cabinet into the ventilation shaft. Install an adapter on the pipe for connection to the ventilation duct. Secure the bottom shelf of the cabinet back and secure the hood screen. Install filters if the system is circulating. |
| 5 | Air duct installation | One end of it is connected to the adapter, and the other to the ventilation shaft. |
| 6 | Power connection | To connect the system to the mains, a regular outlet will do. If the device is built-in, then place the socket under the cabinet. Since the kitchen is a place of high humidity, buy an outlet with a protection class starting from IP44. And to avoid getting electrocuted, be sure to ground it. |
Mount the hood
Depending on the design chosen by the manufacturer, installation may differ, so refer to the instructions. In general, the algorithm is as follows.
Wall models
Frame: @KaYuT Company / YouTube
Drill holes using a hammer drill at the previously marked points and install dowels in them. Secure the mounting plate with screws. If it is not there, simply screw the fastener into the wall, not tightening it by 1-2 mm.
Hang the hood on a bracket or screws in the wall. Place the electrical cable in such a way that it will not be crushed. If necessary, level the housing and secure finally.
Built-in models
Frame @Redecoration / YouTube
If the cabinet where the hood is mounted is massive, immediately install it on the wall and align it with the rest. Then press the device body against the shelf, place the cable in the prepared cutout and attach the hood to the cabinet using screws.
If the cabinet is small, you can screw the hood to it and only then hang the entire assembly on the wall.
Installing an air duct for a kitchen hood
Carefully insert the corrugated air duct through the holes made so as not to damage the pipe itself. At the point of connection to the ventilation shaft, carefully cut off the excess corrugation, leaving a small margin. Cut a few corners and then bend them inside the ventilation duct. When extending the air duct, do not make bends, and if they cannot be avoided, then make an angle of no more than 90°, otherwise the air intake power will decrease.
Securely fasten the corrugation and secure it with clamps. At the junctions of structural elements, do not forget to seal the cracks with silicone so that traction power is not lost.
Duct selection
The pipe for the air duct is made of aluminum or plastic, with a round or rectangular cross-section.
For your information. The plastic air duct with a rectangular cross-section is compact and inconspicuous.
A corrugated aluminum pipe is an excellent option for connecting to the ventilation of a built-in hood. Such an air duct, as a rule, is placed inside a plasterboard box or hidden behind the facades of a furniture set. The advantage of a corrugated pipe is its ease of connection and installation: it does not require an adapter to connect the ventilation shaft to a forced ventilation device and corner connections. The flexible structure of the pipe allows you to easily lay it as convenient as possible, without additional effort. And such a pipe does not create vibration when the hood is operating.
rectangular plastic duct It doesn’t have to be hidden in a decorative box. The disadvantages of the pipeline are a large number of parts and vibration when the forced ventilation device is turned on. But many people prefer this option because of its appearance and smooth inner surface, which does not create resistance to air flow.
Useful video on the topic
Great article 11
- Even more interesting:
Discussion: 3 comments
- Vlad:
01/23/2020 at 13:08Great article! Friends advised me to take hotpoint, they understand it, I took it, but they don’t understand how to install it anymore)
Answer
- Alexander:
02/21/2020 at 08:33
Does it make sense to run the air duct into the ventilation shaft at an angle?
Answer
- Andrey:
06/18/2020 at 03:54
Hello. Is it possible to make a 150 turn of the pipe, an angle of 90 degrees, immediately at the exit from the hood? If not, how long should the pipe be straight before turning?
Answer
Installing a built-in hood in a cabinet
The built-in hood is almost completely hidden in the cabinet made for it. It is attached in exactly the same way as described above - with screws, only they are screwed into the walls. Only in advance it is necessary to make holes for the air duct in the shelves located above. This is done after the hood has been purchased, since the location of the air outlet depends on the company and model.
Example of installing a built-in hood
If the cabinet is hanging, it is better to remove it. In the removed cabinet, install the hood in place, mark the location of the air outlet on the bottom shelf, and cut it out. To do this, it is easier to use a jigsaw and a file with fine teeth. The laminate file leaves almost no chips. If desired, you can seal the cut area with a plastic C-shaped furniture profile. They are rigid and flexible. The flexible one is easy to use - it bends at any angle; the rigid ones will have to be heated with a hair dryer before installation. These profiles are “set” with glue; most often “liquid nails” are used. After installation in place, remove the remaining glue (with a damp, clean rag) and secure it to the shelf with masking tape. We cut off the excess profile with a fine-tooth file, and clean the cut with fine-grain sandpaper.
The process of preparing a cabinet for installing a hood
We make holes in the other shelves in the same way. By the way, they may no longer be round, but rectangular - it depends on the cross-section of the air duct you have chosen.
After this, all the shelves are installed in place, the cabinet is hung and secured. A built-in hood is attached to it with screws through holes in the body. Next is the process of connecting the air duct.